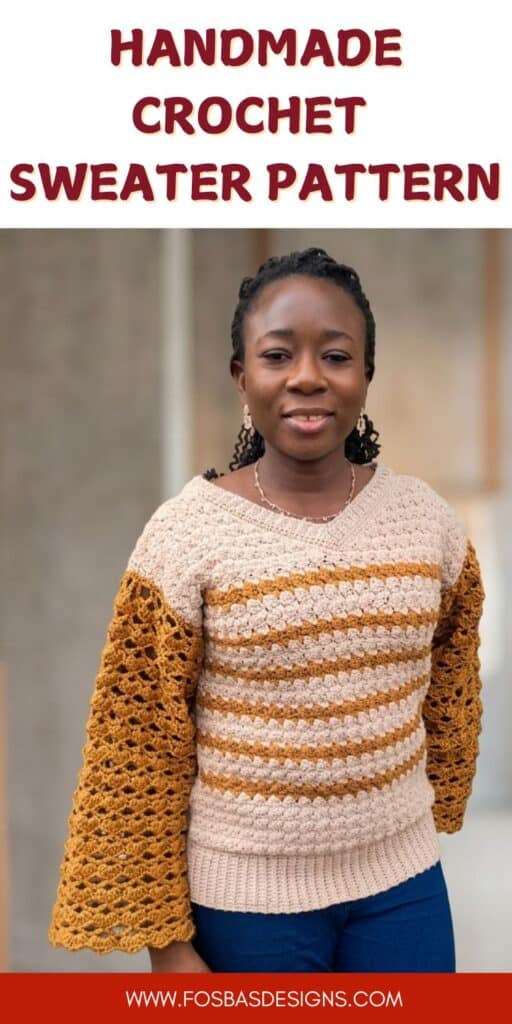
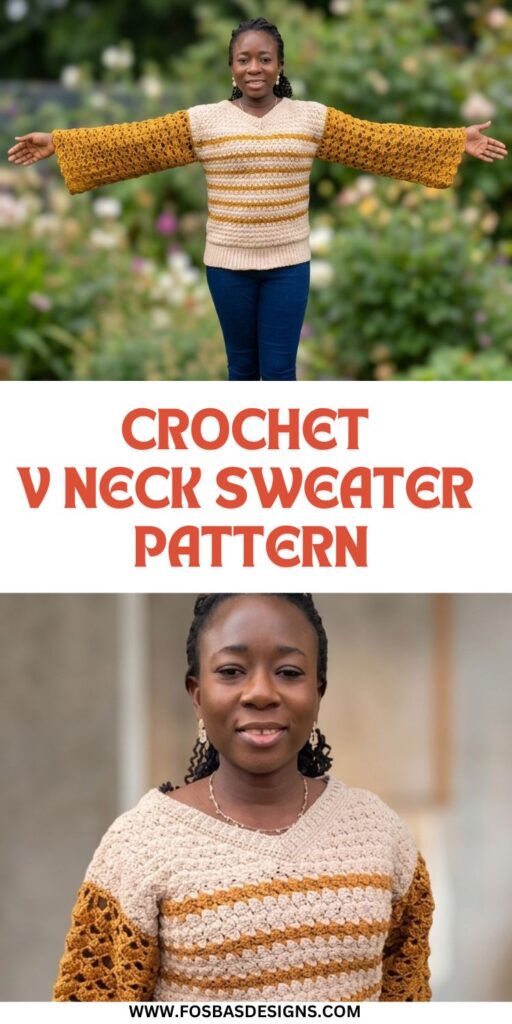
Crochet V Neck Sweater Free Pattern
A modern crochet V neck sweater is one of those timeless pieces you’ll reach for again and again. This design blends texture, comfort, and style, making it perfect for layering across seasons. Whether you’re dressing it up or keeping it casual, this sweater offers versatility with a flattering fit and eye-catching stitch detail.
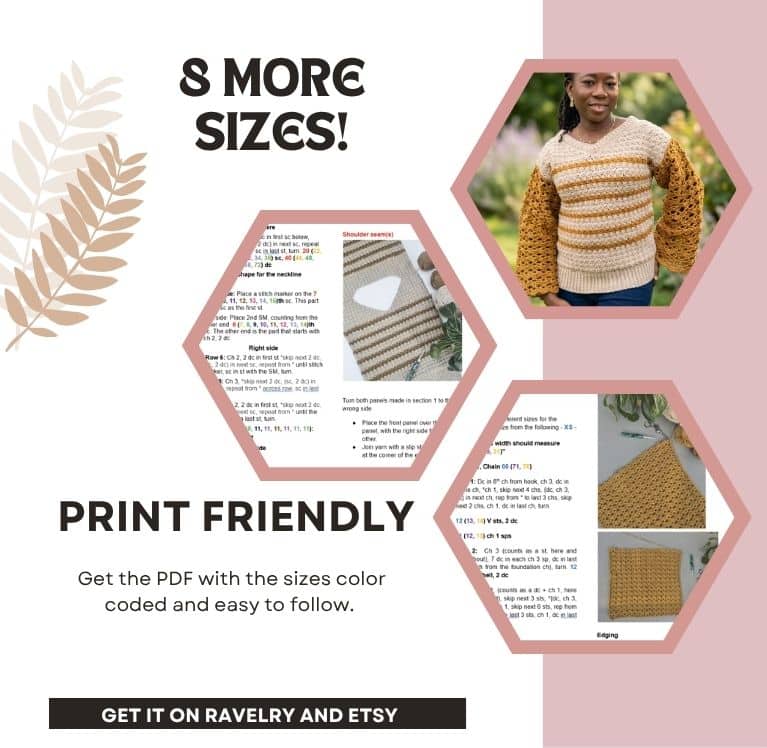
Get Print friendly PDF on Ravelry, use code “Modern” for 30% discount
Why You’ll Love This Crochet V Neck Sweater
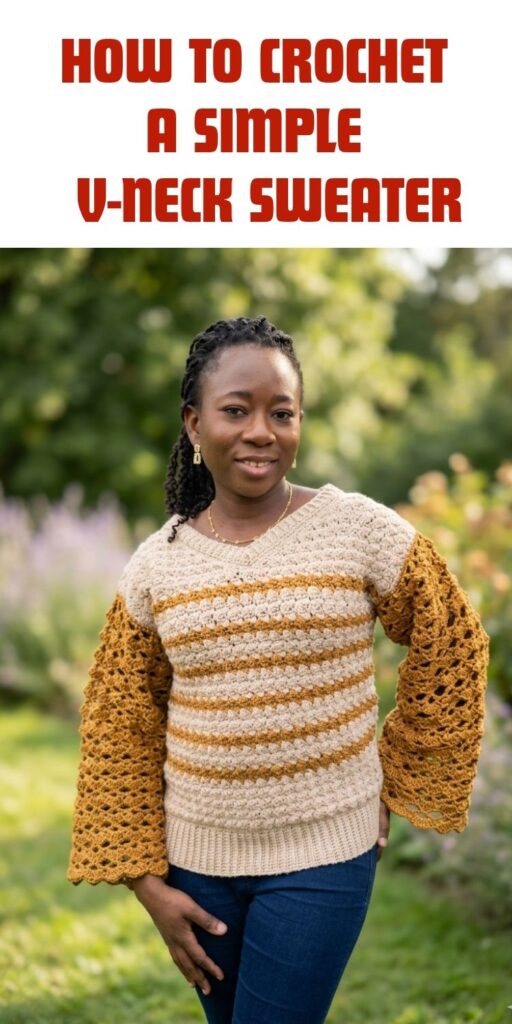
- Flattering V neckline that suits all body types
- Textured stitch pattern that adds visual interest
- Lightweight yet cozy for transitional weather
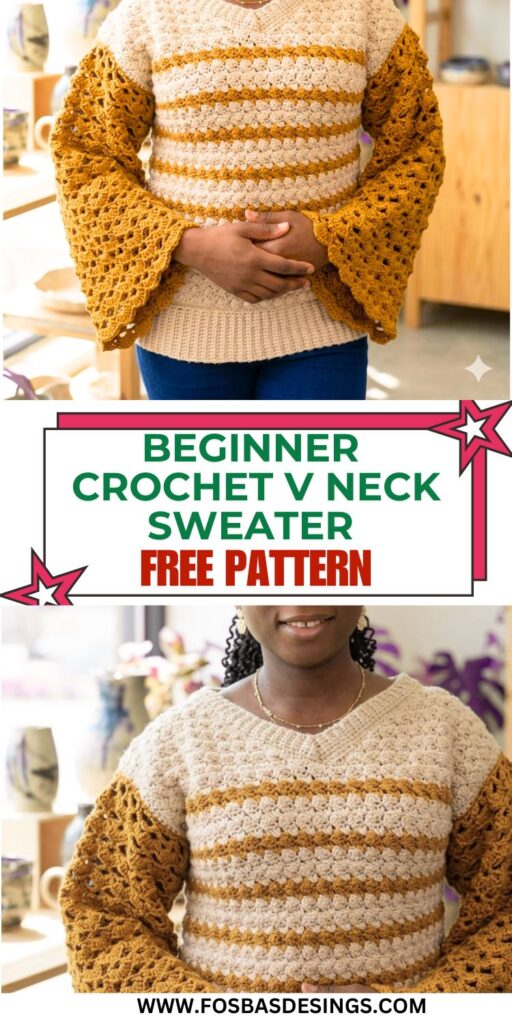
- Customizable sleeve design with lace details
- Perfect for everyday wear or gifting
Skill Level
Easy to Intermediate
- Suitable for confident beginners ready to try shaping and texture
- Includes simple repeats and guided construction
Crochet V Neck Sweater Free Pattern: Finished Measurements
Size(s) and color codes – XS (S, M, L, XL, 2XL, 3XL, 4XL, 5XL)
Bust Measurement: 30 (34, 38, 42, 46, 50, 54, 58, 62)”
Armhole Circumference: 14 (14, 16, 16, 16, 16, 18, 18, 18)”
Length of sweater: 21 (21, 23, 23, 23, 23, 25, 25)”
The modeled garment is shown in M, with about 1” of Positive Ease.
The instruction below is only for the XS. You can get the 8 other sizes on Ravelry or ETSY
Materials Needed
- Yarn – Any Worsted weight yarns in colors of your choice. Prototype made using Vanna’s choice for the mustard and Pound of Love for the cream – you can have a look at the colors here.
- 5 mm Crochet hook
- Stitch markers
- Tapestry needle
- Scissors
Gauge ( I have written out 2 different gauge instructions for the sweater, the first is for the body of the sweater, and the second is for the sleeve)
For the body of the sweater = 4 x 4” made using the stitch pattern for the body of the sweater, before blocking.
Gauge pattern
Chain 19 and follow the pattern for 12 rows.
Gauge for the sleeves
21 sts over 7 rows = 4.5” Square, see gauge pattern below.
Adjust hook size if necessary to obtain gauge.
Sleeves Gauge Instruction
Chain 21
Row 1: Dc in 8th ch from hook, ch 3, dc in same ch, *ch 1, skip next 4 chs, {dc, ch 3, dc} in next ch, rep from * to last 3 chs, skip next 2 chs, dc in last ch, turn. 3 V sts, 2 dc
Row 2: Ch 3 (counts as a st, here and throughout), 7 dc in each ch 3 sp, dc in last st (6th ch from the foundation ch), turn. 3 shells, 2 dc
Row 3: Ch 4, (counts as a dc + ch 1, here and throughout), skip next 3 sts, *{dc, ch 3, dc} in next st, ch 1, skip next 6 sts, rep from * to last 4 sts, skip next 3 sts, ch 1, dc in last st. 3 V sts, 2 dc
Row 4: Ch 3, 7 dc in each ch 3 sp, dc in last st, turn. 3 shells, 2 dc
Row 5: Rep Row 3
Rows 6 – 7: Rep Rows 4 – 3
Rows 5 – 6: Repeat row 4.

Pattern Notes
- Please kindly read through the pattern before starting.
- The stitch count is written after each row/round, with the smallest XS written first and the others in the ().
- Stitch count written in black is for all sizes, but at some points, the stitch counts are color-coded for clarity, i.e. XS (S, M, L, XL, 2XL, 3XL, 4XL, 5XL)
Difficulty Level – Intermediate
Terms – US Terminology
Stitches Abbreviations
Chain/chains – ch/chs
Chain space – ch sp
Stitch(es) – st(s)
Slip Stitch – sl st
Single Crochet – sc
Back Loop Only – BLO
Special Stitches
V st – [dc, ch 3, dc] in same st
Shell – 7 dc in the same stitch
Ch 3 = dc
Ch 4 = dc + ch 1
Construction Notes
- This project is made in sections.
- The sweater is made in rows, with the front, back, and sleeves made separately. After which, these are joined together


Crochet V Neck Sweater Free Pattern Instruction
Section 1
Front panel: Band
With MC
Row 1: Chain 15, sc in 2nd ch from hook and in each ch across, turn. 14 sc
Row 2: Ch 1, sc in first st, sc in BLO across until the last st, sc in both loops, turn. 14 sc
Rows 3 – 61: Repeat Row 2
Or until you have a length measuring half of your bust measurement.
Your piece should measure about 16”
Do not fasten off.
Edging
Row 1: Ch 1, sc in each st across the long side of the panel, turn. 61 sc
If you have a different count, make sure to have a multiple of 3 + 1
Body of sweater
Row 2: Ch 1, sc in each st across the panel, turn. 61 sc
Row 3: Ch 2 (does not count as a stitch, here and throughout), 2 dc in first st, *skip 2 sts, (sc, 2 dc) in next sc, repeat from * until the last 3 sts, sc in last st, turn. 20 sc, 40 dc
Row 4: Ch 2, 2 dc in first sc below, *skip next 2 dc, (sc, 2 dc) in next sc, repeat from * across the row, sc in the last st, turn. 20 sc, 40 dc
Rows 5 – 10: Repeat row 4.
Drop MC, pick up CC
Rows 11 – 12: Repeat row 4.
Drop CC, pick up MC
Rows 13 – 16: Repeat row 4.
Drop MC, pick up CC
Rows 17 – 18: Repeat row 4
Drop CC, pick up MC
Rows 19 – 22: Repeat row 4.
Drop MC, pick up CC
Rows 23 – 24: Repeat row 4
Drop CC, pick up MC
Rows 25 – 28: Repeat row 4.
Drop MC, pick up CC
Rows 29 – 30: Repeat row 4
Drop CC, pick up MC
Rows 31 – 34: Repeat row 4.
Drop MC, pick up CC
Rows 35 – 36: Repeat row 4
Drop CC, pick up MC
Your piece should measure about 16” from the band.
Fasten off CC.
Neckline
For all sizes
Continue with MC only from here.
Fasten off CC, Continue with only MC from here on.
Row 1: Repeat row 4.
Right side
- Place stitch marker on the 10th sc
- This should be the middle.
Row 2: Ch 2, 2 dc in first st *skip next 2 dc, (sc, 2 dc) in next sc, repeat from * until stitch marker, sc in st with the SM, turn. 9 sc, 18 dc
Row 3: Ch 3, *skip next 2 dc, (sc, 2 dc) in next sc, repeat from * across the row, sc in last st, turn. 9 sc, 18 dc
Row 4: Ch 2, 2 dc in first st, *skip next 2 dc, (sc, 2 dc) in next sc, repeat from * until the last 3 sts, sc in last st, turn. 8 sc, 16 dc
Rows 5 – 8: Repeat rows 3 – 4
Adjust the number of rows for a comfortable neckline.
If the depth is too short, add a few more repeats without decreasing.
Fasten off.
Front panel – Left side
- Join yarn with a sl st to the stitch with the stitch marker at the neckline.
Row 2: Ch 1, sc in same st, *skip next 2 dc, (sc, 2 dc) in next sc, repeat from * until the end, sc in last st, turn. 9 sc, 18 dc
Row 3: Ch 2, 2 dc in first st *skip next 2 dc, (sc, 2 dc) in next sc, repeat from * until the last 3 sts, sc in last st, turn. 9 sc, 18 dc
Row 4: Ch 3, *skip next 2 dc, (sc, 2 dc) in next sc, repeat from * across the row, sc in the last st, turn.8 sc, 16 dc
Rows 5 – 8: Repeat rows 3 – 4
Counts after the last row = 4 sc, 10 dc
Edging
Crocheting around the whole panel
I used MC but you are welcome to match the colors appropriately.
Round 1: Ch 1, sc in each st around the whole panel, (sc, ch 2, sc) at each corner, join with a sl st to the beginning chain.
Fasten off.
Back panel
Follow the instructions for the front panel and stop at the neckline.
Back panel Neckline
Using only MC from here
Rows 1 – 8: Ch 2, 2 dc in first sc below, *skip next 2 dc, (sc, 2 dc) in next sc, repeat from * across row, sc in last st, turn. 20 sc, 40 dc
Back panel shape for the neckline
Right side: Place a stitch marker on the 7 th sc. This part has a sc as the first st.
Left side: Place 2nd SM, counting from the other end 6th sc. The other end is the part that starts with ch 2, 2 dc.
Right side
Row 5: Ch 2, 2 dc in first st *skip next 2 dc, (sc, 2 dc) in next sc, repeat from * until stitch marker, sc in st with the SM, turn.
Row 6: Ch 3, *skip next 2 dc, (sc, 2 dc) in next sc, repeat from * across row, sc in last st, turn.
Row 7: Ch 2, 2 dc in first st, *skip next 2 dc, (sc, 2 dc) in next sc, repeat from * until the last 3 sts, sc in last st, turn.
Rows 8: Repeat row 6
Back panel – Left side
- Join yarn with a sl st to the stitch with the 2nd stitch marker at the neckline.
Row 5: Ch 1, sc in same st, *skip next 2 dc, (sc, 2 dc) in next sc, repeat from * until the end, sc in last st, turn.
Row 6: Ch 2, 2 dc in first st *skip next 2 dc, (sc, 2 dc) in next sc, repeat from * until the last 3 sts, sc in last st, turn.
Row 7: Ch 3, *skip next 2 dc, (sc, 2 dc) in next sc, repeat from * across the row, sc in the last st, turn.
Rows 8: Repeat row 6
Counts after the last row = 4 sc, 10 dc
Shoulder seam(s)
Turn both panels made in section 1 to the wrong side.
- Place the front panel over the back panel, with the right side facing the other.
- Join yarn with a slip stitch to ch 1 sp at the corner of the edging.
- Crocheting from the edge towards the neckline, ch 1, sc over both panels.
- Fasten off and repeat on the other side.
Neckline Edging
Join yarn to any stitch around the neckline.
Crocheting around and the corresponding stitches on the back panel.
Round 1: Ch 1, sc in each st around, join with a sl st to the beginning chain.
Fasten off.
Neck band
Option 1
Starting from the deepest part of the V neck.
Row 1: Chain 5, sc in 2nd ch from hook and in each chain across, skip corresponding st on the sweater neckline, sl st into the next 2 sts on the neckline, turn. 4 sc
Note:
- You can go down a hook size for the ribbing.
- Skip 3 sts instead of 2 sts for a neater joining on the sweater.
Row 2: In BLO, sc in each st across, turn
Row 3: Ch 2, in BLO, sc in each st across, skip corresponding st on the sweater, sl st into the next 2 sts on the sweater, turn. 4 sc
Rows 4 – end: Repeat Rows 2 and 3 until you have crocheted into all the stitches on around the neckline of your sweater. Leave the end unjoined. The instructions for securing the last row to the foundation row is below on page 8.
Upper band edging
Crocheting across the band just made, join yarn with a sl st to any of the sts on the edge.
Row 1: Ch 1, sc evenly across.
Do not fasten off, skip to the band shaping g below.
Option 2: The band is made separately and then joined to the sweater
With Color A
Row 1: Chain 5, sc in 2nd ch from hook and in each ch across, turn. 4 sc
Row 2: Ch 1, sc in first st, sc in BLO across until the last st, sc in both loops, turn. 4 sc
Rows 3 – until you have a length long enough to go around the neckline: Repeat Row 2
Joining the band to the sweater
Place the band next to the front opening.
Starting from the deepest part of the V neck.
Using color A, sl st or sc to join the band to the sweater.
Shaping the neckline band
For both methods
Pinch the lower end of the lower tip of the neckline band where you have a reductant band at the base of the “Neckline.”
Turn to the wrong side and sew the pinched part closely together.
This will leave a “bump” flip it towards the neckband and secure neatly to one side.
Optional: Add a round of sc around the band, and fasten off.
Section 3: Sleeves
Make 2
Picking a size:
There are three different sizes for the sleeves, pick a size from the following – XS – S
Each panel’s width should measure about 17”
With CC, Chain 66
Row 1: Dc in 8th ch from hook, ch 3, dc in same ch, *ch 1, skip next 4 chs, {dc, ch 3, dc} in next ch, rep from * to last 3 chs, skip next 2 chs, ch 1, dc in last ch, turn.
12 V sts, 2 dc
11 ch 1 sps
Row 2: Ch 3 (counts as a st, here and throughout), 7 dc in each ch 3 sp, dc in last st (6th ch from the foundation ch), turn. 12 shell, 2 dc
Row 3: Ch 4, (counts as a dc + ch 1, here and throughout), skip next 3 sts, *{dc, ch 3, dc} in next st, ch 1, skip next 6 sts, rep from * to last 4 sts, skip last 3 sts, ch 1, dc in last st.
12 V sts, 2 dc
13 ch 1 sps
Row 4: Ch 3, 7 dc in each ch 3 sp, dc in last st, turn. 12 shell, 2 dc
Rows 5 – 26 : Rep Rows 3 – 4
Or until it measures 16”
Edging
Crocheting around the whole panel
Round 1: Ch 1, sc in each st around the whole panel, (sc, ch 2, sc) at each corner, join with a sl st to the beginning chain.
Fasten off.
Joining the sleeves to the bodies
- Pick up your main panel.
- Fold the main panel into two (as if you are putting it on).
- The folded edge of the sleeves should align with the folded edge of the main panel.
- Open the main panel with the wrong side up. Make sure the sleeve is wrong side up, the beginning of the sleeve (foundation row) should be placed next to the body of the sweater. Attach with a stitch marker the outer edges of the sleeve to the main panel.
- Count an equal number of stitches on the sleeve and main panel.
- Sew the edge of the sleeve to the main panel.
Sleeve Seam(s)
- With the wrong side facing you, sew the sides of the sleeves together, starting from the sleeve cuffs towards the armpit. Then, continue the instructions for the side seam as written below.
Side seam(s)
- With the wrong side facing you, sew the sides of the front and back panels together.
- Fasten off.
- Repeat on the other side.
Weave in all ends.
Block to measurement.
Frequently Asked Questions
Can beginners make this sweater?
Yes, with basic crochet knowledge and patience.
Can I use a different yarn weight?
Yes, but adjust hook size and check gauge.
How do I adjust sizing?
Follow stitch multiples and add/subtract rows or stitches.
Is the sweater worked top-down or in panels?
The sweater is made in rows, front panels and back made separately and then joined together.
Modern crochet V neck sweater free pattern with step-by-step instructions, sizing XS–5XL, and stylish textured design. Perfect for beginners and intermediate crocheters.