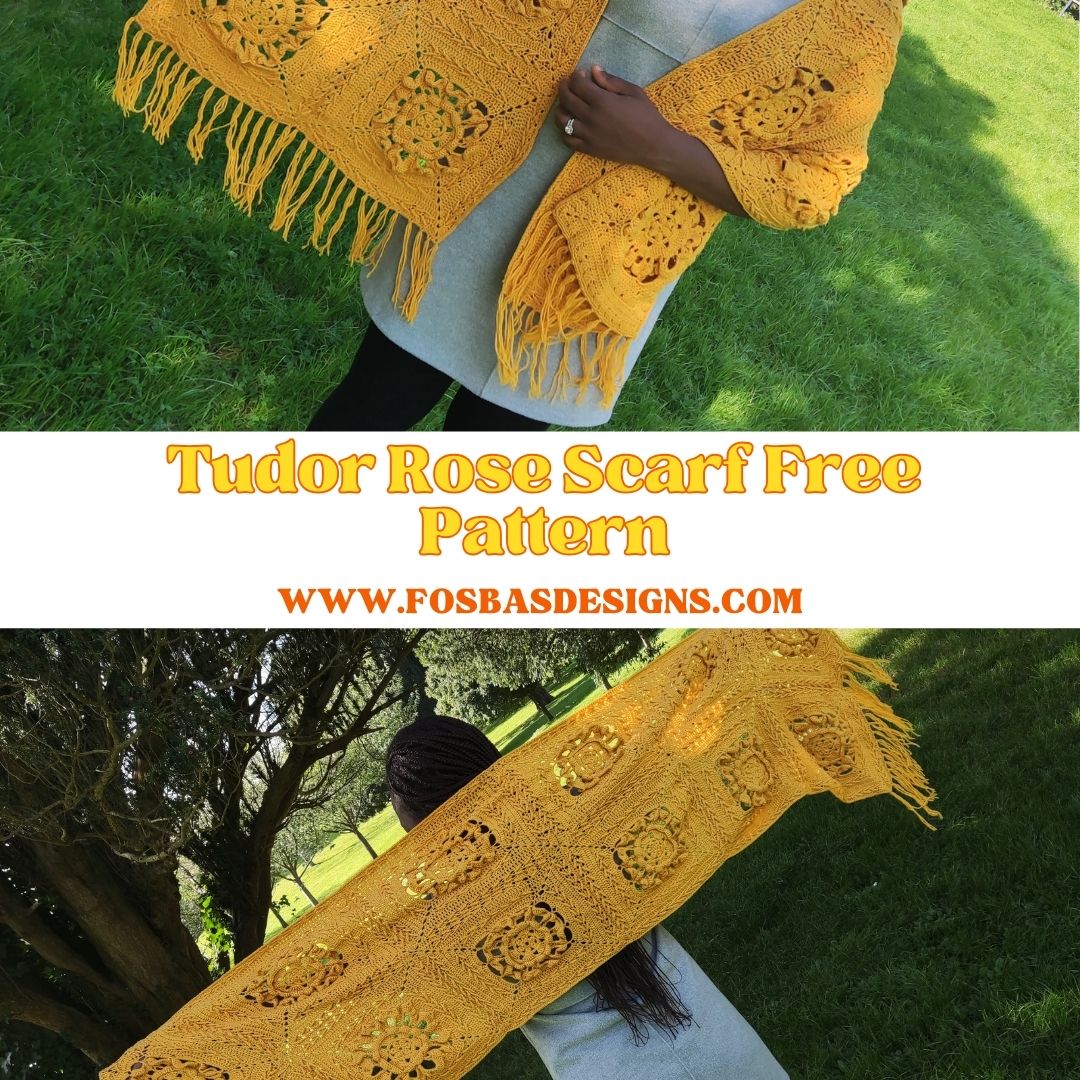
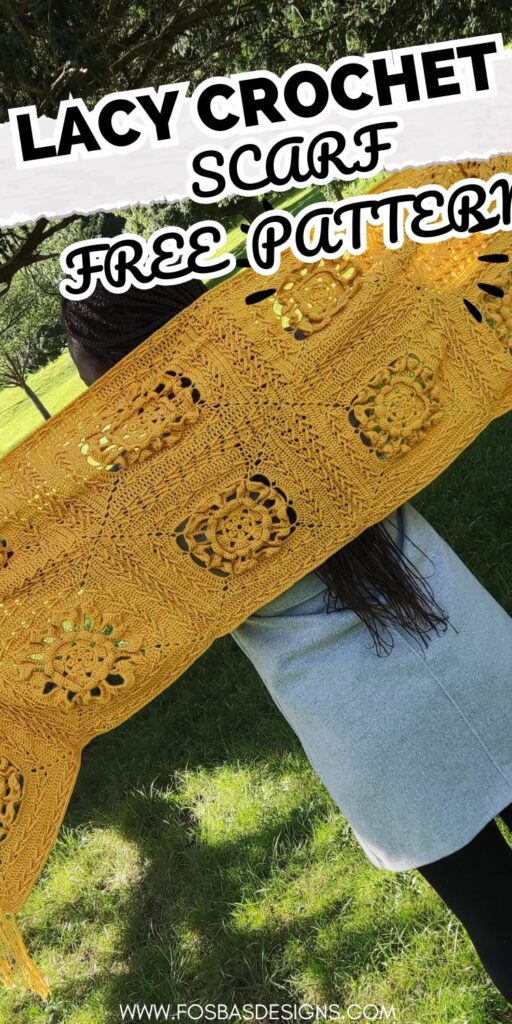
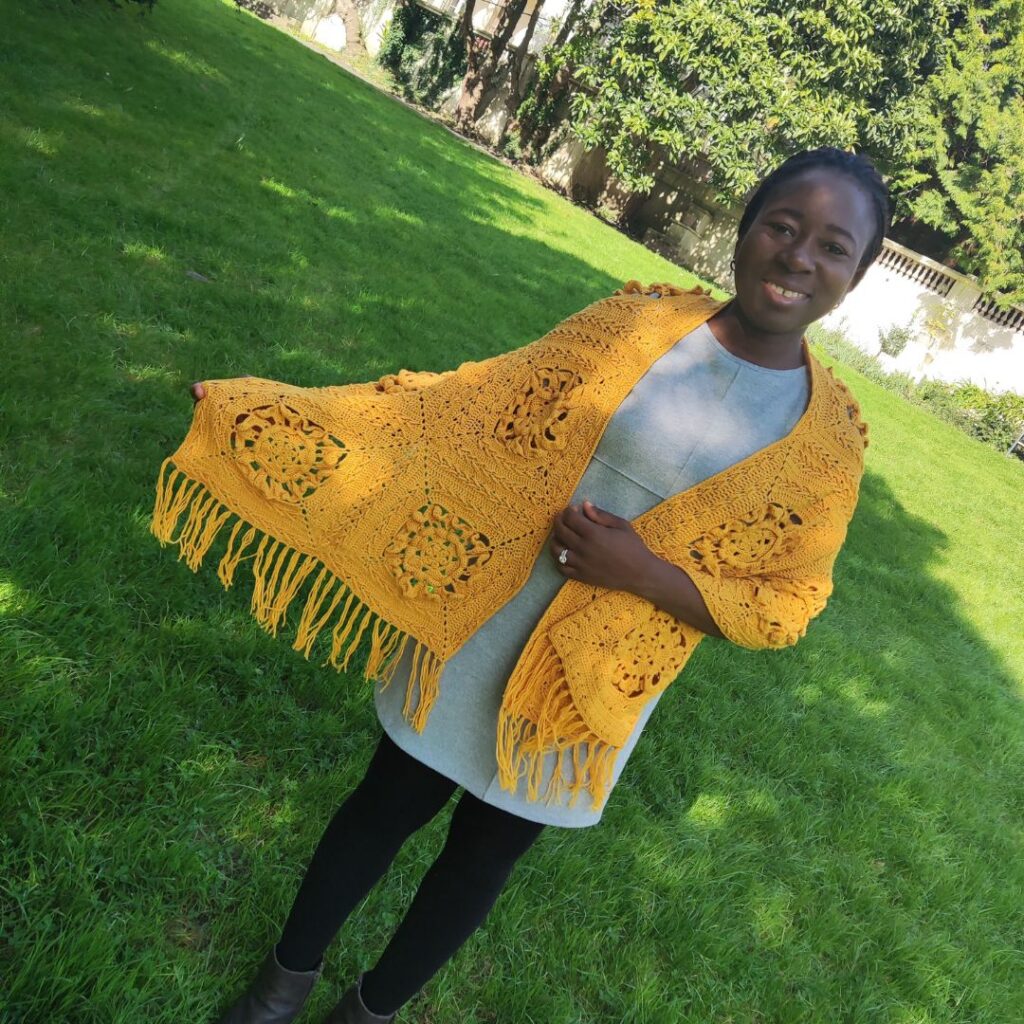
Lacy crochet scarf free pattern
It’s time for a fun project! I am excited to share with you this project, the lacy crochet scarf-free pattern.
If you have been following my designs, you will know this square! The first time I shared the square was when the Tudor Rose Blanket, then I joined the Rose Garden CAL, and this square was my contribution, then the ‘Gbemi cardigan, and finally, the Mandela wall hanging.

The making of this lacy crochet scarf-free pattern
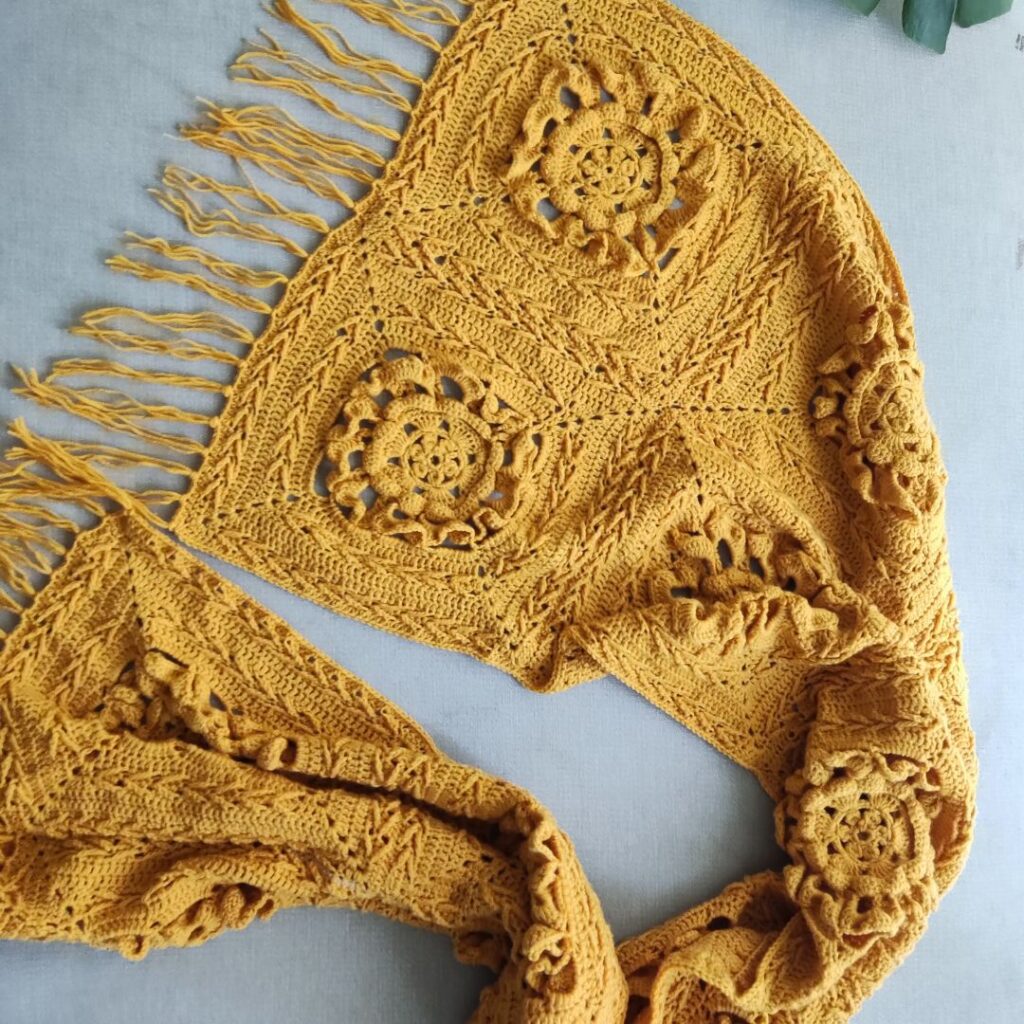
This is a fun scarf made in sections. You need 12 separate squares. The squares are then joined together and a round of edging is added. You can also add fringes to make this super classy.
Finished measurement of this lacy crochet scarf
20” by 60” Excluding the fringes.
Each square measures about 10” by 10”.
Pin the crochet scarf for later.
Supplies for Tudor Lacy crochet scarf
Yarn – Infinity Hearts Baby Merino, #2 lightweight Double knit (100% Polyester, 170 m per 1.75oz/50g).
Estimated yardage
1160 yards
Hook – US size G (4 mm) Crochet Hook
Gauge
21 sts over 11 rows = 10 cm square/4” made in dc
Difficulty level – Intermediate
Terms – US Terminology
Note – Chains at the beginning of the rounds/rows do not count as a stitch.
Stitches
Chain – ch
Single crochet – sc
Double crochet – dc
Half double crochet – hdc
Treble crochet – tr
Double treble – dtr
Stitch – st
Special stitches
Loop – Ch 12
Shell – 5 tr in indicated stitch
Bobble = 5 dc together in indicated stitch. (5dctog)
Adjustments
- You can use a thicker yarn for a wider scarf.
- Add more squares for a longer or wider scarf.
As part of the Handmade Wardrobe, this scarf is featured.


How to crochet a lacy crochet scarf
Section 1: Square
Rnd 1: In a magic ring, ch 1, 18 sc, join with a sl st to beg ch. 18 sc
Or
Rnd 1: Ch 4, 18 sc in 1st ch, join with a sl st to beg ch. 18 sc
Rnd 2: Ch 3, bobble in first st, sk next 2 sts, ch 3 *bobble in next st, sk next 2 sts, ch 3, rep from * to end, join with a sl st to 3rd ch. 6 bobbles, 6 ch sp
Rnd 3: Ch 2 (counts as beg ch and + ch 1), sk next bobble, *4 sc in ch sp, ch 1, sk next bobble, rep from * to end, join with a sl st to beg ch. 24 sc, 6 ch sp
Rnd 4: Ch 3, *6 dc in next ch 1 sp, sk next 4 sts, ch 2; rep from * to end, join with a sl st to beg ch. 36 dc, 6 ch sp
Rnd 5: Ch 1, *sc in next 6 sts, ch 3, sk next ch sp, rep from * to end, join with a sl st to ch 1st ch. 36 sc, 6 ch sp
Rnd 6: Ch 1, *sc in next 5 sts, 2 sc in next st, ch 3, sk next ch sp, rep from *to last ch 3 sp, sk last ch 3 sp, join with a sl st to beg ch. 42 sc, 6 ch sp
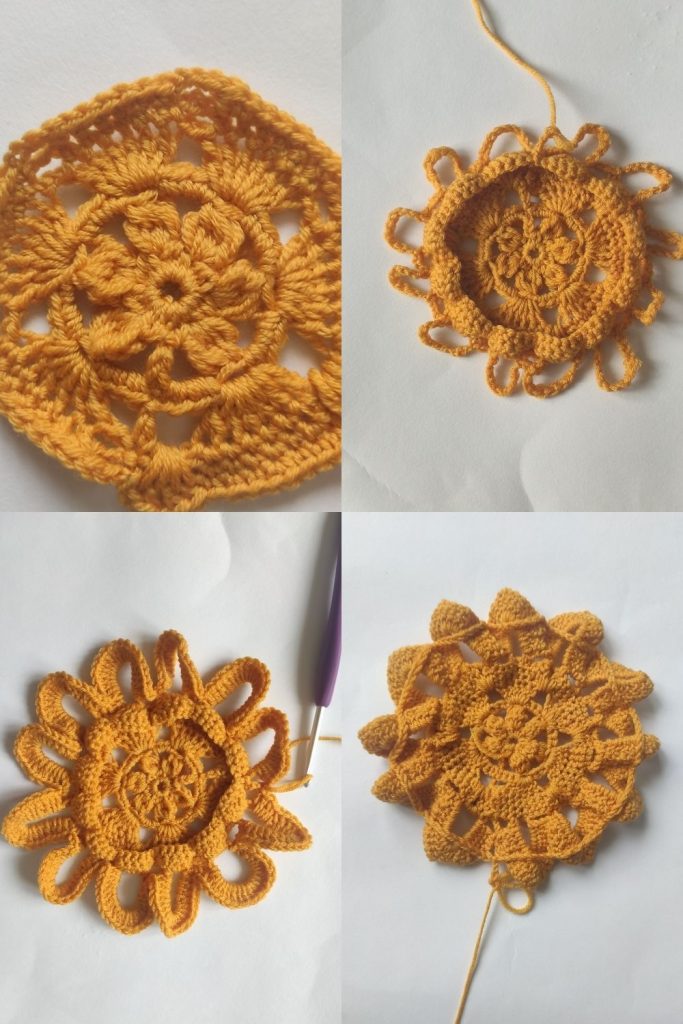
Rnd 7: Ch 1, *sc in next 3 sts, [sc, ch 1, sc] in next st, sc in next 3 sts, (2 dc over the 3 ch 3 sps from 3 rows below, ch 1, 2 dc over ch 3 sps from 3 rnds below), rep from * to end, join with a sl st to beg ch. 48 sc, 12 ch sp, 24 dc
Rnd 8: Ch 1, sk first 4 sts, *shell in each ch 1 sp, ch 1, rep from * to last 4 sts, sk last 4 sts, join with a sl st to beg ch. 12 shells, 12 ch sp
The sk sts above would be where you crochet into in rnd 10.
Rnd 9: Ch 1, *sc in next 5 sts, sc in next ch 1 sp, rep from * to end, join with a sl st to beg ch. 72 sc
Note:
- Your piece curls up after round 9.
- To make crocheting the next rounds easier, you can press down stitches made in round 9
Rnd 10: Ch 3, working to the sk sts left unworked from round 7, sk first st, sc in next st, * ch 10, sk next shell, sc in next st, ch 4, sk next 3 sts, sc in next st, rep from * to end, join with a sl st to 1st ch from beg ch. 24 ch sp, 24 sc
Rnd 11: Ch 3, *20 dc in ch 10 sp, sc in ch 4 sp, rep from * to last ch 10 sp, 20 dc in ch 10 sp, join with a sl st to beg ch. 12 sc, 240 dc
Rnd 12: Ch 1, sk first st *sc in next 9 sts, ch 3, sc in next 9 sts, sk next 3 sts, rep from * to end, sk last st, join with a sl st to beg ch. 12 ch sp, 216 sc
Rnd 13: Ch 3, sk next 2 sts, sc in next st, *ch 8, sk next [6 sts, ch 3 sp, 6 sts], insert hook from the back, to the front of next st, sk next 4 sts, insert hook from the front to the back of next st, [sc2tog], rep from * to last petal, ch 8, sk next [6 sts, ch 3 sp, 6 sts], sc in next st, sk last 2 sts, join with a sl st to beg ch. 12 ch sp, 12 sc
Keep all ch 8 sps behind the petals.
Rnd 14: Ch 3, 9 dc in each ch 8 sp, join with a sl st to beg ch. 108 dc
Rnd 15: Ch 3, *dc in next 26 sts, [dc, ch 3, dc] in next st, rep from * to the end, join with a sl st to beg ch. 112 dc, 4 ch sp
Rnd 16: Ch 3, sk next 2 sts, tr in next st, working behind the tr, 2 dc in the first sk st, dc in next st, (*sk next 3 sts, tr in next st, working behind the tr, dc in each of the 3 sk sts, starting from the first st, rep from * to corner, [2 dc, ch 2, 2 dc] in ch 3 sp); rep ( to ) to last st, sk last st, join with sl st to beg ch, turn. 28 tr, 100 dc
Turn, working from the wrong side
Rnd 17 (WS): Ch 3, (dc in next 2 sts, [2 dc, ch 2, 2 dc] in ch 2 sp, dc in next 2 sts) **sk next 3 sts, tr in next st, working in front of the tr, dc in each of the 3 sk sts, starting from the first st, rep from ** to last 2 sts before ch 2 sp, work from ( to ), rep from *to end, join with a sl st to beg ch, turn. 28 tr, 116 dc
Turn, working from the right side.
Rnd 18 (RS): Ch 3, *dc in each st to corner, [2 dc, ch 2, 2 dc] in ch 2 sp, rep from * to last 4 sts, dc in last 4 sts, join with a sl st to beg ch. 160 dc
Rnd 19: Ch 3, *dc in each st to corner, [2 dc, ch 2, 2 dc] in ch 2 sp, rep from * to last 6 sts, dc in last 6 sts, join with a sl st to beg ch. 176 dc
Rnd 20: Ch 3, (*sk next 3 sts, tr in next st, working from behind the tr, dc in each of the 3 sk sts, rep from * to next corner, [2 dc, ch 2, 2 dc] in ch 2 sp), rep from (to) to last 8 sts, rep from * in last 8 sts, join with a sl st to beg ch, turn. 44 tr, 148 dc
Rnd 21(WS): Ch 3, (*sk next 3 sts, tr in next st, working in front of the tr, dc in each of the 3 sk sts, rep from * until 2 sts before ch 2 sp, dc in next 2 sts, [2 dc, ch 2, 2 dc] in ch 2 sp, dc in next 2 sts), rep from (to) to end, join with a sl st to beg ch, turn. 44 tr, 164 dc.
Fasten off
Sew in all ends
Make 11 more squares.
Block the squares separately.
Section 2: Joining
- Arrange the squares in 2’s and with the wrong side facing you.
- Place Squares 1 and 2 next to each other.
- On the next line, place squares 3 and 4 next to each other and next to the first set of squares; continue this sequence until you have all the squares lined in 2’s.
- Using either a darning needle or crochet hook, join the sides with mattress stitch or slip stitch across.
- Secure all ends.
Section 3: Scarf Edging
Join yarn with a sl st to any side.
Round 1: Ch 2, hdc in each st around, aim for 2 hdc, ch 2, 2 hdc at each corner, join with a sl st to the beginning chain.
Adding Fringes to your crochet scarf
Supplies needed for the fringe
- Yarn in the color of your choice
- Scissors
- Solid material – Can be a book
- Tape measure
Finished measurement – 4”
Note that the length of the solid material you intend to use will determine the length of your yarn.
Step 1: Wrap yarn around the solid material (book) multiple times.
Step 2: Cut an opening into the bunch of yarn.
To attach the fringes to the scarf.
- Use any of the sts from the short edge of the scarf, with your hook and the 2 – 3 strands of yarn; using a slip stitch, secure the tassel firmly to the scarf.
- Count 2 sts away from the previous fringe, and secure another fringe.
- Repeat until you have attached your fringes across the last row of your scarf.
- Repeat on the other short end of the scarf.
- Trim off excess yarn on the fringe, to have an equal length of loops.
There you have your Tudor rose Lacy crochet scarf, I would love to see your version made from this free pattern!
Other crochet shawls and scarf patterns to check on the blog
One skein Shanae shawl-free pattern
Convertible rectangular scarf pattern
Chunky rectangular scarf-free pattern
Reversible crochet scarf pattern