
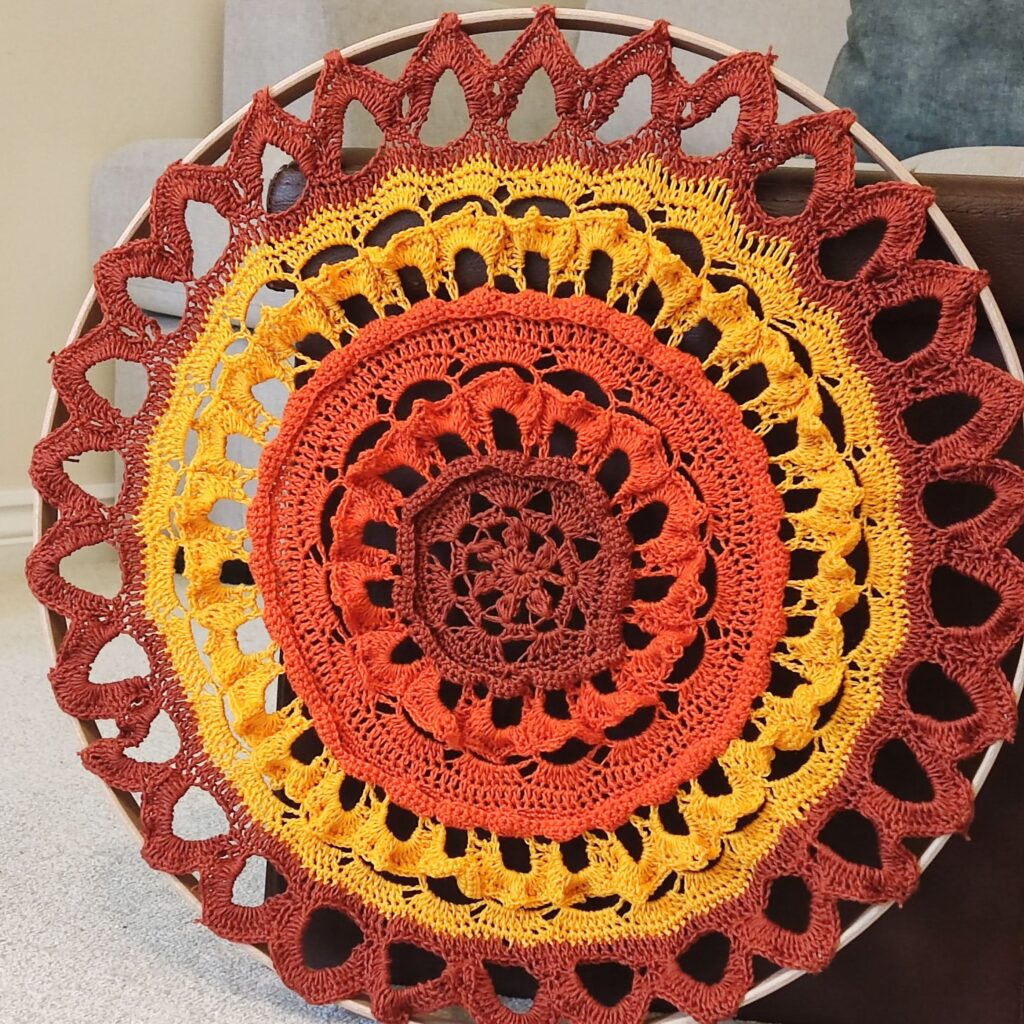
Crochet Mandela wall hanging free pattern
Let’s make a crochet mandala wall hanging! This is a creative way to add a touch of color and texture to your home decor. The Crochet Mandela wall hanging is a beautiful piece of art that can be customized in countless ways and makes a stunning focal point in any room.
You don’t need to spend a fortune to get one; you can make yours! This free pattern for the Mandela Wall Hanging is perfect for you. In no time, you will have a gorgeous crochet Mandela wall hanging to decorate your space. So grab your yarn and hooks, and let’s get started!
The Mandela wall hanging pattern is available as a free pattern; scroll down for the tutorial. If you would love to have the print-friendly on ETSY and Ravelry
Mandela Wall Hanging Pattern on Etsy
What is a Crochet Mandala Used For?
A crochet mandala is a circular pattern made by crocheting in rounds with colorful designs. Crochet mandalas can be used for a variety of purposes, including:
- Decorative purposes: Crochet mandalas can be used to add a pop of color and texture to any room in your house. You can hang them on the wall or use them as a table centerpiece or a decorative doily.
- Meditation and relaxation: Mandalas are often used as a form of meditation and relaxation.
- Spiritual and symbolic purposes: Mandalas have a long history of use in spiritual and symbolic contexts. The circular shape and intricate patterns are believed to represent wholeness, balance, and harmony.
- Creative expression: Crochet mandalas can be a fun and creative way to express your personality and style. You can experiment with different colors and patterns to create a unique and personalized mandala.
More beginner-friendly crochet Mandela wall hanging patterns
Beginner-friendly crochet Mandela wall hanging patterns can be fun and rewarding simultaneously!
The Daisy crochet wall hanging free pattern is another beautiful art for your space.
10 + crochet Mandela patterns to make
Yarn for Mandela Wall Hanging project
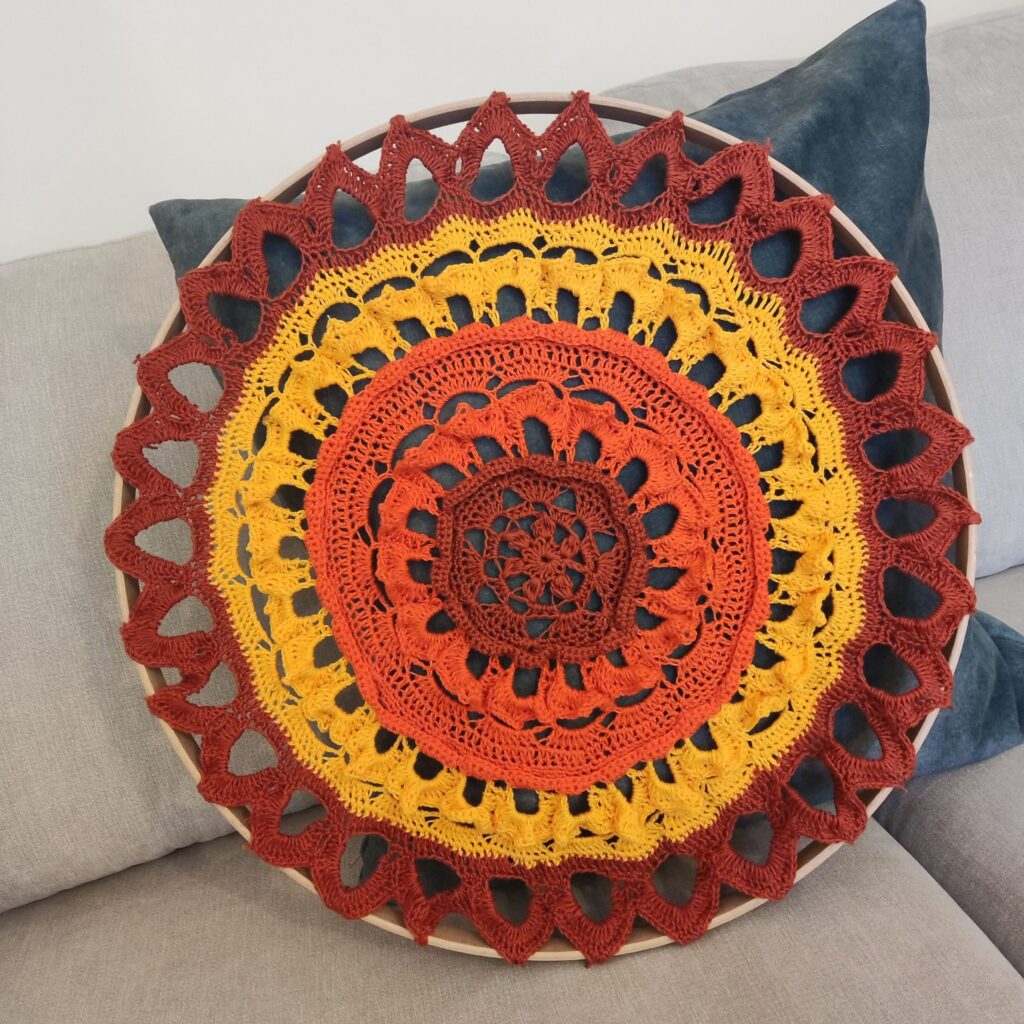
For this beautiful crochet Mandela Wall hanging project, I used 3 different colors. But this would look so beautiful in any number of colors. If you are struggling with picking colors, you can have a look at any yarn cake for inspiration.
How to choose colors for your Mandela Project
You can go color-blocking with your Mandela or use complementary colors.
Supplies needed for your crochet Mandela Wall Hanging
Yarn – Hobbii Friends wheel, 4 ply, 55% Cotton, 45% Acrylic, 400 m / 437 yds per 100 g / 3.5 oz.
Sample made in :
Color A = Chocolate
Color B = Pumpkin
Color C = Dark Yellow
Estimated Total Yardage
220 yards
Hook and other Materials
4 mm Crochet Hook
Hoop – 13”
Gauge 17 sts over 14 rounds = 4” made in hdc
Gauge is not critical to this project.

Notes for this crochet Mandela
- Please kindly read through the pattern before starting.
- Any #3 weight yarn can be substituted.
- Difficulty Level – Intermediate
Terms – US Terminology
Finished Measurement
13” by 13”
Stitches Abbreviations
Chain – ch
Slip stitch – sl st
Double crochet – dc
Treble – tr
Single crochet – sc
Stitch – st
Special stitches
Loop – Ch 12
Shell – 5 dc in indicated stitch
Bobble = 5 dc together in indicated stitch. (5dctog)
Petals = 20 dc made in ch 10
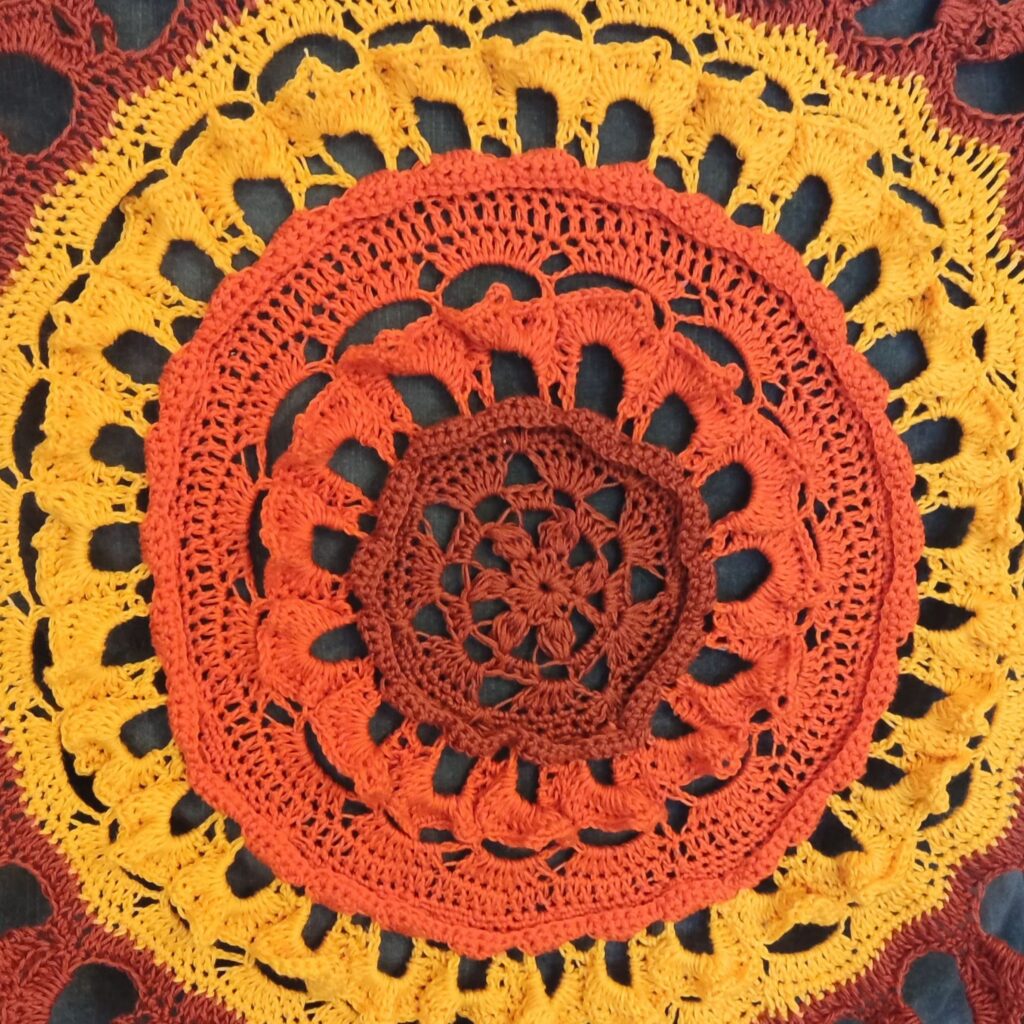
How to crochet a Mandela wall hanging
With A
Round 1: In a magic ring, ch 1, 18 hdc, join with a sl st to beginning ch. 18 hdc
Or
Round 1: Ch 4, 18 hdc in 1st ch, join with a sl st to beginning ch. 18 hdc
Round 2: Ch 5, bobble in first st, skip next 2 sts, ch 3 *bobble in next st, skip next 2 sts, ch 3, rep from * to end of the round, join with a sl st to 3rd ch. 6 bobble, 6 ch sps
Round 3: Ch 3 (counts as starting ch + ch 2 sp), *4 hdc in ch sp, ch 2, skip next bobble, rep from * to end, join with a sl st to beginning ch. 28 hdc, 6 ch sps
Round 4: Ch 3, 6 dc in first ch sp, ch 2, *skip next 4 sts, 6 dc in next ch 2 sp, ch 2, rep from * to end of the round, join with a sl st 3rd ch. 42 dc, 7 ch sps
Round 5: Ch 1, *sc in next 6 sts, ch 2, skip next ch sp, rep from *to end, join with a sl st to ch 1st ch. 42 sc, 7 ch sps
Round 6: Ch 1, *sc in next 5 sts, 2 sc in next st, ch 3, skip next ch sp, rep from *to last ch 3 sp, skip last ch 3 sp, join with a sl st to beginning ch. 49sc, 7 ch sp
Round 7: Ch 1, *sc in next 3 sts, (sc, ch 1, sc) in next st, sc in next 3 sts, (dc, ch 1, dc), over the 3 ch sps from 3 rounds below, rep from * to end, join with a sl st to beginning ch. 56 sc, 14 ch sps, 14 dc
Round 8: Ch 3, Shell in first st, ch 1, *shell in each ch 1 sp, ch 1, rep from * to end, join with a sl st to beginning ch. 15 shells, 15 ch sps
The skipped stitches above would be where you crochet into in Round 10.
Round 9: Ch 1, *sc in next 5 sts, sc in next ch 1 sp, rep from * to end, join with a sl st to beginning ch. 90 sc
Fasten off
Note
- Fasten off A, join B with a sl st to the base where you have ch 3 from round 8
- Round 10 is worked from the back into the skipped from round 7; this means that both rounds 8 and 9 would be in front of round 10
- With Color B
Round 10: Ch 1, sc in that same st, *ch 10, skip shell st, sc in next st, ch 4, skip next 3 sts, sc in next st, rep from * end, join with a sl st to beginning ch. 30 ch sps, 30 sc
Round 11: Ch 3, *20 dc in ch 10 sp, sc in ch 4 sp, rep from * to last ch 10 sp, 20 dc in ch 10 sp, join with a sl st to beginning ch. 15 sc, 300 dc
Round 12: Ch 1, skip first st *sc in next 9 sts, ch 3, sc in next 9 sts, skip next 3 sts, rep from * to end, skip last st, join with a sl st to beginning ch. 15 ch sps, 270 sc
Round 13: Ch 3, skip next 2 sts, sc in next st, *ch 8, skip next (6 sts, ch 3 sp, 6 sts), insert hook from the back, back to the front of next st, skip next 4 sts, insert hook from the front to the back of next st, (sc2tog), rep from * to last petal, ch 8, skip next (6 sts, ch 3 sp, 6 sts), sc in next st, skip last 2 sts, join with a sl st to beginning ch. 15 ch sps, 15 sc
Keep all ch 8 sps behind the petals.
Round 14: Ch 3, 9 dc in each ch 8 sp, join with a sl st to beginning ch. 135 dc
Round 15: Ch 2, dc in each st around, join with a sl st to beginning ch. 135 sc.
Round 16: Ch 1, *sc in next 7 sts, ch 3, skip next 2 st, rep from *to end, join with a sl st to ch 1st ch. 105 sc, 15 ch sps
Round 17: Ch 1, *sc in next 6 sts, 2 sc in next st, ch 4, skip next ch sp, rep from *to last ch 3 sp, skip last ch 3 sp, join with a sl st to beginning ch. 120 sc, 15 ch sps
Round 18: Ch 1, *sc in next 3 sts, (sc, ch 1, sc) in next st, sc in next 4 sts, (dc, ch 1, dc) over the 3 ch sps from 2 rounds below, rep from * to end, join with a sl st to beginning ch. 135 sc, 30 ch sps, 30 dc
Round 19: Ch 3, *shell in each ch 1 sp, ch 1, rep from * to end, join with a sl st to beginning ch. 30 shells, 30 ch sps
The skipped stitches above would be where you crochet into in Round 21.
Round 20: Ch 1, *sc in next 5 sts, sc in next ch 1 sp, rep from * to end, join with a sl st to beginning ch. 180 sc
Note
- Fasten off B, join C with a sl st to the base where you have ch 3 from round 19
- With the right side facing you.
- Round 21 is worked from the back of sts in Rounds 19 and 20; this means that both rounds 19 and 20 would be in front of Round 21
- Round 21 is worked into the skipped stitches left unworked in round 18 when working round 19.
- Working to the skipped sts left unworked from round 19
- With C
Round 21: Ch 1, sc in that same st, *ch 4, skip next 3 sts, sc in next st, ch 10, skip shell st, sc in next st, rep from * end, join with a sl st to beginning ch. 60 ch sps, 60 sc
Round 22: Ch 1, *sc in ch 4 sp, 20 dc in ch 10 sp, rep from * to last ch 10 sp, join with a sl st to beginning ch. 30 sc, 600 dc
Round 23: Ch 1, skip first 2 sts *sc in next 9 sts, ch 3, sc in next 9 sts, skip next 3 sts, rep from * to end, skip last st, join with a sl st to beginning ch. 540 sc
Round 24: Ch 1, skip next 2 sts, sc in next st, *ch 8, skip next (6 sts, ch 3 sp, 6 sts), insert hook from the back, back to the front of next st, skip next 4 sts, insert hook from the front to the back of next st, (sc2tog), rep from * to last petal, ch 8, skip next (6 sts, ch 3 sp, 6 sts), sc in next st, skip last 2 sts, join with a sl st to beginning ch. 30 ch sps, 30 sc
Keep all ch 8 sps behind the petals.
Round 25: Ch 3, 9 dc in each ch 8 sp, join with a sl st to beginning ch. 270 DC
Round 26: Ch 2, dc in each st around, join with a sl st to beginning ch. 270 DC
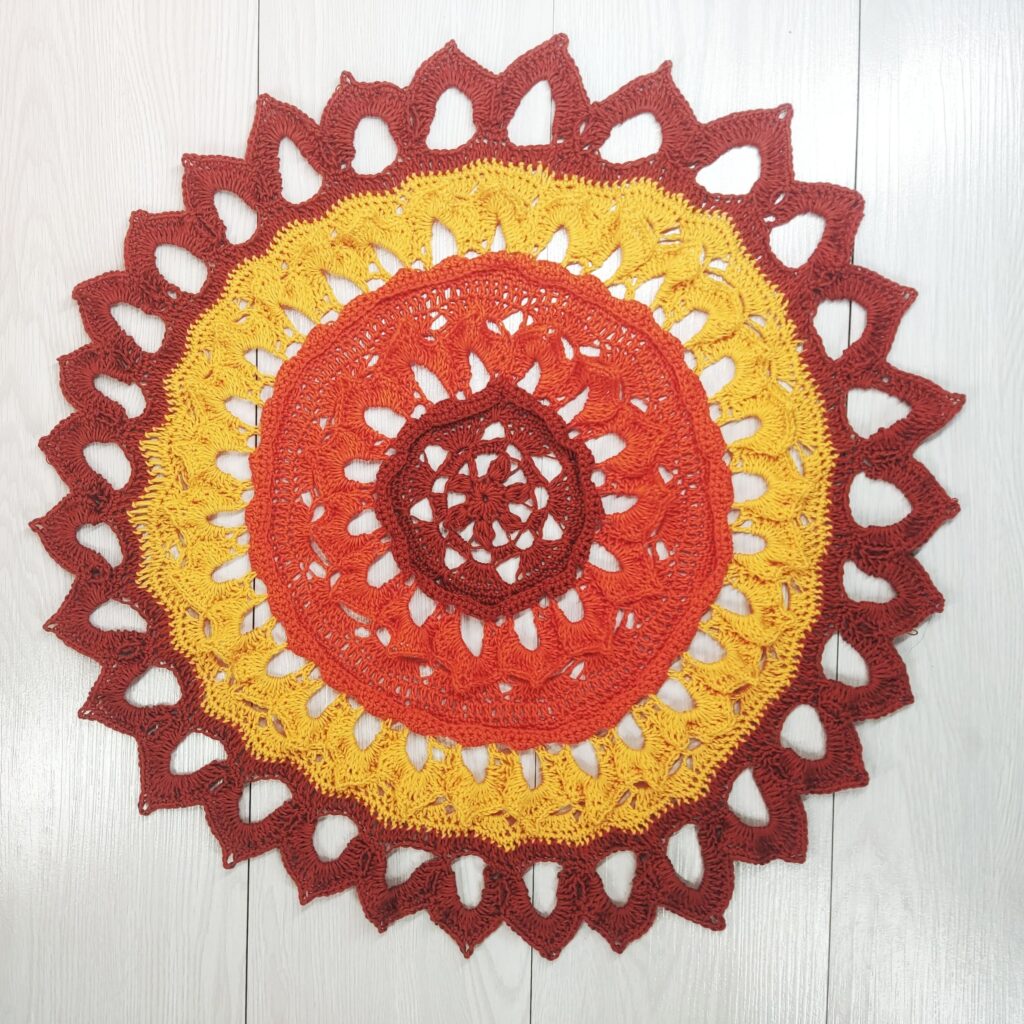
- Fasten off for the medium-sized Mandela version.
- Continue with the instructions below if adding a hoop and fringes
For large Mandela, continue below
Join A with a sl st
Round 27: Ch 2, dc in each st around, join with a sl st to beginning ch. 270 DC
Round 28: *Ch 12, skip next 5 sts, sc in next 4 STS, rep from * to end, join with a sl st to beginning ch. 120 sc, 30 ch sps
Round 29: Ch 1, * 24 dc in ch 12 sp, skip next 2 sts, sc in next st, skip next st, rep from * to last ch 12 sp, 24 dc in last ch 12 sp, join with a sl st to beginning ch. 720 dc, 30 sc
Round 30: Ch 1, sl st into the next 4 sts, *sc in next 8 sts, ch 3, sc in next 7 sts, insert hook from the back, back to the front of next st, skip next 9 sts, rep from * to last petal, sc in next 8 sts, ch 3, sc in next 7 sts, join with a sl st to beginning ch. 480 dc, 30 ch sps
Fasten off
Sew in ends
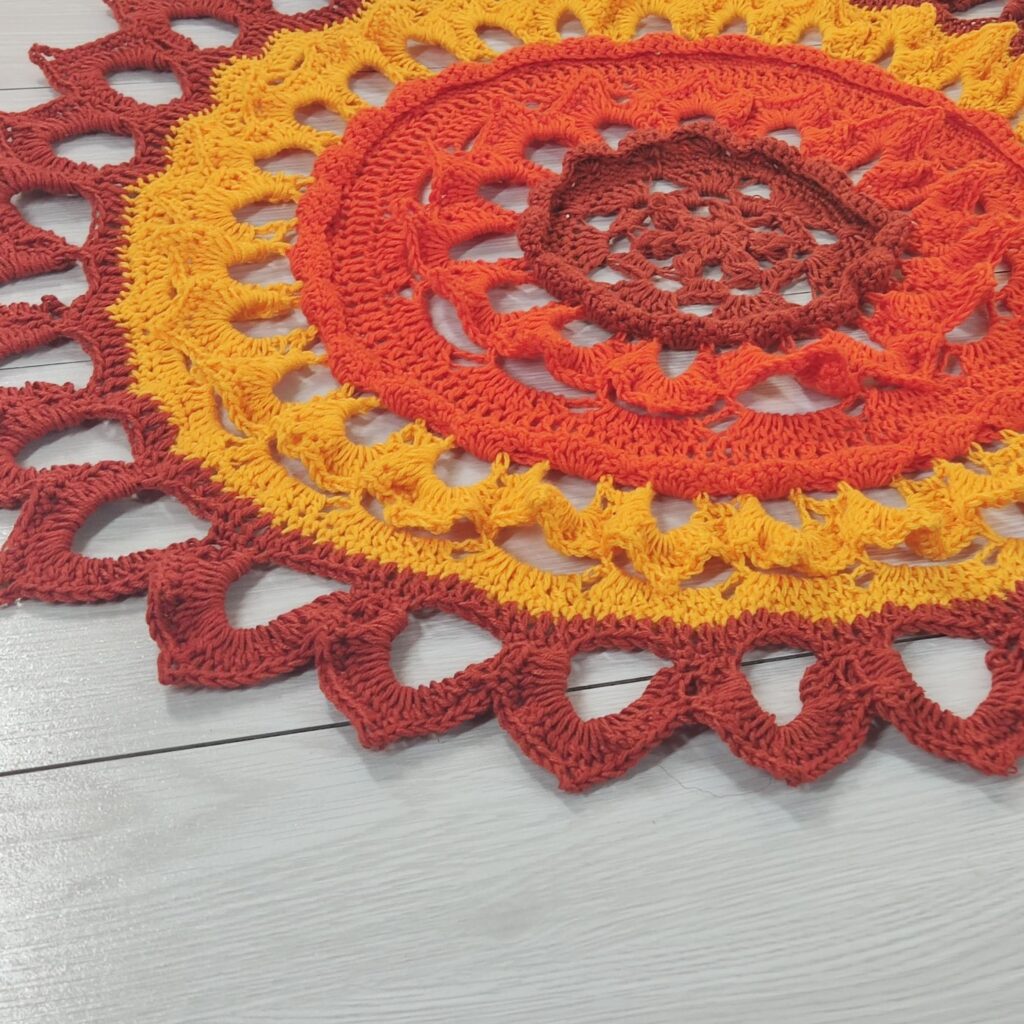
Block to measurements – Pay attention to the petals; blocking them individually with pins would make a difference.
Her is a reel I made showing how I blocked mine = Fosbas Designs | Crochet🧶💜 (@crochet_fosbas) • Instagram photos and videos
If adding hoop
- Measure the diameter of your Mandela.
- Pick a similar dimension for your hoop.
How to attach a Mandela to a hoop
Make sure your mandala is 1-2″ SMALLER than the hoop you are using! Then, follow these instructions:
- If making the medium-sized Mandela
Round 1: Pick up the hoop, ch 1, crocheting over the hoop, sc in each st around, join with a sl st to the beginning ch.

Fasten off.
- If making the large size Mandela and wooden hoop


- Pick the correct measurement of the hoop.
- Using the ch 3 sp of each petal (from the last round)
- Secure the mandala to the hoop with a strip of yarn, rep with each ch sp around.
- Trim off excess yarn
Sew in ends
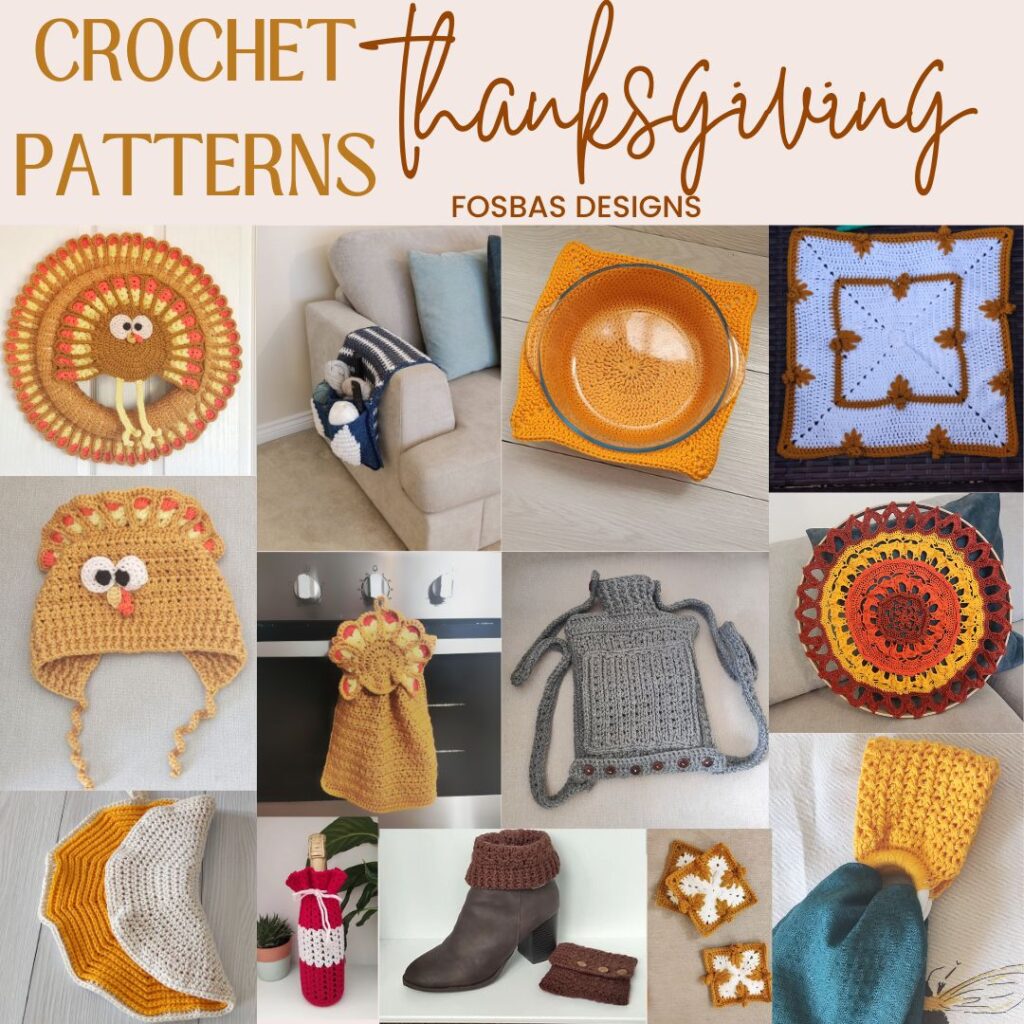
As part of the Thanksgiving Crochet Project Event, the Mandela Wall Hanging Pattern is featured. Use the images below for more details.

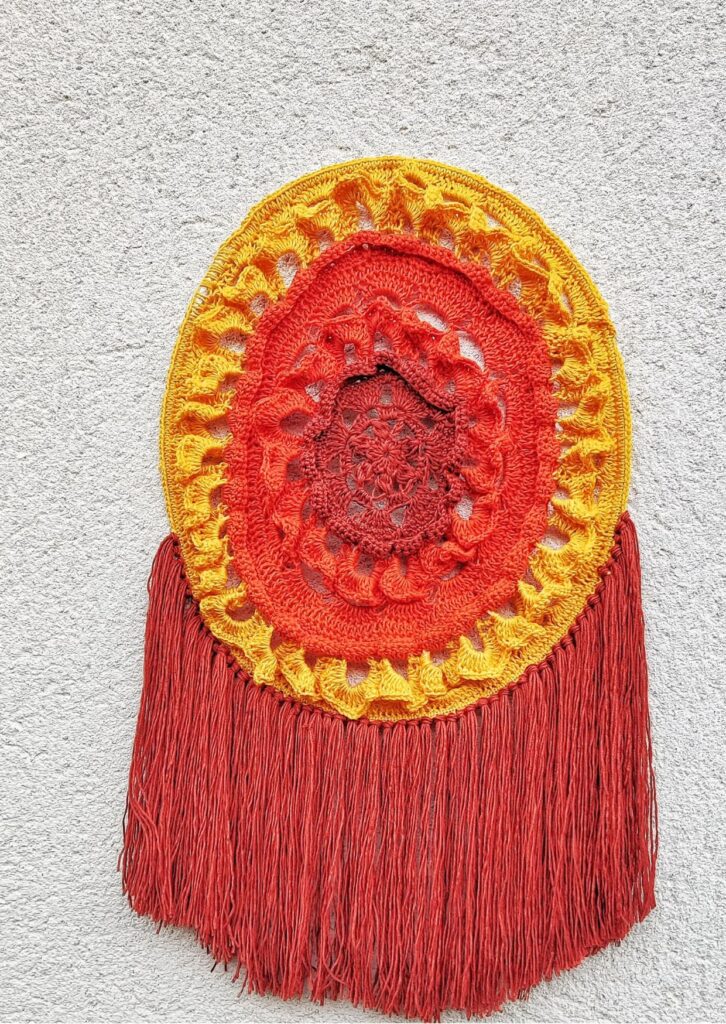
Adding Fringe to your Crochet Mandela Wall Hanging
Materials needed
Yarn in color(s) of your choice
Scissors
Solid material – Can be a book
Tape measure
Finished measurement – 8”
The length of the solid material you intend to use will determine the length of your fringe.
- Wrap your yarn around any firm material like a book multiple times.
Cut yarn
- Cut the lower end of the loop around the solid material.
- Pick up your Mandela
- Locate the lower ⅓ and mark with stitch markers – this would be the fringe’s beginning and ending points.
- Using your crochet hook, insert the hook through a stitch and make a slip knot with 5 yarn trends.
- Skip the next stitch.
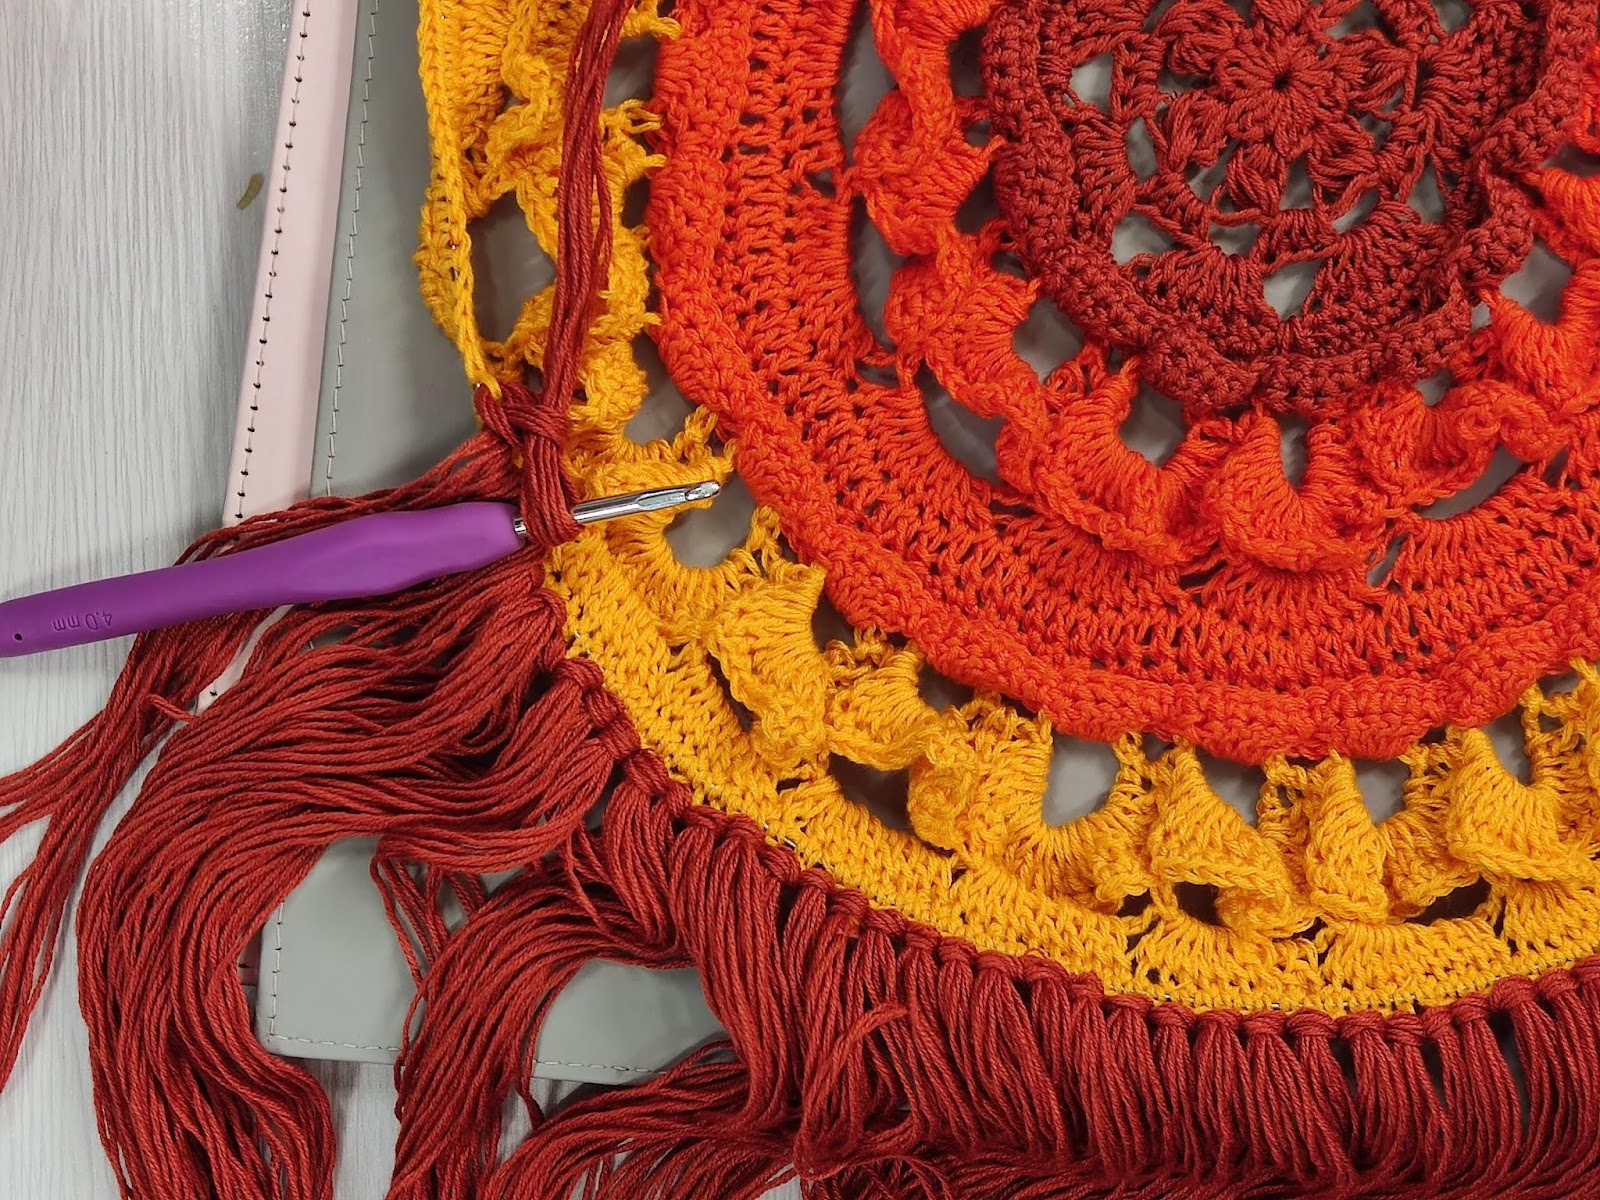

- Repeat the process for more fringes.
- Trim off excess yarn, to have an equal length of fringe.
Crochet mandala wall hangings are a beautiful and trendy way to add color and texture to your home decor. You can create your own unique project and hang it on your wall to create a stunning focal point.
I can’t wait to see your beautiful makes! Come share your projects with me and the crochet community on Facebook and on Instagram.
Fosbas


Thank you so much! Just what I’ve been looking for to make a gift for my mama! <3
Glad you love this Mandela, when you make your version, kindly let me know.