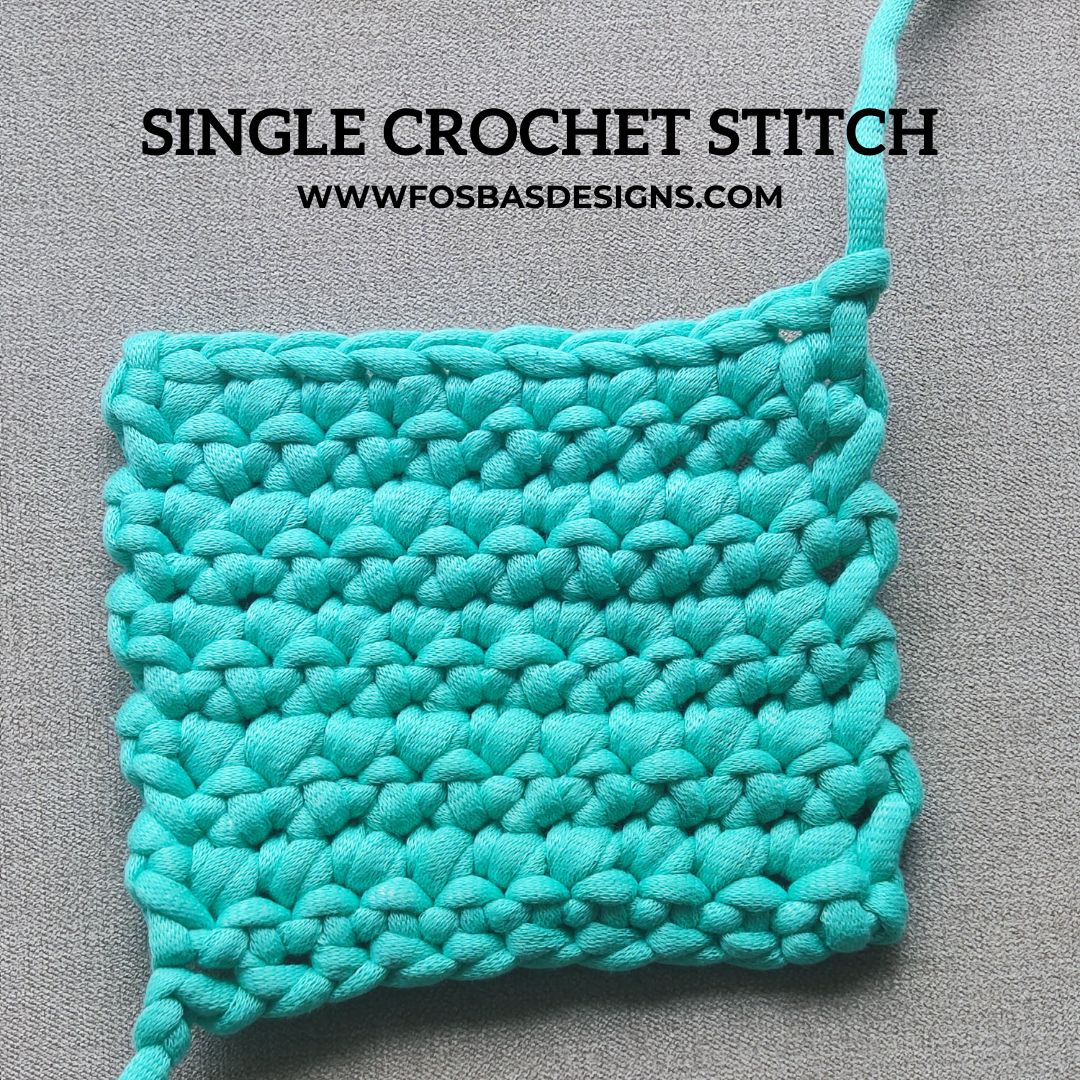
How to crochet the single crochet stitch
Learn and perfect the single crochet stitch with this detailed step-wise stitch tutorial.
Single crochet is one of the basic stitches every crocheter must know. Single crochet is a super simple stitch and easy to learn and perfect.
What is the single crochet stitch?
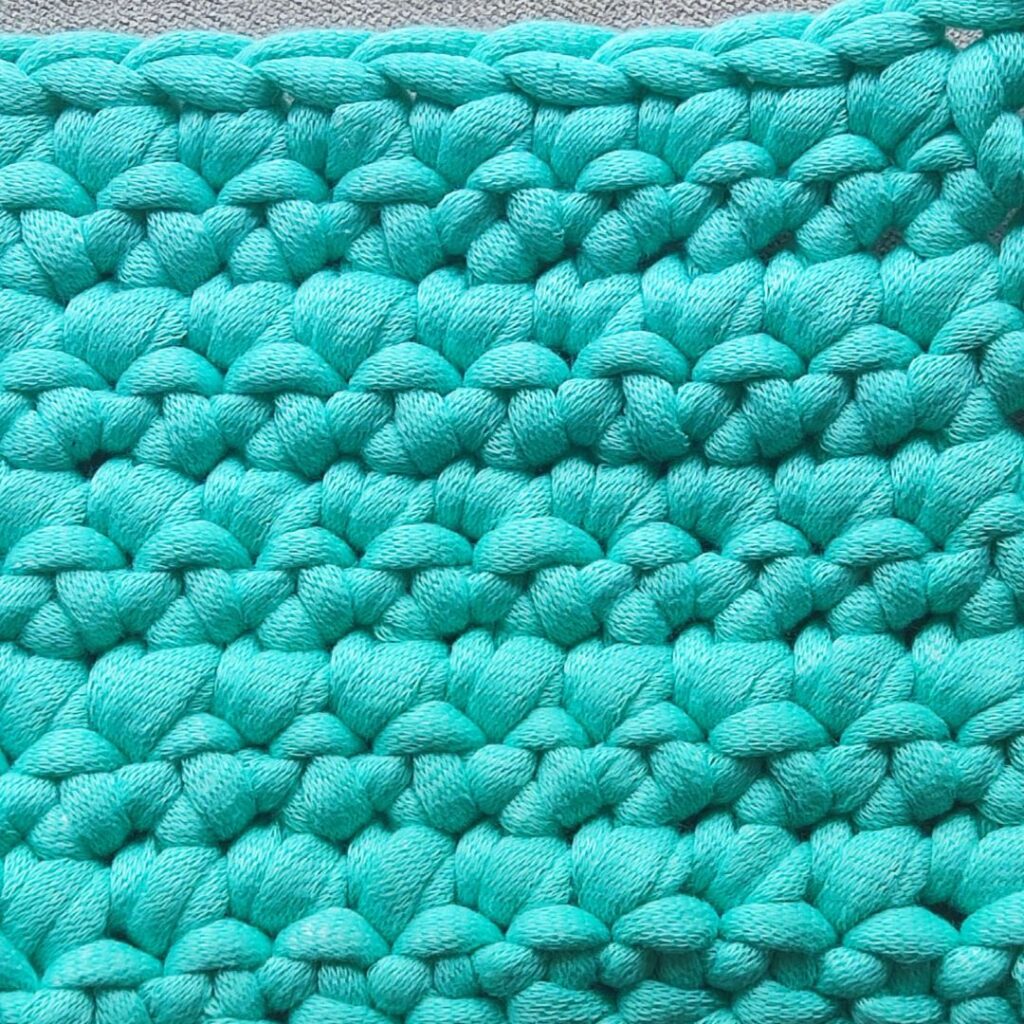
The single crochet stitch (abbreviated as sc) is one of the basic stitches in crochet. It is a tight and dense stitch that creates a solid texture. The single crochet stitch is commonly used in a variety of crochet projects, such as garments, accessories, blankets, and amigurumi.
The single crochet stitch is usually worked row by row, turning the work at the end of each row. It can also be worked in the round, where you continue working in a spiral without turning.
How to crochet the single crochet stitch
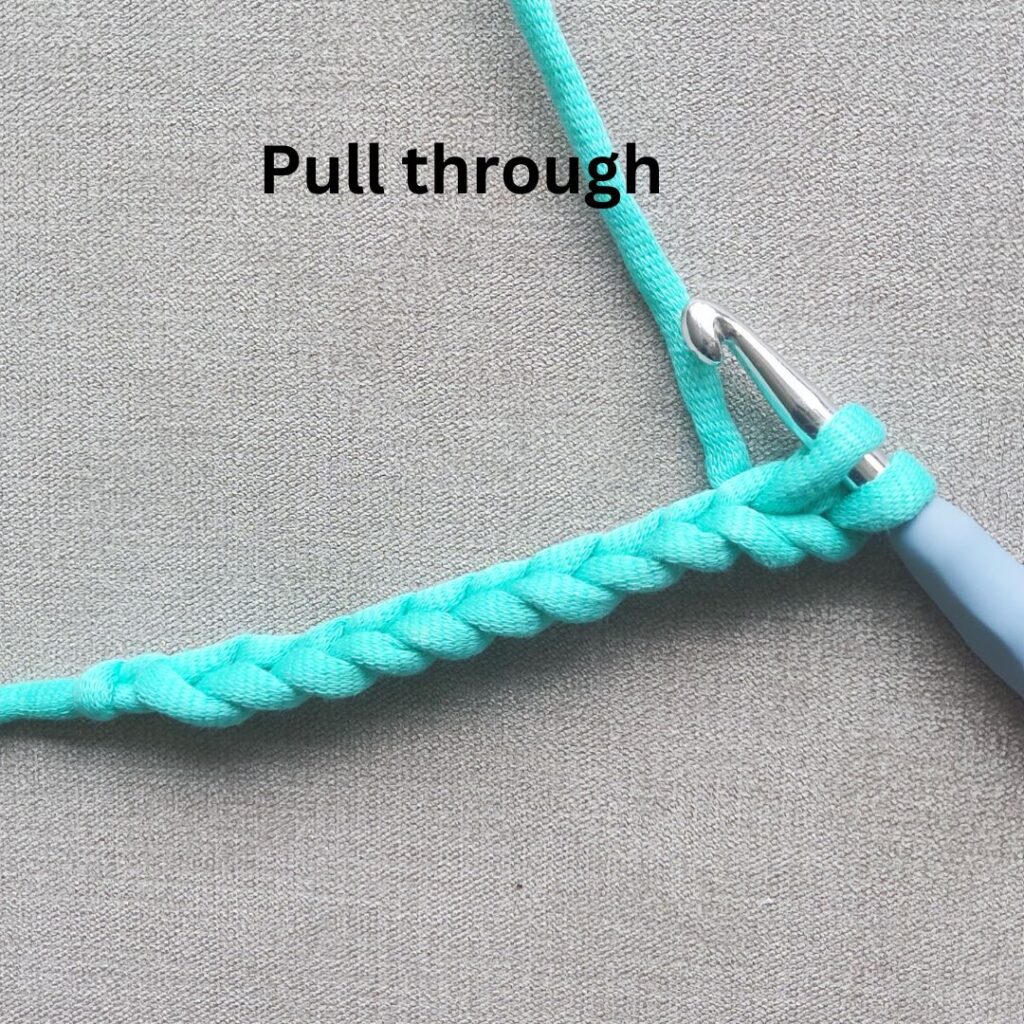
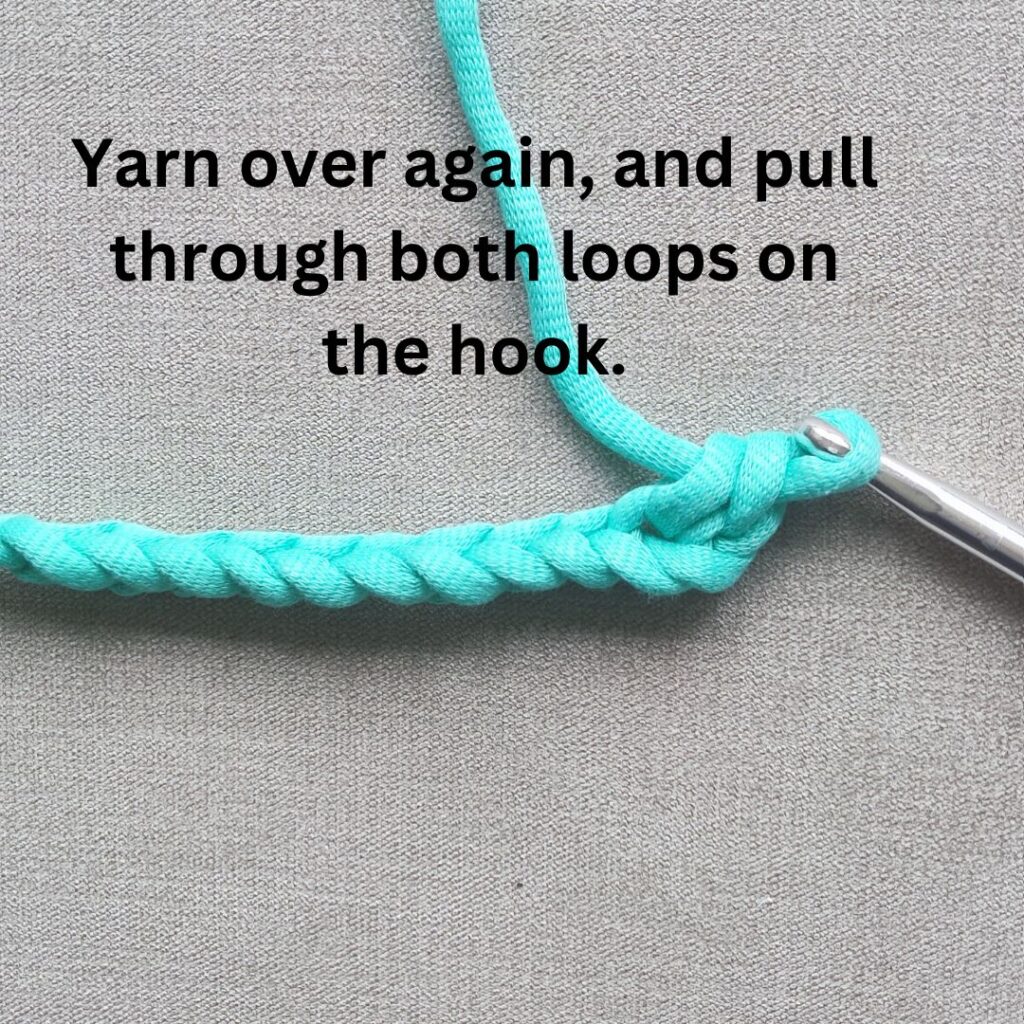
To create a single crochet stitch, insert the hook into the desired stitch, yarn over, pull through, yarn over again, and pull through both loops on the hook.

Height of Single Crochet
The height of a single crochet stitch is shorter than other crochet stitches, such as half double crochet, double crochet, or treble crochet, giving it a tighter stitch.
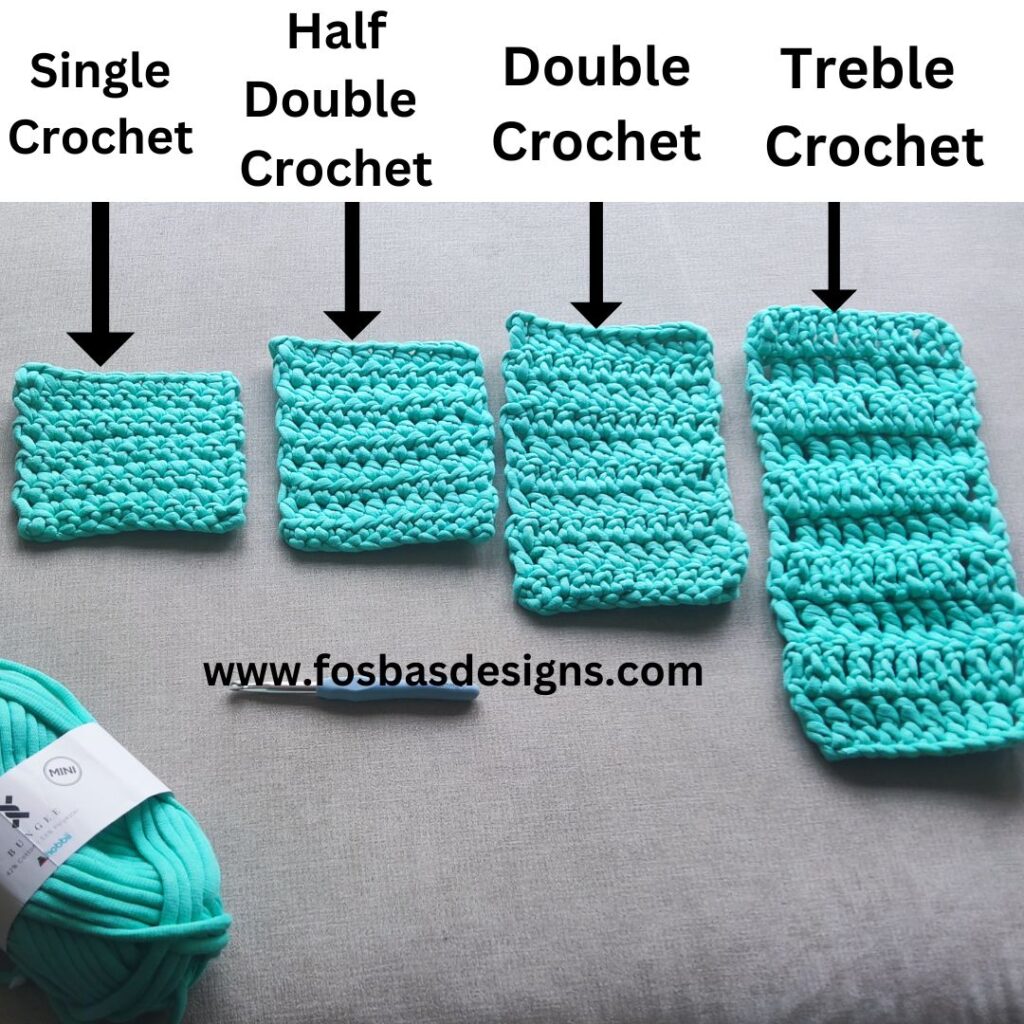
The single crochet stitch is taller than the slip stitch.
Single crochet stitch Tutorial
Learning and perfecting the single crochet stitch is crucial. See below the detailed steps needed to follow to create this beautiful stitch – single crochet.
Single crochet abbreviation
The single crochet is abbreviated as (sc).
Terminology
It’s important to note that the terminology for crochet stitches may vary depending on the country. In US terminology, the stitch I described is called a single crochet, while in UK terminology, it is referred to as a double crochet.
Single crochet symbol
The single crochet (sc) is represented using either of these “X” or a “+.” in crochet symbols – a form of short handwriting
Step-by-Step Single Crochet for Beginners
Single crochet in the foundation chain
To make a single crochet stitch in US terms, you can follow these steps:
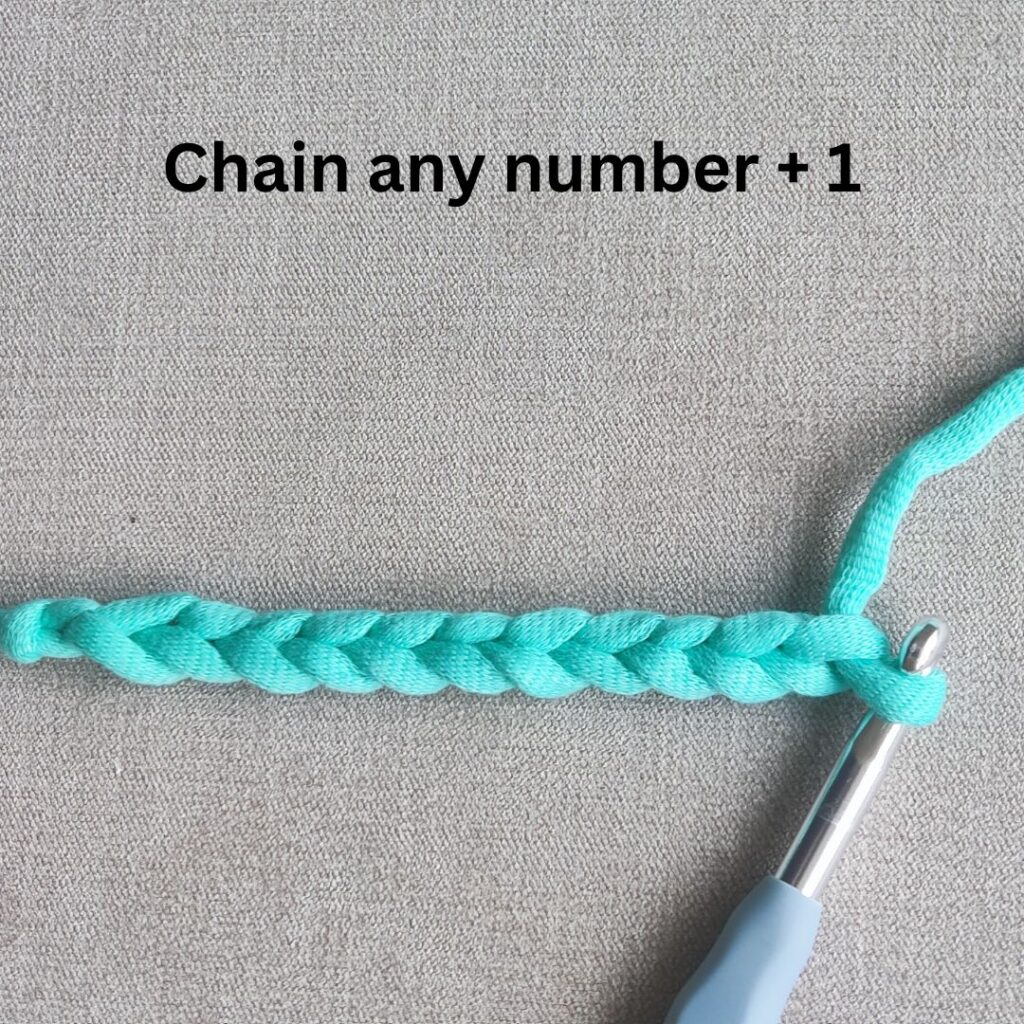
Step 1: Start by creating a foundation chain. Make a slip knot and insert your crochet hook into the slip knot. The number of chains needed should be in any number plus 1 (the added chain is for turning).
Step 2: Insert the crochet hook into the second chain from the hook. Yarn over your hook, and pull up a loop, You should have two loops on your hook.

Step 3: YO again and draw the yarn through both loops on the hook. Now you should have one loop on your hook.
This completes one single crochet stitch.
Step 5: Insert the crochet hook into the next chain. Yarn over your hook, and pull up a loop, You should have two loops on your hook.
Step 6: YO again and draw the yarn through both loops on the hook. Now you should have one loop on your hook.
Repeat steps 5 to 6 for each stitch across the row until you reach the end and have used up all the chains.
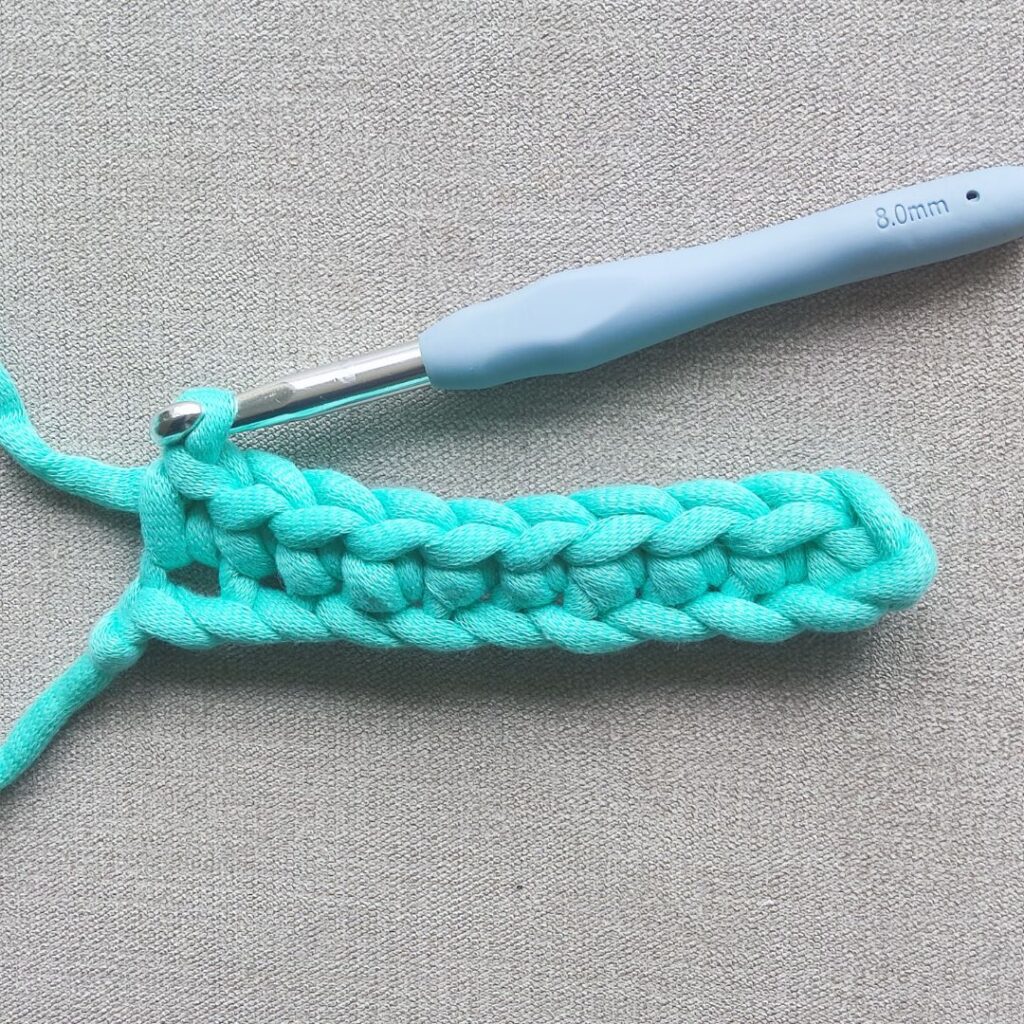
The above makes the first row for your single crochet row. To add more rows, follow the instructions below.
Single crochet to another row
To start the next row, turn in your work. This means you flip your work so that the side facing you changes.
Chain one stitch (ch 1) to create a turning chain. This does not count as a stitch.
Insert your hook into the first stitch of the previous row.
Step 1: Insert the crochet hook into the first stitch. Yarn over your hook, and pull up a loop, you should have two loops on your hook.
Step 2: YO again and draw the yarn through both loops on the hook. Now you should have one loop on your hook.
Repeat steps 1 and 2 for each stitch across the row, working into the top loop of each stitch. The last stitch of the row will be worked into the turning chain from the previous row.
Continue repeating the single crochet stitch in each row until you reach the desired length for your project.
Other variations of the classic single crochet
Single crochet in rounds
The single crochet can also be used for numerous projects made in the round. The main difference is that you do not need to turn after each row. You simply join with a slip stitch to the beginning chain and continue.
Working in rounds is common in crochet, especially when creating things like hats, amigurumi, or anything with a circular or cylindrical shape. The following steps explain how to single crochet in rounds:
Make a slipknot and chain two, or make a magic circle. Work 6 sc in to the first chain or ch 1, 6 sc into the magic circle. join with a slip stitch to the beginning chain.
Single crochet in rounds step by step instruction
Make a slipknot and chain two, or make a magic circle. Work 6 sc in to the first chain or chain 1, 6 sc into the magic circle. join with a slip stitch to the beginning chain.
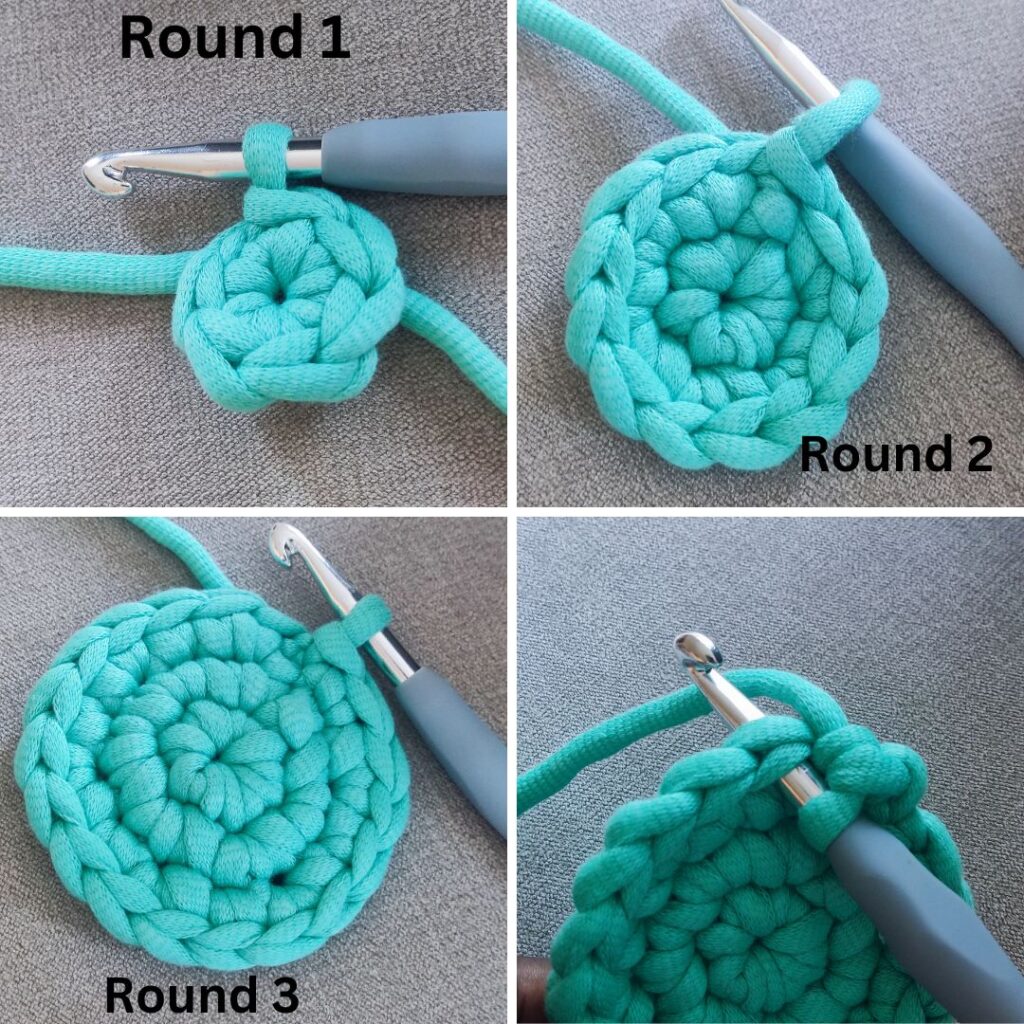
Step 1: Make a slipknot and chain two, or make a magic circle.
Step 2: Work 6 sc in to the first chain or ch 1, 6 sc into the magic circle. join with a slip stitch to the beginning chain.
Step-by-Step Single Crochet in Rounds
Foundation – You can use either the magic ring or ch 2, and work the first round into the first chain.
Step 1: Insert your hook into the first chain or into the magic ring, yarn over, and pull up a loop, you should have two loops on your hook, yarn over, pull through both loops. This creates the first single crochet.
Step 2: Insert hook into the same circle, yarn over, and pull up a loop, you should have two loops on your hook, yarn over, pull through both loops. This creates the second single crochet.
Repeat step 2 until you have the desired number of single crochets required. Ususaly, you might need 6, 8, 10 or 12 single crochets in the first round.
Start the next round. Chain one to get your hook to the height of a single crochet stitch. This counts as the first stitch of the next round.
Continue single crocheting. Make a single crochet stitch into the same stitch as the chain one, then make two single crochet stitches into each of the other stitches from the previous round.
Join the round and continue. Just like before, join the round with a slip stitch in the first single crochet stitch (not the chain), chain one to start the next round, and keep going.
Keep repeating this process. Keep single crocheting, joining, and starting new rounds until your project is as large as you want it to be.
Single crochet Increases and Decreases
Depending on the type of project you are working on, some will require making the piece larger and some smaller. When you need the project bigger, that is called an increase. When the project needs to be smaller, that is called a decrease.
How to do a single crochet increase
A single crochet increase (abbreviated as “sc inc” or simply 2 sc in crochet patterns) is a technique used to add more stitches to your row and make your project wider. A single crochet increase entails working two single crochet stitches into one stitch from the previous row.
Begin your row with a single crochet (or as your pattern suggests), as you would normally do. To do an increase, you’ll want to do another single crochet into the same stitch you’ve just worked into. That means you’ll have two stitches coming out of one.
You can work the single crochet increase in rows or in rounds.
A step-by-step guide to a single crochet increase
Step 1: Make the first single crochet into the indicated stitch as you will normally do.
Step 2: Insert your hook into the same stitch you’ve just worked into, yarn over (yo), and pull the loop through the stitch (you’ll have two loops on your hook now)
Step 3: Yarn over again, and then pull through both loops on your hook. Now you’ve made two single crochet stitches into one stitch.
Continue with the pattern. If the crochet pattern calls for another increase, repeat steps 2 and 3.
This technique is used to create a variety of shapes and forms in crochet, like circles or ovals. Examples of projects that use single crochet increase include – Crochet Cupcake and Crochet Carrot.
How to do a Single Crochet Decrease
A single crochet decrease (abbreviated as “sc dec” or “sc2tog” in crochet patterns) is a technique used to remove stitches from your row, which makes your project narrower or smaller. It involves turning two single crochet stitches into one.
Step-by-step guide on how to do a single crochet decrease
Step 1: Insert your hook into the next stitch (according to your pattern or if you’re just practicing, into the next stitch you see).
Step 2: Yarn over (yo) and pull the yarn through the stitch. You should now have two loops on your hook.
Step 3: Without yarning over again, insert your hook into the next stitch.
Step 4: Yarn over and pull the yarn through this second stitch. You will now have three loops on your hook.
Step 5: Yarn over one last time and pull through all three loops on your hook.
You’ve just completed a single crochet decrease! This technique has effectively combined two stitches into one, thereby reducing the overall stitch count.
Like with increases, make sure to keep count of your stitches, especially when you’re decreasing, as it’s easy to lose track.
The single crochet decrease is a very common technique used to shape your project, whether you’re making amigurumi, clothing, or more complex shapes in your crochet. Examples of projects that use single crochet decrease include – Crochet Cupcake and Crochet Carrot.
Variation of single crochet decrease: Invisible single crochet Decrease
The invisible decrease is a popular technique in crochet, particularly for projects like amigurumi, where you want your decreases to be as unnoticeable as possible. Using the single crochet invisible decrease gives a better-looking finished look as it takes away the “obvious” visible decrease.
What you need to know before making a single crochet invisible decrease
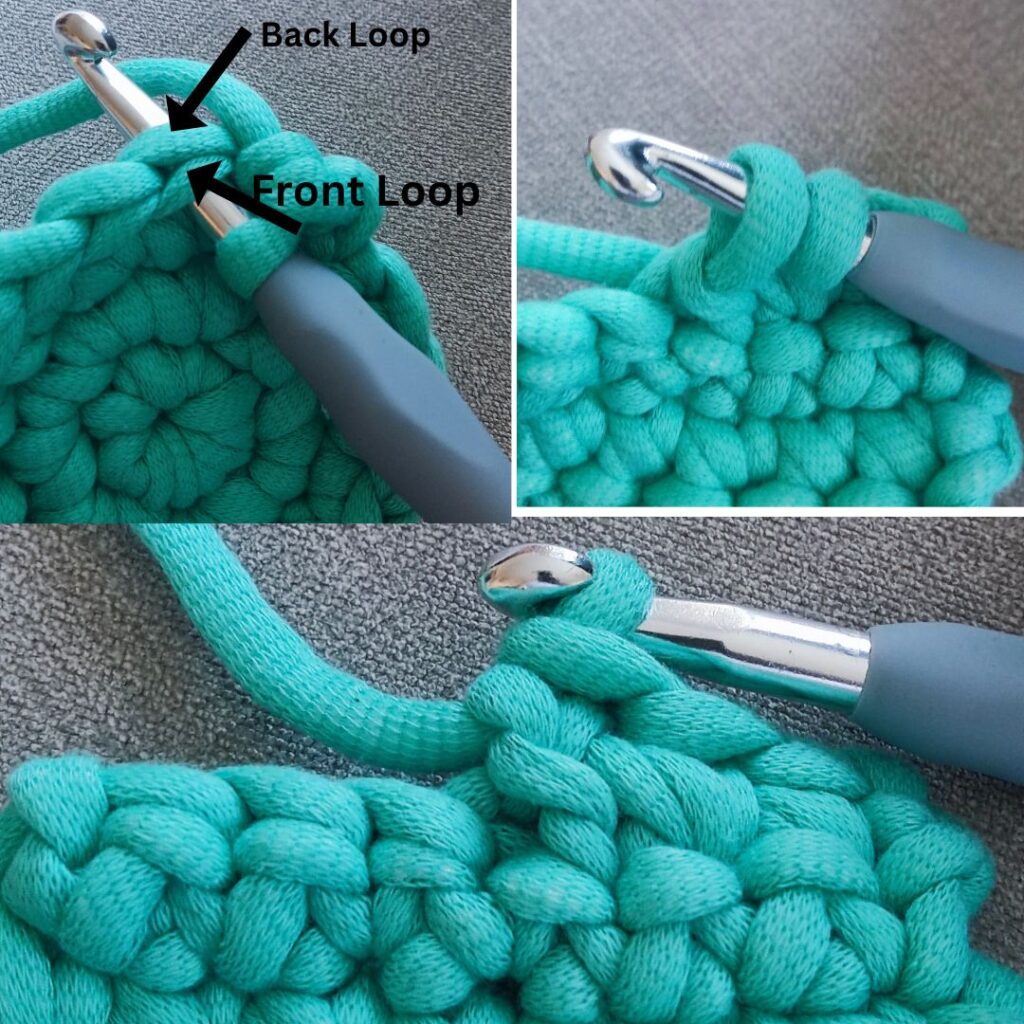
Know and identify the first loop, abbreviated as (FL), and the back loop, abbreviated as (BL).
How you do an invisible single crochet decrease
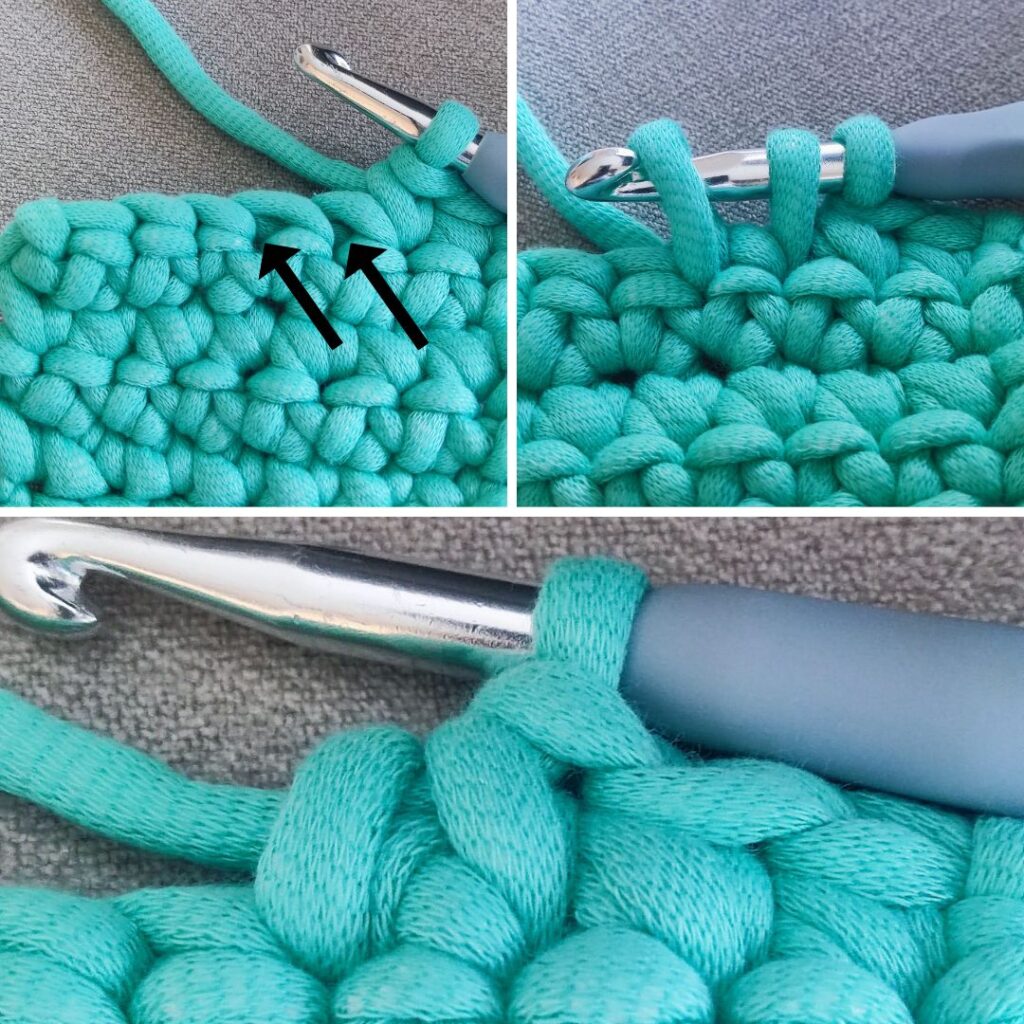
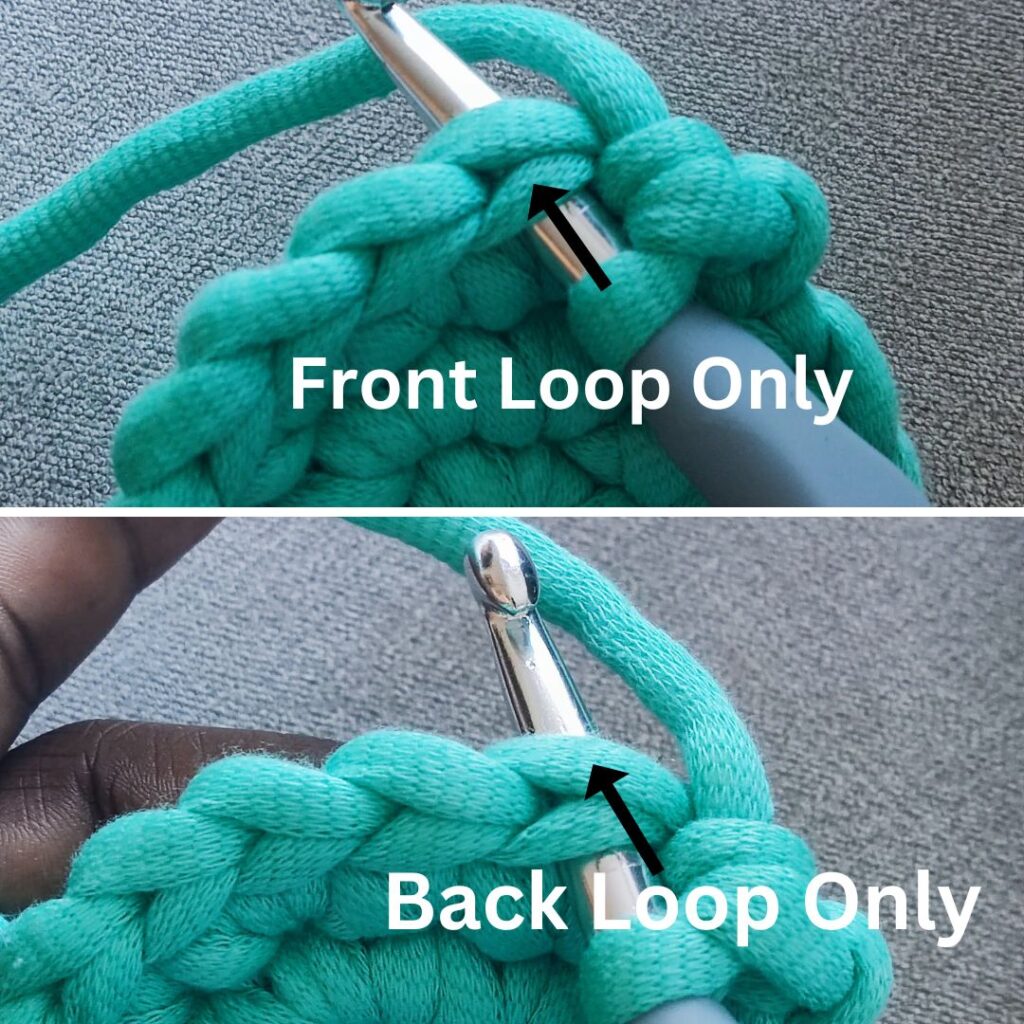
Step 1: Insert your hook into the front loop only of the next stitch. The front loop is the loop that’s closest to you.
Step 2: Without yarning over, insert your hook into the front loop of the next stitch. You should now be going through the front loops of two stitches. You’ll have two loops on your hook.
Step 3: Yarn over (yo) and carefully pull through the first two loops on your hook. Now you have two loops remaining on your hook.
Step 4: Yarn over one last time and pull through both loops on your hook.
You’ve just completed an invisible single crochet decrease! This technique turns two stitches into one, but it’s less noticeable than a standard single crochet decrease.
The invisible decrease technique creates a smoother, less bulky finish than the traditional single crochet decrease. It’s a fantastic technique to use when you want the surface of your crochet to look even and consistent.
Working Single Crochet in Different Loops
Single Ccrochet in Back Loop Only
“SC BLO” stands for “Single Crochet Back Loop Only” in crochet terminology.
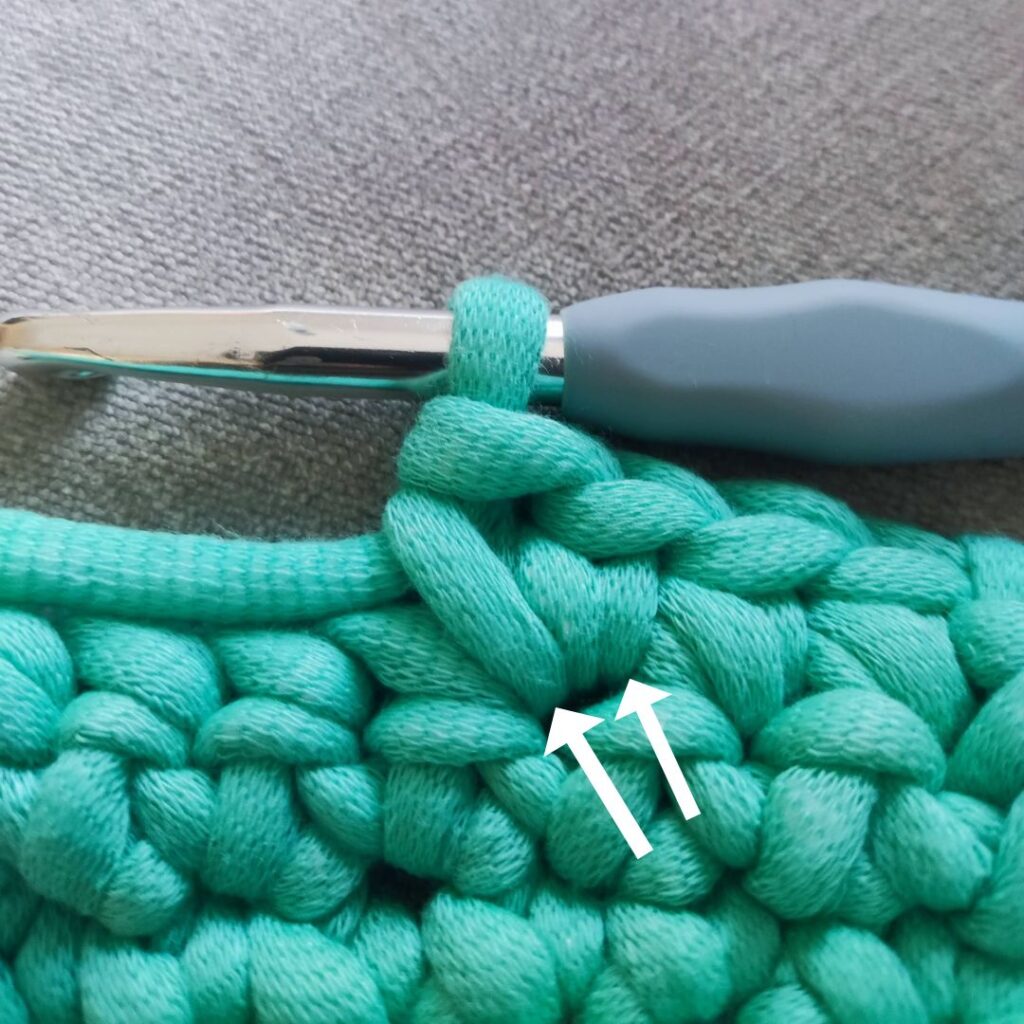
When you look at the top of a crochet stitch, it forms a shape that looks like a chain or a little V. These are the front and back loops of a stitch. The front loop is the one that’s closer to you, and the back loop is further away.
Here’s how you do a Single Crochet Back Loop Only (SC BLO):
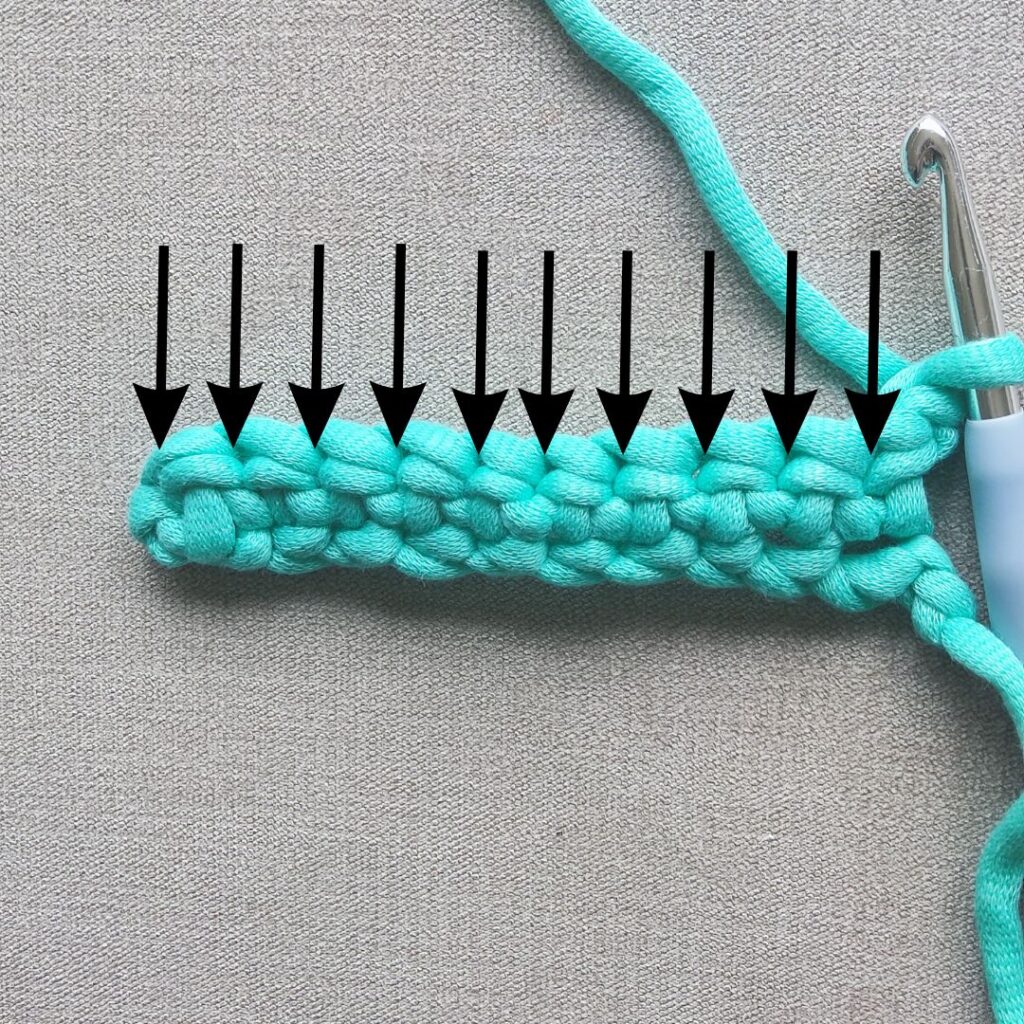
- Normally, when you insert your hook into a stitch, you go under both loops of the ‘V’. However, for the SC BLO, you will insert your hook into the back loop only, see the picture above for the arrow showing the BLO.
- Yarn over (yo) and draw the yarn through the back loop. You’ll have two loops on your hook.
- Yarn over again and pull through both loops on the hook.
Working in the back loop only of a stitch creates a subtle ridged texture on the fabric because it leaves the front loop free. It’s often used for decorative effects or to add elasticity to the fabric.
Remember that it’s important to keep track of your stitches when working in the back loop only because it can be a bit more difficult to see where your next stitch should go, especially if you’re new to crochet or this technique.
Single Crochet in Front Loop Only
“SC FLO” stands for “Single Crochet Front Loop Only” in crochet terms. Similar to SC BLO (back loop only) explained above, this technique involves working into just one loop of the stitch rather than both.
When you look at a stitch from the top, it forms a small “V” shape. These are the front and back “loops” of the stitch. The front loop is the one closer to you, and the back loop is farther away from you.
Here’s how you do a Single Crochet Front Loop Only (SC FLO):
- As you might expect, instead of inserting your hook beneath both loops of the “V” (as you would in a regular single crochet), you only insert your hook into the front loop.
- Yarn over (yo) and draw the yarn through the front loop. You’ll have two loops on your hook now.
- Yarn over again and pull through both loops on the hook.
Working in the front loop only of a stitch leaves the back loop unworked, which creates a ridge in the fabric and provides texture. It can also add a bit of elasticity to the work.
As always, make sure to keep track of your stitches when working in the front loop only as it can be slightly more challenging to identify where your next stitch should go, especially if you’re new to this technique or crochet in general.
Single Crochet Ribbing
Single crochet ribbing is a crochet technique that creates a stretchy fabric similar to the ribbing seen on the edges of knitted items, like hats, cuffs, and socks. This effect is often used to create a snug, elastic edge on garments, but it can also be used throughout a piece for textural interest.
Here’s a basic way to create single crochet ribbing:
- Chain a number of stitches: This will be the width of your ribbing. For a tighter rib, you could use fewer chains.
- Single crochet in each chain across: For the first row, work a single crochet stitch into the second chain from the hook, then continue with single crochets into each chain to the end.
- Chain 1 and turn your work: The chain 1 is often used as a turning chain in single crochet patterns. It raises the height of the row to that of a single crochet stitch.
- Work in the back loop only (BLO): For the second row and every row after, work a single crochet in the back loop only of each stitch across. This means you insert your hook into the back part of the “V” of the previous stitch only, not under both parts of the “V” as you would in regular single crochet.
- Repeat: Continue with Step 3 and 4 until your ribbing is the length you want.
When you work in the back loop only, it pushes the unworked front loop forward, creating a ridge that looks like a knit stitch on the right side of your work. This gives the ribbing its characteristic look and elasticity. The more rows you add, the longer your ribbing will be.
When working in rows as described here, it’s important to note that single crochet ribbing will stretch horizontally (across the rows, widthwise) rather than vertically (along the rows, lengthwise) as it does in knitting.
FAQ about the Single Crochet Stitch
- What does “sc” mean in a crochet pattern?“Sc” is the abbreviation for “single crochet” in a crochet pattern.
- How do I know where to insert my hook for the next stitch? You should insert your hook under both loops of the ‘V’ shape at the top of the previous stitch.
- What should I do if my edges are uneven? It could be because you’re accidentally adding or skipping stitches. Make sure to count your stitches in each row to ensure they’re consistent. Also, remember to do one chain stitch and turn your work at the end of each row.
- My work is curling. What’s happening? Curling can occur if your stitches are too tight. Try to loosen your tension by not pulling the yarn too tight when making stitches.
- Why do I need to make a turning chain? The turning chain serves to bring your yarn to the correct height for starting the next row. In the case of single crochet, you chain one because the single crochet is a short stitch.
- How many foundation chains do I need? The number of foundation chains depends on the pattern or the width of the project you want. For practice, start with a small number like 10 or 20. If you’re following a pattern, it will tell you how many chains to start with. Add 1 to the number of foundation chains when you intend to work in sc.
- How can I increase or decrease in single crochet? To increase, simply make two single crochet stitches into the same stitch. To decrease, insert your hook into the stitch, yarn over, and pull through, then insert your hook into the next stitch, yarn over and pull through. You’ll have three loops on your hook – yarn over and pull through all three.
- Is it normal for my work to have holes? Some amount of space between stitches is normal, but if there are large holes, it might be because your tension is too loose or you’re accidentally adding extra stitches. Practice maintaining consistent tension as you work.
- Why do my stitches look uneven?As a beginner, it’s common to have uneven stitches because you’re still learning to maintain consistent tension. Keep practicing, and your stitches should become more even over time.
- What is the single crochet x stitch? The single crochet X stitch is when you yarn under instead of yarn over when making your regular single crochet stitch. It creates the “X” look. This is mostly used when making amigurumi projects.
Remember, the key to improving your single crochet skills is practice. Don’t be discouraged if your first few attempts aren’t perfect – keep at it and you’ll improve over time.
Xo
Susan