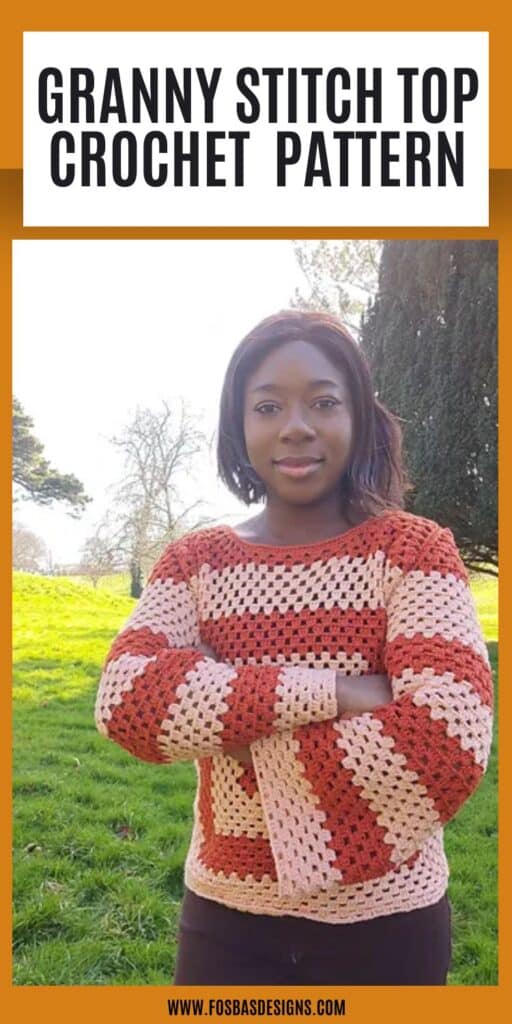
Granny square sweater pattern
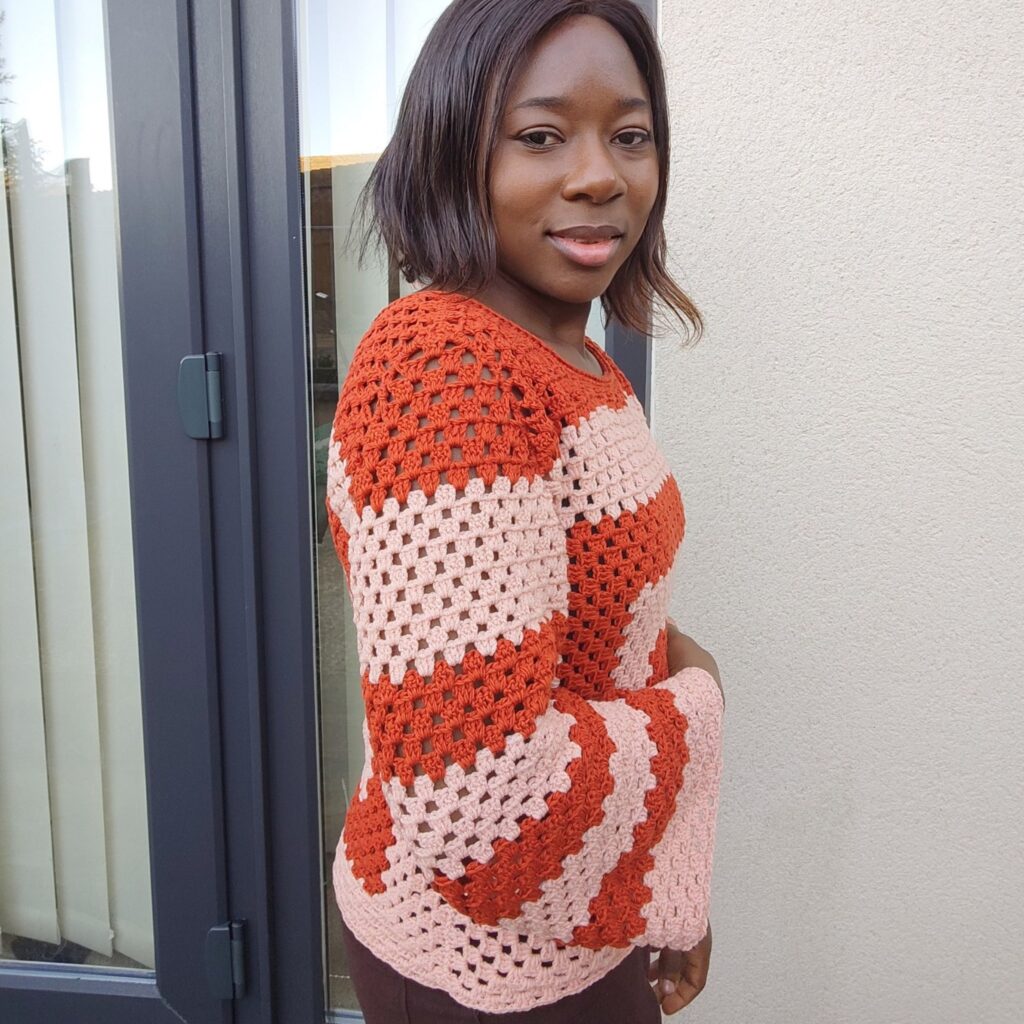
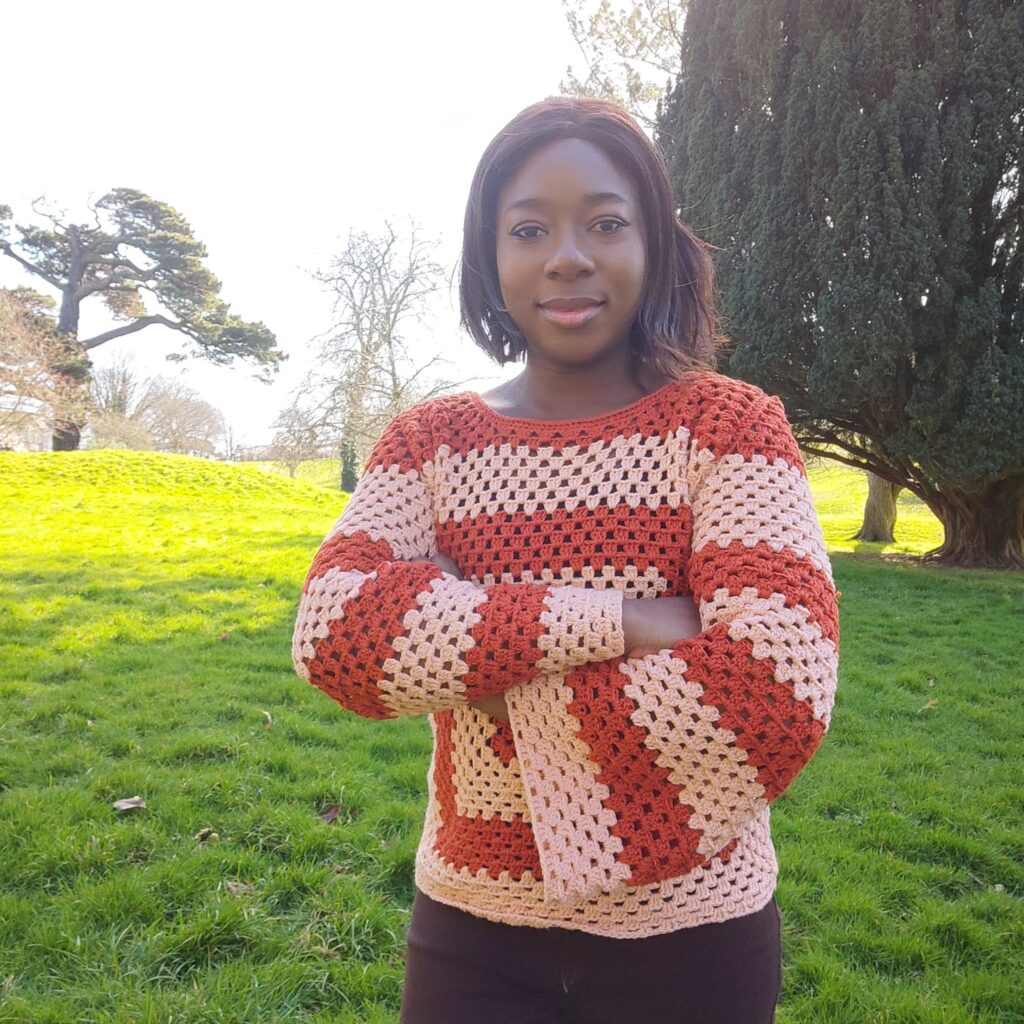
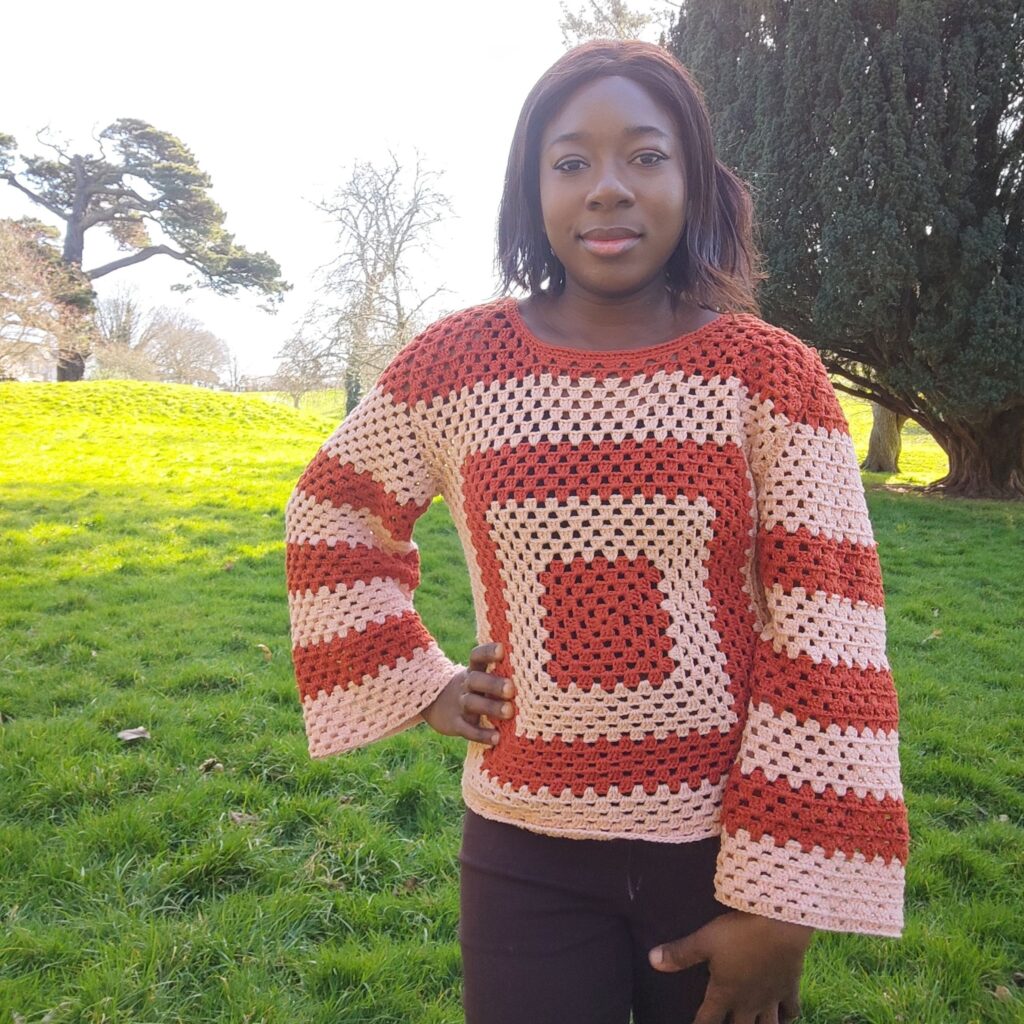
Hey friends, I am excited to share the granny square sweater—a free pattern with you all! Most crocheters started off crocheting by learning how to make the granny stitch. I have adapted the popular granny stitch pattern for this sweater.
This traditional stitch technique has been used to create a variety of cozy garments, which is the same technique used for this granny square sweater.
The free pattern is to help you with the step-by-step granny square sweater pattern that you can easily follow to create your very own warm and stylish piece.

The Granny Square Top was designed a few years ago, and ever since then, I have wanted a sweater. I am so happy to have the sweater version to share with you all!
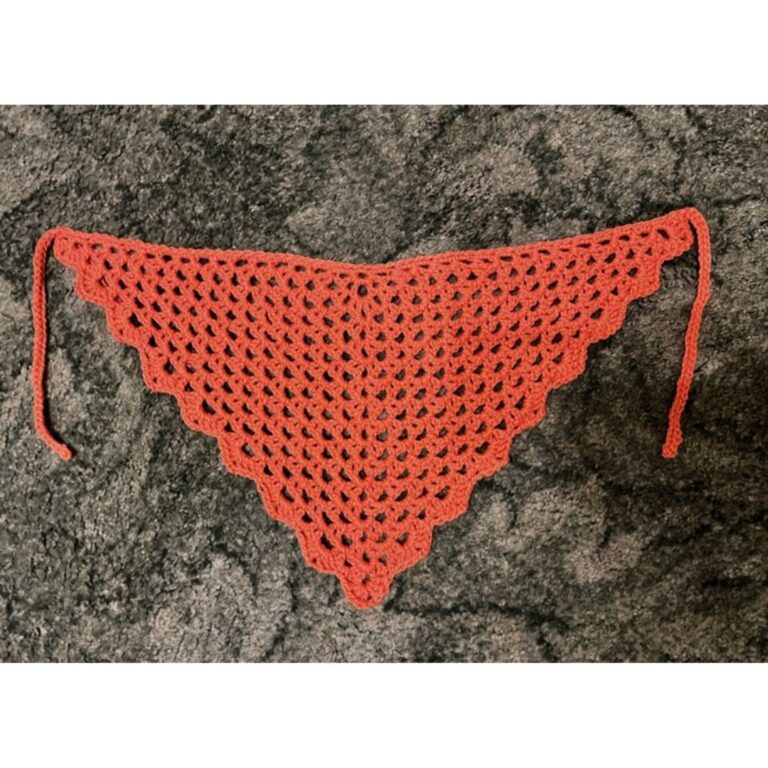
Some other crochet projects on the blog that use the granny stitch include the granny square stockings, Tudor rose square, and many other amazing granny stitches.

So, grab your hook and yarn, and let’s start creating your perfect granny square sweater.
The granny square sweater pattern is free; scroll down. If you would prefer the Ad-free version, use the buttons below.


Supplies needed for the easy granny square sweater pattern
Lion Brand Superwash Merino, DK, Lightweight, #3 (100% Superwash Merino Wool, 306 yards/280 m per 3.5 oz/100g Ball).
Color A – 3 (4, 4, 5, 5, 6, 6, 7) Balls
Color B – 2 (3, 4, 4, 5, 5, 6, 6) Balls
Estimated Yardage
1000 (1100, 1300,1500, 1700, 1900, 2100, 2300, 2500) yards
Hook and other materials for your granny square crochet sweater
US Size G/6 (4.0mm) crochet hook
Yarn needle
Stitch markers (2 pieces)
Stitches needed for the granny square sweater pattern
ch- Chain
st – Stitch
pp – space
hdc – Half Double Crochet
dc – Double Crochet
sl st – Slip Stitch
RS – Right Side
WS –Wrong Side
Skill level – Intermediate
Terms – US Terms
Sizing available for the granny square sweater pattern
St – Stitch
Sp – space
Hdc – Half Double Crochet
Dc – Double Crochet
Sl st – Slip Stitch
FO – Fasten Off
Rs – RIGHT SIDE
Ws –Wrong Side
Skill level – Intermediate
Sizing available for the granny square sweater pattern
This lightweight sweater is graded in 8 different sizes – S (M, L, XL, 2XL, 3XL, 4XL, 5XL)
Bust Measurement: 34 (38, 42, 46, 50, 54, 58, 62)”
Length of Sweater: 21 (21, 21, 23, 23, 23, 25, 25)”
Armhole Measurement: 16 (16.5, 17, 17.5, 18, 18.5, 19, 19.5)”
The modeled garment is shown in Medium, with 1” of Positive Ease.
Gauge
18 dc and 9 rows = 4”/10 cm
Adjust hook size if necessary, to obtain gauge.

How to crochet the granny square crochet sweater pattern
Front/Back Panel
Round 1: With A, ch 5, sl st to first to form a ring, ch 3, 2 dc, [ch 3, 3 dc] 3 times, ch 3, join— 4 (3 dc clusters), 4 ch-3 sps.
Round 2: Ch 4 {counts as dc + ch 1 sp here and throughout the pattern}, [(3 dc, ch 3, 3 dc, ch 1) in next ch- 3 sp] 3 times, (3 dc, ch 3, 2 dc) in next ch-3 sp, join to the 3rd ch from the beginning ch 4. — 8 (3 dc clusters), 4 ch-3 sps, 4 ch-1 sps.
Round 3: Ch 3 {counts as dc here and throughout the pattern}, 2 dc in first ch-1 sp, ch 1, *(3 dc, ch 3, 3 dc, ch 1) in next ch-3 sp, (3 dc, ch 1) in each ch-1 sp to next corner; repeat from * to the last corner, (3 dc, ch 3, 3 dc, ch 1) in the last ch-3 sp join— 12 (3 dc clusters), 4 ch-3 sps, 8 ch-1 sps.
Round 4: Ch 4, *(3 dc, ch 1) in each ch-1 sp to next corner, (3 dc, ch 3, 3 dc, ch 1) in next ch-3 sp; repeat from * to the last corner, (3 dc, ch 1) each ch- 1 sp to last ch-1 sp, 2 dc in last ch-1 sp, join to the 3rd ch from the beginning ch 4. —16 (3 dc cluster), 4 ch-3 sps, 12 ch 1 sps.
Rounds 5 – 18 (21, 22, 24, 28, 32, 36, 40): Repeat Rows 3 – 4, changing color as indicated for each size below:
Small – 4 rounds A, 6 rounds B, 4 rounds A, 4 rounds B. = 72 (3 dc cluster), 4 ch-3 sps, 68 ch 1 sps.
Medium – 5 rounds A, 6 rounds B, 5 rounds A, 6 rounds B. = 84 (3 dc cluster), 4 ch-3 sps, 80 ch 1 sps.
Large – 5 rounds A, 6 rounds B, 7 rounds A, 6 rounds B. = 88 (3 dc cluster), 4 ch-3 sps, 84 ch 1 sps.
X-large – 6 rounds A, 7 rounds B, 8 rounds A, 7 rounds B = 96 (3 dc cluster), 4 ch-3 sps, 92 ch 1 sps.
2X-large – 7 rounds A, 9 rounds B, 8 rounds A, 5 rounds B = 112 (3 dc cluster), 4 ch-3 sps, 108 ch 1 sps.
3X-large – 8 rounds A, 8 rounds B, 8 rounds A, 8 rounds B = 128 (3 dc cluster), 4 ch-3 sps, 124 ch 1 sps.
4X-large – 9 rounds A, 9 rounds B, 9 rounds A, 9 rounds B = 144 (3 dc cluster), 4 ch-3 sps, 140 ch 1 sps.
5X-large – 10 rounds A, 10 rounds B, 10 rounds A, 10 rounds B = 160 (3 dc cluster), 4 ch-3 sps, 156 ch 1 sps.
Fasten off
Note: At this point, your work should be half of your burst measurement, if it’s not, then continue to repeat. – Rows 3 – 4 till you get the appropriate measurement.
Now, working in Rows and only on one of the 4 sides.
Row 1: Join A to any corner ch-3 sp, ch 3, 2 dc in the same corner, ch 1 *3 dc in each ch-1 sp, ch 1, rep from * till next ch 3 sp, 3 dc in corner sp, turn to leave the remaining sts unworked. — 19 (22, 23, 25, 29, 33, 37, 41) shells, 18 (21, 22, 24, 28, 32, 36, 40) ch 1 sps
Row 2: Ch 4, *3 dc in next ch-1 sp, ch 1; repeat from * to the last shell, dc in the last st of the shell, turn. —18 (21, 22, 24, 28, 32, 36, 40) shells, 2 dc.
Place stitch markers in (small – 8th and 12th) (Medium – 8th and 14th), (Large – 8th and 15th), (X-Large – 10th and 16th), (2X-Large – 12th and 18th), (3X-Large – 14th and 20th), (4X-Large – 15th and 23rd), (5X-Large – 17th and 25th) ch-1 sps.
Note that the sp between the stitch markers will be the neckline, as such – you can adjust it appropriately.
Right Armhole/Neckline
Row 1: With A, working towards 1st stitch marker, ch 4, turn, skip first ch-1 sp, *3 dc in next ch-1 sp, ch 1; repeat from* to a ch-1 sp before the stitch marker, dc in ch-1 sp, turn. — 7 (7, 7, 9, 11, 13, 14, 16) shells, 2 dc.
Leave remaining sts unworked
Row 2: Ch 4, skip 1st ch-1 sp, 3 dc in next ch-1 sp, *ch 1, 3 dc in next ch-1 sp; repeat from * to the last ch-1 sp, ch 1, dc in the last ch-1 sp, turn. — 6 (6, 6, 8, 10, 12, 13, 15) shells, 2 dc.
Rows 3 – 5: Repeat Row 2.
Row 6: Ch 3, 2 dc in first ch-1 sp, ch 1 *3 dc in next ch-1 sp, ch 1; repeat from * to the last shell, dc in the last st of the shell, turn. — 4 (4, 4, 6, 8, 10, 11, 13) shells
Row 7: Ch 4, *3 dc in next ch-1 sp, ch 1; repeat from * to the last shell, dc in the last st of the shell, turn. — 3 (3, 3, 5, 7, 9, 10, 12) shells, 2 dc.
Row 8: Ch 3, 2 dc in first ch-1 sp, ch 1, *3 dc in next ch-1 sp, ch 1; repeat from* to the ch-1 sp, ch-1 sp, 3 dc in the last ch-1 sp, turn. — 4 (4, 4, 6, 8, 10, 11, 13) shells
Fasten off with a long tail for sewing.
Left Armhole/Neckline
Turn, with A, sl st to top of first st working toward 2nd stitch marker, repeat Right Armhole/Neckline instructions.
Repeat from start for Back Panel
Finishing
With RS together, WS facing, sew shoulder seams.
Fasten off.
Shape the neckline
With the right side facing you.
Join A with sl st to any point on the neckline
Round 1: Ch 1, sc evenly in each row end round neckline, join with sl st to ch-1.
Round 2: Ch 1, hdc in each st around, join with sl st to ch-1.
Optional – if the neckline is too wide for you, you can add a few more rounds of hdc around.
Round 3: Ch 1, in 3rd loop, sl st in each st around, join with sl st to ch-1.
Fasten off.
Weave in ends.
Section 2: Sleeves (make 2)
- Note that you can vary the colors accordingly.
- For a more fitted sleeve, go down one or more sizes!
- You can reduce the length of the sleeves as you deemed fit.
With B, Chain 69 (73, 81, 85, 89, 93, 93, 93),
Row 1: Dc in 4th ch from hook, dc in next, *ch 1, skip next ch, dc in next 3 chs; repeat from * to the end of row, turn. — 17 (18, 20, 21, 22, 23, 23, 23) shells, 16 (17, 19, 20, 21, 22, 22, 22) ch-1 sps.
Row 2: Ch 4, *3 dc in next ch-1 sp, ch 1; repeat from * to the end of row, dc on top of last st — 16 (17, 19, 20, 21, 22, 22, 22) shells, 17 (18, 20, 21, 22, 23, 23, 23) ch-1 sps.
Row 3: Ch 3, turn, 2 dc in same ch-1 sp, *ch 1, 3 dc in next ch-1 sp; repeat from * to the end of row —17 (18, 20, 21, 22, 23, 23, 23) shells, 16 (17, 19, 20, 21, 22, 22, 22) ch-1 sps.
Rows 4 – 7: Repeat Rows 2 – 3.
Fasten off B, Join A
Rows 8 – 11: Repeat Rows 2 – 3.
Row 12: Repeat Row 2
Fasten off A, Join B
Row 13: Repeat Row 3
Rows 14 – 17: Repeat Rows 2 – 3.
Row 18: Repeat Row 2
Fasten off B, Join A
Rows 19 – 23: With A, repeat Rows 2 – 3.
Fasten off A, Join B
Rows 24 – 29: Repeat Rows 2 – 3.
Fasten off B, Join A
Rows 30 – 33: Repeat Rows 2 – 3.
Shaping the arm (this part is done by skipping the first ch-1 sps and working 2dc in the last ch-1 sps.
Row 1: With A, repeat Row 2.
Fasten off A, Join B
Row 2: Ch 3 (counts as dc), skip 1st ch-1 sp, *3 dc in next ch-1 sp, ch 1; repeat from * to last ch-1 sp,dc in the last ch-1 sp, turn. 15 (16, 18, 19, 20, 21, 21, 21) shells, 14 (15, 17, 18, 19, 20, 20, 20) ch-1 sps, 2 dc.
Row 3: Ch 3, skip 1st ch-1 sp, *3 dc in next ch-1 sp, ch 1; repeat from * to last ch-1 sp,dc in the last ch-1 sp, turn. 14 (15, 17, 18, 19, 20, 20, 20) shells, 2 dc.
Rows 4 – 8 (9, 11, 12, 13, 14, 14, 14): Repeat Row 3
Fasten off B, Join A
Rows 9 (10, 12, 13, 14, 15, 15, 15) – 16 (17, 19, 20, 21, 22, 22, 22): Repeat Row 3
Repeat Row 3 until you have 1 shell remaining.
Fasten off and weave in the end.
Edging – Sleeves
Crocheting around the whole panel, using appropriate color at each time.
Round 1: Ch 1, sc evenly around, join.
Assembling
- With WS facing fold sleeve in 2
- Place tip of sleeve (the narrowest part, after folding to 2) to shoulder seam/side, secure with stitch marker.
- With the sleeve placed on the part marked with stitch marker on the panel, sew both sleeve and the panel together starting from the beginning of skipped stitches.
- The remaining part of the sleeve is joined/sewn together.
Fasten off.
Sew the side of the panels (front and back) together from the armpit, continue down side
Fasten off and weave in all ends.
Repeat for the other side.