Simple crochet baby cardigan pattern
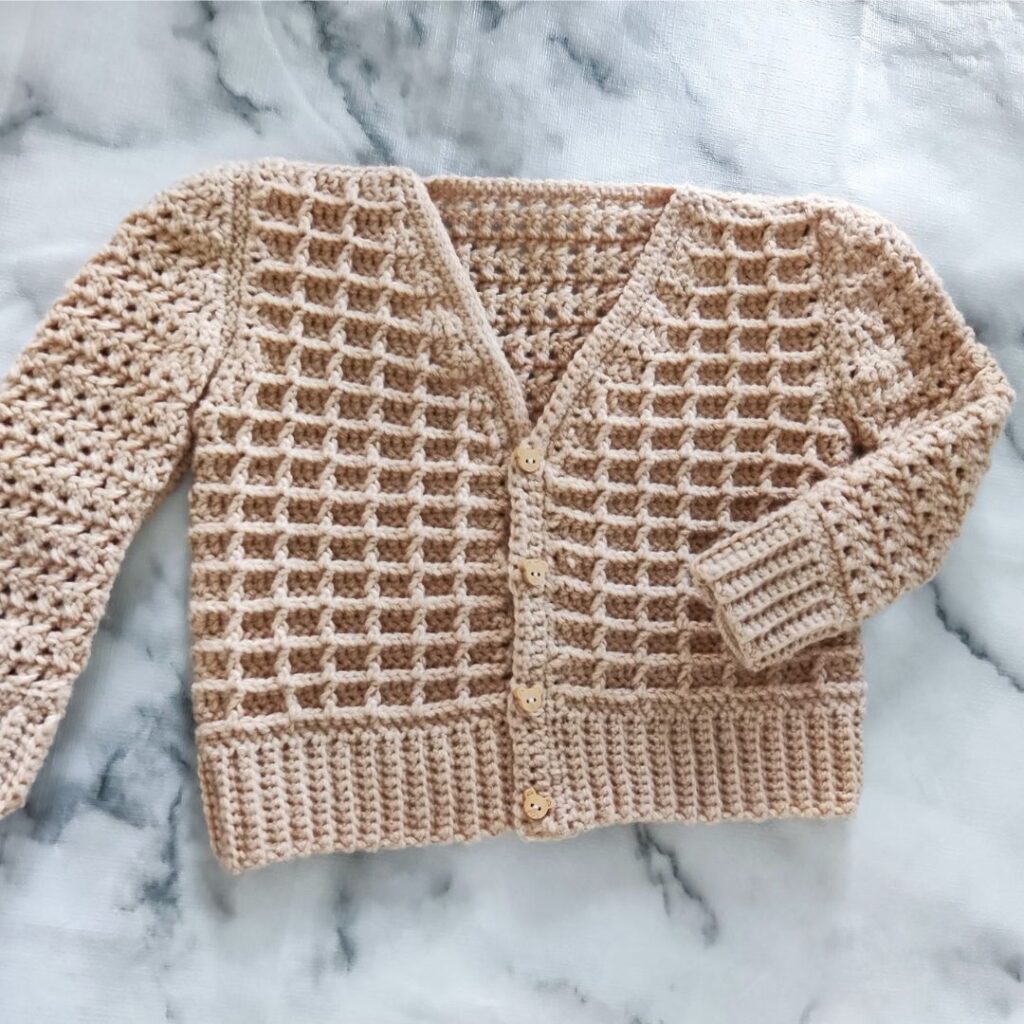
Simple crochet baby cardigan pattern, perfect for all age groups! This beautiful waffle teamed baby cardigan comes in multiple sizes to choose from.
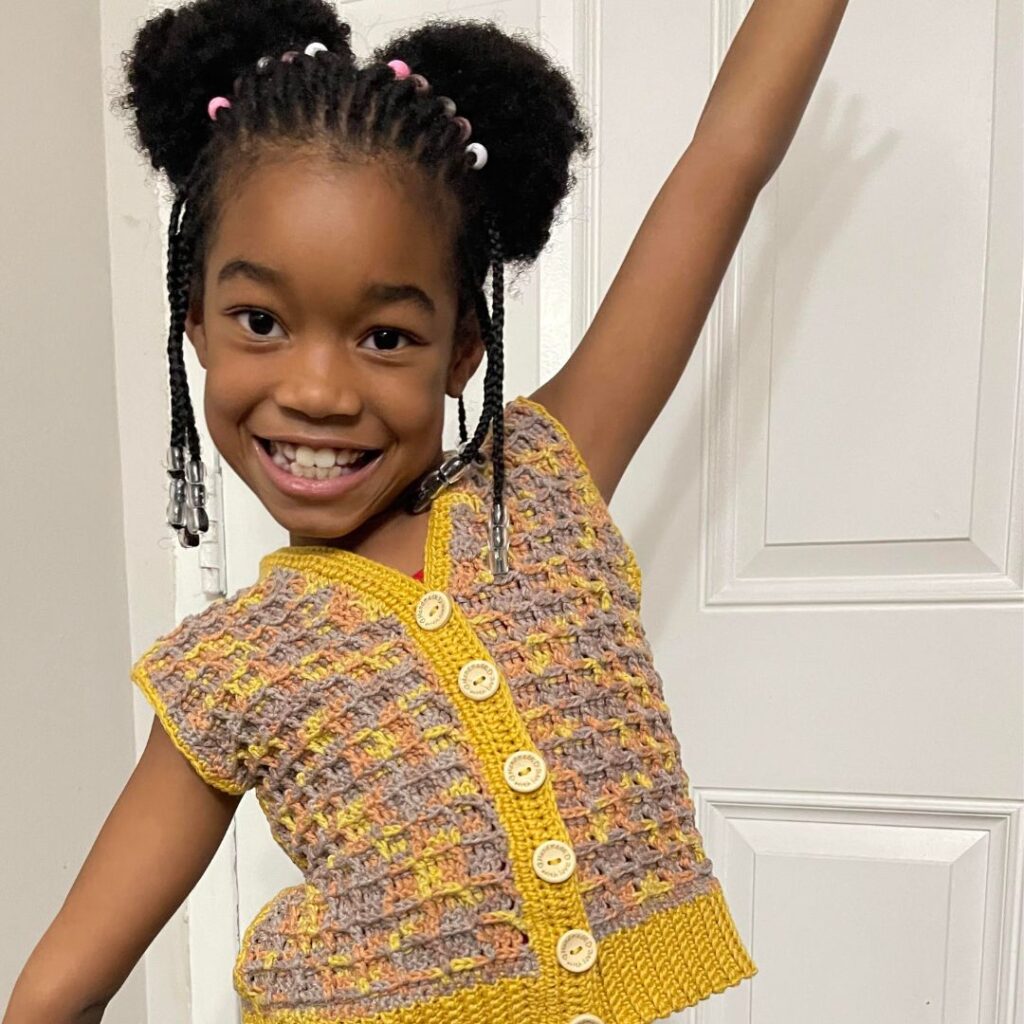
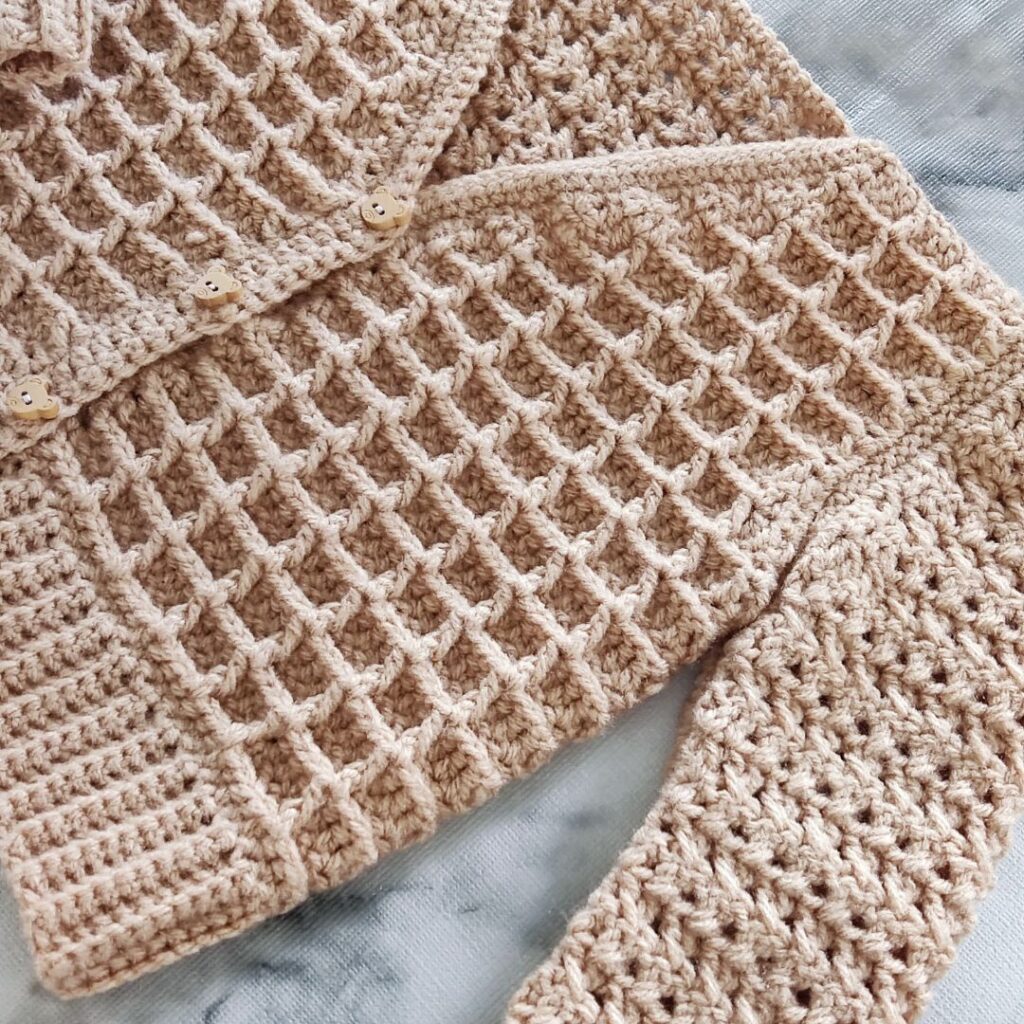
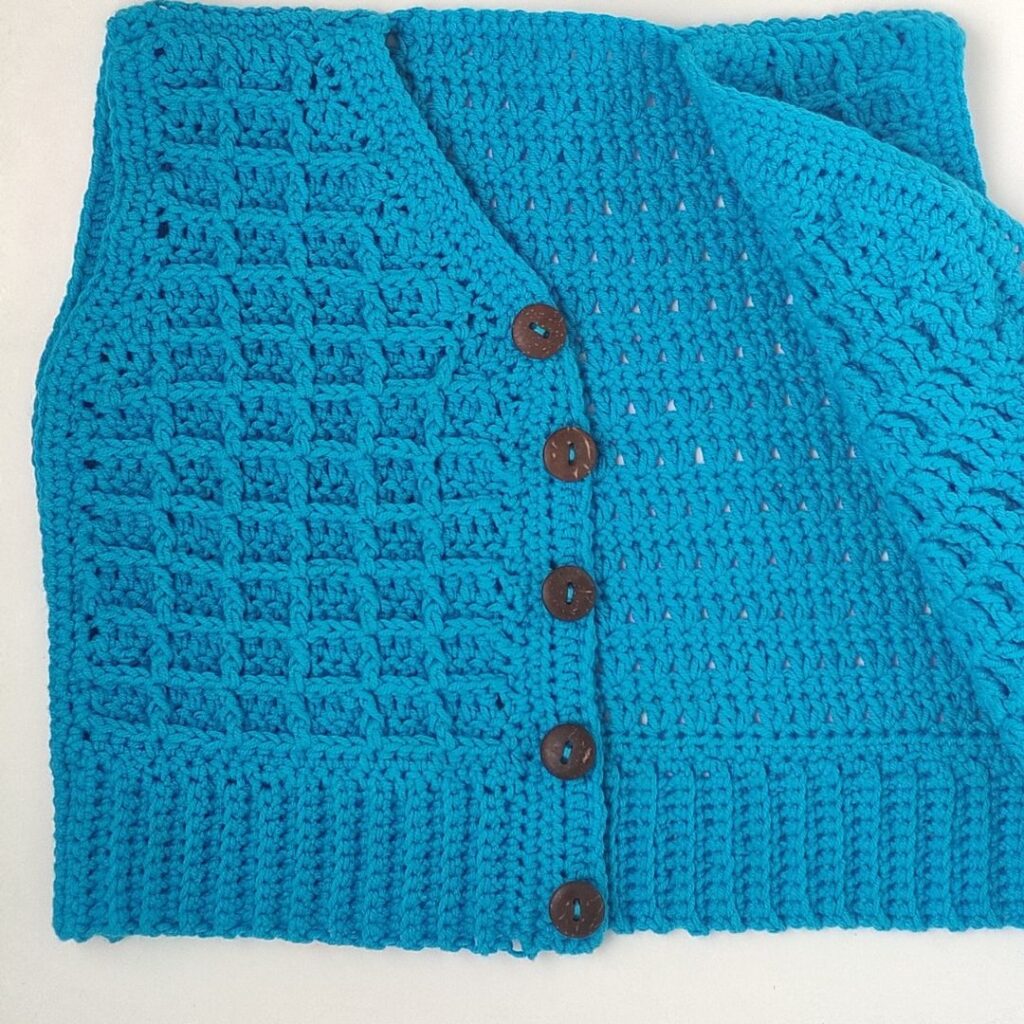
I love the beautiful details and texture in this simple crochet baby cardigan pattern. Not only would you love and enjoy every moment spent making this simple crochet baby cardigan, your little one would absolutely look adorable in this V neck sweater.
Another beautiful thing about this simple crochet baby cardigan pattern is that you can customize it into a sweater or leave it as a vest. Truth is, it looks so beautiful either way.
Name inspiration for this simple crochet baby cardigan pattern
With the front panel made using the crochet waffle stitch, I decided to name it after the stitch. Plus, my baby actually loves waffles!

Tim loves waffles crochet cardigan pattern is available as a free pattern, do continue to read along. If you would prefer the print friendly version, you can get a copy on Etsy or Revelry. Linked below.
Simple crochet baby cardigan pattern on Ravelry
Tim loves waffles crochet cardigan on ETSY
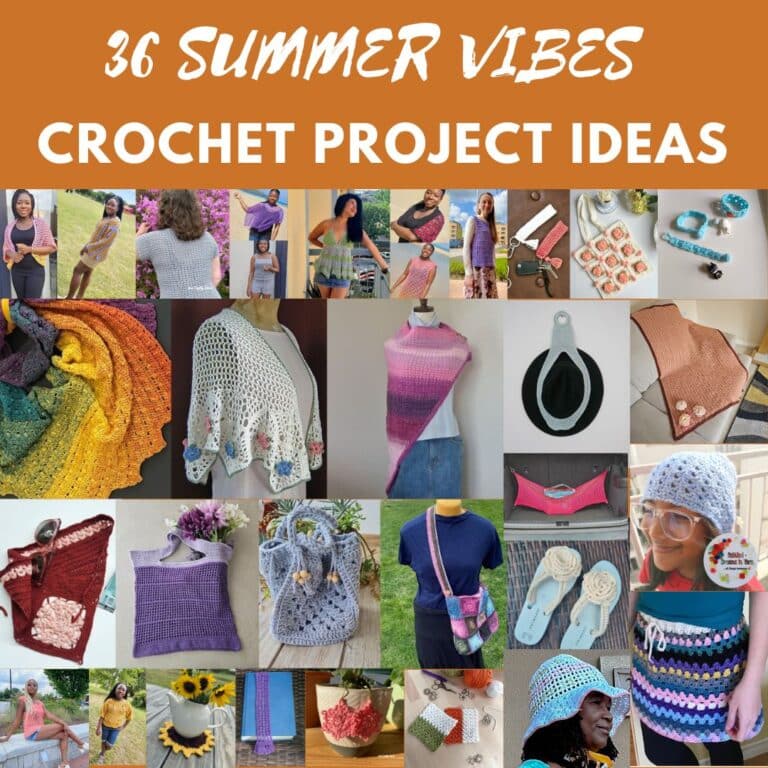
Since you love this simple crochet baby cardigan pattern, you might also love the other crochet patterns for kids here on my blog
Crochet baby cardigan free pattern
Reversible baby blanket pattern

Not ready to make a start on you r own version of this easy and Simple crochet baby cardigan pattern?
Materials needed for this simple crochet baby cardigan pattern
Yarn
Hayfield Bonus DK Extra Value, #3 (100% Acrylic, 306 yd/ 280 m per 3.5 oz/ 100g Ball)
Estimated Yardage
270 (290, 310, 330, 360, 400, 450) yards
Hook
US size G (4 mm) Crochet Hook
Gauge
10 sts over 18 rows = 4” made in sc in BLO
Adjust hook size if necessary, to obtain gauge.
Pattern Notes
1. Please kindly read through the pattern before starting.
2. Any #3 weight yarn can be substituted
3. Chains at the beginning of the rows do not count as a stitch, unless stated.
Difficulty Level – Intermediate
Terms – US Terminology
Stitches Abbreviations
Chain(s) – ch(s)
Slip stitch – sl st
Half Double Crochet – hdc
Double Crochet – dc
Front Post Double Crochet – FPdc
Repeat – rep
BLO – Back loop only
Finished Measurements
0 – 6mths (6 – 12mths, 2 yrs, 4 yrs, 6 yrs, 8 yrs, 10 yrs, 12 yrs)
Chest: 17 (19, 21, 23, 25, 26.5, 28, 30)’’
Cross back – 7.4 (7.5, 8, 8.5, 8.5, 9, 9, 9.5)”
Length – 6 (7, 7.5, 8, 8.5, 9, 10, 11)
Arm hole – 3 (3.5, 3.5, 4, 4, 4.5, 4.5, 5)
Construction note
Special Stitch
Crossed double crochet (Xdc)
First row of xdc = *Skip next st, dc in next st, crocheting over the dc just made into the skipped st, yarn over, insert hook into skipped stitch and yarn over (3 loops on the hook), yarn over, pull through 2 loops, yarn over, pull through the remaining 2 loops
The first xdc made
Rep from * to the end
Subsequent rows of xdc =
*Skip the first leg of xdc, dc in the second leg of xdc, crocheting over the dc just made into the first leg of xdc, yarn over, insert hook into skipped stitch and yarn over (3 loops on the hook), yarn over, pull through 2 loops, yarn over, pull through the remaining 2 loops
Rep from * to the end
Simple crochet baby cardigan pattern
Pattern Instruction for the simple crochet baby cardigan pattern
Back Panel
Ribbed Waistband
Row 1: Chain 11, sc in 2nd ch and in each ch across, turn. 10 sc.
Row 2: Ch 1, in BLO, sc in each st across, turn. 10 sc.
Rows 3 – 40 (44, 48, 52, 56, 60, 64, 68): Rep Rows 2
Or till you have half chest measurement = 8.5 (9.5, 10.5, 11.5, 12.5, 13.5, 14, 15)’’
Body
Row 1: Ch 1, turn, working on the long edge, sc in each st across turn. 40 (44, 48, 52, 56, 60, 64, 68) sc
Row 2: Ch 2, hdc in each st across, turn. 40 (44, 48, 52, 56, 60, 64, 68) hdc
Row 3: Ch 3, dc in first st, xdc across until the last st, dc in last st, turn. 19 (21, 23, 25, 27, 29, 31, 33) xdc, 2 dc
Rows 4 – 11 (11, 13, 13, 15, 17, 19, 21): Rep Row 3
Shape the arm hole
Row 1: Ch 2, dc in first st, dc2tog twice, xdc across until the last 5 sts, dc2tog twice, dc in the last st, turn. 34 (38, 42, 46, 50, 54, 58, 62) xdc, 4 dc
Row 2: Ch 2, dc in first st, dc2tog, xdc across until the last 3 sts, dc2tog, dc in the last st, turn. 32 (36, 40, 44, 48, 52, 56, 60) xdc, 4 dc
Row 3: Ch 2, dc2tog, xdc across until the last 2 sts, dc2tog, turn. 32 (36, 40, 44, 48, 52, 56, 60) xdc, 2 dc
Row 4: Ch 2, dc in first st, xdc across until the last st, dc in last st, turn. 32 (36, 40, 44, 48, 52, 56, 60) xdc, 2 dc
Rows 5 – 6 (6, 7, 9, 9, 11, 13, 15): Repeat Row 4
Or till you have 7.4 (7.5, 8, 8.5, 8.5, 9, 9, 9.5)” (kindly note the number of repeats.
Fasten off.
Edging
- Crocheting across the sides/edges of the panel
- Join yarn with a sl st to the beginning of the foundation chain
- With the right side facing you
Row 1: Ch 1, sc evenly across the 3 edges of the panel.
Fasten off.
Front Panel
Right Side
Ribbed Waistband:
Row 1: Chain 11, sc in 2nd ch and in each ch across, turn. 10 sc.
Row 2: Ch 1, in BLO, sc in each st across, turn. 10 sc.
Rows 3 – 20 (20, 24, 28, 28, 32, 32, 36): Rep Rows 2
Or till you have ¼ chest measurement
Making sure to have in multiple of 4
Body
Row 1: Ch 1, sc in each st across, turn. 20 (20, 24, 28, 28, 32, 32, 36) sc
Row 2: Ch 2, hdc in each st across, turn. 20 (20, 24, 28, 28, 32, 32, 36) hdc
Row 3: Ch 2, dc in first st, *FPdc in next 3 sts, dc in next st, rep from * to end, turn. 20 (20, 24, 28, 28, 32, 32, 36) dc
Row 4: Ch 2, FPdc around first st, dc in next 3 sts, *FPdc in next st, dc in next 3 sts, rep from * to last st, FPdc around last st, turn. 20 (20, 24, 28, 28, 32, 32, 36) dc
Rows 5 – 14 (16, 18, 19, 20, 22, 24, 24): Rep Row 3 and 4.
Match with the back panel, the repeats should be of similar height before the split for armholes/neckline
Make sure to end with a Row 4
Shape for armholes and Neckline
Row 1: Ch 2, dc2tog, FPdc in next 2 sts, dc in next st, *FPdc in next 3 sts, dc in next st, rep from * till last 4 sts, FPdc in next 2 sts, dc2tog, turn. 18 (18, 22, 26, 26, 30, 30, 34) dc
Row 2: Ch 2, dc2tog, dc in next st, *FPdc in next st, dc in next 3 sts, rep from * till the last 3 sts, dc in next st, dc2tog, turn. 16 (16, 20, 24, 24, 28, 28, 32) dc
Row 3: Ch 2, dc2tog, * dc in next st, FPdc in next 3 sts, rep from * till the last 3 sts, dc in next st, dc2tog, turn. 14 (14, 18, 22, 22, 26, 26, 30) dc
Row 4: Ch 2, dc2tog, *dc in next 3 sts, FPdc around next st, dc in next 3 sts, rep from * to the last 2 sts, dc2tog, turn. 12 (12, 16, 20, 20, 24, 24, 28) dc
Continue shaping the neck
Row 5: Ch 2, dc2tog, FPdc in next 2 sts, *dc in next st, FPdc in next 3 sts, rep from * till last st, dc in last st, turn. 11 (11, 15, 19, 19, 23, 23, 27) dc
Row 6: Ch 2, dc in first 4 sts, *FPdc in next st, dc in next 3 sts, rep from * till the last 4 sts, FPdc in next st, dc in next st, dc2tog, turn. 10 (10, 14, 18, 18, 22, 22, 26) dc
Row 7: Ch 2, dc2tog, *dc in next st, FPdc in next 3 sts, rep from * till last st, dc in last st, turn. 9 (9, 13, 17, 17, 21, 21, 25) dc
Row 8: Ch 2, FPdc in first st, *dc in next 3 sts, FPdc around next st, dc in next 3 sts, rep from * till the last 2 sts, dc2tog, turn. 8 (8, 12, 16, 16, 20, 20, 24) dc
0 – 6mths (6 – 12mths) – Skip to the Row 13
Row 9: Ch 2, dc2tog, FPdc in next 2 sts, dc in next st, *FPdc in next 3 sts, dc in next st, rep from * to end, turn. 0 (0, 11, 15, 15, 19, 19, 23) dc
Row 10: Ch 2, FPdc around first st, dc in next 3 sts, *FPdc in next st, dc in next 3 sts, rep from * to the last 4 sts, FPdc around next st, dc in next, dc2tog, turn. 0 (0, 10, 14, 14, 18, 18, 22) dc
Row 11: Ch 2, dc2tog, dc in next st, *FPdc in next 3 sts, dc in next st, rep from * to end, turn. 0 (0, 9, 13, 13, 17, 17, 21) dc
Row 12: Ch 2, FPdc around first st, dc in next 3 sts, *FPdc in next st, dc in next 3 sts, rep from * to the last 2 sts, dc2tog, turn. 0 (0, 8, 12, 12, 16, 16, 20) dc
Stop Reducing
Row 13: Ch 2, dc in first st, *FPdc in next 3 sts, dc in next st, rep from * to end, turn. 8 (8, 8, 12, 12, 16, 16, 20) dc
Does the length correspond with the back panel?
If not, continue the pattern repeats without decreasing.
Fasten off
Edging
With Right side facing you.
Join yarn with a sl st to the beginning of the ribbed waistband, crocheting across the edges and towards the shoulder and back to the other side of the waist band, leaving out the ribbed waistband.
Row 1: ch 1, sc evenly across the edges, aim for ch 2 at each tip, turn.
Front edge for Buttons
Crocheting only across the front.
Row 2: Ch 2, hdc in each st across, turn.
Row 3: Ch 1, sl st across
Left Side
Rep as for Right side from Row 4 of shape for right side of shape for neckline.
Start shaping only the Left Neckline
Row 5: Ch 2, dc, *FPdc in next 3 sts, dc in next st, rep from * till last 4 sts, FPdc in next 2 sts, dc2tog, turn.
Row 6: Ch 2, dc2tog, dc in next st, *FPdc in next st, dc in next 3 sts, rep from * to the last st, dc in the last st, turn.
Row 7: Ch 2, dc in first st, * FPdc in next 3 sts dc in next st, rep from * till the last 2 sts, dc2tog, turn.
Row 8: Ch 2, dc2tog, dc in next 3 sts, *FPdc in next st, dc in next 3 sts, rep from * to the last st, FPdc in the last st, turn.
Row 9: Ch 2, dc in first st, *FPdc in next 3 sts, dc in next st, rep from * to last 4 sts, FPdc in next 2 sts, dc2tog, turn.
Row 10: Ch 2, dc2tog, dc in next st, FPdc around first st, dc in next 3 sts, *FPdc in next st, dc in next 3 sts, rep from * to the last st, FPdc in last st, turn.
Row 11: Ch 2, dc in first st, *FPdc in next 3 sts, dc in next st, rep from * to last 2 sts, dc2tog, turn.
Row 12: Ch 2, dc2tog, dc in next 3 sts, FPdc in next st, FPdc in next st, dc in next 3 sts, FPdc around last st, turn.
Edging
With Right side facing you.
Crocheting across the 3 sides of the panel and leaving out the ribbed waistband.
Row 1: Turn, working down the edge, ch 1, sc in each down the edge, aim for 2 sc in each dc/ch 2 sp, turn.
Row 2: Ch 2, hdc in each st across, turn.
Buttonhole
Row 3: Ch 2, hdc in first 2 sts, *ch 1, sk next st, hdc in next 7 sts, rep from * 4 more times, sc in each of the remaining sts across, turn.
Row 4: Ch 1, sc in each st across, turn.
Fasten off.
Sew buttons on the corresponding side of the front panel
FInishing and joining
Place the front panels on the back panel
With the right side of the panels over each other and wrong side facing you
Join yarn with a sl st to the shoulder tip.
Using either sc or mattress stitch, sew the shoulder stitches on the front and back panel together.
Repeat on the other side.
Fasten off
Sleeve – Make 2
Ribbed cuff
Row 1: Chain 11, sc in 2nd ch and in each ch across, turn. 10 sc.
Row 2: Ch 1, in BLO, sc in each st across, turn. 10 sc.
Rows 3 – 24 (24, 24, 28, 28, 32, 32, 36): Rep Rows 2
Body
Row 1: Ch 1, sc in each st across, turn. 24 (24, 24, 28, 28, 32, 32, 36) sc
Row 2: Ch 2, hdc in each st across, turn.24 (24, 24, 28, 28, 32, 32, 36) hdc
Row 3: Ch 2, dc in first st, *xdc across until the last st, dc in last st, turn. 24 (24, 24, 28, 28, 32, 32, 36) dc
Row 4 – 6 (6, 10, 10, 10, 12, 12, 14): Repeat Row 3
Row 7 (7, 11, 11, 11, 13, 13, 15): Ch 2, 2 dc in first st, *xdc across until the last st, 2 dc in last st, turn. 26 (26, 26, 30, 30, 34, 34, 38) dc
Row 8 (8, 12, 12, 12, 14, 14, 16): Ch 2, 2 dc in first st, dc in next st, *xdc across until the last 2 sts, dc in next st, 2 dc in last st, turn. 28 (28, 28, 32, 32, 36, 36, 40) dc
Rows 9 (9, 13, 13, 13, 15, 15, 17) – 12 (12, 16, 16, 16, 18, 18, 20): Ch 2, dc in first st, *xdc across until the last st, dc in last st, turn. 28 (28, 28, 32, 32, 36, 36, 40) dc
Row 13 (13, 17, 17, 17, 19, 19, 21): Ch 2, dc in first st, dc2tog twice, *xdc across until the last 5 sts, dc2tog twice, dc in the last st, turn. 24 (24, 24, 28, 28, 32, 32, 36) dc
Row 14 (14, 18, 18, 18, 20, 20, 22): Ch 2, dc in first st, dc2tog, *xdc across until the last 3 sts, dc2tog, dc in the last st, turn. 22 (22, 22, 26, 26, 30, 30, 34) dc
Row 15 (15, 19, 19, 19, 21, 21, 23): Ch 2, dc2tog, *xdc across until the last 2 sts, dc2tog, turn. 20 (20, 20, 24, 24, 28, 28, 32) dc
Row 16 (16, 20, 20, 20, 22, 22, 24): Ch 2, dc in first st, dc2tog, *xdc across until the last 3 sts, dc2tog, dc in last st, turn. 18 (18, 18, 18, 18, 22, 22, 26) dc
Row 17 (17, 21, 21, 21, 23, 23, 25): Ch 2, dc2tog, *xdc across until the last 2 sts, dc2tog, turn. 16 (16, 16, 20, 20, 24, 24, 28) dc
Row 18 (18, 22, 22, 22, 24, 24, 26): Ch 2, dc in first st, dc2tog, *xdc across until the last 3 sts, dc2tog, dc in last st, turn. 14 (14, 14, 18, 18, 22, 22, 26) dc
Row 19 (19, 23, 23, 23, 25, 25, 27): Ch 2, dc2tog, *xdc across until the last 2 sts, dc2tog, turn. 12 (12, 12, 16, 16, 20, 20, 24) dc
Row 20 (20, 24, 24, 24, 26, 26, 28): Ch 2, dc in first st, dc2tog twice, *xdc across until the last 5 sts, dc2tog twice, dc in the last st, turn. 8 (8, 8, 10, 10, 16, 16, 20) dc
Row 21 (21, 25, 25, 25, 27, 27, 29): Ch 2, dc2tog st cross, turn. 4 (4, 4, 5, 5, 8, 8, 10) dc
Fasten off.
Finishing – Join yarn with a sl st to the beginning of the ribbed cuff, crochet across the edges of the sleeve
Row 1: Ch 1, sc evenly across
Fasten off.
To sew the sleeve to the panel
Fold the sleeve into 2
With either darning needle or using mattress stitch, sew the sleeve to the front/back panel, continue to sew the remaining part of the sleeve.
I would love to see your beautiful makes form this simple crochet baby cardigan pattern, when you do make yours, kindly share your photos with