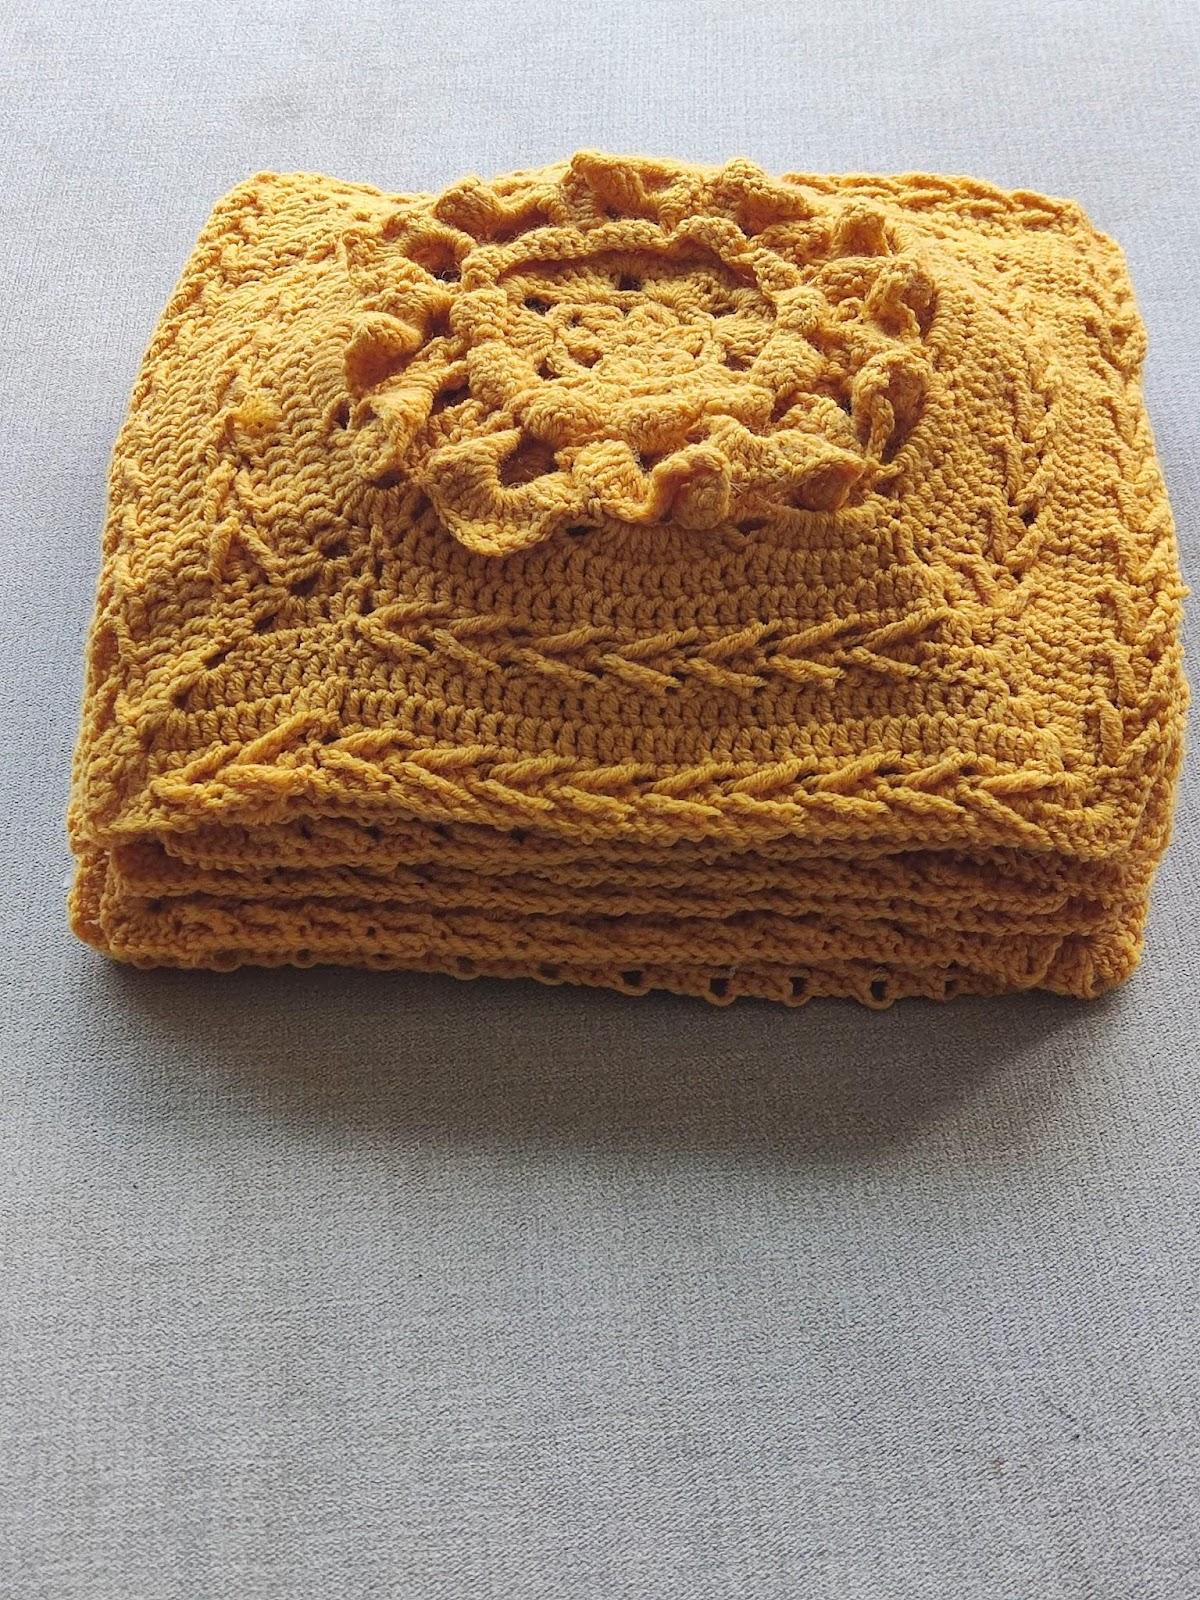
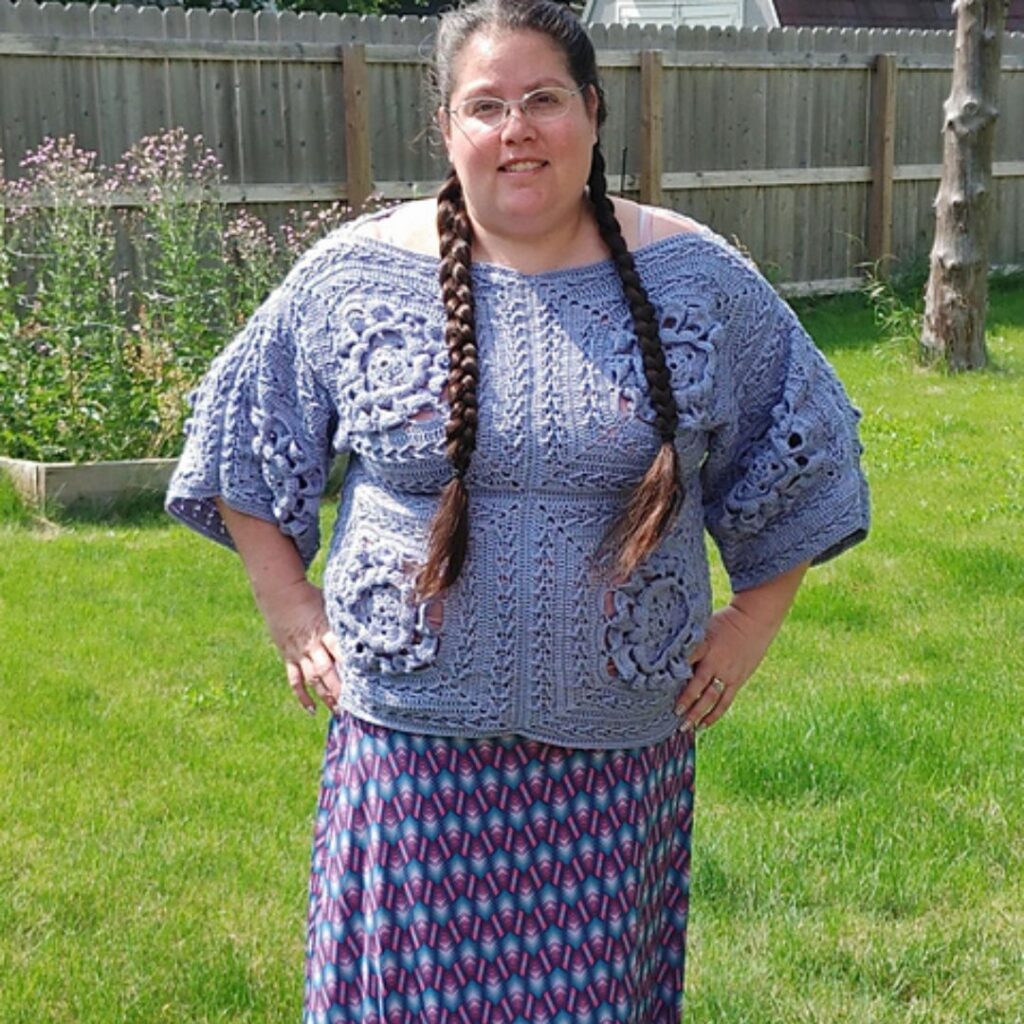
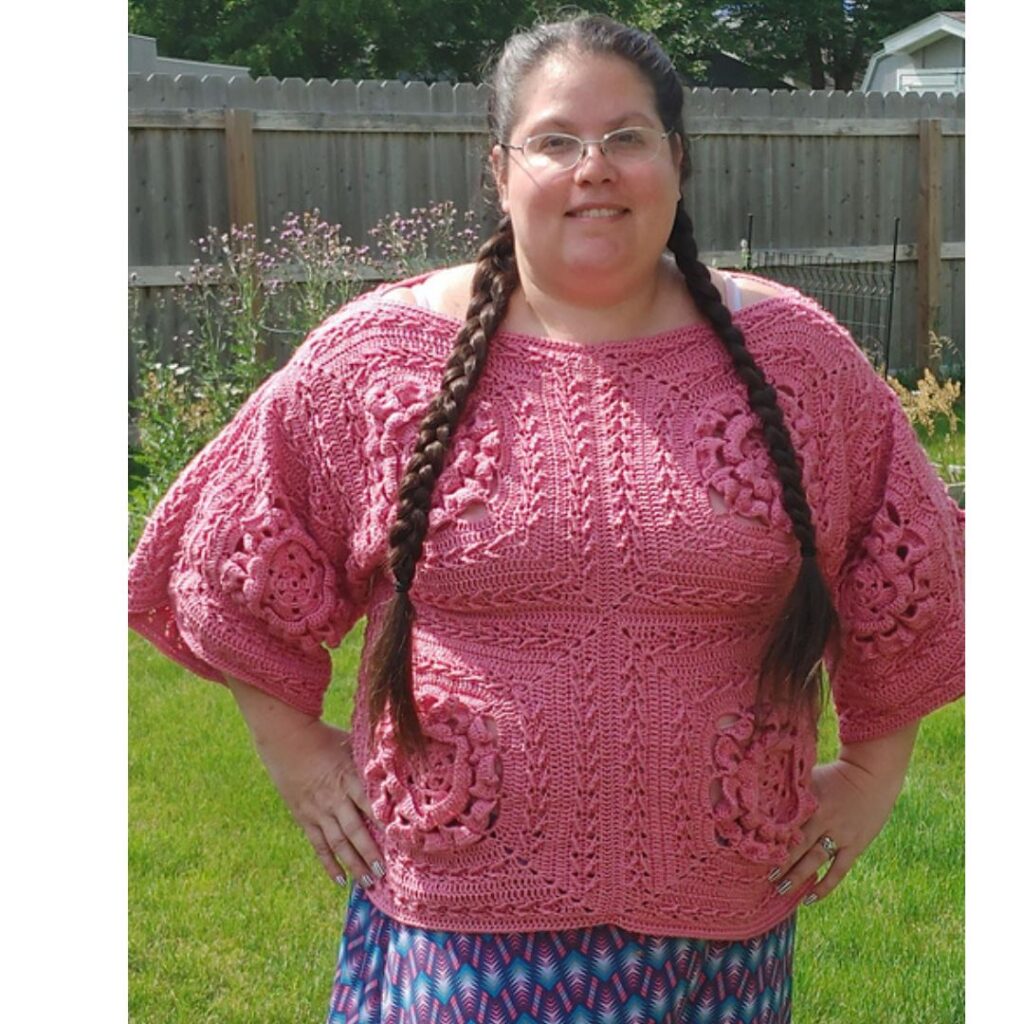
Lacy Crochet Top Free Pattern
This 12-squared lace crochet top pattern is perfect for all sizes and shapes. It uses a combination of crochet stitches and is ready in just a few hours. Make the squares one at a time!

Tudor rose lacy crochet top Finished Measurements.
The top is available in 9 different sizes using the yarn council women’s chart – XS (S, M, L, XL, 2XL, 3XL, 4XL, 5XL)
Bust Measurement: 30 (34, 38, 42, 46, 50, 54, 58, 62)”
Armhole Circumference: 8 (9, 10, 11, 12, 13, 14, 15, 16)”
Length of Top: 16 (18, 20, 22, 24, 26, 28, 30, 32)”
The modeled garment is shown in M, with about 1” of Positive Ease

Materials for the lacy crochet top
Yarn – I wanted a lightweight, lacy crochet top that is perfect for all seasons and not bulky.
A sport-weight yarn is perfect, considering the crochet stitches used for lacy tops!
The prototype lacy crochet top pattern was designed using Infinity Hearts Baby Merino, #2 lightweight Double knit (100% Polyester, 170 m per 1.75oz/50g).

Estimated yardage
1600 (1800, 2000, 2200, 2400, 2600, 2800, 3000, 3200) yards
Hook – US size G (4 mm) Crochet Hook
Gauge
21 sts over 11 rows = 10 cm square/4” made in dc
Skill level – Intermediate
Terms – US Terminology
Note – Chains at the beginning of the rounds/rows do not count as a stitch.
Stitches
Chain – ch
Double crochet – dc
Half double crochet – hdc
Treble crochet – tr
Double treble – dtr
Stitch – st
Special stitches
Loop – Ch 12
Shell – 5 tr in indicated stitch
Bobble = 5 dc together in indicated stitch. (5dctog)
How to make the Lacy crochet top project
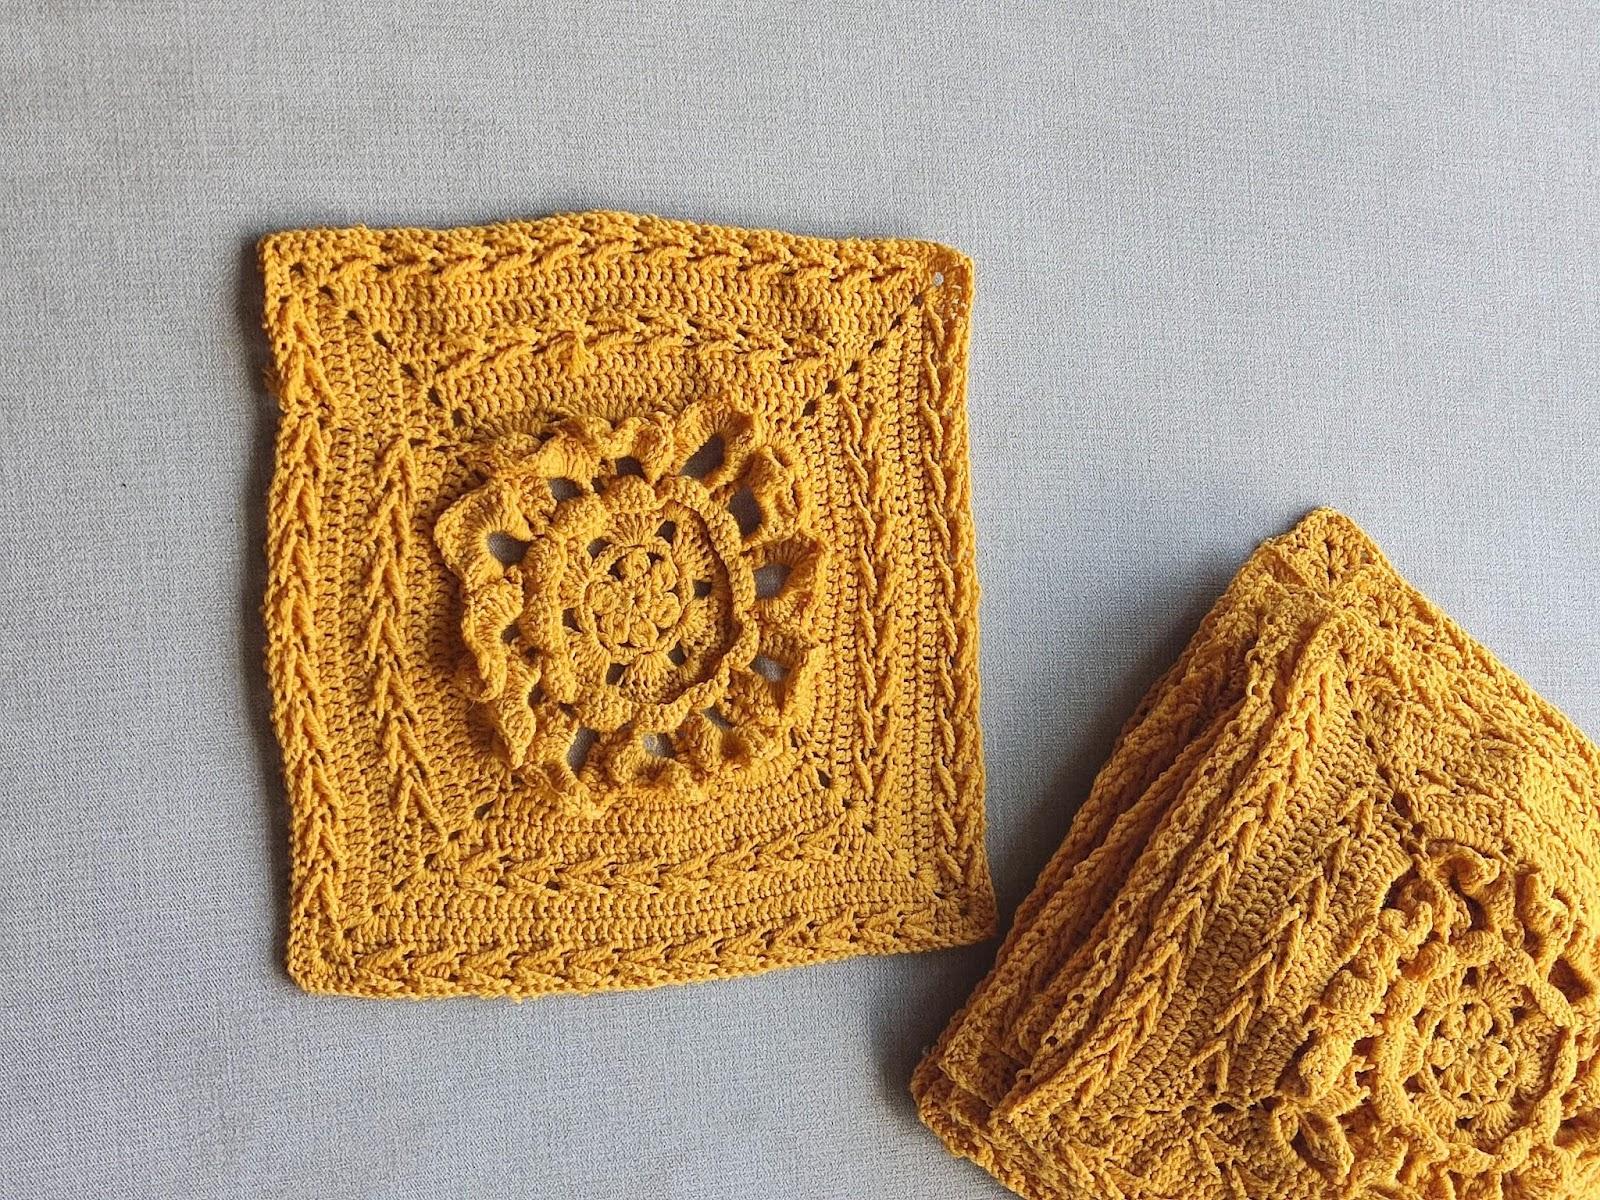
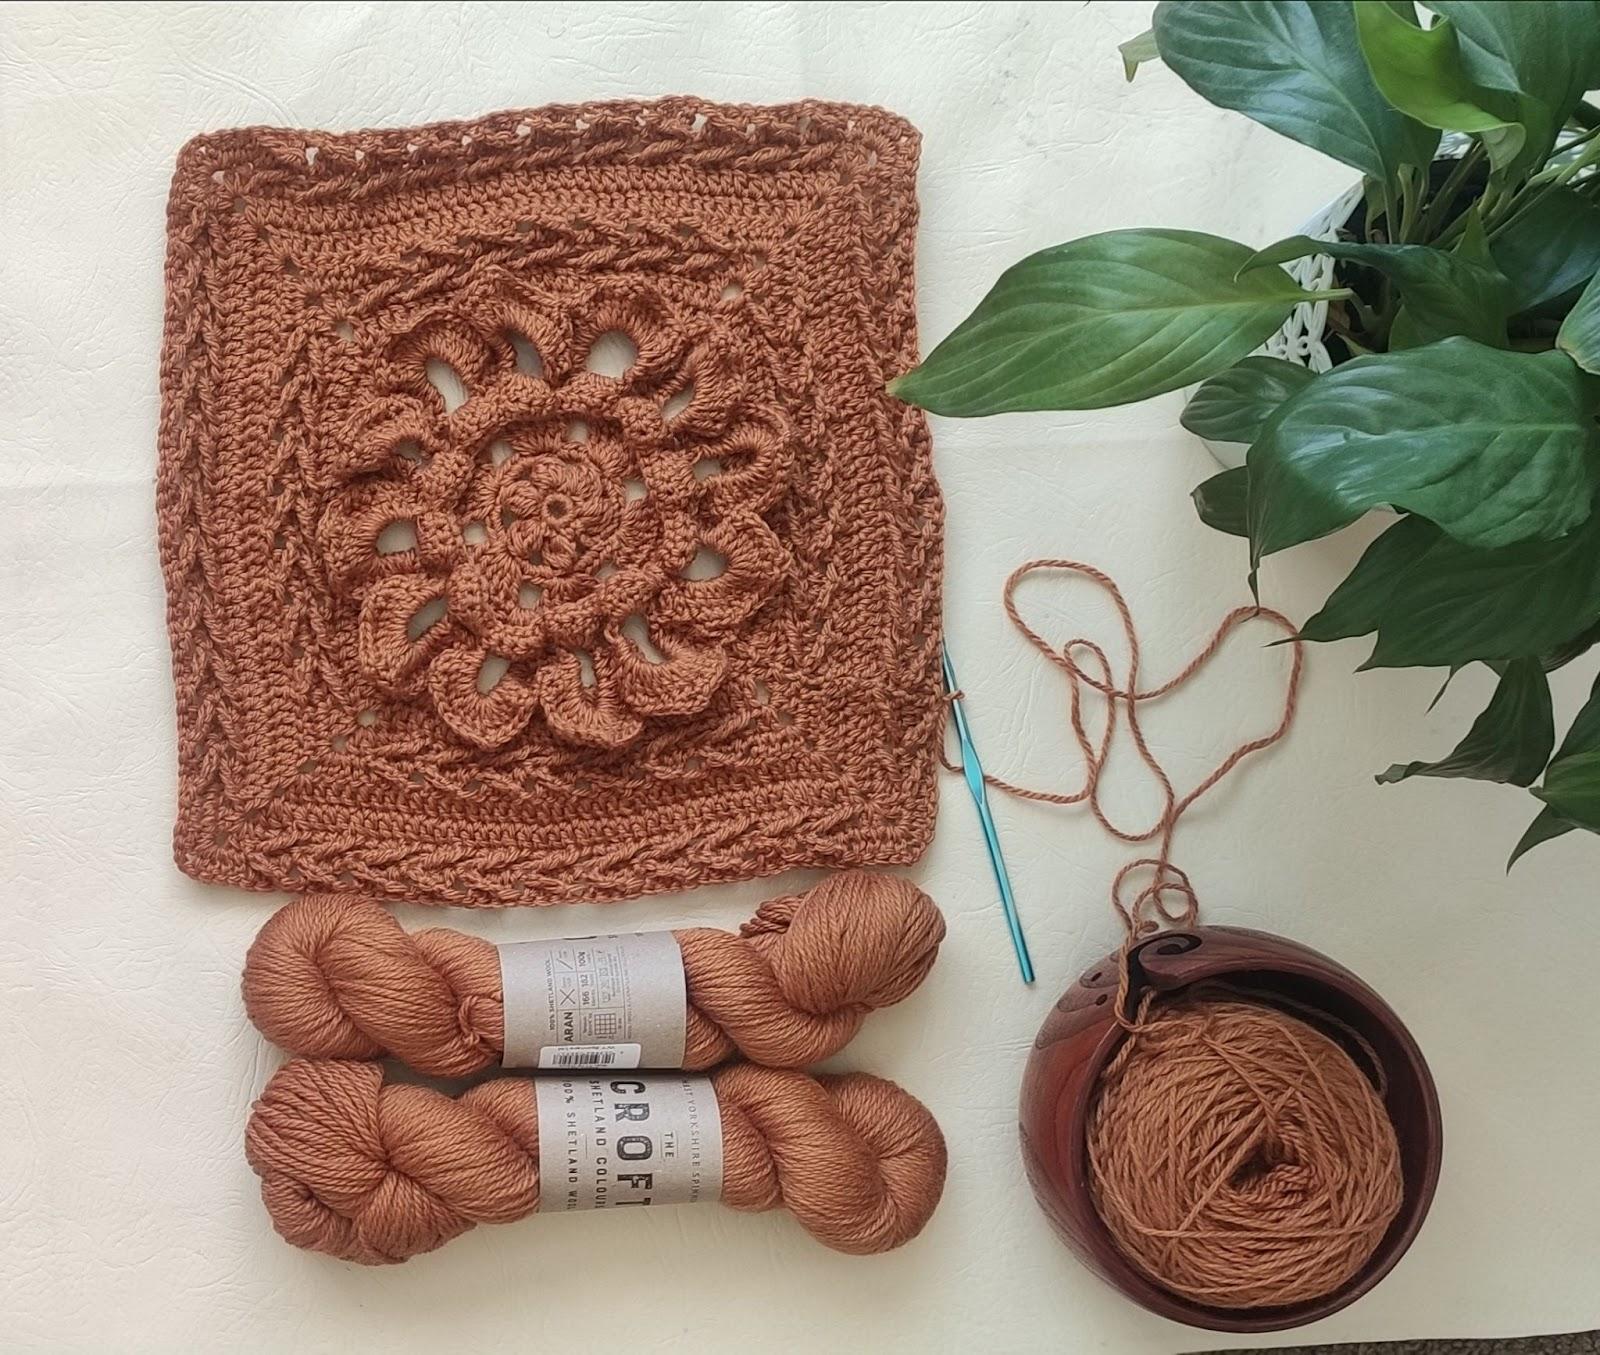
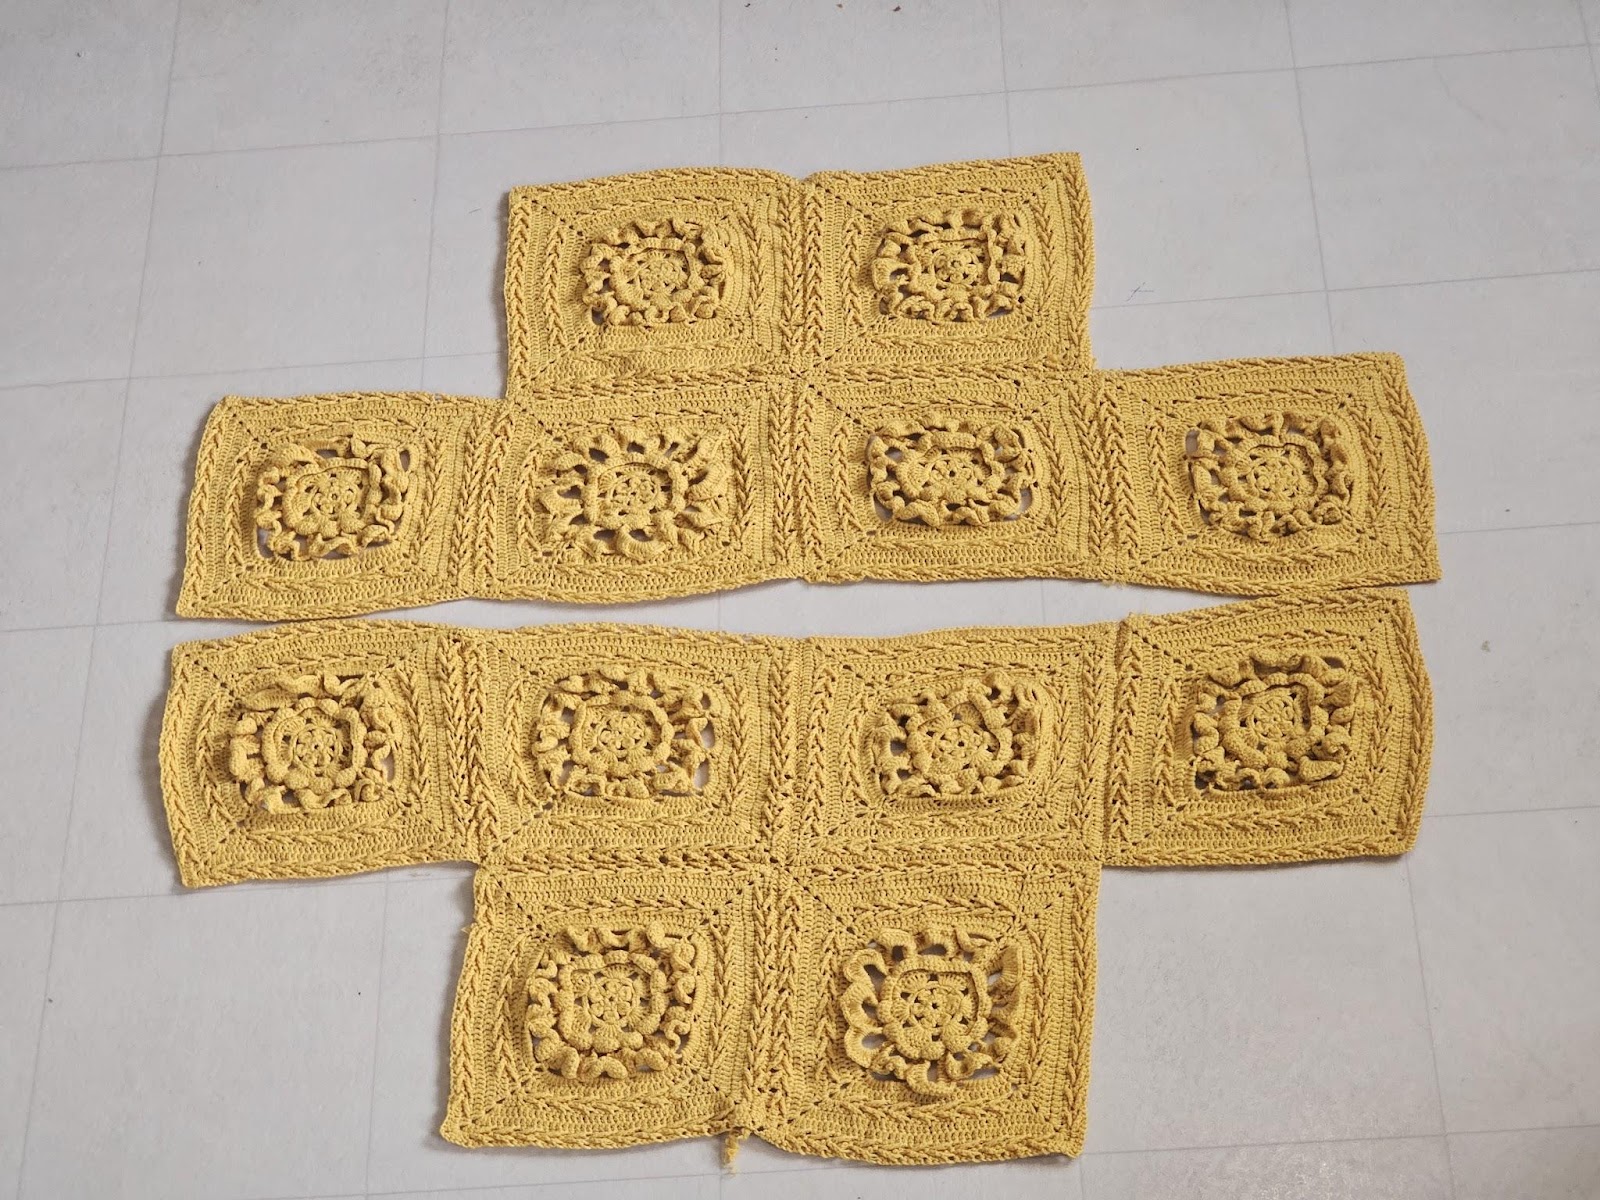
This lacy crochet top is made in rounds. A square at a time until you get 12 similar squares, which are then joined together.
To customize this lacy top, ensure you have similar widths for all of your squares, following the instructions for the size you are making.
This pattern and 35 other summer project ideas are featured on the Summer Vibes blog hop. Check out all the fun projects here.


Lacy crochet top pattern
Section 1: Squares
Each square should measure about 8 (9, 10, 11, 12, 13, 14, 15, 16).”
Make 12 pcs
Rnd 1: In a magic ring, ch 1, 18 sc, join with a sl st to beg ch. 18 sc
Or
Rnd 1: Ch 4, 18 sc in 1st ch, join with a sl st to beg ch. 18 sc
Rnd 2: Ch 3, bobble in first st, sk next 2 sts, ch 3 *bobble in next st, sk next 2 sts, ch 3, rep from * to end, join with a sl st to 3rd ch. 6 bobbles, 6 ch sp
Rnd 3: Ch 2 (counts as beg ch and + ch 1), sk next bobble, *4 sc in ch sp, ch 1, sk next bobble, rep from * to end, join with a sl st to beg ch. 24 sc, 6 ch sp
Rnd 4: Ch 3, *6 dc in next ch 1 sp, sk next 4 sts, ch 2; rep from * to end, join with a sl st to beg ch. 36 dc, 6 ch sp
Rnd 5: Ch 1, *sc in next 6 sts, ch 3, sk next ch sp, rep from * to end, join with a sl st to ch 1st ch. 36 sc, 6 ch sp
Rnd 6: Ch 1, *sc in next 5 sts, 2 sc in next st, ch 3, sk next ch sp, rep from *to last ch 3 sp, sk last ch 3 sp, join with a sl st to beg ch. 42 sc, 6 ch sp
Rnd 7: Ch 1, *sc in next 3 sts, [sc, ch 1, sc] in next st, sc in next 3 sts, (2 dc over the 3 ch 3 sps from 3 rows below, ch 1, 2 dc over ch 3 sps from 3 rnds below), rep from * to end, join with a sl st to beg ch. 48 sc, 12 ch sp, 24 dc
Rnd 8: Ch 1, sk first 4 sts, *shell in each ch 1 sp, ch 1, rep from * to last 4 sts, sk last 4 sts, join with a sl st to beg ch. 12 shells, 12 ch sp
The sk sts above would be where you crochet into in rnd 10.
Rnd 9: Ch 1, *sc in next 5 sts, sc in next ch 1 sp, rep from * to end, join with a sl st to beg ch. 72 sc
Note:
- Your piece curls up after round 9.
- To make crocheting the next rounds easier, you can press down stitches made in round 9
Rnd 10: Ch 3, working to the sk sts left unworked from round 7, sk first st, sc in next st, * ch 10, sk next shell, sc in next st, ch 4, sk next 3 sts, sc in next st, rep from * to end, join with a sl st to 1st ch from beg ch. 24 ch sp, 24 sc
Rnd 11: Ch 3, *20 dc in ch 10 sp, sc in ch 4 sp, rep from * to last ch 10 sp, 20 dc in ch 10 sp, join with a sl st to beg ch. 12 sc, 240 dc
Rnd 12: Ch 1, sk first st *sc in next 9 sts, ch 3, sc in next 9 sts, sk next 3 sts, rep from * to end, sk last st, join with a sl st to beg ch. 12 ch sp, 216 sc
Rnd 13: Ch 3, sk next 2 sts, sc in next st, *ch 8, sk next [6 sts, ch 3 sp, 6 sts], insert hook from the back, to the front of next st, sk next 4 sts, insert hook from the front to the back of next st, [sc2tog], rep from * to last petal, ch 8, sk next [6 sts, ch 3 sp, 6 sts], sc in next st, sk last 2 sts, join with a sl st to beg ch. 12 ch sp, 12 sc
Keep all ch 8 sps behind the petals.
Rnd 14: Ch 3, 9 dc in each ch 8 sp, join with a sl st to beg ch. 108 dc
Rnd 15: Ch 3, *dc in next 26 sts, [dc, ch 3, dc] in next st, rep from * to the end, join with a sl st to beg ch. 112 dc, 4 ch sp
Rnd 16: Ch 3, sk next 2 sts, tr in next st, working behind the tr, 2 dc in the first sk st, dc in next st, (*sk next 3 sts, tr in next st, working behind the tr, dc in each of the 3 sk sts, starting from the first st, rep from * to corner, [2 dc, ch 2, 2 dc] in ch 3 sp); rep ( to ) to last st, sk last st, join with sl st to beg ch, turn. 28 tr, 100 dc
Turn, working from the wrong side
XS – Skip to section 2. Your piece should measure approx 8”

Rnd 17 (WS): Ch 3, (dc in next 2 sts, [2 dc, ch 2, 2 dc] in ch 2 sp, dc in next 2 sts) **sk next 3 sts, tr in next st, working in front of the tr, dc in each of the 3 sk sts, starting from the first st, rep from ** to last 2 sts before ch 2 sp, work from ( to ), rep from *to end, join with a sl st to beg ch, turn. 28 tr, 116 dc
Turn, working from the right side.
Rnd 18 (RS): Ch 3, *dc in each st to corner, [2 dc, ch 2, 2 dc] in ch 2 sp, rep from * to last 4 sts, dc in last 4 sts, join with a sl st to beg ch. 160 dc
Rnd 19: Ch 3, *dc in each st to corner, [2 dc, ch 2, 2 dc] in ch 2 sp, rep from * to last 6 sts, dc in last 6 sts, join with a sl st to beg ch. 176 dc
Small – Skip to section 2. Your piece should measure approx 9”
Rnd 20: Ch 3, (*sk next 3 sts, tr in next st, working from behind the tr, dc in each of the 3 sk sts, rep from * to next corner, [2 dc, ch 2, 2 dc] in ch 2 sp), rep from ( to ) to last 8 sts, rep from * in last 8 sts, join with a sl st to beg ch, turn. 44 tr, 148 dc
Rnd 21(WS): Ch 3, (*sk next 3 sts, tr in next st, working in front of the tr, dc in each of the 3 sk sts, rep from * until 2 sts before ch 2 sp, dc in next 2 sts, [2 dc, ch 2, 2 dc] in ch 2 sp, dc in next 2 sts), rep from ( to ) to end, join with a sl st to beg ch, turn. 44 tr, 164 dc.
Medium – Skip to section 2. Your piece should measure approx 10”
Turn, working from the right side.
Rnd 22 (RS): Ch 3, *dc in each st to corner, [2 dc, ch 2, 2 dc] in ch 2 sp, rep from * to last 12 sts, dc in last 12 sts, join with a sl st to beg ch. 224 dc
Rnd 23: Ch 3, *dc in each st to corner, [2 dc, ch 2, 2dc] in ch 2 sp, rep from * to last 14 sts, dc in last 14 sts, join with a sl st to beg ch. 240 dc

For L only: Skip to section 2. Your piece should measure approx 11”
Rnd 24: Ch 3, (*sk next 3 sts, tr in next st, working from behind the tr, dc in each of the 3 sk sts, rep from * to next corner, [2 dc, ch 2, 2 dc] in ch 2 sp), rep from ( to ) to last 16 sts, rep from * in the last 16 sts, join with a sl st to beg ch, turn. 60 tr, 196 dc
Turn, working from the wrong side
Rnd 25 (WS): Ch 3, (*sk next 3 sts, tr in next st, working in front of the tr, dc in each of the 3 sk sts, rep from * until 2 sts before ch 2 sp, dc in next 2 sts, [2 dc, ch 2, 2 dc] in ch 2 sp, dc in next 2 sts), rep from ( to ) to end, join with a sl st to beg ch, turn. 60 tr, 212 dc
For XL only: Skip to section 2. Your piece should measure approximately 12”.
Turn, working from the right side.
Rnd 26 (RS): Ch 3, dc in each st to corner, [2 dc, ch 2, 2 dc] in ch 2 sp, rep from * to last 20 sts, dc in last 20 sts, join with a sl st to beg ch. 288 dc
Rnd 27: Ch 3, dc in each st to corner, [2 dc, ch 2, 2dc] in ch 2 sp, rep from * to last 22 sts, dc in last 22 sts, join with a sl st to beg ch. 304 dc
For 2XL only: Skip to section 2. Your piece should measure approx 13”
Rnd 28: Ch 3, (*sk next 3 sts, tr in next st, working from behind the tr, dc in each of the 3 sk sts, rep from * to next corner, [2 dc, ch 2, 2 dc] in ch 2 sp), rep from ( to ) to last 24 sts, rep from * in last 24 sts, join with a sl st to beg ch, turn. 76 tr, 244 dc
Turn, working from the wrong side
Rnd 29 (WS): Ch 3, (*sk next 3 sts, tr in next st, working in front of the tr, dc in each of the 3 sk sts, rep from * until 2 sts before ch 2 sp, dc in next 2 sts, [2 dc, ch 2, 2 dc] in ch 2 sp, dc in next 2 sts), rep from ( to ) to end, join with a sl st to beg ch, turn. 76 tr, 260 dc
For 3XL only: Skip to section 2. Your piece should measure approx 14”.
Turn, working from the right side.
Rnd 30 (RS): Ch 3, *dc in each st to corner, [2 dc, ch 2, 2 dc] in ch 2 sp, rep from * to last 28 sts, dc in last 28 sts, join with a sl st to beg ch. 352 dc
Rnd 31: Ch 3, *dc in each st to corner, [2 dc, ch 2, 2dc] in ch 2 sp, rep from * to last 30 sts, dc in last 30 sts, join with a sl st to beg ch. 368 dc
For 4XL only: Skip to section 2. Your piece should measure approx 15”
Rnd 32: Ch 3, (*sk next 3 sts, tr in next st, working from behind the tr, dc in each of the 3 sk sts, rep from * to next corner, [2 dc, ch 2, 2 dc] in ch 2 sp), rep from ( to ) to last 32 sts, rep from * in the last 32 sts, join with a sl st to beg ch, turn. 92 tr, 292 dc
Turn, working from the wrong side
Rnd 33 (WS): Ch 3, (*sk next 3 sts, tr in next st, working in front of the tr, dc in each of the 3 sk sts, rep from * until 2 sts before ch 2 sp, dc in next 2 sts, [2 dc, ch 2, 2 dc] in ch 2 sp, dc in next 2 sts), rep from ( to ) to end, join with a sl st to beg ch, turn. 92 tr, 308 dc
For 5X only: Skip to section 2. Your piece should measure approximately 16”.
Turn, working from the right side.
Fasten off.
Sew in all ends.
Make 11 more squares.
Block the squares separately.
Section 2: Edging
Join yarn with a sl st to any side.
Round 1: Ch 2, hdc in each st around, aim for 2 hdc, ch 2, 2 hdc at each corner, join with a sl st to the beginning chain.
Fasten off.
Section 3: Joining
- Arrange the squares in 2’s and with the wrong side facing you.
- Place Squares 1 and 2 next to each other.
- On the next line, place squares 3 and 4 next to each other.
- Using a darning needle or crochet hook, join the sides with mattress stitch or slip stitch across.
- Secure all ends.
Shoulder Seam(s)
- Turn both panels to the wrong side.
- Place the front panel over the back panel.
- Measure 3.5 – 5” from the 3rd square towards the middle, and place a stitch marker.
- Note that you can adjust this measurement for a comfortable neckline fit.
- Place stitch markers on the point (1st on the front panel, the 2nd on the back panel), over both panels.
- Join yarn with a slip stitch at the stitch with the marker.
- Ch 1, sc over both sides, towards the sleeves.
- Fasten off, repeat on the other side.
Side seam(s)
- Turn both panels to the wrong side.
- Place the front panel over the back panel, with the wrong side facing you and the right side facing each other.
- Join yarn with a slip stitch to the tip of the sleeve.
- Crocheting over both panels, across the base of the sleeve towards the sides.
- Ch 1, sc over both sides.
- Fasten off, repeat on the other side.
Edging (Neckline)
With the right side facing, join yarn with a sl st to any point at the neckline, ch 1, sc evenly in each st.
Edging (Lower Sleeve edging)
With the right side facing, join yarn with a sl st to any point at the sleeve edge, ch 1, sc evenly in each st.
Repeat on the other side.
Fasten off and sew in the ends.

Made a project from thsi Lacy crochet top pattern? Kindly share with me and the community.
About the Designer
Say Hi on Instagram and Subscribe To my email List for pattern discounts and freebies. For questions, send such to [email protected]. Read more about me here.