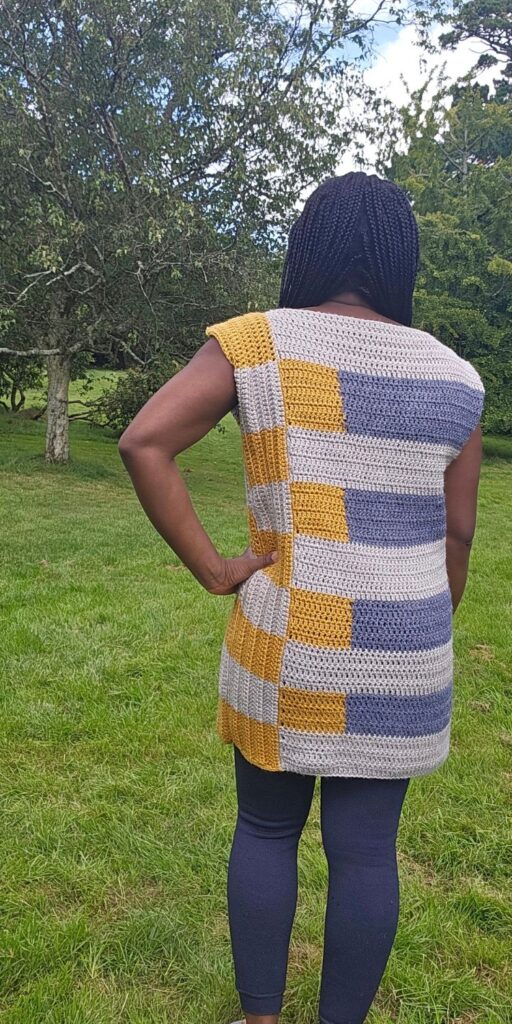
Simple Crochet Tunic Pattern
The simple crochet tunic pattern is a perfect transition croceht garment into the colder months. You can dress this up or down!
I love that there’s an endless posibilites of colors when it comes to picking yours. This crochet tunic pattern will mak eaperfect stash busting garment idea!

This simple tunic is featured alongside many other seasonally appropriate patterns in this year’s Winter collection. Have a look at the collection.


Crochet tunic pattern details
Materials needed for this sleeveless top
Yarn – Any worsted-weight yarn in colors of your choice.
Hobbii Mega Ball, Aran weight, #4 (100% Acrylic, 1200 m (1312 yds) per 14.1oz/400g Ball)
Estimated Total Yardage
Size(s) and color codes – XS (S, M, L, XL, 2XL, 3XL, 4XL, 5XL)
Main Color – Cream
800 (900, 1000, 1100, 1200, 1300, 1400, 1500, 1600) yards in Color MC
Contrasting Color 1 – Mustard
400 (450, 500, 550, 600, 650, 700, 750, 800) yards in CC1
Contrasting Color 2 – Grey
600 (650, 700, 750, 800, 850, 900, 950, 100) yards in CC2

Hook – 6 mm Crochet Hook
Gauge – 12 sts over 8 Rows = 4 x 4” made in dc before blocking.
Pattern Notes
- Please kindly read through the pattern before starting.
- Beginning chains do not count as a stitch throughout the pattern.
- Stitch count is written after each row, with size S written first in green and the other in the (). I.e. XS (S, M, L, XL, 2XL, 3XL, 4XL, 5XL)
Skill Level – The crochet tunic pattern for women is a super simple project made mainly usign double crochet stitches.
Terms – US Terminology
Stitches Abbreviations
Chain space – ch sp
Stitch(es) – st(s)
Single Crochet – sc
Double crochet – dc
Crochet Tunic Pattern Finished Measurements:
Size(s) and color codes – XS (S, M, L, XL, 2XL, 3XL, 4XL, 5XL)
Bust Measurement: 30 (34, 38, 42, 46, 50, 54, 58, 62)”
Armhole Circumference: 14 (16, 16, 18, 18, 22, 22, 22, 22)”
Length of Sweater: 33”
The modeled garment is shown in L, with about 1” of Positive Ease.
Construction Note:
This project is made in flat (rows), after which the panels are joined together at the shoulder and the side seams.


How to Crochet a Simple Tunic Sweater
Section 1: Make 2
With MC – Chain 38 (44, 50, 56, 62, 68, 74, 80, 86)
Row 1: Dc in 3rd ch from hook and in each ch across, turn. 36 (42, 48, 54, 60, 66, 72, 78, 84) dc
Rows 2 – 8: Ch 2, dc in each st across, turn. 36 (42, 48, 54, 60, 66, 72, 78, 84) dc
Fasten off MC, join CC 1
Your piece should measure about 13 (15, 17, 19, 21, 23, 25, 27, 29)” wide.
Row 9: With CC1, ch 2, dc in the first 10 (10, 10, 12, 12, 12, 14, 14, 14) sts, drop CC1, Pick up CC2, dc in the remaining sts, turn. 36 (42, 48, 54, 60, 66, 72, 78, 84) dc
- Keep unused yarn on the wrong side to make your color changing easier.
Row 10: With CC2, ch 2, dc in the first 26 (32, 38, 42, 48, 54, 58, 64, 70) sts, drop CC2, pick up CC1, dc in the remaining sts, and turn. 36 (42, 48, 54, 60, 66, 72, 78, 84) dc
Rows 11 – 14: Repeat rows 9 – 10.
Fasten off CC 1 and CC2, and join MC.
Rows 15 – 20: Ch 2, dc in each st across, and turn. 36 (42, 48, 54, 60, 66, 72, 78, 84) dc
Fasten off MC, join CC 1
Rows 21 – 26: Repeat Rows 9 – 14
Fasten off CC 1 and CC2, and join MC.
Rows 27 – 32: Ch 2, dc in each st across, turn. 36 (42, 48, 54, 60, 66, 72, 78, 84) dc
Fasten off MC, join CC 1
Rows 33 – 38: Repeat Rows 9 – 14
Fasten off CC 1 and CC2, and join MC.
Rows 39 – 44: Ch 2, dc in each st across, turn. 36 (42, 48, 54, 60, 66, 72, 78, 84) dc
Fasten off MC, join CC 1
Rows 45 – 50: Repeat Rows 9 – 14
Fasten off CC 1 and CC2, join MC
Rows 51 – 56:Ch 2, dc in each st across, turn. 36 (42, 48, 54, 60, 66, 72, 78, 84) dc
Edging
- Crocheting across just one of the long sides,
- Turn your project so that the side with the mustard (or the equivalent of your CC1) is on the bottom.
- You can fasten off and rejoin your MC if this is not the same side you completed the last round on.
Row 1: Ch 1, sc in each st/edge across.
Cut yarn.
- Repeat the edging on the other long side.
- Join yarn with a sl st to the beginning of the foundation chain.
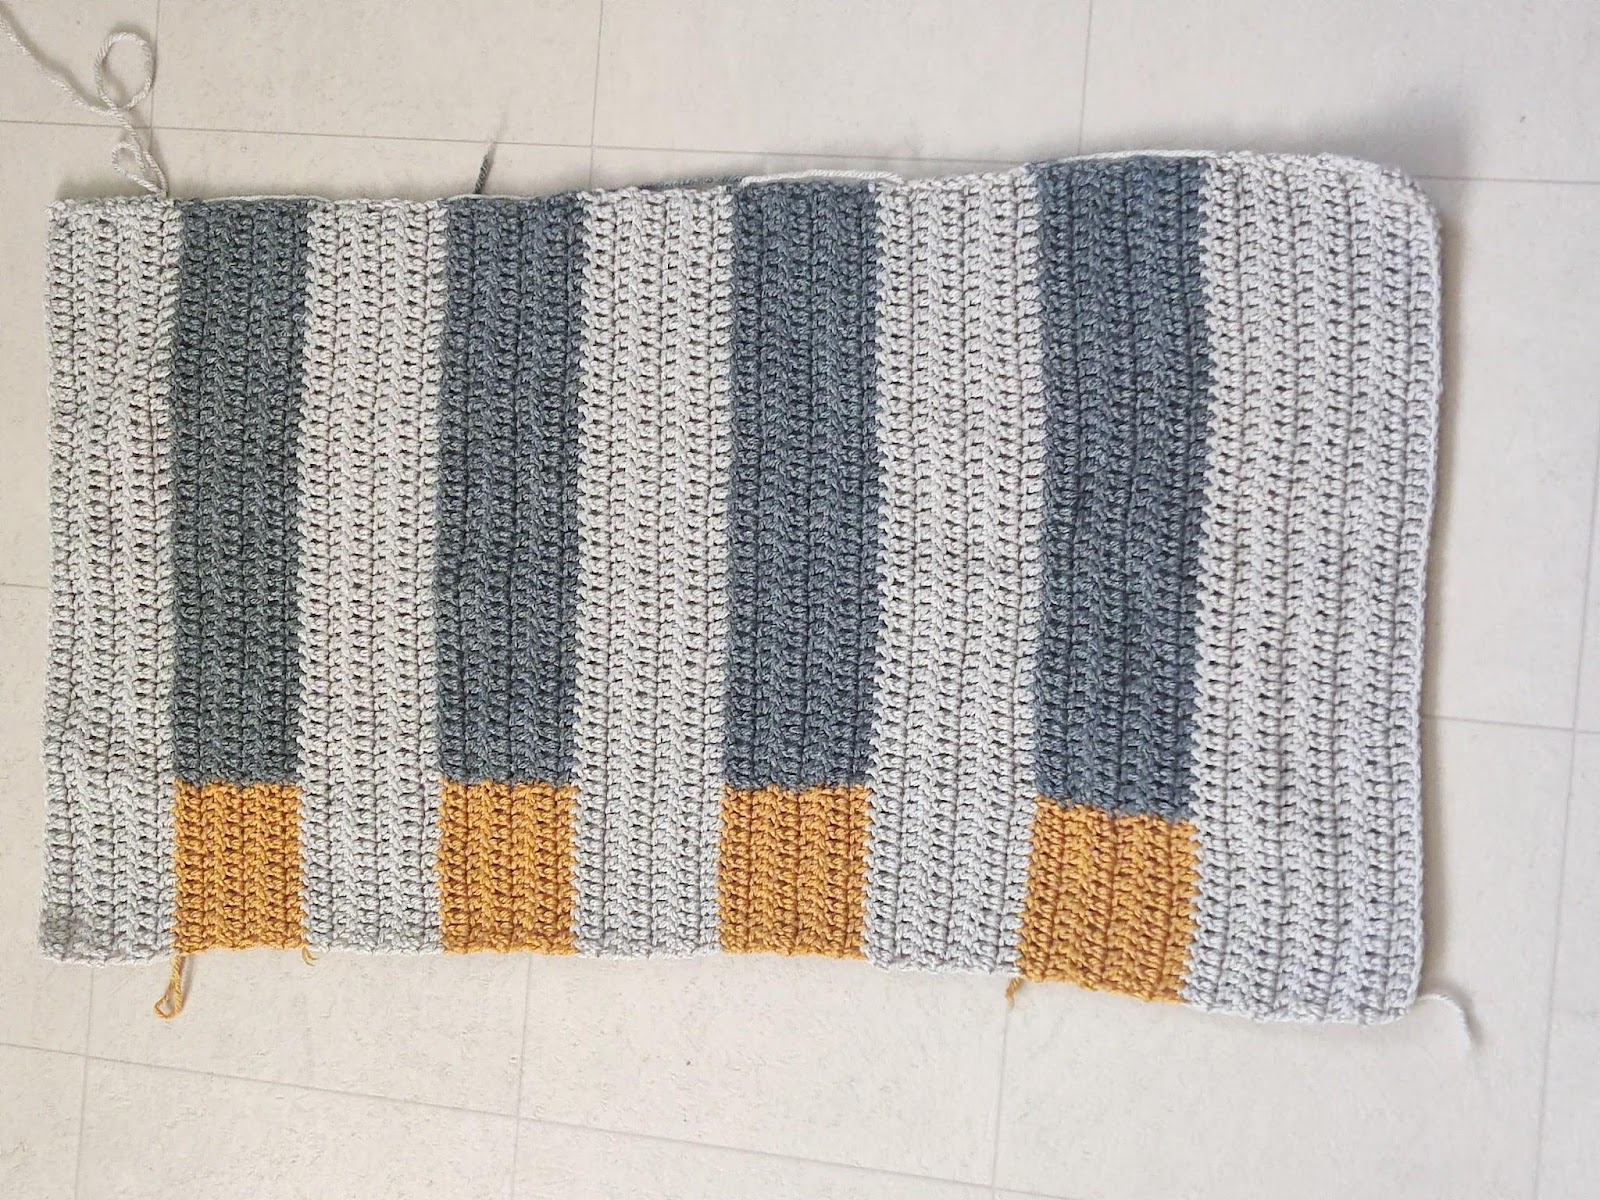
Crochet Tunic Side extension:
- This part uses just two colors – MC and CC1.
- Make sure to have your sts in the opposite color for row 1.
- Please note that each color’s numbers might differ from the one written in the pattern, depending on the number of stitches you have when crocheting across the edges earlier.
- Aim for evenly distributed stitches to avoid puckering or punches.
- You can adjust the number of sts made per color. Make sure your project does not curl or shrink.

Note that the colors are switched after each panel.
Row 1: With CC1, ch 2, dc in first 10 sts, *with MC, dc in next 10 sts, with CC1, dc in next 10 sts, rep from * to the end, turn.
Rows 2 – 8: Repeat Row 1.
Increase or reduce the number of repeats for a wider piece.
Fasten off.
Edging
- Crocheting around the whole panel.
- Use color appropriate for each stitch for a smooth edging.
Round 1: Ch 1, sc in each st/edge around (2sc, ch 2, 2 sc) at each corner, join with a sl st to the beginning chain.
Cut yarn.
Make the second panel.
Finishing – Joining
Shoulder seam(s)
- Place the front panel over the back panel.
- Measure 4” from the shoulder tip to the center, place a stitch marker at this point, and repeat on the other side. This distance between the two markers would be the neckline opening. Adjust the placement of the markers for a perfect fit.
- Join yarn with a slip stitch to the edge, crocheting towards the stitch marker.
- Sew the remaining sts on both panels using a needle or hook and either mattress stitch or sl st.
- Repeat on the other side.
- Fasten off.
Neckline Opening
- Join yarn with a slip stitch to the tip/end of the neckline.
- Crocheting around the whole neckline
Round 1: Ch 1, sc in each st around the whole neckline opening, join with a sl st to the beginning chain
Round 2: Ch 1, sl st in each st around, join with a sl st to the beginning chain.
Fasten off.
Side seam(s)
- Place the two panels over each other.
- Measure 7.5 (8, 8, 8.5, 8.5, 9, 9, 9.5, 10)” from the shoulder tip Downwards, this would be the sleeve opening.
- Place stitch markers on the point (the first on the front panel, the second on the back panel) over both panels.
- Join yarn with a sl st to the stitch with the marker.
- Sew the remaining sts on both panels together using a needle or hook and either mattress stitch or sl st.
- Repeat on the other side.
- Fasten off.
I would love to see your version made from this simple crochet tunic pattern!
About the Designer
Say Hi on Instagram and Subscribe To my email List for pattern discounts and freebies. For questions, send such to [email protected]. Read more about me here.