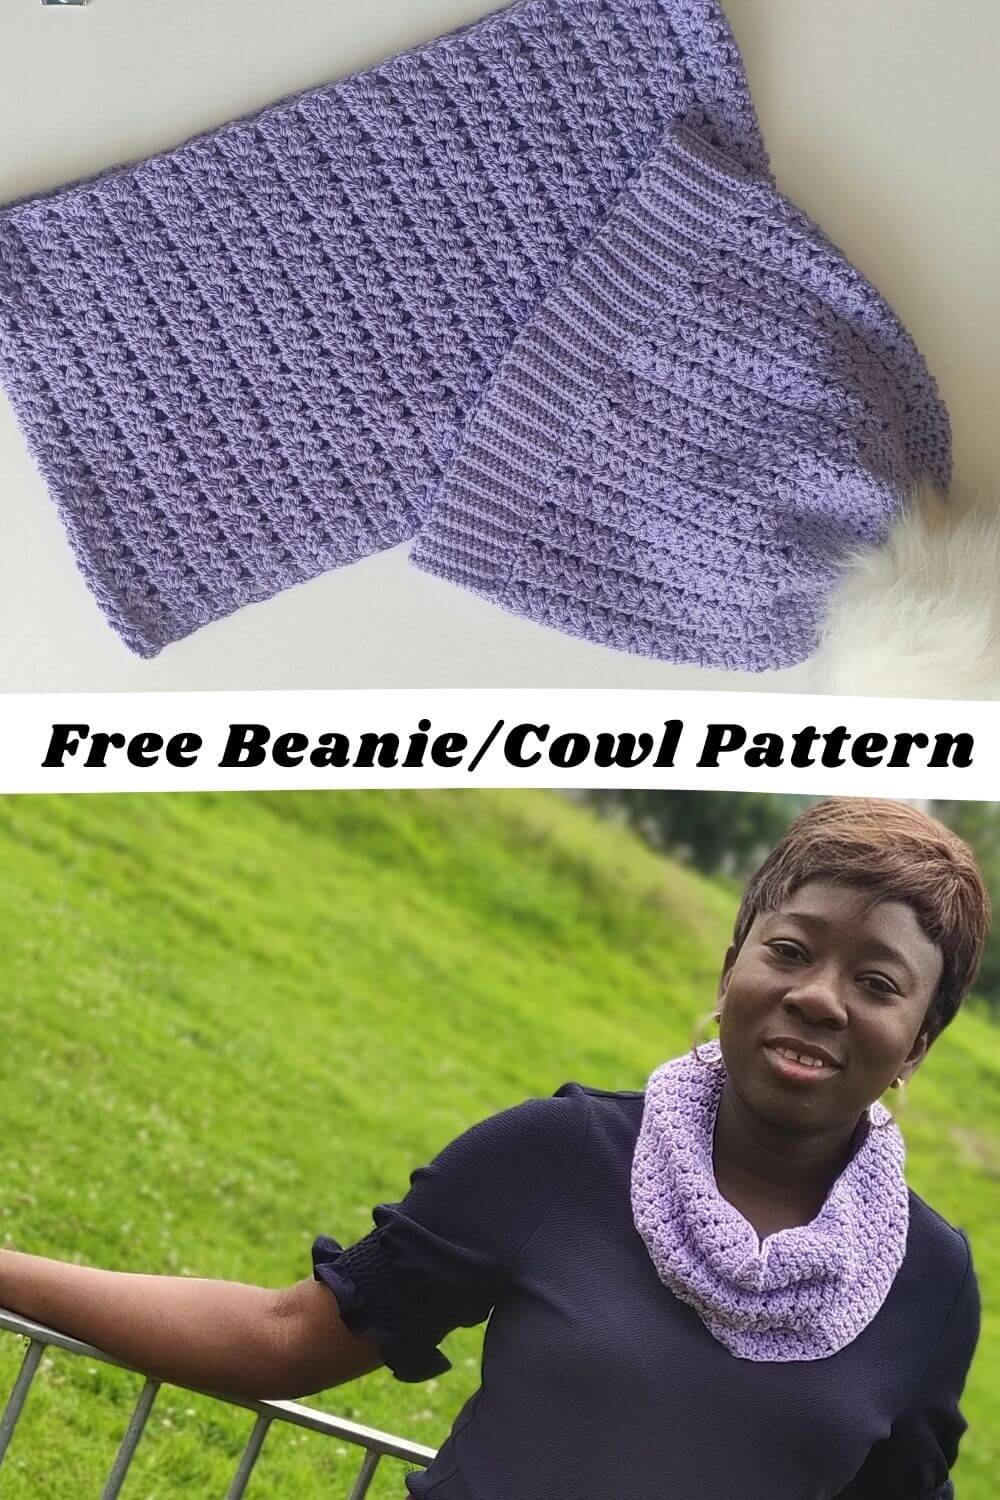
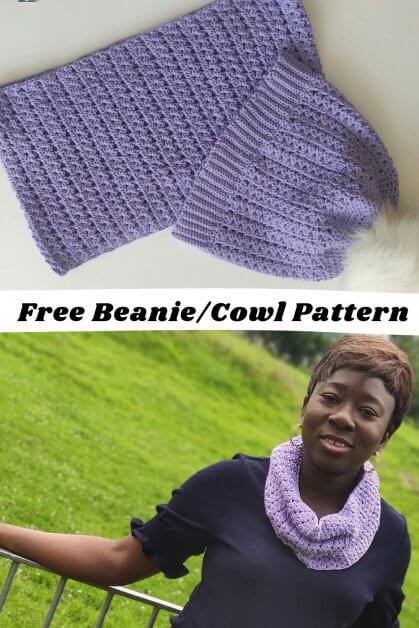
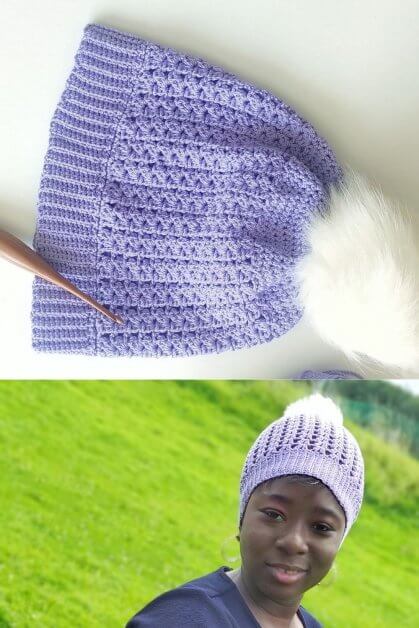
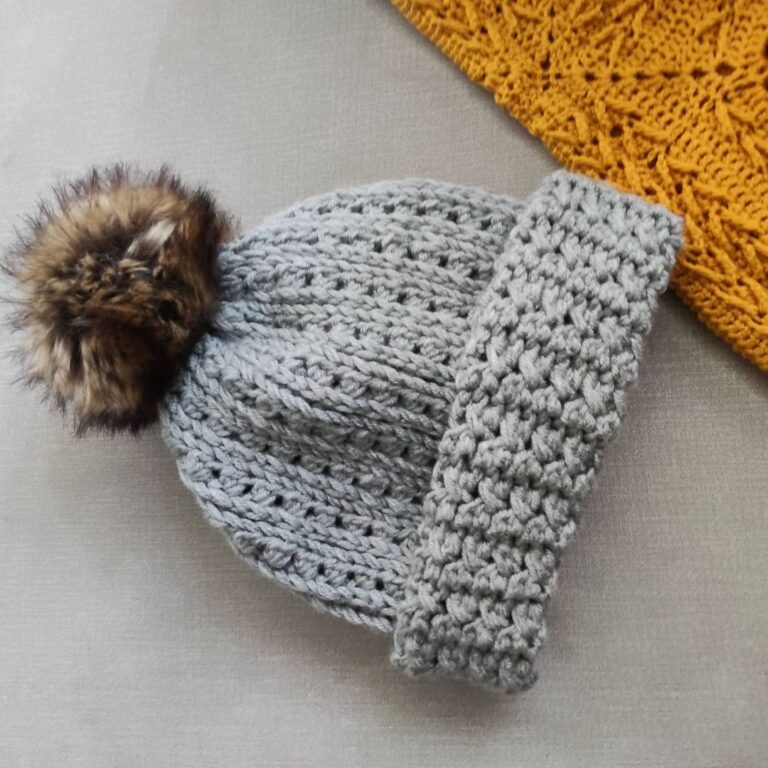
Free Crochet Beanie and cowl pattern.
A few months ago, I made a sun hat using the same design used in this easy beanie and cowl pattern. Since designing that sun hat, I knew immediately that I would eventually make many designs using the stitches. One of the reasons I love the stitch is that it is addictive, soothing, and full of beautiful Texture.
Another good thing about this set is that it is size inclusive! The easy beanie and cowl pattern was written and tested from Preemie sizes up to Adult large sizes. However, I felt Babies can choke with cowls and have omitted their size.
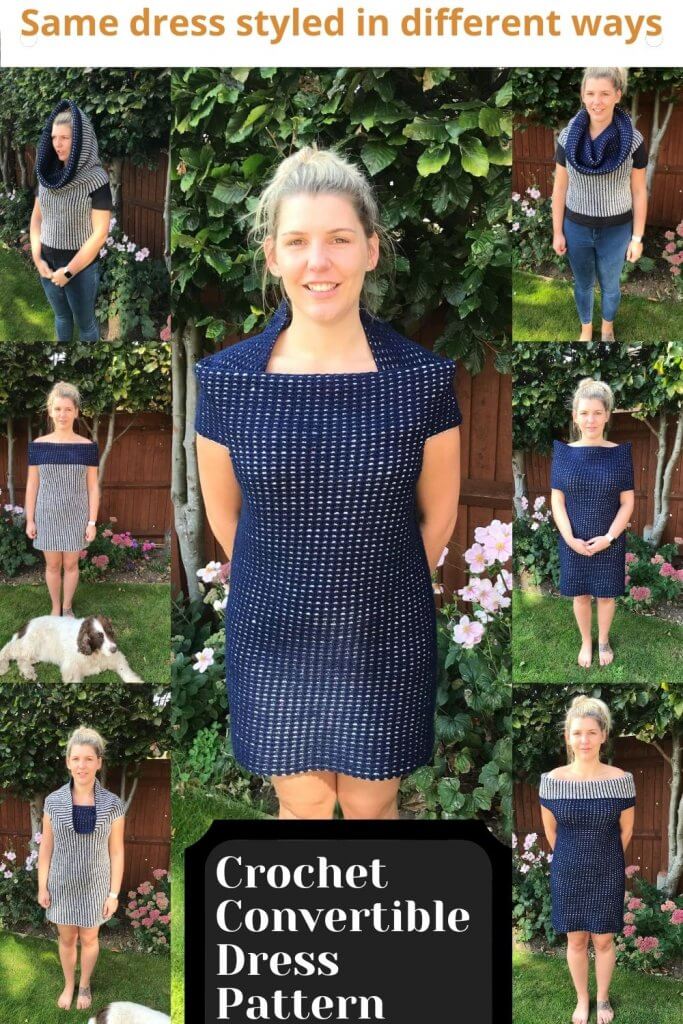
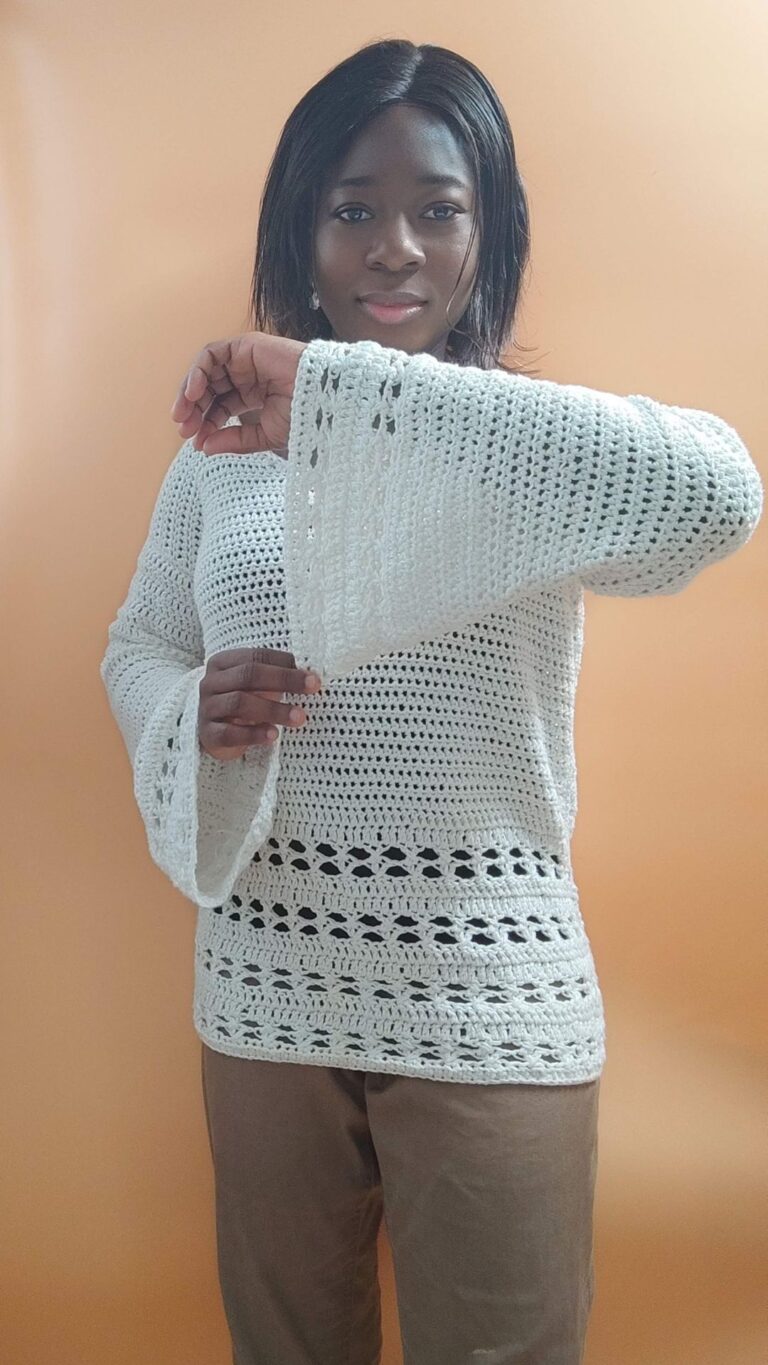
Not only would you love your makes from the easy beanie and cowl pattern, but would also fall in love with the beautiful stitch and texture in the set. I made a pullover using the stitch and the end result is breathtaking. You can grab the bundle (easy beanie and cowl pattern alongside the pullover here)
Since this stitch is addictive and super easy to follow, I have added a cowl (neck warmer) as a free pattern also. Scroll down to the Cowl pattern
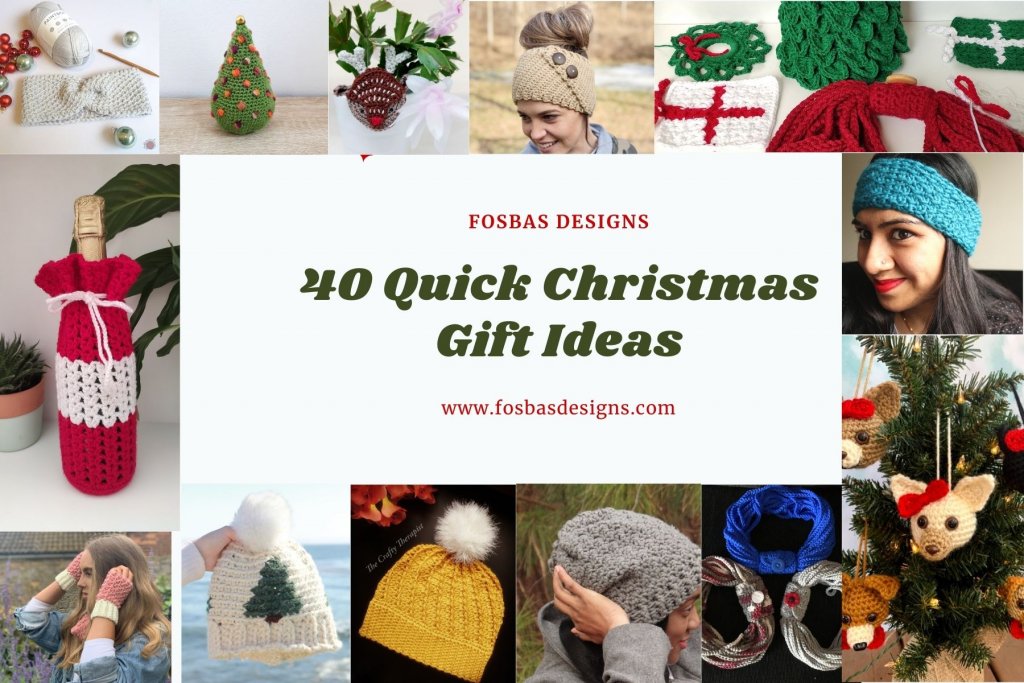
More patterns on my blog;
2. 40 free Christmas Gift ideas.
Check out the Stitch tutorial here.
Materials for the beanie and cowl set
YARN
Lion Brand Truboo, DK, #3, (100% Bamboo, 241 yards/220 m per 3.5 oz/100g Ball)
2 (2, 2, 3) Balls in Lilac
ESTIMATED YARDAGE
150 (200, 250, 280) yards
HOOK AND OTHER MATERIALS
US size G (4 mm) Crochet Hook
Yarn needle
GAUGE
Rounds 1 – 6 = 3.5” Diameter
Adjust hook size if necessary, to obtain gauge.
SKILL LEVEL – Easy
TERMS – US Terminology
ADJUSTMENTS
Increase the number of rounds if you cannot meet the required diameter for the size you are making.
As much as head measurements vary from individual to individual, make sure you size your hat as you crochet. To do so, once you are in Round 3 of the body, check the fitting of your hat to make sure it’s a good fit.
Too small? Go up a size
Too Big? Go down a size
PATTERN NOTES
Please kindly read through the pattern before starting.
Any #3 weight of yarns can be substituted.
Chains at the beginning of Rounds do not count as a stitch.
Each dc cluster is worked stacked on previous dc clusters, except for the first round of Brim, where dc is also worked in ch 1 sp between each dc clusters.
STITCHES ABBREVIATIONS
Chain(s) – ch(s)
Slip Stitch – sl st
Single Crochet – sc
Half double crochet – hdc
Double Crochet – dc
Double Crochet 2 stitches together– dc2tog
SPECIAL STITCH
Double crochet Cluster = [dc2tog, ch 1, dc2tog] in indicated
stitch.
Get the Beanie Pattern on Ravelry
FINISHED MEASUREMENTS
Beanie
| Size | Head Circumference | Brim |
| Preemie | 14” | 1.5” |
| Infant (XS) | 16” | 2” |
| Toddler (S) | 17” | 2” |
| Child (M) | 19” | 3” |
| Teen/Adult (L) Adult Large (XL) | 21” 22” | 3” 3.5” |
Cowl
| Size | Length | Breadth |
| Toddler (S) | 6” | 10” |
| Child (M) | 7” | 12” |
| Teen/Adult (L) Adult Large (XL) | 8” 10” | 12” 14” |
Part 1: Easy Breezy Beanie Pattern
Instructions
Preemie Size.
Round 1: In a Magic ring, ch 2 (does not count as a stitch), 12 hdc in magic ring, join with a sl st to ch 2. 12 hdc.
Round 2: Ch 2, 2 hdc in each around, join with a sl st to ch 2. 24 hdc.
Round 3: Ch 2, hdc in each st around, join with a sl st to ch 2. 24 hdc
Round 4: Ch 2, *hdc in next, 2 hdc in next, repeat from * around, join with a sl st to ch 2. 36 hdc.
Round 5: Ch 2, *hdc in next 2 sts, 2 hdc in next, repeat from * around, join with a sl st to ch 2. 48 hdc.
The diameter should be about 3”
Round 6: Ch 2, hdc in each around, join with a sl st to ch 2. 48 hdc
Do not fasten off, continue to Body for all sizes.
Infant SizeRound 1: In a magic ring, ch 2 (does not count as a stitch), 12 hdc in magic ring, join with a sl st to ch 2. 12 hdc.
Round 2: Ch 2, 2 hdc in each around, join with a sl st to ch 2. 24 hdc.
Round 3: Ch 2, hdc in each st around, join with a sl st to ch 2. 24 hdc
Round 4: Ch 2, *hdc in next, 2 hdc in next, repeat from * around, join with a sl st to ch 2. 36 hdc.
Round 5: Ch 2, *hdc in next 2 sts, 2 hdc in next, repeat from * around, join with a sl st to ch 2. 48 hdc.
Round 6: Ch 2, *hdc in next 3 sts, 2 hdc in next, repeat from * around, join with a sl st to ch 2. 60 hdc
The diameter should be about 3.5”
Round 7: Ch 2, hdc in each around, join with a sl st to ch 2. 60 hdc
Do not fasten off, continue to Body for all sizes.
Toddler Size
Round 1: In a magic Ring, ch 2 (does not count as a stitch), 12 hdc in magic ring, join with a sl st to ch 2. 12 hdc.
Round 2: Ch 2, 2 hdc in each around, join with a sl st to ch 2. 24 hdc.
Round 3: Ch 2, hdc in each st around, join with a sl st to ch 2. 24 hdc
Round 4: Ch 2, *hdc in next, 2 hdc in next, repeat from * around, join with a sl st to ch 2. 36 hdc.
Round 5: Ch 2, *hdc in next 2 sts, 2 hdc in next, repeat from * around, join with a sl st to ch 2. 48 hdc.
Round 6: Ch 2, *hdc in next 3 sts, 2 hdc in next, repeat from * around, join with a sl st to ch 2. 60 hdc
Round 7: Ch 2, *hdc in next 4 sts, 2 hdc in next; repeat from * around, join with a sl st to ch 2. 72 hdc
The diameter should be about 4.25”
Rounds 8 – 9: Ch 2, hdc in each around, join with a sl st to ch 2. 72 hdc.
Do not Fasten off, continue to Body for all sizes.
Child Size
Round 1: In a magic Ring, ch 2 (do not count as a stitch), 12 hdc in magic ring, join with a sl st to ch 2. 12 hdc.
Round 2: Ch 2, 2 hdc in each round, join with a sl st to ch 2. 24 hdc.
Round 3: Ch 2, hdc in each st around, join with a sl st to ch 2. 24 hdc
Round 4: Ch 2, *hdc in next, 2 hdc in next, repeat from * around, join with a sl st to ch 2. 36 hdc.
Round 5: Ch 2, *hdc in next 2 sts, 2 hdc in next, repeat from * around, join with a sl st to ch 2. 48 hdc.
Round 6: Ch 2, *hdc in next 3 sts, 2 hdc in next, repeat from * around, join with a sl st to ch 2. 60 hdc
Round 7: Ch 2, *hdc in next 4 sts, 2 hdc in next; repeat from * around, join with a sl st to ch 2. 72 hdc
Round 8: Ch 2, *hdc in next 5 sts, 2 hdc in next, repeat from * around, join with a sl st to ch 2. 84 hdc
The diameter should be about 5”
Rounds 9 – 10: Ch 2, hdc in each around, join with a sl st to ch 2. 84 hdc
Do not Fasten off, continue to Body for all sizes.
Teen/Adult Small Sizes
Round 1: In a magic Ring, ch 2 (do not count as a stitch), 12 hdc in magic ring, join with a sl st to ch 2. 12 hdc.
Round 2: Ch 2, 2 hdc in each around, join with a sl st to ch 2. 24 hdc.
Round 3: Ch 2, hdc in each st around, join with a sl st to ch 2. 24 hdc
Round 4: Ch 2, *hdc in next, 2 hdc in next, om * around, join with a sl st to ch 2. 36 hdc.
Round 5: Ch 2, *hdc in next 2 sts, 2 hdc in next, repeat from * around, join with a sl st to ch 2. 48 hdc.
Round 6: Ch 2, *hdc in next 3 sts, 2 hdc in next, repeat from * around, join with a sl st to ch 2. 60 hdc
Round 7: Ch 2, *hdc in next 4 sts, 2 hdc in next; repeat from * around, join with a sl st to ch 2. 72 hdc
Round 8: Ch 2, *hdc in next 5 sts, 2 hdc in next, repeat from * around, join with a sl st to ch 2. 84 hdc
Round 9: Ch 2, *hdc in next 6 sts, 2 hdc in next, repeat from * around, join with a sl st to ch 2. 96 hdc
The diameter should be about 5.5”
Round 10: Ch 2, hdc in each around, join with a sl st to ch 2. 96 hdc
Do not Fasten off; continue with the body as with other sizes.
Adult Large Size
Round 1: In a magic Ring, ch 2 (do not count as a stitch), 12 hdc in magic ring, join with a sl st to ch 2. 12 hdc.
Round 2: Ch 2, 2 hdc in each around, join with a sl st to ch 2. 24 hdc.
Round 3: Ch 2, hdc in each st around, join with a sl st to ch 2. 24 hdc
Round 4: Ch 2, *hdc in next, 2 hdc in next, repeat from * around, join with a sl st to ch 2. 36 hdc.
Round 5: Ch 2, *hdc in next 2 sts, 2 hdc in next, repeat from * around, join with a sl st to ch 2. 48 hdc.
Round 6: Ch 2, *hdc in next 3 sts, 2 hdc in next, repeat from * around, join with a sl st to ch 2. 60 hdc
Round 7: Ch 2, *hdc in next 4 sts, 2 hdc in next; repeat from * around, join with a sl st to ch 2. 72 hdc
Round 8: Ch 2, *hdc in next 5 sts, 2 hdc in next, repeat from * around, join with a sl st to ch 2. 84 hdc
Round 9: Ch 2, *hdc in next 6 sts, 2 hdc in next, repeat from * around, join with a sl st to ch 2. 96 hdc
Round 10: Ch 2, *hdc in next 7 sts, 2 hdc in next, repeat from * around, join with a sl st to ch 2. 108 hdc
The diameter should be about 6”
Round 11: Ch 2, hdc in each around, join with a sl st to ch 2. 108 hdc
Do not fasten off, continue with the body as with other sizes.
For all Sizes
Section 2: Body
Round 1: Ch 3, [dc2tog, ch 1, dc2tog] in first st, *skip next 3 sts, ch 1, [dc2tog, ch 1, dc2tog] in next st, rep from * to last 3 sts, ch 1, skip last 3 sts, join with a sl st to ch 3. 12 (15, 18, 21, 24, 27) dc clusters.
Round 2: Ch 3, *[dc2tog, ch 1, dc2tog] in ch 1 sp, ch 1, skip next ch 1 sp, rep from * to end, ch 1, join with a sl st to ch 3. 12 (15, 18, 21, 24, 27) dc clusters.
Rounds 3 – 4 (5, 6, 8, 8, 8): Rep Round 2.
Round 5 (6, 7, 9, 9, 9): Ch 1, *sc in dc2tog, sc in next ch 1 sp, rep from * to end, join with a sl st to beginning chain. 48 (60, 72, 84, 96, 108) sc
Do not fasten off.
Section 3: Brim
chain 7(7, 9, 9, 11, 13) turn
Row 1: Sc in second ch from hook, and in each ch, 6 (6, 8, 8, 10, 12 sc), locate the next 2 sts on the body of the hat, sl st into these 2 sts, rotate your work.
Row 2: Working in BLO, skip the 2 sts with sl st, sc each st across, turn. 6 (6, 8, 8, 10, 12 sc)
Row 3: Ch 1, sc in BLO of each st across, locate the next 2 sts on the body of the hat, sl st into these 2 sts, rotate your work, skip the 2 sts with sl st.
Row 4 – End, repeat Row 2 and Row 3 alternatively.
Slip stitch into last st.
With both ends of the brim together, sl st through both sides.
Fasten off.
Sew in ends
Sew a pompom.
Part 2 of the easy beanie and cowl pattern
Grab the Cowl pattern on Ravelry
Cowl Pattern
Instruction
Chain 108 (120, 132, 144), join with a sl st to beginning chain.
Round 1: Ch 3, [dc2tog, ch 1, dc2tog] in first ch, *skip next 3 chs, ch 1, [dc2tog, ch 1, dc2tog] in next ch, rep from * to last 3 chs, skip last 3 sts, ch 1, join with a sl st to top of ch 3. 24 (27, 30, 33, 36) dc clusters.
Round 2: Ch 3, *[dc2tog, ch 1, dc2tog] in ch 1 sp, ch 1, skip next ch 1 sp, rep from * to end, ch 1, join with a sl st to ch 3. 24 (27, 30, 33, 36) dc clusters.
Rounds 3 – 12(16, 21, 24): Rep Round 2.
Or to the desired length.
Fasten off and sew in the ends.
Block to measurement.
I can’t wait to see your makes from this easy beanie and cowl pattern. Do tag me with yours !!! Share your makes with me on Instagram – @crochet_fosbas and in my Facebook group – @Crochet Patterns by Fosbas Designs

3 Comments
Comments are closed.