Crochet thong bookmark free pattern
If you’re looking for a fun and cheeky crochet project, this Crochet Thong Bookmark is the perfect pattern to try! It’s a quick make that combines functionality with a touch of humor, making it a fantastic gift idea for book lovers.
Whether you’re looking for a conversation starter or a unique handmade item to slip into your favorite novel, this pattern is sure to bring smiles. Designed with simple stitches, it’s beginner-friendly and works up in no time.

The Crochet Thong Bookmark is a playful yet practical crochet pattern designed to hold your place in books while adding a quirky twist. Made using simple stitches like chains, double crochets, and easy shaping, this bookmark works up quickly and uses very little yarn. Its thong-inspired shape makes it fun to gift, and it’s lightweight enough to slip into any book without damaging the pages.
Crochet Pattern
Thong Bookmark

Pro Tips for Making Your First Crochet Bookmark
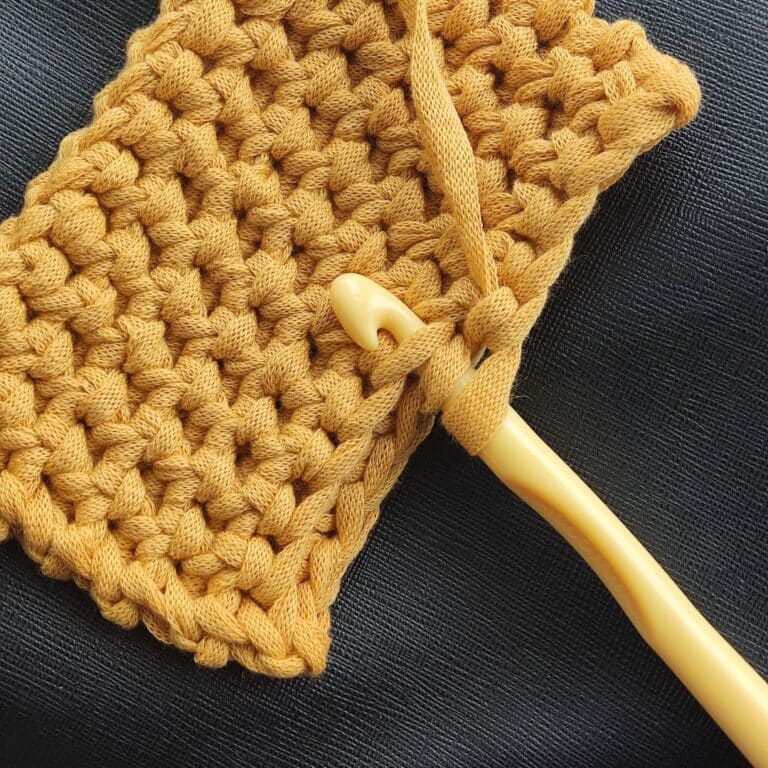
- Use cotton yarn for durability and a neat finish since it lays flat in books.
- Block your finished bookmark lightly to keep it shaped and flat.
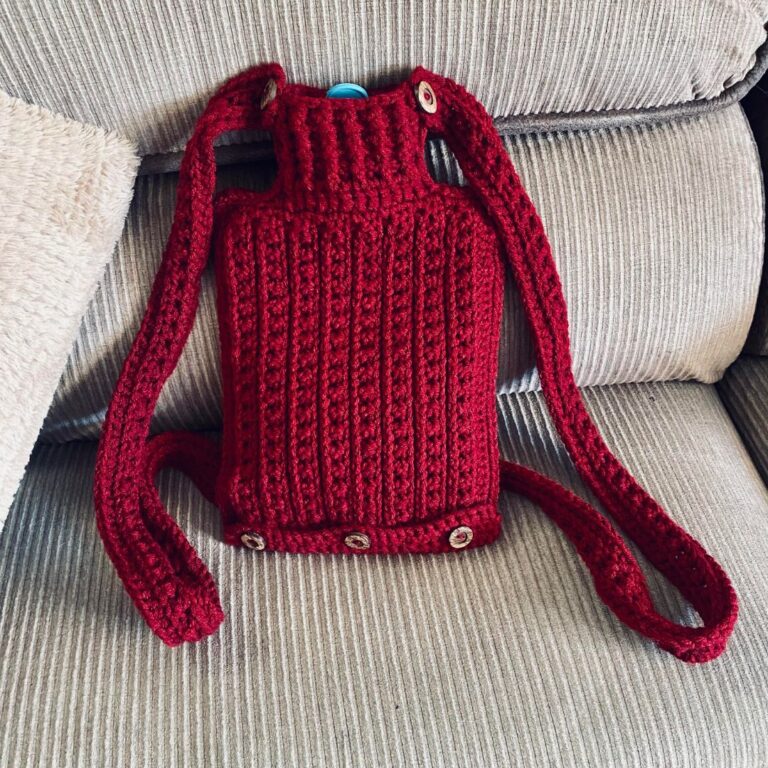
- Experiment with colors—classic red or playful pinks make it stand out, but neutrals can also look chic.
- Keep your stitches even and your tension light for a smooth shape.
- Add a little embellishment, like a small bow or charm, to personalize your bookmark.

Materials needed for a Crochet thong bookmark
Yarn: Any DK weight yarns in colors of your choice.
Prototype made using Lionbrand Mandala Craft Cake Yarn (Discontinued)
Hook size = 3.5 mm
Guage = is not crucial for this project.
Estimated Yardage: 20 Yards
Pattern Notes
- Please kindly read through the pattern before starting.
- You are welcome to substitute with any other DK weight yarn in colors of your choice.
- Chains at the beginning of the rows count as a stitch.
Difficulty Level – Intermediate
Terms – US Terminology
Finished Measurement
thong Triangle
Front panel = 4 by 3.5”
Back panel = 3 by 3.5”
Rope – Adjustable to fit your book

Adjustments
Length: Increase or decrease the chains when making the rope for a longer or shorter bookmark.
Stitches Abbreviations
Magic Ring – MR
Chain/chains – ch/chs
Single Crochet – sc
Double crochet – dc
2 double crochet cluster – 2 dc cl
3 double crochet cluster – 3 dc cl
3 Half double crochet cluster – 3 hdc cl
Special stitches
- 2 double crochet cluster – 2 dc cl
Step 1: Yarn over insert hook into same stitch
Step 2: Yarn over, bring up a loop (3 loops on hook)
Step 3: Yarn over pull through 2 loops (2 loops on hook)
Step 4: Yarn over, insert hook intothe same stitch
Step 5: Yarn over, bring up a loop (4 loops on hook)
Step 6: Yarn over, pull through 2 loops (3 loops on hook)
Step 7: Yarn ove,r pull through 3 loops (1 loop on hook)
- 3 double crochet cluster – 3 dc cl
Step 1: Yarn over, insert hook intothe same stitch
Step 2: Yarn over, bring up a loop (3 loops on hook)
Step 3: Yarn over, pull through 2 loops (2 loops on hook)
Step 4: Yarn over, insert hook into the same stitch
Step 5: Yarn over, bring up a loop (4 loops on hook)
Step 6: Yarn over, pull through 2 loops (3 loops on hook)
Step 7: Yarn over, insert hook into the same stitch
Step 8: Yarn over, bring up a loop (5 loops on hook)
Step 9: Yarn over, pull through 2 loops (4 loops on hook)
Step 10: Yarn over, pull through 4 loops (1 loop on hook)
- 3 Half double crochet cluster – 3 hdc cl
Step 1: Yarn over insert hook into same stitch
Step 2: Yarn over, bring up a loop (3 loops on hook)
Step 3: Yarn over insert hook into same stitch
Step 4: Yarn over, bring up a loop (5 loops on hook)
Step 5: Yarn over, insert hook intothe same stitch
Step 6: Yarn over, bring up a loop (7 loops on hook)
Step 7: Yarn over, pull through all 7 loops (1 loop on hook)


1 FREE DOWNLOAD PER MONTH
WITH JUST $3 PER MONTH!
- Pick your desired pattern each month.
- It can be a new or old pattern.

2 FREE DOWNLOADS PER MONTH
WITH JUST $5 PER MONTH!
- Pick your desired patterns each month.
- It can be a new or old pattern.
- You get 2 patterns per month.

3 FREE DOWNLOADS PER MONTH
WITH JUST $8 PER MONTH!
- Pick your desired patterns each month.
- You get 3 free patterns per month.
- It can be a new or old pattern.

Crochet Thong Bookmark Free Pattern Instructions
Section 1: Front panel
Round 1: In a MR, ch 3 (counts as first st- dc), 2 dc cl, ch 5, *3 hdc cl, ch 5, 3 dc cl, ch 5, rep from * 1 more time, 3 hdc cl, ch 5, join with a sl st to the top of beginning ch 3. 3 dc cl/ hdc cl
Close the MC tightly.
Round 2: Ch 3 (first corner) *[6 sc in ch 5 sp, ch 1, skip next st, 6 sc in ch 5 sp], ch 3, rep from * one more time, rep [ ] one more time, join with a sl st to the base of the beginning ch. 3 corners, 30 dc, 3 ch 1 sps
Round 3: Ch 5 (counts as dc + ch 3), dc in ch 3 sp, *[ch 1, dc in next st, skip next st, rep from * until the next ch 3 sp, ch 1], (dc, ch 3, dc) in ch 3 sp, rep from* one more time, rep [ ] one more time, join with a sl st to the 3rd ch from the beginning ch. 27 dc/ch sps
Round 4: Ch 5, dc in ch 3 sp, *[dc in next st, dc in ch 1 sp, rep from * until the next ch 3 sp], (dc, ch 3, dc) in ch 3 sp, rep from* one more time, rep [ ] one more time, join with a sl st to the 3rd ch from the
Rope
Do not fasten off
Step 1: Chain 20, leave about 4” of yarn and cut yarn.
Step 2: Join yarn with a sl st to the next ch 3 (corner), chain 28, leave about 4” of yarn, and cut yarn.
Step 3: Join yarn with a sl st to the last ch 3 (corner), chain 28, leave about 4” of yarn, and cut yarn.
Set aside
Section 2: Back panel
Round 1: In a MR, ch 3 (counts as first st- dc), 2 dc cl, ch 5, *3 hdc cl, ch 5, 3 dc cl, ch 5, rep from * 1 more time, 3 hdc cl, ch 5, join with a sl st to the top of beginning ch 3. 3 dc cl/ hdc cl
Close the MC tightly.
Round 2: Ch 3 (first corner) *[6 sc in ch 5 sp, ch 1, skip next st, 6 sc in ch 5 sp], ch 3, rep from * one more time, rep [ ] one more time, join with a sl st to the base of the beginning ch. 3 corners, 30 dc, 3 ch 1 sps
Round 3: Ch 5 (counts as dc + ch 3), dc in ch 3 sp, *[ch 1, dc in next st, skip next st, rep from * until the next ch 3 sp, ch 1], (dc, ch 3, dc) in ch 3 sp, rep from* one more time, rep [ ] one more time, join with a sl st to the 3rd ch from the beginning ch. 27 dc/ch sps
Round 4: Ch 3 (counts as sc + ch 1), sc in ch 3 sp, *[sc in next st, sc in ch 1 sp, rep from * until the next ch 3 sp], (sc, ch 3, sc) in ch 3 sp, rep from* one more time, rep [ ] one more time, join with a sl st to the2n d ch from the beginning ch 3 sp.
Fasten off.
Joining the two panels together
Step 1: Pick up the first chain from the first panel, using the yarn left from the chain, and slip stitch to the chain 3 space on panel 2.
- Secure lightly and do not fasten off.
- Repeat step 1 with the remaining 2 corners.
- Place the thong on the intended book.
Adjustments
- If the chains are too loose, reduce the number and then repeat step 1 above
- If too tight, add a few more chains to the corners, then repeat step 1 above.
When you are happy with the fit of the thong around your book, secure the chain spaces to the corners tightly and weave in all ends.
Fasten off.
Optional
Decorative Bow
Chain 30, cut off yarn
Twist to create a bow and sew on the front panel.
How to use the thong Bookmark
The wider panel (front panel is designed to be on the outside of the book.
With the lower end of the thong, across the shorter part of the book.
And the smaller (back panel) inside of the book.
FAQ’s About Crochet Bookmarks
Q: Do crochet bookmarks damage book pages?
A: Not at all! When made with lightweight yarn and flat stitches, crochet bookmarks fit snugly without harming your pages.
Q: Can I use other yarn weights?
A: Yes, but lighter yarns like fingering or sport weight work best to keep the bookmark slim and functional.
Q: How long does it take to make one?
A: Less than an hour for most crocheters—it’s a quick and satisfying project.
Q: Can beginners make this pattern?
A: Absolutely! If you know basic stitches like chains and double crochet, you can make this bookmark.
This Crochet Thong Bookmark is more than just a bookmark—it’s a fun and quirky handmade piece that’s guaranteed to spark joy. Perfect for gifting or keeping for yourself, it’s a quick project that will leave you smiling every time you open your book. Don’t forget to share your makes and tag me so I can see your unique versions!
About the Designer
Say Hi on Instagram and Subscribe To my email List for pattern discounts and freebies. For questions, send such to [email protected]. Read more about me here.