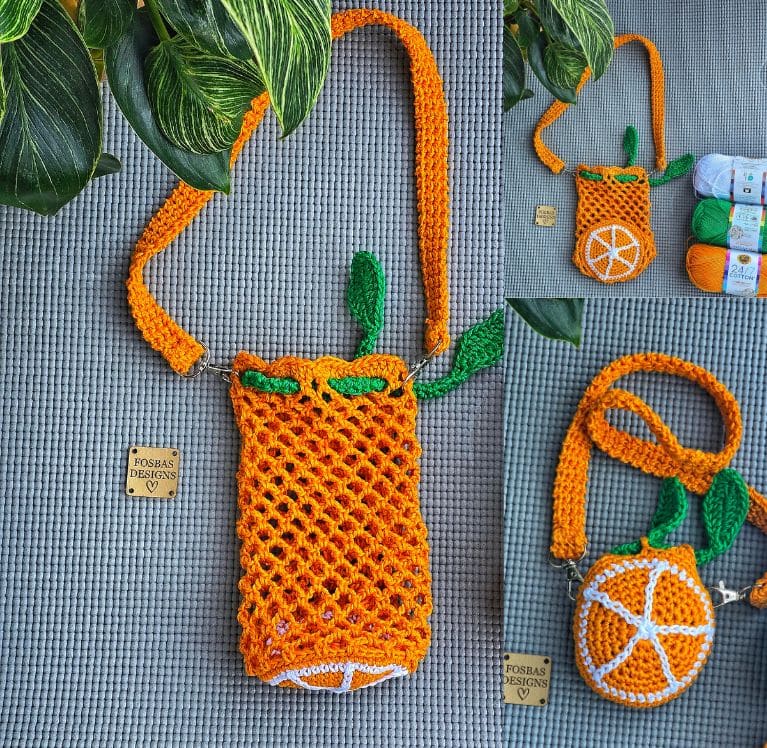
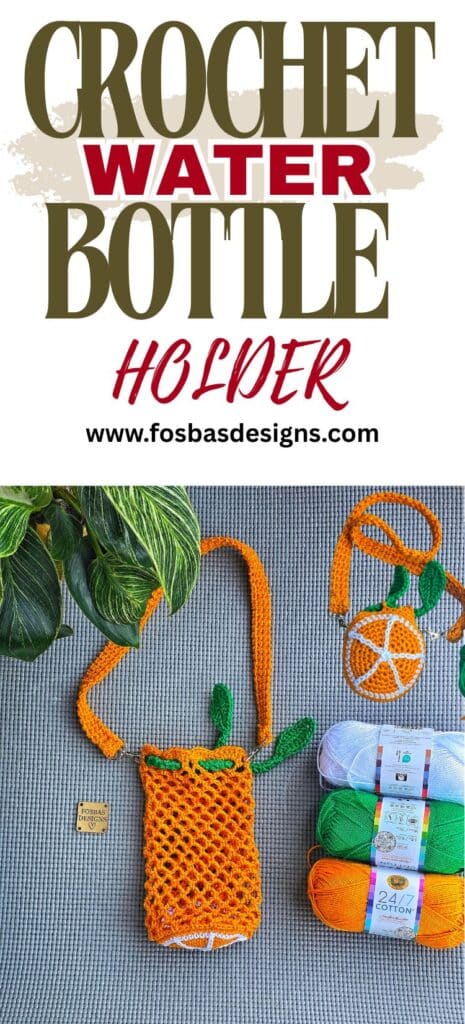
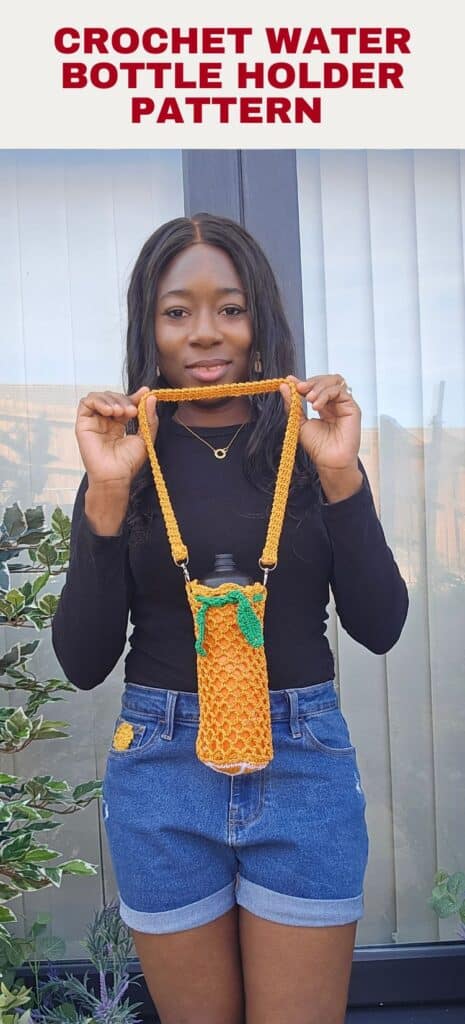
Orange Slice Crochet Water Bottle Holder Pattern
Looking for the perfect summer crochet accessory? This Crochet Water Bottle Holder Pattern adds a playful citrus twist to your everyday essentials. The bright orange slice detail instantly turns a simple crochet bottle sling into a conversation piece, the kind of bag that makes everyone ask, “Where did you get that?” Lightweight, practical, and fun to wear, this crochet crossbody bag pattern is perfect for walks, festivals, markets, beach days, and everyday summer adventures.
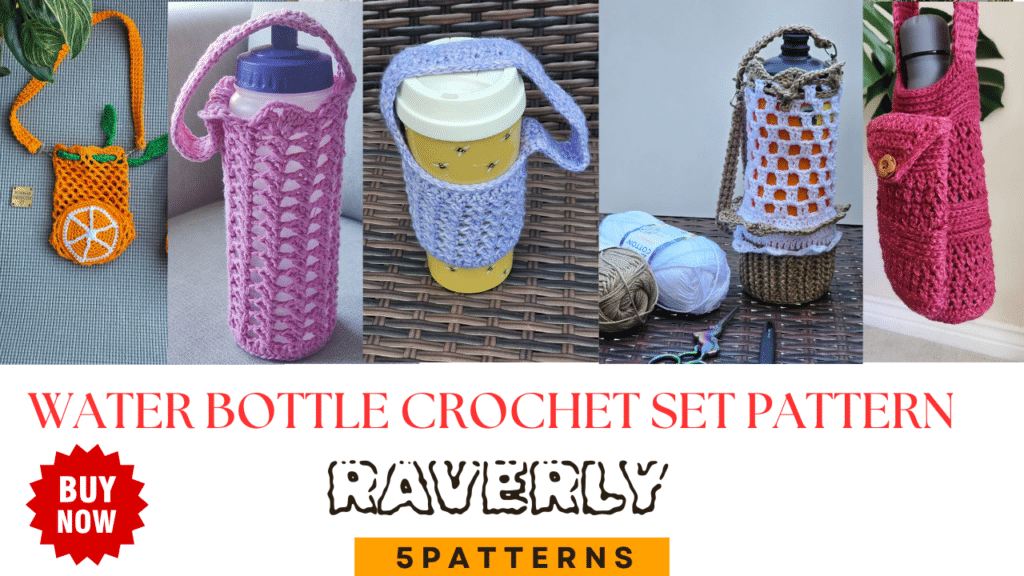
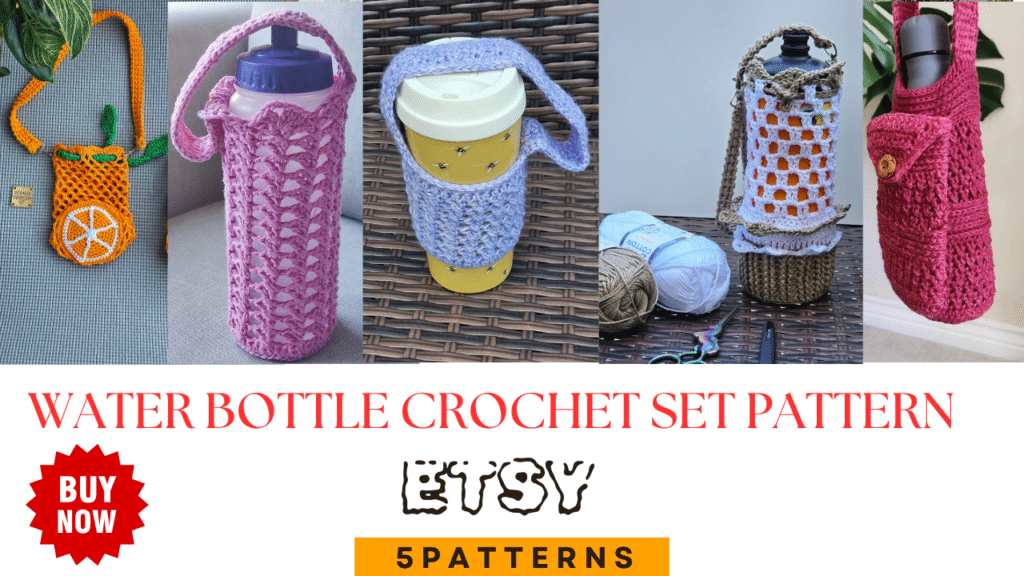
Get a printfriendly copy on either Etsy or Ravelry.
Use code “OrangeP” for 30% discount at checkout, valid until May 30th, 2026
Whether you are looking for a functional crochet water bottle holder or a cute handmade gift idea, this easy summer crochet pattern combines style and practicality in one beginner-friendly project.
Why You’ll Love This Crochet Bottle Sling
This orange crochet bag is designed to comfortably hold your water bottle while keeping your hands free. The airy mesh body keeps the project lightweight, while the sturdy strap makes it easy to carry throughout the day.
This crochet bottle holder pattern features:
- Adorable orange slice base
- Lightweight mesh body
- Comfortable crochet crossbody strap
- Removable handle option
- Easy customization for different bottle sizes
- Fun citrus-inspired summer look
It is the perfect project for warm weather markets, beach trips, walks, picnics, and festivals.
Materials
Yarn: Any DK weight yarn in three colors
Lion Brand 24/7 Cotton (#3, 100% cotton, 196 m per 3.5 oz/100g Ball)
Estimated Yardage
- Color A (Orange): 100 yards
- Color B (White): 30 yards
- Color C (Green): 20 yards
Hook and Other Materials
- 4 mm Crochet Hook
- Button — 1 piece
- Yarn needle
- Tape measure
- Metal hook for bag handle — 2 pieces (optional)
Gauge
Rounds 1– 4 = 4”
Use the instructions for Section 1.
Finished Measurements
One size, but easily adjustable. Instructions for adjusting the size are included in the pattern.
- Bag Base: 3” x 3”
- Bag Height: 10”
- Handle Length: 24”
Skill Level
Advanced Beginner
Crochet Terms (US Terminology)
Stitches Used
- Chain(s) – ch(s)
- Stitch(es) – st(s)
- Single Crochet – sc
- Half Double Crochet – hdc
- Double Crochet – dc
- Repeat – Rep
- sc 3rd loop
- Slip Stitch – sl st
Pattern Notes
- Please kindly read through the pattern before starting.
- Any #3 weight yarn can be substituted.
- The project is worked in sections for easier construction and customization.
Construction Notes
This crochet water bottle holder pattern is made in 4 sections.
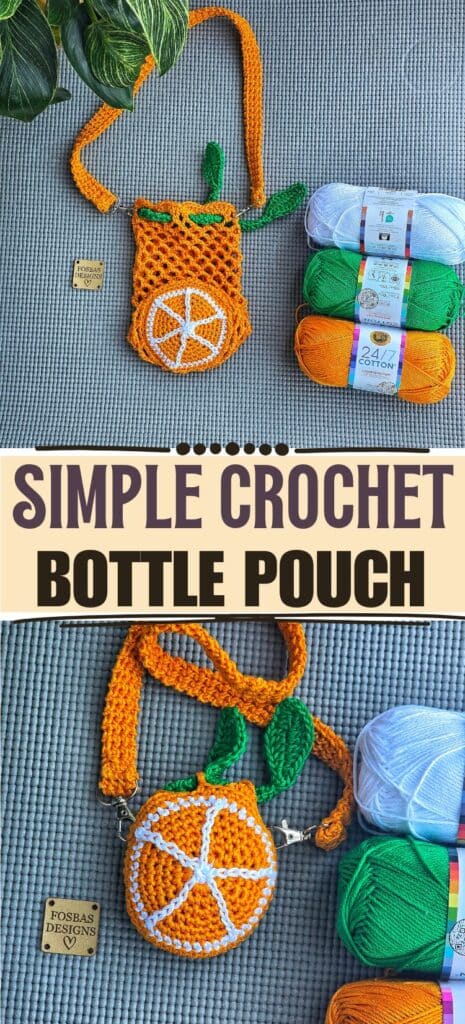
Section 1 — Orange Slice Pouch
The orange slice pouch is worked in rounds using two separate panels. The panels are then joined together to create the pouch base.
Section 2 — Mesh Body
The body of the crochet bottle sling is worked in rounds until your preferred height is reached.
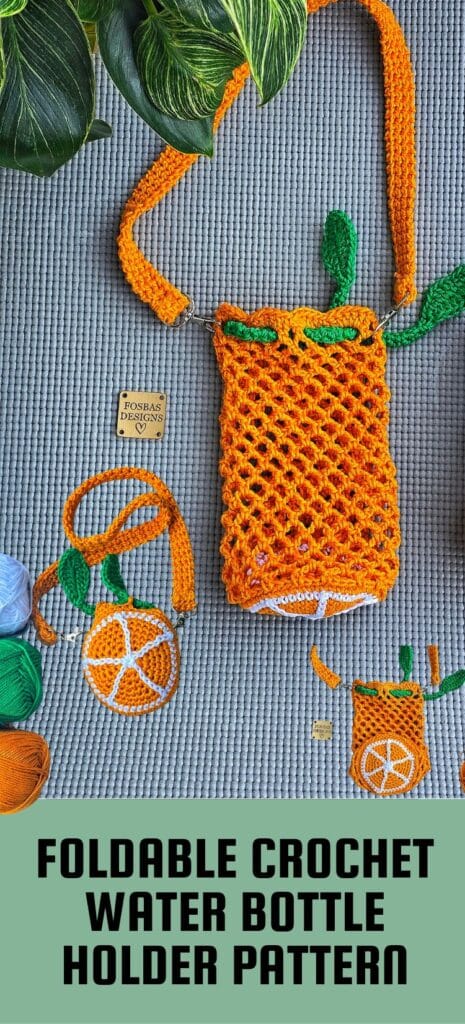
Section 3 — Bag Rope and Leaves
The bag rope is worked in rows and includes two decorative crochet leaves that secure the upper portion of the rope.
Section 4 — Handle
The handle is worked in rows using thermal stitch for extra durability. You can either sew the handle directly onto the bag or attach it using metal clasps for easy removal.
Free Crochet Water Bottle Holder Pattern
The full written crochet water bottle holder pattern is available below on the blog. Follow along section by section to create your own orange inspired crochet bottle sling.
This pattern is designed to be simple, practical, and easy to customize for different bottle sizes.
Love Bottle Holders? Grab the Full Bundle
Crochet Bottle Holder Bundle
Love bottle holders? Get all 5 patterns, including this one:
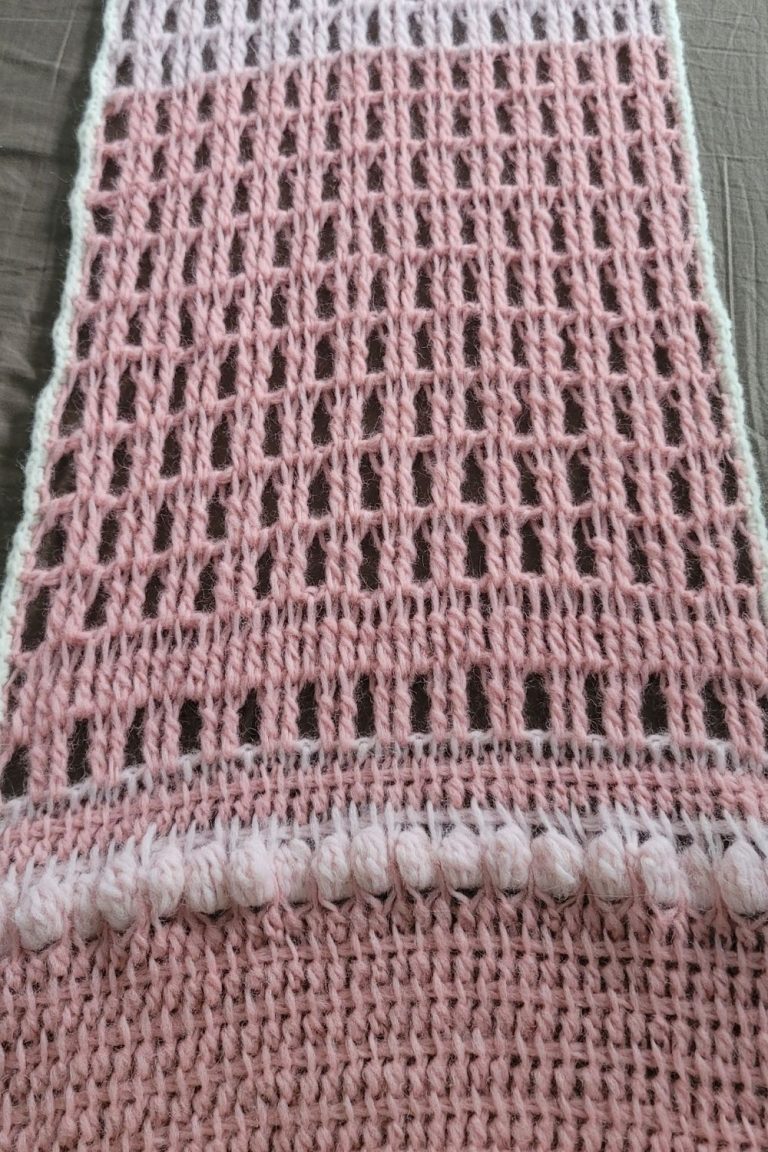
- Pink Mesh Tote – A 1-hour crochet water bottle holder pattern
- Berry Button Flap – Simple bottle holder with phone pouch
- Cupcake Foldable Water Bottle Holder
- Orange Slice bottle holder
- Coffee cup holder
Available now on Ravelry and Etsy.
This bundle is perfect if you love practical crochet accessories and want multiple crochet crossbody bag patterns for every season.
Printable PDF Pattern
Prefer a clean printable version?
The premium PDF includes:
- Printer-friendly layout
- Detailed photos
- Easy-to-follow formatting
- Step-by-step guidance
- Crochet charts
The PDF version is available on both Ravelry and Etsy.
Grab the introductory discounted price while available.

Perfect Summer Crochet Project
If you are searching for a summer crochet pattern that is both functional and eye-catching, this crochet water bottle holder pattern is the perfect project to make next. The playful orange slice detail gives this crochet crossbody bag pattern a fresh summer feel while still being practical enough for everyday use.
From festivals to beach days, this crochet bottle sling is a stylish way to carry your water bottle hands-free all summer long.


Crochet water bottle holder pattern
Need step-wise photos for the pattern? Get a printfriendly copy on either Etsy or Ravelry.
Section 1: Pouch
Bag base: Make 2
With white
Round 1: In a magic ring, ch 1 (do not count as a st), 6 sc in the magic ring, join with a sl st to the beginning chain. 6 sc.
Fasten off white, join orange color
Round 2: 2 sc in each st around. 12 sc
Round 3: *sc in next, 2 sc in next, repeat from * around. 18 sc
Round 4: *sc in next 2 sts, 2 sc in next, repeat from * around. 24 sc
Round 5: *sc in the next 3 sts, 2 sc in the next, and repeat from * around. 30 sc
Round 6: *sc in the next 4 sts, 2 sc in the next, and repeat from * around. 36 sc
Round 7: *sc in the next 5 sts, 2 sc in the next, and repeat from * around. 42 sc
Drop orange, pick up white
Round 8: *sc in the next 6 sts, 2 sc in the next, and repeat from * around. 48 sc
Place a stitch marker every 8th st
Creating the orange slice effect:
Continue with white, and through the first stitch marker towards the MR, surface crochet/sl st across until the MR, turn towards the next stitch marker, repeat the process of sl st/surface crocheting.
Cut yarn
Repeat until you have created a white track of surface crocheting across the piece.
Once completed, make a sl st through the bases of the sl sts close to the MR, secure tightly, and pass the excess yarn to the wrong side; this closes the gap.
Drop white, pick up orange
Round 9: Ch 1, sc in each st around, join with a sl st to the beginning chain. 48 sc
Fasten off.
Make the second, but do not fasten off.
Sew the two panels together.
- Place the wrong side of the first panel over the right side of the second panel.
- Crocheting over both panels
Round 1: Ch 1, sc in both sts around the panels, leave the last 18 sts unjoined.
- Drop the front panel and continue crocheting around the back panel.
- Sc in next 9 sts, chain 30, sc in last 9 sts, join with a sl st to the beginning chain.
Do not fasten off.
Button
Sew a button to the other side of the pouch. I sew mine to the start of the bag (MR).
Section 2 – Bottle holder body
- Crocheting around the base (front panel) – this is the part without the buttonhole.
Round 1: *Ch 4, skip next 2 sts, sc in next st, rep from * around, join with a sl st to the beginning chain. 16 sc/ch 4 sps
Round 2: Ch 1, sl st in the ch 4 sp, *ch 4, sc in next ch sp, rep from * around, do not join. Place a stitch marker in the last ch 4 sp and move after each round. 15 sc/ch 4 sps
Round 3: *Ch 4, sc in each ch 4 sp around, move stitch marker. 16 sc/ch 4 sps
Rounds 4 – 22: Rep round 3 or until your desired height.
Round 23: Ch 1, *5 dc in next ch 4 sp, sc in next ch 4 sp, rep from around, join with a sl st the beginning ch
Remove stitch marker.
Fasten off
Section 3: Leaf
Using green, Chain 9
Round 1: Sc into 2nd ch from hook, hdc in next ch, dc in next ch, 2 dc in next ch, dc in next ch, hdc in next 2 chs, 5 sc in last ch, continue on the opposite side of the chains, hdc in next 2 chs, dc in next ch, 2 dc in next ch, dc in next st, hdc in next ch, 4 sc in last ch. 24 sts
Stalk – rope
Turn,
Row 1: Sc in next 2 sts,
Rows 2 – 34: Ch 1, sc in each of the 2 sts, turn 2 sc
Do not fasten off
Second leaf – chain 9, sc into 2nd ch from hook, hdc in next ch, dc in next ch, 2 dc in next ch, dc in next ch, hdc in next 2 chs, 5 sc in last ch, continue on the opposite side of the chains, hdc in next 2 chs, dc in next ch, 2 dc in next ch, dc in next st, hdc in next ch, 4 sc in last ch. 24 sts
Leave a long tail of yarn and then cut the yarn.
Thread the remaining yarn and pass it through the stem of the second leaf until you get to the beginning of the stalk.
hreading the leaf through the pouch
Locate round 22 on the pouch, pass the rope using the ch spaces until you have thread the rope through the whole round. The leaf secures it and prevents it from pulling out.
You can tie the rope to keep the bottle secure.
The leaf serves as decoration when you fold the pouch later.
Handle: uses Thermal stitch, see the tutorial here.
With orange yarnRow 1: Ch 4, using the back loop only, sc in 2nd ch from hook, sc in each chain across, turn. 3 sc
Row 2: Working into the front loop only of this row and the loop left from the foundation chain, sc in each st across, turning. 3 sc
Row 3: Using only the front loop of the current row and the unworked loop from the row below, sc across, and turn. 3 sc
Rows 4 until the end: Repeat Row 3.
Repeat the last row until you have your desired length. Last row: Ch 1, going through BOTH loops of the current row AND the open loop from the previous row (for three loops total), sc across.
Leave a long tail of yarn and sew the end to one side of the purse.
Sew the other end of the strap to the corresponding side of the purse.
Option two: Using the metal clasps
Step 1: Pass the handle through the lower end of a clasp about 1/2 “Step 2: Fold the lower end and secure it over the claps to the other corresponding part of the handle. Use a sewing needle and whip stitch. Cut the yarn and secure the ends
Repeat on the other end.
The clasps make it easier to remove and attach the handle.
You can secure the handle to the bag or to the bottle pouch.
How to fold
Step 1: Remove the straps and set them aside.
Step 2: Turn the bag to the wrong side; this exposes the handle you made in section 1.
Step 3: Locate the opening from the base (this is the part that was left unjoined while making the body of the bag.
Step 4: Lift the opening and place your hand inside the bag, and scoop the body of the bag inside the base. (This is like turning the base inside out, but with the body of the bag inside the base).
Step 5: Fluff (shape) the pouch properly.
Step 6: Button up the pouch.
Step 6: Attach the strap to either side of the pouch.
Place the wrong side of the first panel over the right side of the second panel.
1 FREE DOWNLOAD PER MONTH
WITH JUST $3 PER MONTH!
- Pick your desired pattern each month.
- It can be a new or old pattern.

2 FREE DOWNLOADS PER MONTH
WITH JUST $5 PER MONTH!
- Pick your desired patterns each month.
- It can be a new or old pattern.
- You get 2 patterns per month.

3 FREE DOWNLOADS PER MONTH
WITH JUST $8 PER MONTH!
- Pick your desired patterns each month.
- You get 3 free patterns per month.
- It can be a new or old pattern.

Join my crochet channel for daily updates at your finger tips
About the Designer
Say Hi on Instagram and Subscribe To my email List for pattern discounts and freebies. For questions, send such to [email protected]. Read more about me here.