
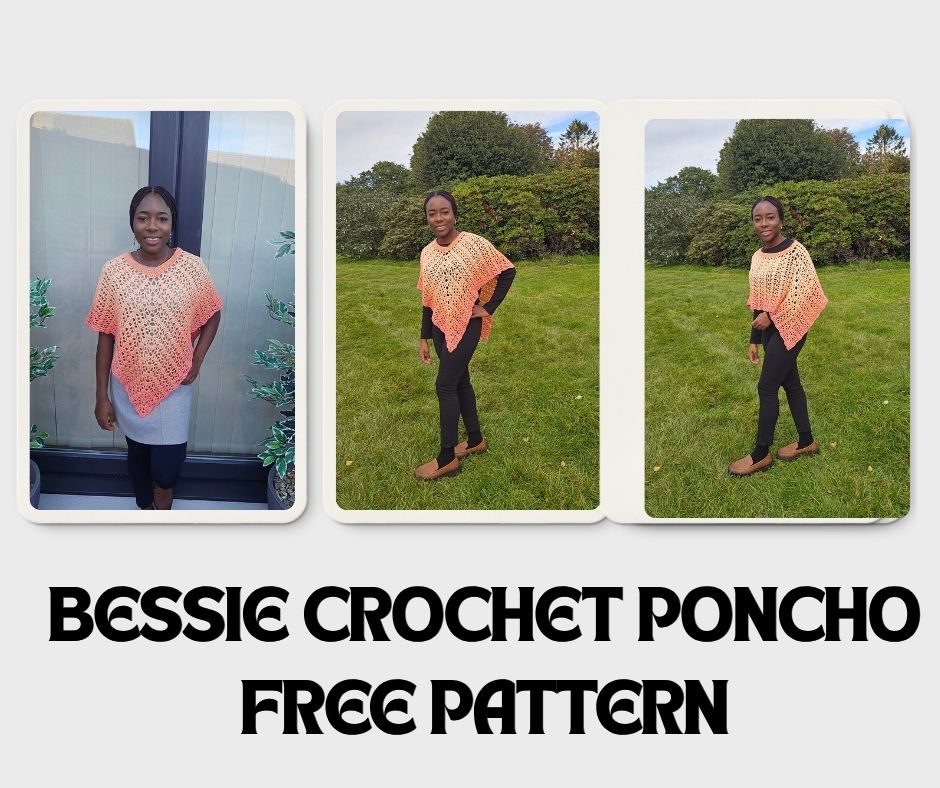
Bessie Lace Crochet Poncho Free Pattern
You know those days when your outfit feels a little too plain, but you don’t really want to change what you’re wearing? Sometimes, all you need is one beautiful crochet piece to bring everything together! Meet the Bessie lace Crochet Poncho Free Pattern, my newest crochet pattern and one that I have been looking forward to sharing with you.
I love crochet garments that are easy to wear, comfortable, and beautiful without requiring too much effort to style. And this poncho ticks all those boxes.
Get this pattern
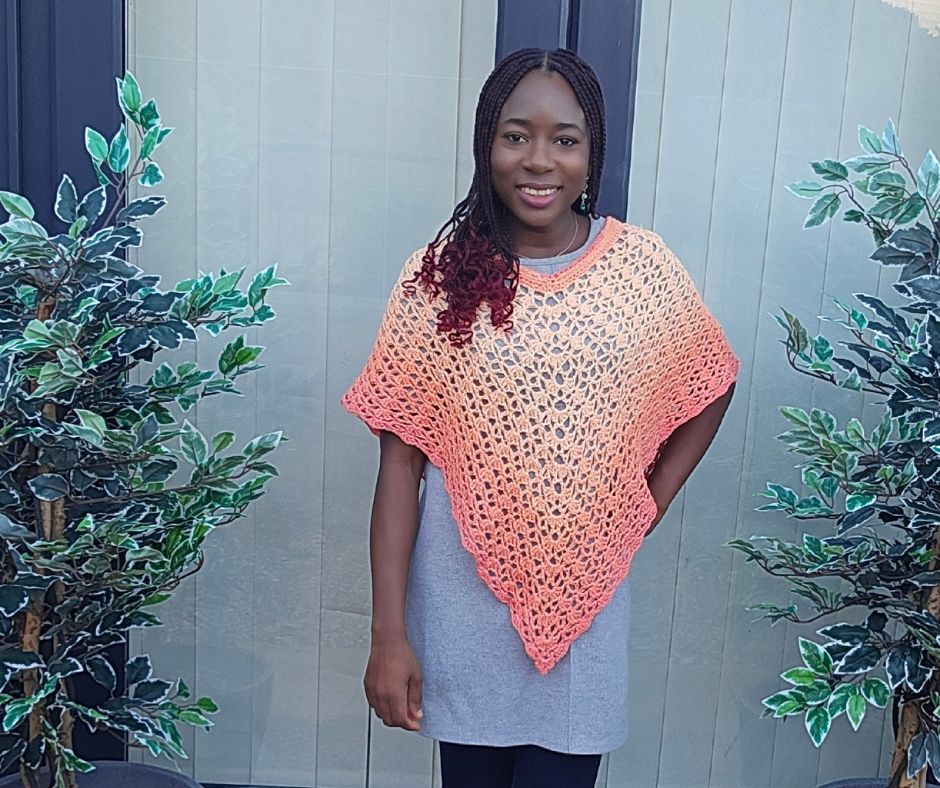
With its gorgeous lace stitches, relaxed silhouette, and pointed front and back, the Bessie Poncho is a lovely way to add texture and colour to an everyday outfit.
And the best part? You don’t have to worry about making separate pieces and sewing everything together!
This poncho is worked in rounds, starting from the neckline and gradually growing into that beautiful pointed shape.
So, grab your favourite yarn, and let’s talk about this new design!
Meet the Bessie Crochet Poncho
If you’ve been following my crochet designs for a while, you’ll know how much I love creating wearable pieces that can be styled in different ways.
More Like This




The Bessie Crochet Poncho is another addition to that collection.
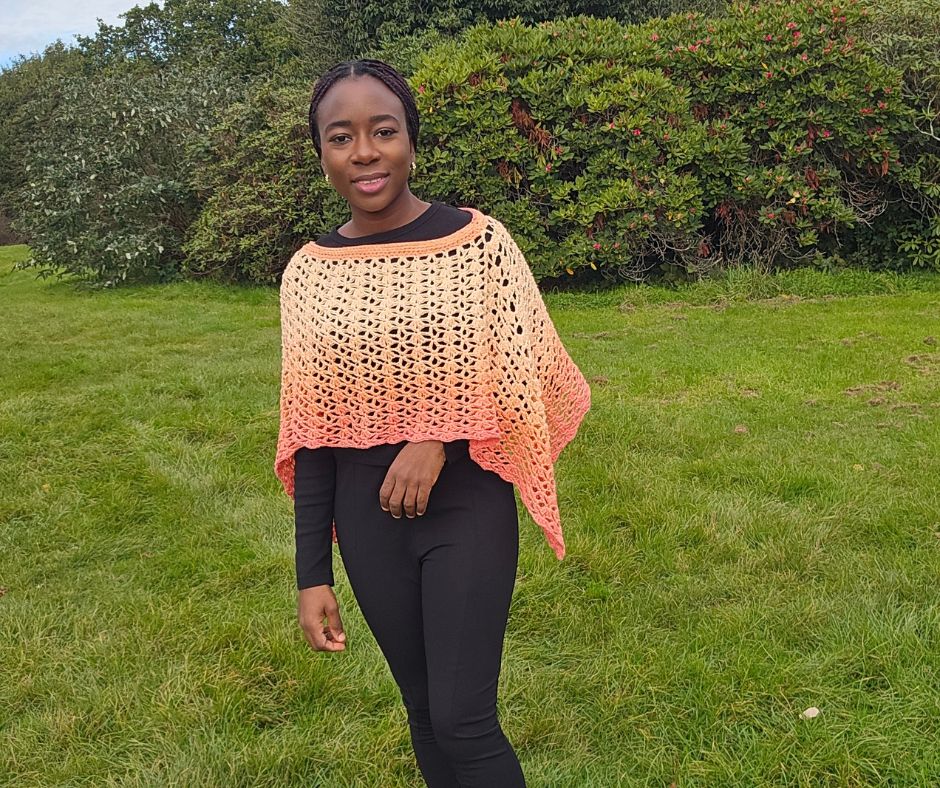
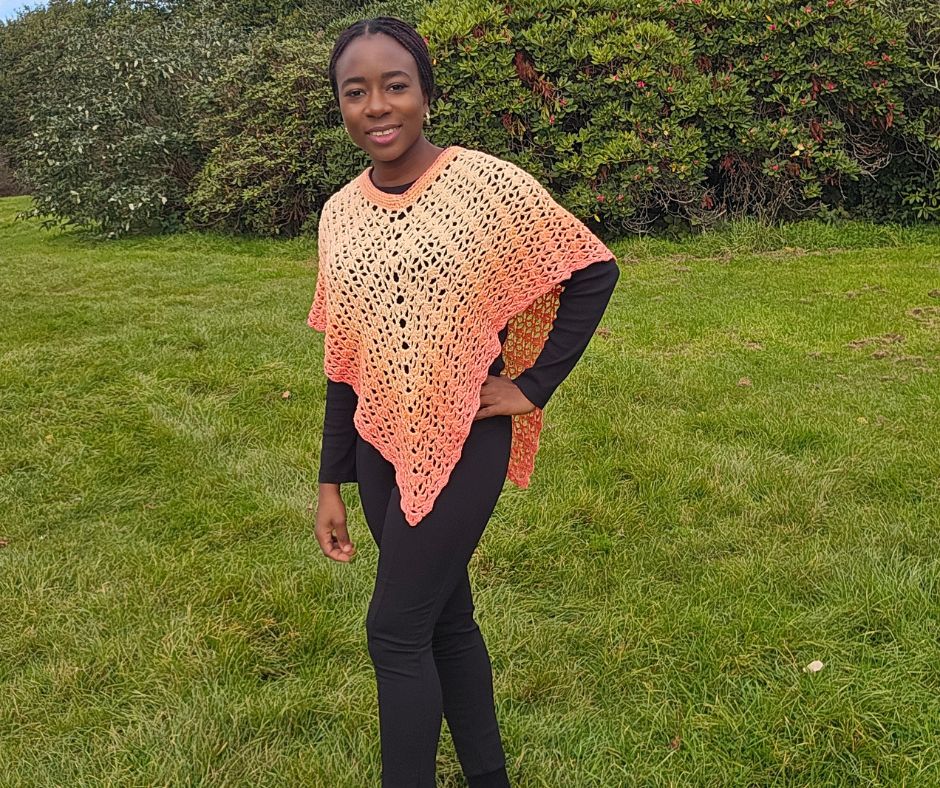
For my sample, I used two strands of sport weight Hobbii Twister yarn held together to achieve a DK weight equivalent.
I absolutely love how the colours turned out!
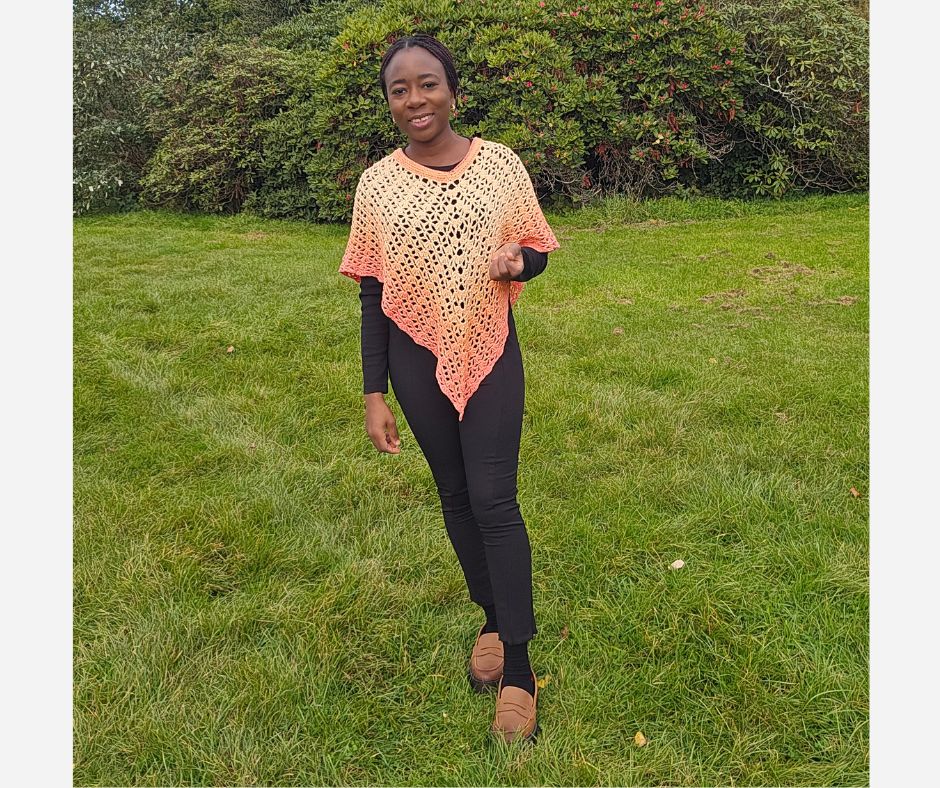
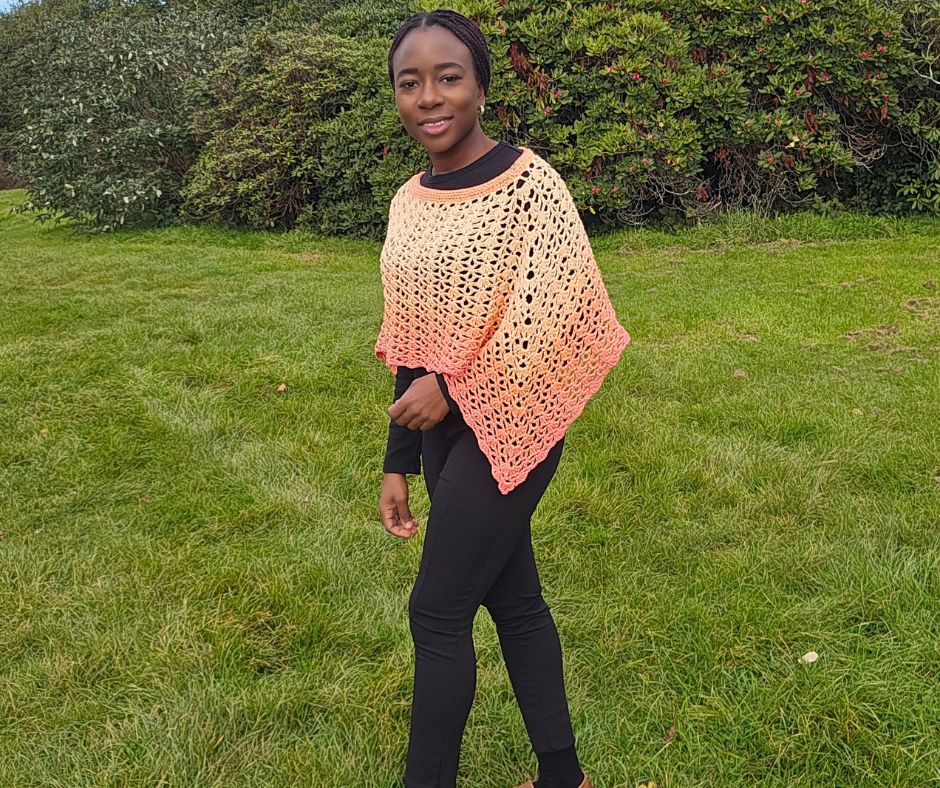
The soft peach at the top gradually transitions into a deeper coral shade towards the bottom. Combined with the open lace stitches, it creates such a beautiful effect.
I styled mine with a fitted black top, black trousers, and loafers. It is a simple outfit, but the poncho brings everything together.
I can already imagine this design looking just as lovely in blue gradients, earthy autumn shades, or even a single solid colour.
Why You’ll Love This Crochet Poncho Pattern
1. Beautiful lace stitches
The stitch pattern combines V stitches and shell stitches to create an open, decorative design.
2. No complicated assembly
The poncho is worked in rounds from the neckline down, so there’s no need to make separate front and back panels.
3. Four size groups
The pattern includes XS to S, M to L, XL to 2XL, and 3XL to 5XL.
4. Easy to customise the length
All sizes begin with the same foundation chain. You simply continue the stitch repeats until you reach your preferred length.
5. A lovely layering piece
Wear it over a fitted top, a dress, or a long sleeve shirt. The lightweight lace fabric adds interest without overwhelming your outfit.
What Yarn Is Best for the Bessie Crochet Poncho?
For this design, you can use any DK weight yarn in your preferred colours.
My sample was made using two strands of sport weight Hobbii Twister yarn held together.
Using two strands helped me achieve the equivalent of a DK weight yarn while enjoying the beautiful colour transitions that Hobbii Twister offers.
One thing I particularly love about gradient yarn is that the colours do much of the work for you.
You can concentrate on your stitches while the yarn gradually introduces new shades.
Of course, you don’t have to use gradient yarn.
A solid coloured DK yarn would also look beautiful, especially if you want the lace stitch pattern to stand out.
Whatever yarn you choose, remember to check your gauge. This will help you achieve the intended size and drape.
How Much Yarn Do You Need?
The estimated yardage depends on your chosen size.
| Size | Estimated Yardage |
|---|---|
| XS to S | 700 yards |
| M to L | 800 yards |
| XL to 2XL | 900 yards |
| 3XL to 5XL | 1,000 yards |
These are estimated total yardages for the DK weight equivalent used in the pattern.
If you’re using two strands held together, remember to account for the total length of yarn consumed by both strands.
How Is the Bessie Crochet Poncho Constructed?
One thing I love about this pattern is that the construction is quite straightforward once you get into the stitch repeats.
The poncho begins with a foundation chain of 144 stitches, which is joined to form a round.
From there, you work the beautiful lace design while shaping the front and back points.
The design alternates between V stitch and shell stitch rounds, creating its distinctive open texture.
Once you have reached your desired length, you’ll add the edging before finishing the neckline.
The ribbed neckline helps close up the depth of the opening and gives the poncho a lovely, neat finish.
Bessie Crochet Poncho Free Pattern
Ready to make your own Bessie Crochet Poncho?
Below you’ll find the materials, measurements, stitch abbreviations, and complete written instructions.
Materials
Yarn: Any DK weight yarn in colours of your choice.
The prototype was made using two strands of sport weight Hobbii Twister held together to achieve a DK equivalent.
Estimated Total Yardage:
700 (800, 900, 1000) yards
Crochet Hook: 5.5 mm
Other materials:
- Yarn needle
- Scissors
- Stitch markers
- Measuring tape
Gauge
20 stitches over 10 rows = 4 × 4 inches, using the stitch pattern before blocking.
Gauge pattern: Chain 20 and follow the pattern for 10 rows.
Difficulty Level
Intermediate
Crochet Terminology
US Crochet Terms
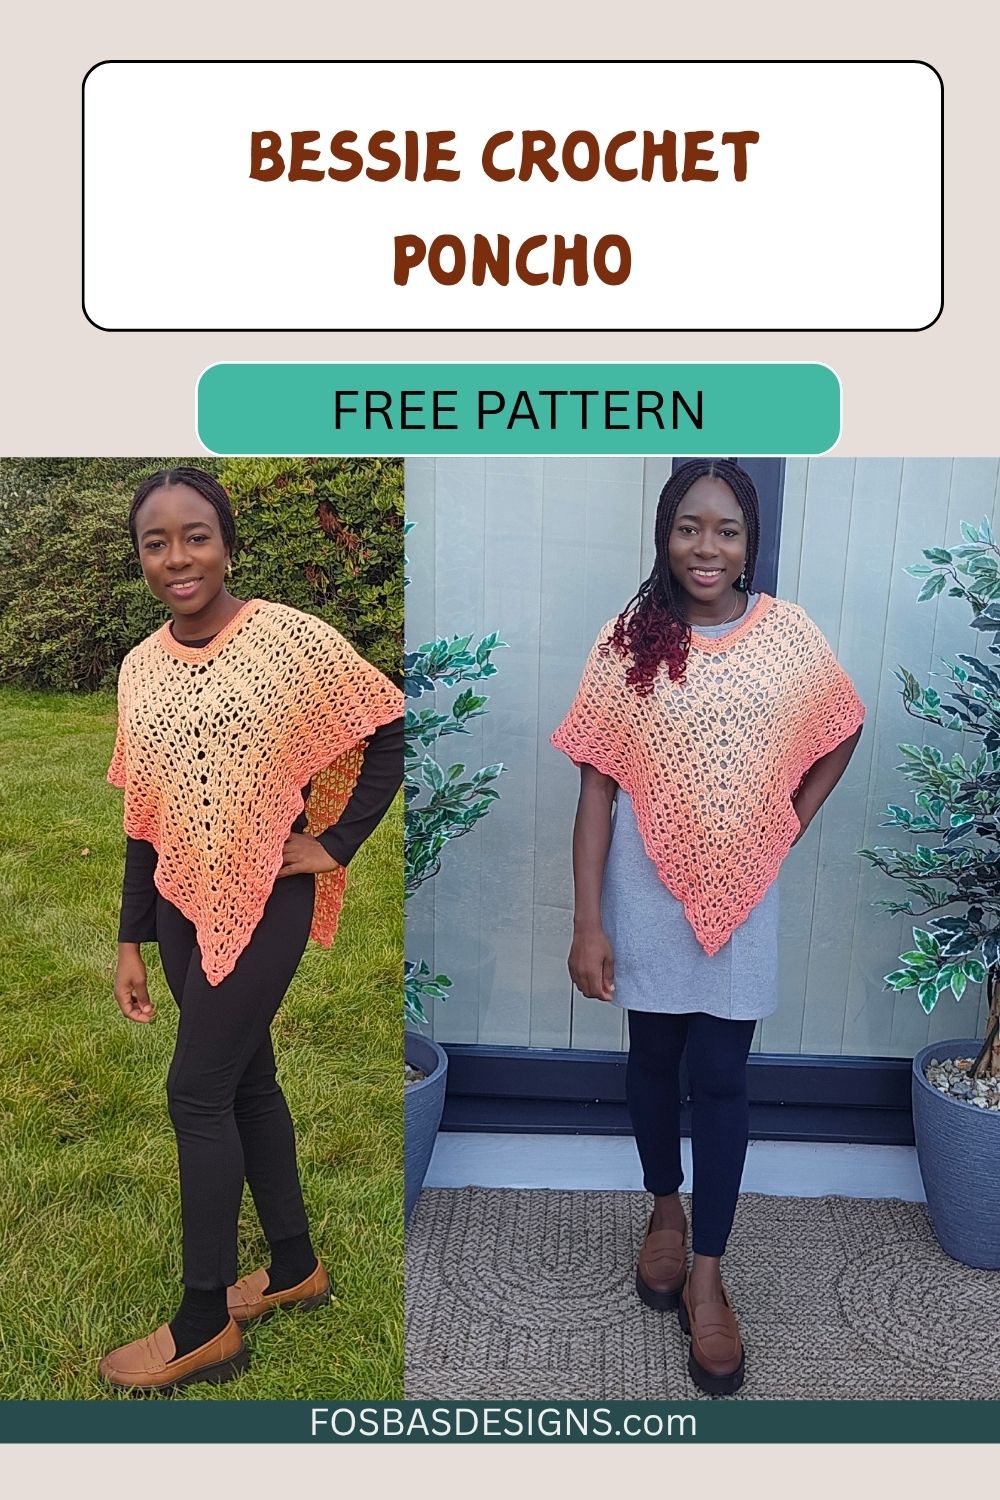
Bessie Lace Poncho free crochet pattern Finished Measurements
| Size | Bust Measurement | Length of Poncho |
|---|---|---|
| XS to S | 30 to 34 inches | 18 inches |
| M to L | 38 to 42 inches | 20 inches |
| XL to 2XL | 46 to 50 inches | 22 inches |
| 3XL to 5XL | 54 to 60 inches | 24 inches |
The modelled poncho is shown in the medium size.
Stitch Abbreviations
- ch/chs: Chain/chains
- ch sp: Chain space
- st(s): Stitch(es)
- sl st: Slip stitch
- sc: Single crochet
- hdc: Half double crochet
- dc: Double crochet
- hdc in 3rd loop: Half double crochet in the third loop
Special Stitches
V Stitch: (dc, ch 3, dc)
Shell: (2 dc, ch 1, 2 dc)
Pattern Notes
- Please read through the entire pattern before starting.
- Stitch counts are written after each row or round.
- The smallest size group is written first, followed by the other sizes in parentheses.
- Sizes are written in this order: XS to S (M to L, XL to 2XL, 3XL to 5XL).
- The poncho is made in rounds throughout.
- Start at the neckline and work down until you reach the required length.
- All sizes begin with the same foundation chain. Stop the repeats when your poncho reaches your desired size.
- Finish by working the edging and neckline.
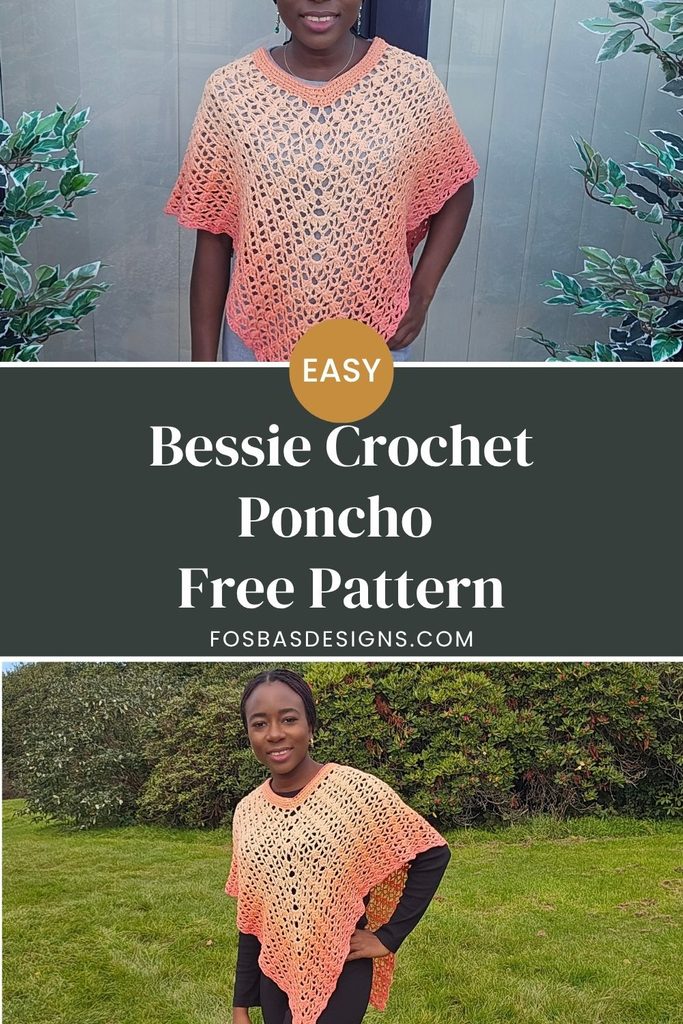
Bessie Lace Poncho free crochet pattern
Section 1: Main Panel
Foundation: Chain 144.
Join with a slip stitch to the beginning chain, ensuring that the chain is not twisted.
Round 1:
Ch 5 (counts as dc + ch 3), *skip next 3 chs, sc in next ch, ch 2, skip next 3 chs, (dc, ch 3, dc) in next ch, ch 2, rep from * 7 more times, skip next 3 chs, sc in next ch, ch 2, skip next 3 chs, (dc, ch 5, dc) in next ch.
Centre made. Place a stitch marker in the ch 5 sp and move it after every round.
Ch 2, rep from * until the last 8 chs, skip next 3 chs, sc in next ch, ch 2, skip next 3 chs, (dc, ch 5) in last ch.
Join with a sl st to the 3rd ch from the beginning ch 5 sp.
Stitch count: 2 ch 5 sps, 16 V sts, 18 sc.
Round 2:
Ch 1 (does not count as a st, here and throughout), sc in same st, ch 2, (2 dc, ch 1, 2 dc) in next st, ch 2, skip next (ch sp and st), sc in ch 3 sp.
*Ch 2, skip ch sp, (2 dc, ch 1, 2 dc) in next st, ch 2, skip next (ch sp and st), sc in ch 3 sp.
Rep from * until the st marker.
[Ch 2, skip next (ch sp and st), (2 dc, ch 1, 2 dc) in next st, ch 2, at the centre work into ch 5 sp, (sc, ch 2, 2 dc, ch 3, move st marker, 2 dc, ch 2, sc)].
Rep from * until the last ch 5 sp, rep [ ], ch 2, join with a sl st to the beginning ch 1.
Stitch count: 18 shells, 22 sc, 8 dc.
Round 3:
Ch 5 (counts as dc + ch 2, here and throughout), dc in same st {first V st made}.
*Ch 2, sc in next ch 1 sp, ch 2, skip next (2 sts and ch 2 sp), (dc, ch 3, dc) in next st.
Rep from * until the centre.
(ch 2, dc, ch 5, dc, ch 2) in next ch 3 sp.
**Ch 2, skip next (2 sts and ch 2 sp), (dc, ch 3, dc) in next st.
Rep from * to ** one more time.
Join with a sl st to the 3rd ch from the beginning ch 5 sp.
Stitch count: 2 ch 5 sps, 20 V sts, 18 sc.
Round 4:
Ch 1, *sc in ch 3 sp, ch 2, skip ch sp, (2 dc, ch 1, 2 dc) in next st, ch 2, skip next (ch sp and st).
Rep from * until the st marker.
Ch 2, (2 dc, ch 1, 2 dc, ch 3, 2 dc, ch 1, 2 dc), ch 2.
**Skip next (ch sp and st), rep from * to **.
Join with a sl st to the beginning ch 1.
Stitch count: 20 shells, 20 sc, 8 dc.
Round 5:
Ch 5, dc in same st.
*Ch 2, sc in next ch 1 sp, ch 2, skip next (2 sts and ch 2 sp), (dc, ch 3, dc) in next st.
Rep from * until the centre.
Ch 2, sc in next ch 1 sp, (ch 2, dc, ch 5, dc) in next ch 3 sp.
**Rep from * to ** until the end.
Ch 2, sc in ch 1 sp, ch 2, join with a sl st to the 3rd ch from the beginning ch 5 sp.
Stitch count: 2 ch 5 sps, 20 V sts, 22 sc.
Round 6:
Ch 1, sc in ch 2 sp.
*Ch 2, skip ch sp, (2 dc, ch 1, 2 dc) in next st, ch 2, skip next (ch sp and st), sc in ch 3 sp.
Rep from * until the st marker.
[Ch 2, skip next (ch sp and st), (2 dc, ch 1, 2 dc) in next st, ch 2, at the centre work into ch 5 sp, (sc, ch 2, 2 dc, ch 3, 2 dc, ch 2, sc)].
**Rep from * to **.
Ch 2, (2 dc, ch 1, 2 dc) in next st, ch 2, join with a sl st to the beginning ch 1.
Stitch count: 22 shells, 24 sc, 8 dc.
Round 7:
Ch 5, dc in next st.
*Ch 2, sc in next ch 1 sp, ch 2, skip next (2 sts and ch 2 sp), (dc, ch 3, dc) in next st.
Rep from * until the centre.
(ch 2, dc, ch 5, dc) in next ch 3 sp, ch 2, skip next (2 sts and ch 2 sp), (dc, ch 3, dc) in next st**.
Rep from * to ** until the last ch 1 sp.
Ch 2, sc in last ch 1 sp, ch 2.
Join with a sl st to the 3rd ch from the beginning ch 5 sp.
Stitch count: 24 V sts, 22 sc, 2 corners.
Round 8:
Ch 1, sc in ch 2 sp.
*Ch 2, skip ch sp, (2 dc, ch 1, 2 dc) in next st, ch 2, skip next (ch sp and st), sc in ch 3 sp.
Rep from * until the st marker.
Ch 2, (2 dc, ch 1, 2 dc, ch 3, 2 dc, ch 1, 2 dc), ch 2, skip next (ch sp and st), sc in ch 3 sp.
**Rep from * to ** once more.
Rep from * until the end.
Ch 2, skip ch sp, (2 dc, ch 1, 2 dc) in next st, ch 2.
Join with a sl st to the beginning ch 1.
Stitch count: 26 shells, 24 sc.
Round 9:
Ch 5, dc in next st.
*Ch 2, sc in next ch 1 sp, ch 2, skip next (2 sts and ch 2 sp), (dc, ch 3, dc) in next st.
Rep from * until the centre.
Ch 2, sc in next ch 1 sp, (ch 2, dc, ch 5, dc) in next ch 3 sp.
**Rep from * to ** until the last shell.
Ch 2, sc in next ch 1 sp, ch 2.
Join with a sl st to the 3rd ch from the beginning ch 5 sp.
Stitch count: 2 ch 5 sps, 24 V sts, 26 sc.
Round 10: Repeat Round 6.
Round 11: Repeat Round 7.
Round 12: Repeat Round 8.
Round 13: Repeat Round 9.
Continue Working the Main Panel
Rounds 14 to 25 (29, 33, 37):
Repeat Rounds 6 to 9.
You can increase or decrease the number of repeats to achieve your desired length.
The sizes correspond to:
- XS to S: Work through Round 25.
- M to L: Work through Round 29.
- XL to 2XL: Work through Round 33.
- 3XL to 5XL: Work through Round 37.
Section 2: Edging
With the right side facing, crochet around the whole piece.
The odd numbered rounds give the right side of the poncho.
Round 1:
Ch 1, sc in each st around.
Aim for 2 sc in each ch sp/dc st around.
At each corner, work (sc, ch 1, sc).
Join.
Section 3: Neckline
Identify either corner of the neckline.
Find a stitch beside the corner and join your yarn with a slip stitch to that stitch.
You will crochet around the neckline, working into the corresponding stitches on the back panel.
Place a stitch marker at each corner to guide your decreases. Move the markers after each round.
Round 1:
Ch 1, 3 sc in each ch sp around.
Join with a sl st to the beginning chain.
Round 2:
Ch 1, hdc in first st (place a stitch marker and move it after each round), hdc2tog.
Hdc in each st until 3 sts before next st marker, hdc2tog, hdc in next st* (move stitch marker), hdc2tog.
Rep from * one more time.
Join with a sl st to the beginning chain.
Rounds 3 to 5:
Ch 1, working in the 3rd loop:
Hdc2tog.
Hdc in each st until 3 sts before next st marker, hdc2tog, hdc in next st* (move stitch marker), hdc2tog.
Rep from * one more time.
Join with a sl st to the beginning chain.
Finishing
Weave in all loose ends.
Block the poncho to the required measurements.
Your Bessie Crochet Poncho is complete!
Tips for Crocheting Your Bessie Poncho
Use Stitch Markers
The centre points are an important part of this design.
Make sure you place your stitch markers in the ch 5 spaces as instructed and move them after every round.
This will make it much easier to keep the shaping consistent.
Check Your Length as You Go
Because everyone has different preferences when it comes to garment length, you may want your poncho slightly shorter or longer than the sample.
The pattern makes this easy to adjust.
Simply continue or reduce the stitch repeats until you’re happy with the length.
Pay Attention to the Lace Repeats
The V stitches and shells create the beautiful texture of this poncho.
Once you become familiar with the repeats, the pattern becomes easier to follow.
Don’t Skip Blocking
Blocking can help the lace stitches settle and give your finished poncho a neater appearance.
Always use a blocking method suitable for your chosen yarn.
How to Style Your Crochet Poncho
I think one of the best things about this design is how easily it can fit into your everyday wardrobe.
You don’t have to wait for a special occasion to wear it!
For everyday wear: Pair your poncho with a plain fitted top, jeans, and comfortable shoes.
For a dressier outfit: Layer it over a simple dress with ankle boots or heels.
For cooler days: Wear it over a long sleeve top with trousers.
For a summery look: Try it with a sleeveless top and a lightweight skirt.
I particularly love wearing mine over black because the colours and lace stitches really stand out.
Frequently Asked Questions About the Bessie Crochet Poncho
Is the Bessie Crochet Poncho beginner friendly?
This pattern is rated intermediate.
It uses a combination of V stitches, shell stitches, shaping, and repeated rounds.
If you’re already familiar with basic crochet stitches and comfortable following written patterns, this could be a lovely project for developing your skills.
What sizes are included?
The pattern includes four size groups covering XS through 5XL.
All sizes begin with the same foundation chain and are adjusted by the number of rounds worked.
Can I use a different yarn?
Yes! Any DK weight yarn that meets the pattern gauge and gives you a suitable drape can be used.
Can I make the poncho longer?
Absolutely.
You can continue repeating Rounds 6 to 9 until the poncho reaches your preferred length.
Can I make the poncho in one colour?
Of course!
Although I love how the gradient yarn looks in my sample, a single colour would showcase the stitch pattern beautifully.
Is the poncho worked in separate pieces?
No. The Bessie Crochet Poncho is worked in rounds throughout, beginning at the neckline.
Can I wear this poncho in winter?
Yes. The lace design makes it a lovely layering piece.
Try wearing it over a fitted long sleeve top or sweater during cooler weather.
A Little Crochet Project With Lots of Styling Possibilities
The Bessie Lace Poncho free crochet pattern is another reminder of why I love designing crochet garments.
You start with a hook, some yarn, and a few stitches, and before long, you have something beautiful that you can actually wear.
I love how the lace pattern, pointed shape, and gradual colour changes work together in this design.
And I especially love that you can make it your own by choosing your favourite colours and preferred length.
I hope you enjoy making your Bessie Crochet Poncho as much as I enjoyed creating mine.
When you finish yours, don’t forget to share your photos and tag Fosbas Designs. I always enjoy seeing your beautiful versions and the different colours you choose.
Happy crocheting!
Susanna
Fosbas Designs
Buy this pattern for $3.00, or get it free with a membership from $3 a month.
Buy the PDF
Hi, I’m Susanna!
I am Susanna, the designer and maker behind Fosbas Designs. Here, I share not only crochet designs but also the inspirations and process of each project. I am a happy mother of two handsome boys and a wife to my prince charming. These guys are…
More about me