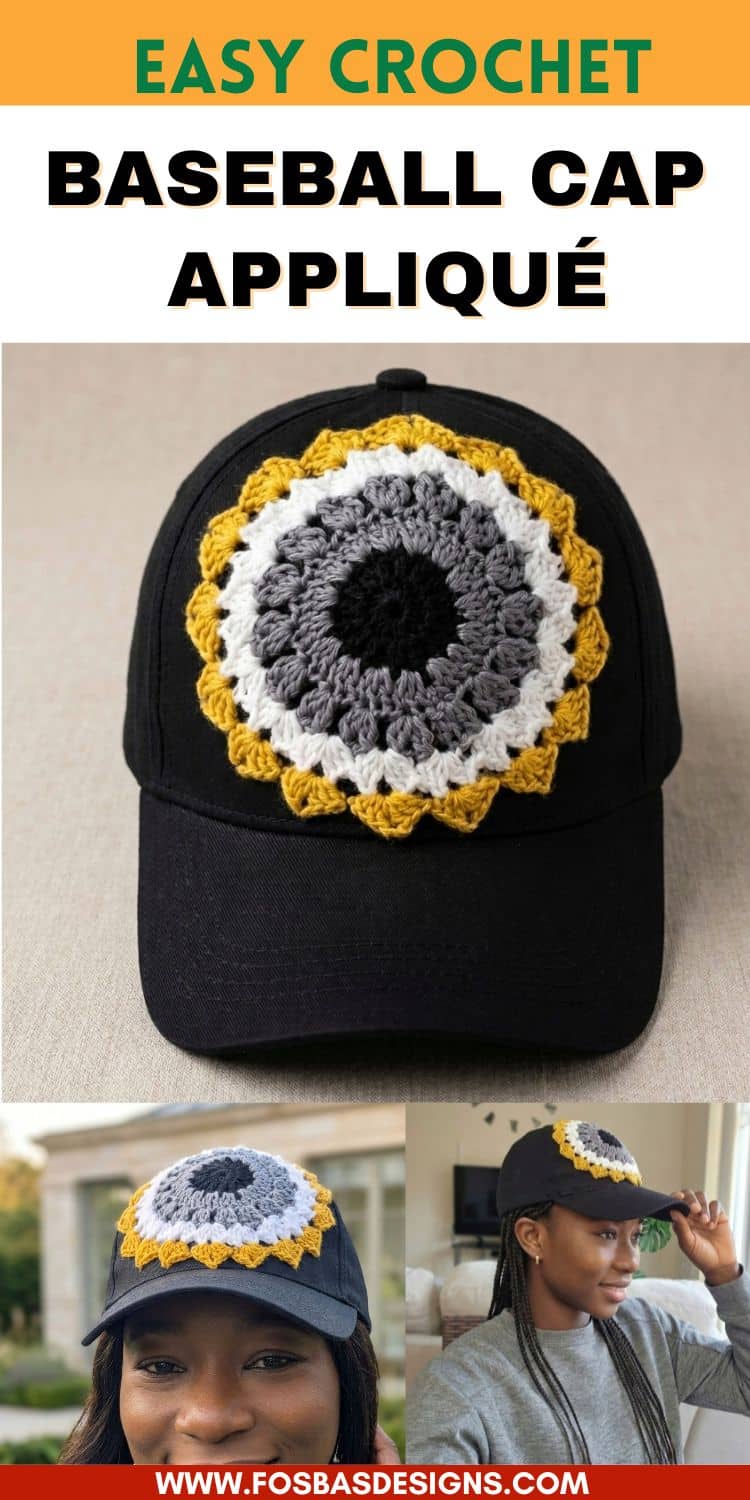
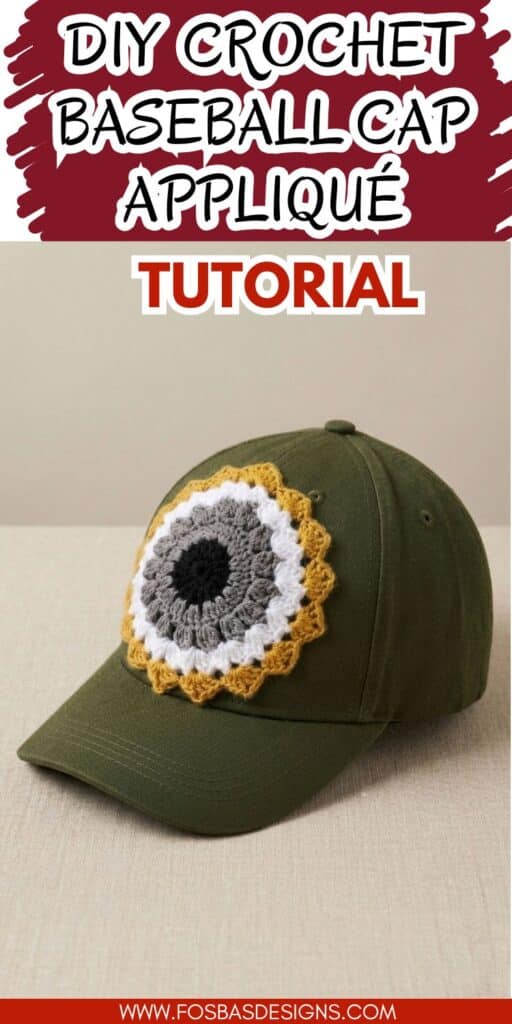
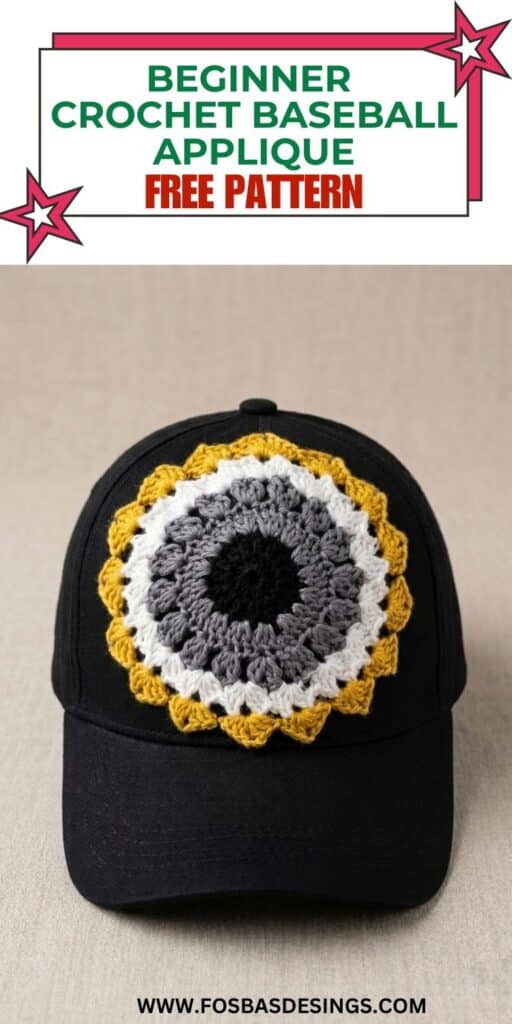
Crochet Baseball Cap with Mandala Appliqué
Introducing a modern crochet accessory you’ll actually wear. If you love blending crochet with everyday fashion, this Crochet Baseball Cap with Mandala Appliqué is going to be right up your street.

Get a copy on Ravelry or on Etsy
This crochet mandala baseball cap is a simple yet striking way to turn a basic cap into a bold, handmade statement piece. It’s quick to make, beginner-friendly, and perfect for using up small amounts of yarn.
Did you see the Denim jacket I added those popping bobble sleeves to last week?
The Visor hat is another great project to check out.

Whether you’re creating something unique for yourself or adding a fresh product to your shop, this is one of those projects that gets compliments instantly.
Different Methods of Customisation
You can easily personalise this design:
- Use bold contrast colours for a statement look
- Try neutral tones for a minimalist aesthetic
- Add beads or sequins for a dressier finish
- Adjust the number of rounds for a larger or smaller motif
Styling Ideas
This cap pairs beautifully with:
- Casual denim outfits
- Summer dresses
- Athleisure looks
- Crochet garments from your own collection
It’s the perfect blend of handmade and modern fashion.


Pro Tips
Keep your stitches even so the mandala lays flat
Block the mandala lightly before attaching for a cleaner finish
Use strong sewing thread to ensure durability
Test placement before sewing to get the perfect position.
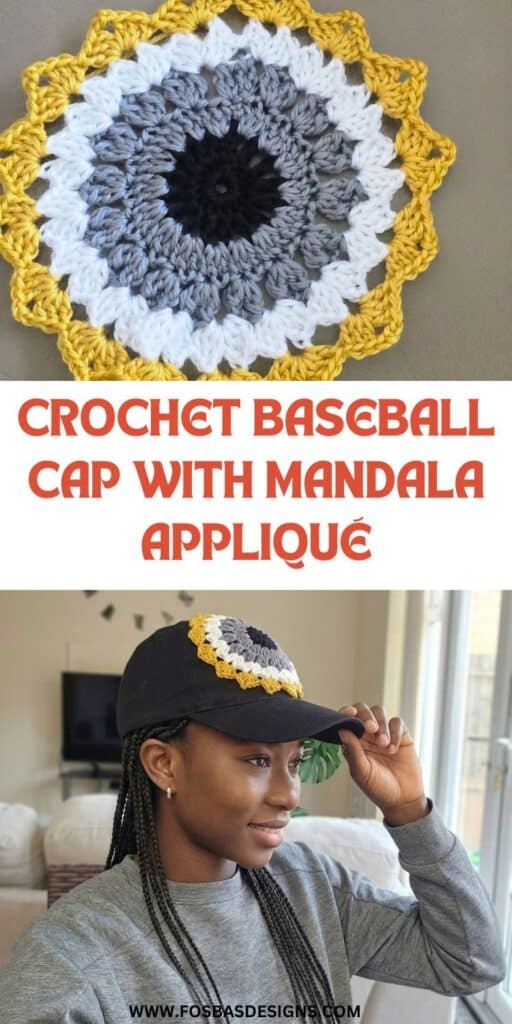
How to Crochet A Mandala Appliqué for A Baseball Cap
Round 1: In a MR, ch 3, 15 dc in the Mr, join with a sl st to the top of the beginning ch 3. 16 dc
Close the MR tightly.
Round 2: Ch 5 (counts as dc + ch 2), *dc in next st, ch 2, rep from * around, join with a sl st to the 3rd chain from the beginning ch 5. 16 dc, 16 ch sps
Round 3: Ch 3 (counts as dc here and throughout) , *2 dc in ch 2 sp, dc in next st, rep from * around, join with a sl st to the top of the beginning ch 3. 48 dc
Round 4: Ch 3, dc in each st around, join 48 dc
Round 5: Ch 3, (dc, ch 2, 2 dc-cl) in same st as ch 3, *ch 2, skip next 2 sts, (2 dc-cl, ch 2, 2 dc-cl) in next st, rep from * around, ch 2, join with a sl st to the top of beginning ch 3. 16 dc-cl set, 16 ch sps
Round 6: Ch 3, *skip dc-cl set, (3 dc, ch 3, 3 dc) in next ch sp, rep from * until the last ch 3 sp, (3 dc, ch 3, 2 dc) in last ch 3, join with a sl st to the 3rd chain from the beginning ch 3. 16 shell groups
Attaching the Mandala to the Cap
Position the mandala on the front of your baseball cap.
Use pins to secure it evenly in place.
Thread your needle with matching thread and sew around the edges carefully, making sure stitches are neat and hidden.
Ensure the mandala lies flat and is securely attached before finishing.
Frequently Asked Questions
Can I use a different yarn weight?
Yes, but the size of your mandala will change. Adjust hook size accordingly.
Do I have to use a baseball cap?
No, you can attach this to bucket hats, tote bags, or even jackets.
Is this beginner-friendly?
Yes—if you’re comfortable with basic stitches and working in rounds.
This crochet baseball cap is a simple project with a big impact. It’s quick, customisable, and perfect for adding a handmade touch to everyday style.
Once you make one, you’ll want to create more in different colour combinations—trust me on that one.
1 FREE DOWNLOAD PER MONTH
WITH JUST $3 PER MONTH!
- Pick your desired pattern each month.
- It can be a new or old pattern.

2 FREE DOWNLOADS PER MONTH
WITH JUST $5 PER MONTH!
- Pick your desired patterns each month.
- It can be a new or old pattern.
- You get 2 patterns per month.

3 FREE DOWNLOADS PER MONTH
WITH JUST $8 PER MONTH!
- Pick your desired patterns each month.
- You get 3 free patterns per month.
- It can be a new or old pattern.