Crochet Sampler Blanket Free Pattern Crochet Along
The Crochet Sampler Blanket Free Pattern is the featured design for our upcoming interactive Crochet Along, created to help crocheters build confidence while making a beautiful, textured blanket.
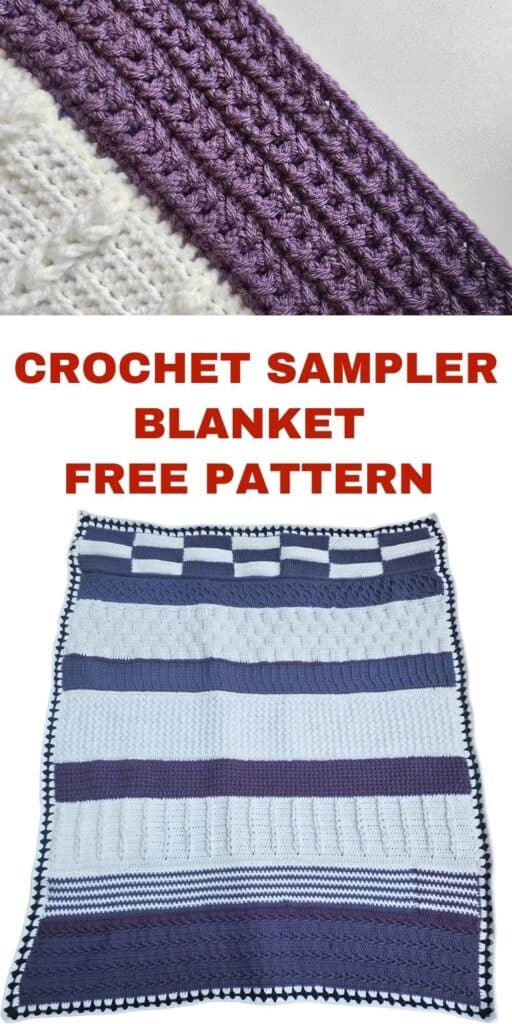
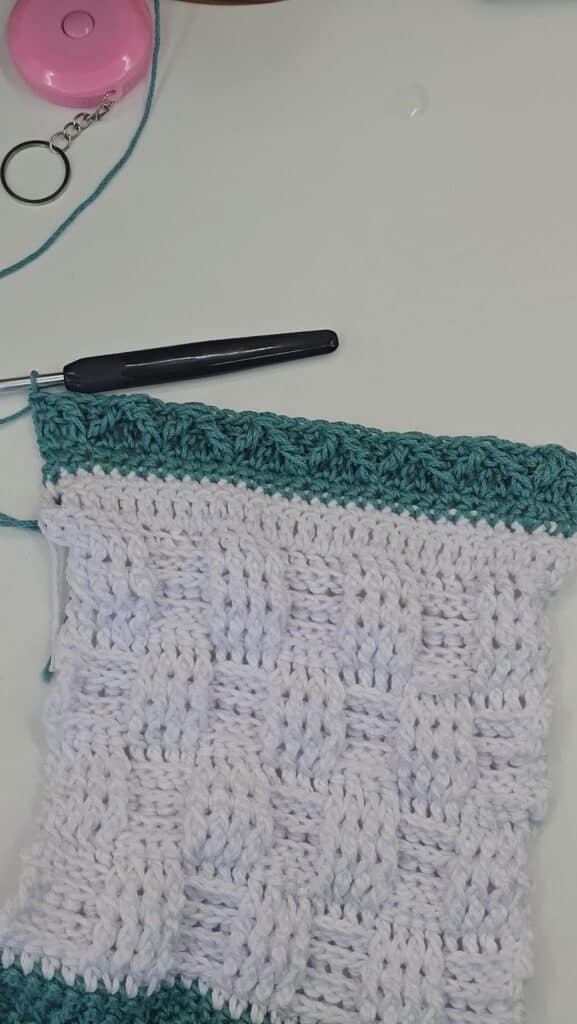
Using a mix of crochet stitches for a textured project, this sampler blanket brings together a variety of stitch patterns into one elegant design that looks just as stunning folded as it does fully spread out.
Designed with learning, creativity, and community in mind, this crochet along is perfect for anyone who wants to expand their stitch knowledge while working toward a meaningful finished project.
Every Friday, a new section would be added to this page and also included in the PDF!


About the Crochet Sampler Blanket Design
This sampler blanket is thoughtfully designed to showcase a range of crochet textures, each section flowing naturally into the next. The combination of raised stitches, structured patterns, and softer textured areas creates visual interest without feeling overwhelming. The white and purple colourway highlights the stitch definition beautifully, allowing each section of the blanket to stand out while still feeling unified.
Rather than feeling like separate blocks stitched together, this sampler blanket reads as one continuous, well-balanced design.
What Makes This Crochet Along Special
This project is worked as a Crochet Along (CAL), meaning the blanket is created in sections released over time. Each stage of the CAL focuses on a different stitch pattern or texture, making it easier to learn and enjoy the process without rushing.
The structured release schedule helps participants stay motivated and engaged, while still allowing flexibility to crochet at their own pace.
The crochet along format transforms this blanket from a simple pattern into a shared experience.
The Community Crochet Along Experience
One of the most rewarding aspects of this Crochet Sampler Blanket CAL is the sense of community it creates. Everyone is encouraged to share progress, celebrate milestones, and support one another throughout the crochet along.
Crocheting alongside others adds motivation and accountability, making it easier to stay consistent and enjoy the process.
This shared experience often becomes just as memorable as the finished blanket itself.
Post your yarn selections, progress, and questions here in the community on Facebook.
How to participate in the crochet along
- Join the community here on Facebook.
- Post pictures of the yarns you have picked for the blanket in the group.
- Each week, a winner would be selected at random on the Facebook group.
- The winner gets to pick a pattern of their choice in my Ravelry store.
- After completing the CAL, an overall winner would be picked and given a yarn gift card voucher worth $20 would be given
Yarn Choice for the Crochet Sampler Blanket
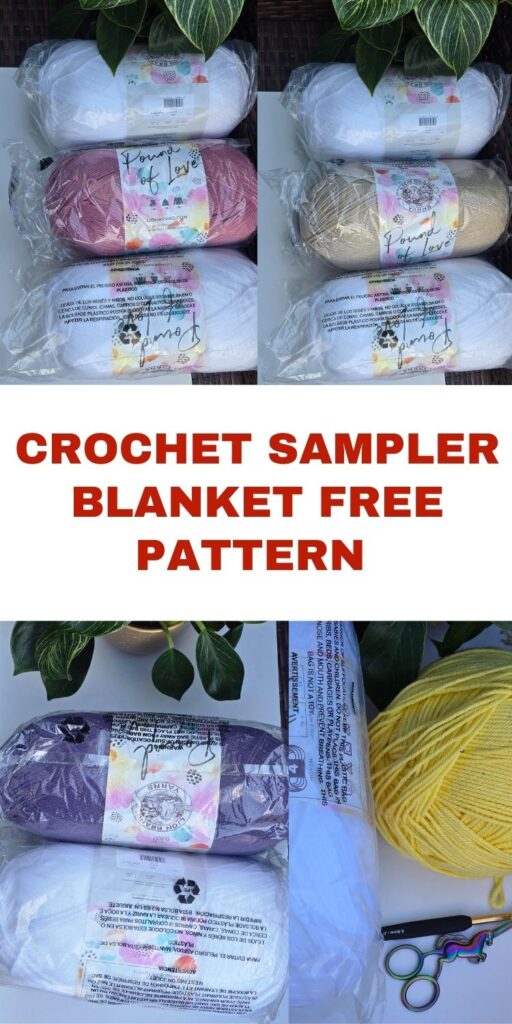
For this easy Crochet Sampler Blanket Free Pattern Crochet Along, I have used the Pound Of Love from lion brnad in colors white and purple. colour combination used for this sampler blanket was chosen to highlight stitch definition and texture.
Lighter shades allow intricate stitches to shine, while the deeper purple adds contrast and structure to the overall design. This balance ensures that every stitch pattern remains visible and impactful.
The result is a blanket that feels classic, calming, and suitable for a wide range of interiors.
Join the Crochet Sampler Blanket Crochet Along
If you’re looking for a free crochet sampler blanket pattern that helps you learn new stitches while staying motivated, this Crochet Along is the perfect project. With its structured format, beautiful textured design, and supportive community element, it’s an enjoyable and rewarding crochet experience from start to finish.
Whether you’re joining to learn, connect, or simply enjoy a beautiful crochet project, the Crochet Sampler Blanket CAL is designed to guide and inspire you every step of the way.
Skill Level and Who This Crochet Along Is For
The Crochet Sampler Blanket CAL is ideal for confident beginners and intermediate crocheters. It’s especially well-suited to those who are comfortable with basic crochet stitches and want to grow their skills by learning new textures in a supportive environment.
Each stitch section is introduced gradually, making the project feel approachable rather than intimidating. More experienced crocheters will also enjoy the variety and rhythm of working through different stitch patterns within a single blanket.
Learning Through Texture and Repetition
Sampler blankets are one of the best ways to learn new crochet stitches, and this design fully embraces that concept. Each section gives you the chance to practice a specific stitch pattern long enough for it to feel familiar, without the repetition becoming boring.
By the end of the crochet along, crocheters will have a brand new blanket and a deeper understanding of the different stitches used in this throw.
The finished blanket becomes a visual record of that learning journey.
Customising Your Sampler Blanket
While the structure of the crochet along is guided, there is still room for creativity. You can personalise your sampler blanket through colour choices, yarn selection, or extend the width of the panels.
Whether you stick closely to the same color palette as mine or adapt it to suit your own style, the design remains flexible and forgiving.
Every finished blanket will feel unique while still being part of a shared project, and I can’t wait to see your version!
Crochet Sampler Blanket Free Pattern Crochet Along: Timeline
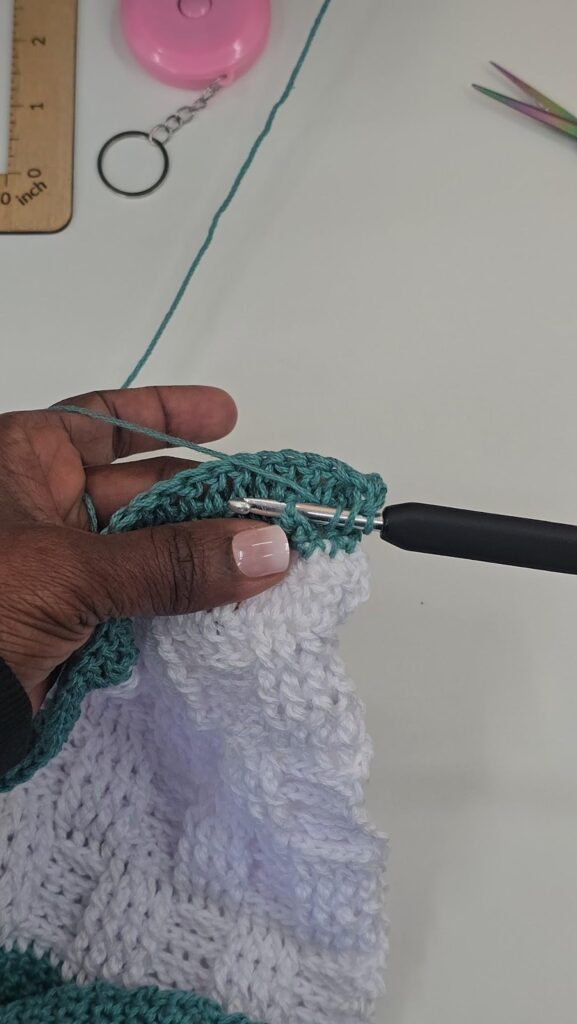
Each week, there would be a new section with a video tutorial to help anyone who prefers a visual pattern. The written pattern would be free here on the blog, on this page.
Materials needed
Yarn – Any worsted weight yarns in colors of your choice.
The prototype was made using Lion Brand Pound of Love in colors White and Violet.
You can check out the color available here
Estimated Total Yardage
White – 1600 yards
Violet (purple) – 1200 yards
Hook – 5 mm Crochet Hook
Gauge – Not crucial for this blanket.
Pattern Notes
- Please kindly read through the pattern before starting.
- The stitch count is written after each row.
Difficulty Level – Intermediate
Terms – US Terminology
Stitches Abbreviations
Chain/chains – ch/chs
Chain space – ch sp
Stitch(es) – st(s)
Slip Stitch – sl st
Single Crochet – sc
Double crochet – dc
Front Post double crochet – FPdc
Back Post double crochet – BPdc
Front Post treble – FPtr
Half double crochet 3rd loop
RS – right side
WS – wrong side
Finished Measurements
50” by 55”
Construction Notes
- This blanket is made in sections. There are 8 sections.
- Sections 1, 3, 5, 7, and 9 measure 8” each.
- Sections 2, 4, 6, and 8 measure 4” each.
- You should have the same number of stitches after each row.
- You can increase or decrease the number of repeats as you make the blanket.
- The blanket is made using 2 colors; most of the sections use just one color. You are welcome to alter the number of colors as you would love.
Crochet Sampler Blanket Free Pattern
Section 1
Here is the Video tutorial for section 1
Section 1 = 8” long
{RS} Row 1: With Purple, chain 171, sc in 2nd ch from hook and in each ch across, turn. 170 sc
{WS} Row 2: Ch 2, dc in each st across, turn. 170 dc
{RS} Row 3: Ch 2, dc in first st, *sk next 3 sts, tr in next st, working behind the tr, dc in each of the 3 sk sts, starting from the first skipped st, rep from * to last st, dc in last st, turn. 42 tr, 128 dc
{WS}Row 4: Ch 2, dc in first st, *sk next 3 sts, tr in next st, working in front of the tr, dc in each of the 3 sk sts, starting from the first skipped st, rep from * to last st, dc in last st, turn. 42 tr, 128 dc
Rows 5 – 6: Ch 2, dc in each st across, turn. 170 dc
Rows 7 – 18: Repeat rows 3 – 6
Add 1 – 3 rows to get 8” if needed.
Section 2 measures 4”
Video Tutorial = https://youtu.be/glBBJn6Gw1A
- This section uses two colors.
- You alternate colors after two rows; there’s no need to fasten off to reduce the number of ends to sew.
- For section 2, you can go up one or two hook sizes, especially if you do have a tight tension. A few testers went to 6 mm for section 2.
Continue with Purple
{RS} Row 1: Ch 1, sc in each st across, until the last 2 sts, sc2tog, turn. 169 sc
{WS} Row 2: Ch 2 (counts as sc + ch 1), *skip next st, sc in next st, ch 1, rep from * to the end, sc in last st, turn. 85 sc, 84 ch sp
Drop purple yarn and join white with a sl st to the last st.
Rows 3 – 4: Ch 2, *sc in next ch-1 space, ch1, skip next sc; repeat from *to last sc, sc in first ch 2 of previous row, turn. 85 sc, 84 ch sp
Drop white yarn and join purple with a sl st to the last st.
Rows 5 – 6: Ch 2, *sc in next ch 1 space, ch1, skip next sc; repeat from *to last sc, sc in first ch 2 of previous row, turn. 85 sc, 84 ch sp
Rows 7 – 18: Rep Rows 3 – 6
Fasten off purple
Rows 19 – 20: With white, Ch 2, *sc in next ch 1 space, ch1, skip next sc; repeat from *to last sc, sc in first ch 2 of previous row, turn. 85 sc, 84 ch spRow 21: With white, ch 1, sc in each st across, turn. 169 sc
Section 3: To measure 8″
Video tutorial = https://youtu.be/H99t04SivEs
Loop = 12 chains
With color White
{WS} Row 1: Ch 2, hdc in each st across, turn. 169 hdc
{RS} Row 2: Ch 2, hdc in first 7 sts, *make one loop (ch12), hdc in next 7 sts, rep from *to end, make one loop. 21 Loops, 169 hdc.
{WS} Row 3: Ch 2, hdc in each st across, note to keep all loops unworked and keep all of them on the right side. 169 hdc.
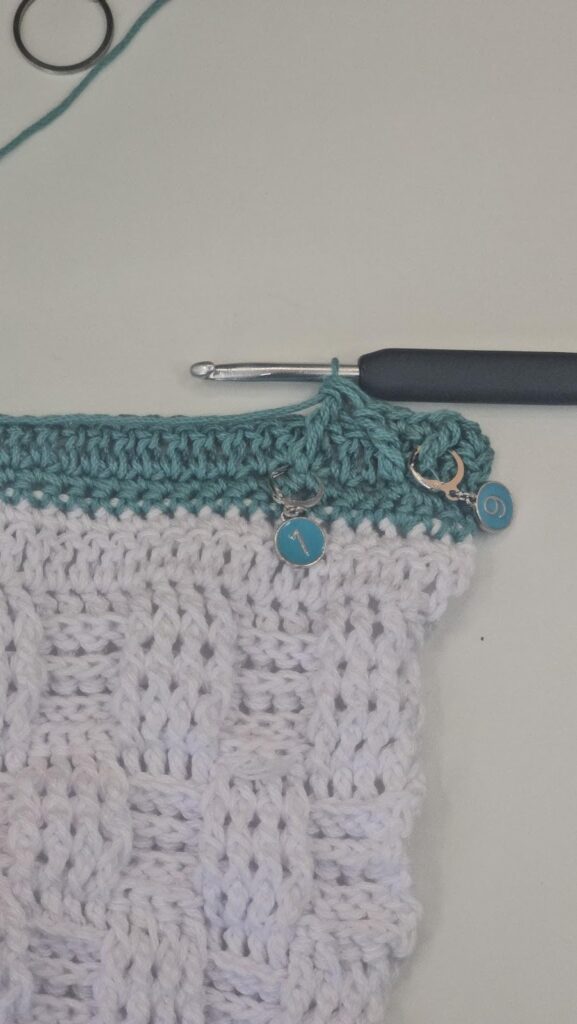
Note
Keep your loops (ch 12) in a straight line, and place a stitch marker in the first chain of each loop. This would help you keep track of where to put the next loop.
Continue to repeat Rows 2 – 3 until the section measures 8.” End with a row 3.
Braiding the loops
Step 1: With the right side facing you(this is the side with the loops). Start with the first 2 vertical ch 12, pass 2nd loop up through the first loop.
Step 2: Pass the 3rd loop through the 2nd loop
Step 3: Pass the 4th through the 3rd, continue until all loops have been worked, and secure with a stitch marker
Step 4: Repeat the instructions with the remaining sets of loops, each vertical row at a time. Row 17: Hdc in first st, *pick up the loop left, hdc over this loop into next st, hdc in next 7 sts, rep from * around, turn. 169 hdc
Section 4: 4” long
With Purple
{WS} Row 1: Ch 1, sc in each st across, turn. 169 sc
{RS} Row 2: Ch 3 (count as the first dc here and throughout), *skip next st, dc in next st, make a dc over the dc just made, rep from * across, dc in last st, turn. 169 dc
Rows 3 – 9: Rep row 2
Increase or decrease the repeats until you have 4”
{RS} Row 10: Ch 1, sc in each st across, turn. 169 sc
Section 5
Video = https://youtu.be/NjZrrRFrTak
Should be 8”
With color White
{WS} Row 1: Ch 1, hdc in each st across until the last 2 sts, hdc2tog in last 2 sts turn. 169 hdc
{RS} Row 2: Ch 2, 2 dc in first st, *skip next 2 sts, (sc, 2 dc) in next st, repeat from * across row, sc in last st, turn. 112 dc, 57 sc
{WS} Row 3: Ch 2, 2 dc in first sc below, *skip next 2 dc, (sc, 2 dc) in next sc, repeat from * across row, sc in last st, turn. 112 dc, 57 sc
Rows 4 – 20: Rep row 3
{WS} Row 21: Ch 2, hdc in each st across, turn. 169 hdc
{RS} Row 22: Ch 1, sc in each front loop across, turn. 169 sc
Fasten off.
Section 6 = Should be 4” long
Video = https://youtu.be/CAxsbh5Xiwg
With Purple
{WS} Row 1: Ch 1(does not count as a stitch here and throughout this section), sc in each st across, turn. 169 sc
Rows 2 – 5: Ch 1, sc in each st across, turn. 169 sc
{RS} Row 6: Ch 1, sc in first 3 sts, *FPtr around 4th st from 4 rows below, skip the st in row 6 behind the FPtr just worked, sc in next 3 sts, fptr in the next st (4 rows below, i.e 3 sts after the previous fptr), rep from * until the last st, sc in last st, turn. 42 FPtr, 127 sc
Note: The skipped stitch directly behind the front post stitch will be left unworked in the next row.
Rows 7 – 9: Ch 1, sc in each st across, turn. 169 sc
{RS} Row 10: Ch 1, sc in first 3 sts, *FPtr around the first fptr below, skip the st behind the FPtr just worked, sc in next 3 sts, fptr in the next fptr, rep from * until the last st, sc in last st, turn. 42 FPtr, 127 sc
Rows 11 – 13: Repeat rows 7 – 9
{RS} Row 14: Repeat row 10
Rows 15 – 17: Repeat rows 7 – 9
{RS} Row 18: Repeat row 10
{WS} Row 19: Ch 1, sc in each st across, turn. 169 sc
Section 7 = Should be 8” long
Video = https://youtu.be/2WCIv-yFHuo
With color White
{RS} Row 1: Ch 2, hdc in each chain across, turn. 169 hdc
{WS} Row 2: Ch 3 (counts as first st, here and throughout this section), FPdc around the next 4 sts, *BPdc around next 4 sts, FPdc around next 4 sts*, repeat from * until you reach the last 4 sts, BPdc around next 3 sts, dc, turn. 21 FPdc group/BPdc group, 2 dc
Row 3: Ch 3, FPdc around the next 3 sts, *BPdc around next 4 sts, FPdc around next 4 sts*, repeat from * until you have 1 st remaining, dc, turn. 21 FPdc group/BPdc group, 2 dc
Rows 4 – 5: Repeat rows 2 – 3
{WS} Row 6: Ch 3, BPdc around the next 4 sts, *FPdc around next 4 sts, bpdc around next 4 sts*, repeat from * until you reach the last 4 sts, FPdc around the next 3 sts, dc, turn. 21 FPdc group/BPdc group, 2 dc
Row 7: Ch 3, BPdc around the next 3 sts, *FPdc around next 4 sts, BPdc around next 4 sts*, repeat from * until you have 1 st remaining, dc, turn. 21 FPdc group/BPdc group, 2 dc
Rows 8 – 9: Repeat rows 6 – 7
Rows 10 – 13: Repeat rows 2 – 3
Rows 14 – 17: Repeat rows 6 – 7
{RS} Row 18: Ch 3, dc in each st across, turn. 169 dc
{WS} Row 19: Ch 1, sc in each st across, turn. 169 sc
Section 8: Diamond Waffle Stitch
Measures 4”
Video =
{WS} Row 1: Ch 1, sc in each st across until the last 2 sts, sc2tog, turn. 168 sc
{RS} Row 2: Ch 1, sc in each st across, turn. 168 sc
{WS} Row 3: Ch 2 (does not count as a st here and throughout this section), dc in each st across, turn. 168 dc
Special stitch
FPtrtog: (partial FPtr) – Yarn over twice, insert around post of the first leg FPtr, pull up a loop, (yarn over and pull through 2 loops) twice, yarn over twice around the previous FPtr, skip next 3 sts 2 rows below, partial FPtr around next next st 2 rows below, complete FPtr2tog.
Notes:
- All FPtr are made into 2 rows below.
- All FPtr are made on the Right side.
{RS} Row 4: Ch 1, sc in first st, FPtr around 4th st from 2 rows below, skip the st behind the FPtr just worked, sc in next 3 sts, *FPtr2tog, skip the st behind the FPtr just worked, sc in next 3 sts, rep from * until the last 2 sts, FPtr around the last leg of FPtr 2 rows below, skip the next st on rows 3, sc in last st, turn.
{WS} Row 5: Ch 2, dc in each st across, turn. 168 dc
{RS} Row 6: Ch 1, sc in next 3 sts, *FPtr2tog around the next 2 post sts below (first leg of the stitch around the same front post triple 2 rows below and the second leg of the stitch around the same stitch as the next front post triple two rows below), on row 3, skip the next stitch and sc in each of the next 3 sts, repeat from * across to the end of the row. Chain 3 and turn your work.
Rows 7 – 14: Repeat rows 3 – 6
{WS} Row 15: Ch 1, sc in each st across until the end, turn. 168 sc
Section 9
Should be 8” long
Video = https://youtu.be/1x3gyI_Pg48
Plaid patch (you need two colors per row for this section)
Terms for this section
- Patch = refers to a section made in one color and in the same stitch. The 12 rows give you 7 patches, which comprise 4 patches in purple and 3 patches in white.
Tips for a perfect section
- Wind yarns into small balls (5 small balls in Purple and 5 small balls in white).
For the first and third patches, you will need 5 sections of purple and 4 sections of white, and the reverse for the second patch.
- Switch to the next color when you have the 2 loops left on the hook while working the last dc of the patch.
- Counting is your friend in this section, as you do not want to add a stitch at the beginning or end of each color change.
- Crochet over the ends!
- The first patch will curl; do not worry, it will straighten up after a few more rows.
Continue with Purple
Row 1: Ch 1, (does not count as a stitch, here and throughout), hdc in each st across until the last st, hdc in last st, turn. 168 hdc
Row 2: Ch 2 (does not count as a stitch, here and throughout), dc in each in the first loop (just below the front loop) across, turn. 168 dc
Row 3: With Purple, ch 2, *dc in first 24 sts, with White, dc in next 24 sts, rep from * until the last 24 sts, with Purple, dc in the remaining 24 sts, turn. 168 dc
Row 4: With Purple, ch 2, *FPdc in first 24 sts, with White, BPdc in next 24 sts, rep from * until the last 24 sts, with Purple, FPdc in the remaining 24 sts, turn. 168 dc
Row 5: With Purple, ch 2, *BPdc in first 24 sts, with White, FPdc in next 24 sts, rep from * until the last 24 sts, with Purple, BPdc in the remaining 24 sts.
Rows 6 – 7: Rep Rows 4 – 5
Row 8: Rep Row 4
First patch completed.
The next set of patches switches the colors.
Fasten off all the yarns for the patches.
Row 9: With White, ch 2, *dc in first 24 sts, with purple, dc in next 24 sts, rep from * until the last 24 sts, with white, dc in the remaining 24 sts, turn. 169 dc
Row 10: With White, ch 2, *BPdc in first 24 sts, with purple, FPdc in next 24 sts, rep from * until the last 24 sts, with white, BPdc in the remaining 24 sts, turn. 169 dc
Row 11: With White, ch 2, *FPdc in first 24 sts, with purple, BPdc in next 24 sts, rep from * until the last 24 sts, with white, FPdc in the remaining 24 sts, turn.
Row 12 – 13: Rep Rows 10 – 11
Row 14: Rep Row 10
Fasten off all 7 patches of yarn.
Second set completed
Third panel: Switch back to the order used in panel 1.
Row 15: Rep Row 3
Rows 16 – 19: Rep Rows 4 – 5
Row 20: Rep Row 4
Optional – You can repeat rows 9 – 14 for another layer of patch if your section is not yet 8”
Fasten of all yarns.
Row 21: With Purple, ch 1, hdc in each st across.
Do not fasten off.
Section 10: Blanket Border
Video = https://youtu.be/Z7BF1JQYJSc
- Crocheting around the whole panel
- I used a single color for each round, but you are welcome to match the colors appropriately.
My colors per round:
- Round 1: I used Purple
- Round 2: I used White
- Round 3: I used Purple
- Round 4: I used White
Round 1: Ch 1, sc in each st around the whole panel, (sc, ch 2, sc) at each corner, join with a sl st to the beginning chain.
- Adjust the sts, so you begin each side with dc in the first 3 sts and end each side with dc in the last 3 sts.
- Chain 2 at each corner
- Chain 1 between the remaining 3 dc’s.
Round 2: Ch 2 (does not counts as st), dc in next 3 sts, *ch 1, skip next st, dc in next 3 sts, rep from * until next corner, (ch 3, dc in next 3 sts) at the corner, rep from * until the end, ch 2, join with a sl st to the top of ch 3 sp.
Round 3: Ch 4(counts as first dc + ch 1), *skip next 3 sts, 3 dc in next ch 1 sp, ch 1, rep from * until next corner, (3 dc, ch 3, 3 dc) in ch 2 sp, rep from * until the last corner, (3 dc, ch 3, 2 dc) in last ch 2 sp, join with a sl st to the 3rd ch from the beginning ch 4.
Round 4: Ch 3 (counts as first dc), 2 dc in first ch 1 sp, *ch 1, skip next 3 sts, 3 dc in next ch 1 sp, rep from * until next corner, (3 dc, ch 3, 3 dc) in ch 2 sp, rep from * until the end, ch 1, join with a sl st to the top of ch 3 sp.
For a wider border, repeat round 4 until you have your desired width.
Fasten off, sew in all ends.
How the Sampler Blanket is Made
The blanket is made using 2 colors; most of the sections use just one color. You are welcome to alter the number of colors as you would love. Materials
This blanket is made in sections.
You should have the same number of stitches after each row.
You can increase or decrease the number of repeats for each section as you make the blanket.
A Blanket That Becomes a Keepsake
By the end of the Crochet Sampler Blanket Crochet Along, participants will have more than just a completed blanket. They’ll have a keepsake that represents skill growth, creativity, and time spent learning something new. The mix of textures and stitch patterns makes this blanket a piece you’ll be proud to use, display, or gift.
It’s the kind of project that holds meaning long after the final stitch is made.
1 FREE DOWNLOAD PER MONTH
WITH JUST $3 PER MONTH!
- Pick your desired pattern each month.
- It can be a new or old pattern.

2 FREE DOWNLOADS PER MONTH
WITH JUST $5 PER MONTH!
- Pick your desired patterns each month.
- It can be a new or old pattern.
- You get 2 patterns per month.

3 FREE DOWNLOADS PER MONTH
WITH JUST $8 PER MONTH!
- Pick your desired patterns each month.
- You get 3 free patterns per month.
- It can be a new or old pattern.

Join my crochet channel for daily updates at your finger tips
About the Designer
Say Hi on Instagram and Subscribe To my email List for pattern discounts and freebies. For questions, send such to [email protected]. Read more about me here.