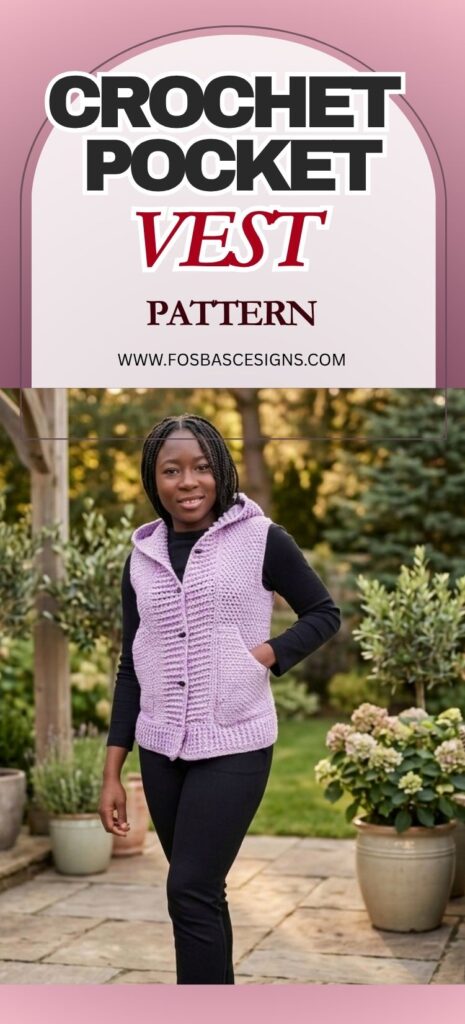
Crochet Lavender Lane Hooded Vest (Free Pattern + Easy Beginner Vest Tutorial)
Looking for a modern crochet hooded vest pattern that’s stylish, beginner-friendly, and perfect for layering all year round? The Crochet Lavender Lane Hooded Vest is designed to give you a flattering fit, cozy texture, and a polished finish — whether you’re heading out or relaxing at home.
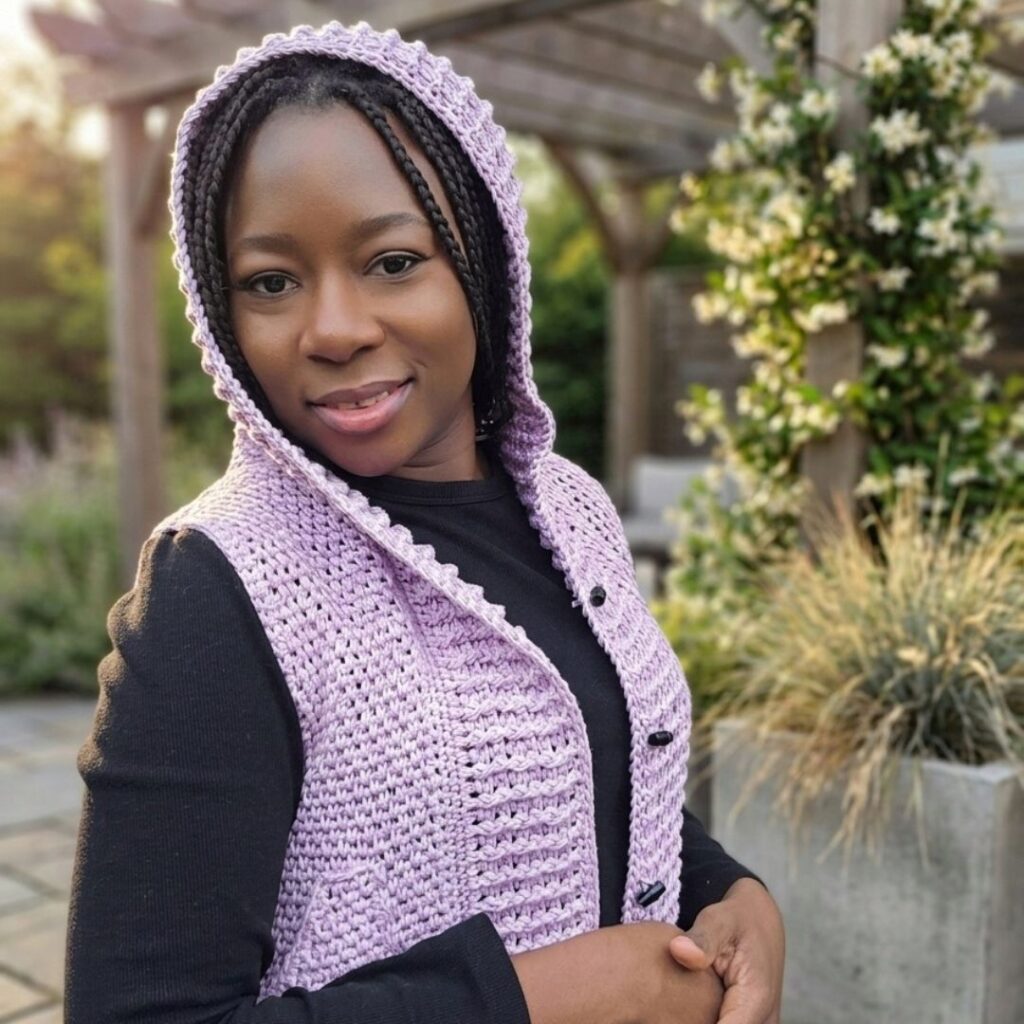
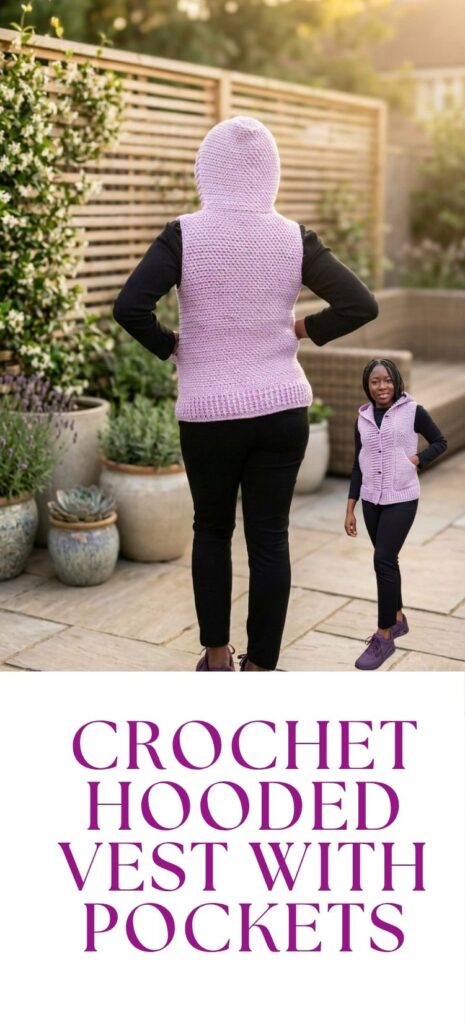
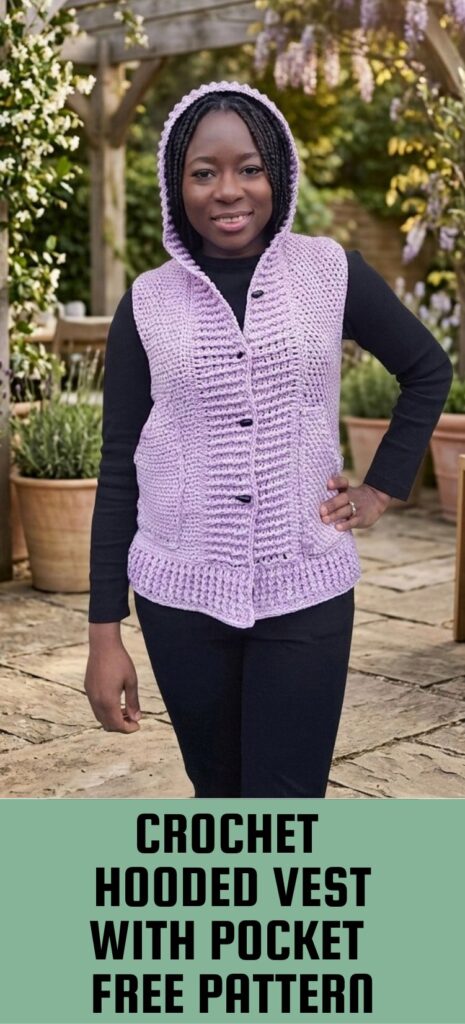
This pattern features a clean silhouette, functional hood, and practical pockets, making it one of those timeless pieces you’ll reach for again and again.
And the best part? You can try the pattern with a free size on the blog, and upgrade to the full PDF with all 9 sizes for a perfect custom fit.


Why You’ll Love This Crochet Hooded Vest
- Beginner-friendly construction with simple stitches
- Customizable fit for all body types
- Cozy yet lightweight layering piece
- Works beautifully in solid or multi-color yarns
- Perfect for spring, autumn, and cool summer evenings.
Materials For Crochet Lavender Lane Hooded Vest
Yarn
Any worsted-weight yarns can be used
I held two strands of #3 to make a #4
You can use a single or multiple colors for your project
Estimated yardage
950 (1050, 1100, 1200, 1300, 1400, 1500, 1600, 1700) yards
Hook
6 mm Crochet Hook
Notions
Buttons – 4 to 6 pcs (optional)

Gauge
16 chains over 15 rows = 10 cm/4” square made using Moss stitch, follow the pattern
Skill Level
Beginner
Terms
US Terminology
Stitches & Abbreviations
Chain(s) – ch(s)
Single Crochet – sc
Double Crochet – dc
Front Post Double Crochet – FPdc
Back Post Double Crochet – BPdc
Finished Measurements
Sizes
XS (S, M, L, XL, 2XL, 3XL, 4XL, 5XL)
Bust Measurement
30 (34, 38, 42, 46, 50, 54, 58, 62)”
Armhole Circumference
14 (14, 14, 16, 16, 16, 18, 18, 20)”
Length of Vest
25 (25, 25, 27, 27, 27, 28, 28, 30)”
The modeled garment is shown in M, with about 1” of positive ease

Pattern Notes
- Please kindly read through the pattern before starting
- Any #4 weight can be substituted; please check the gauge
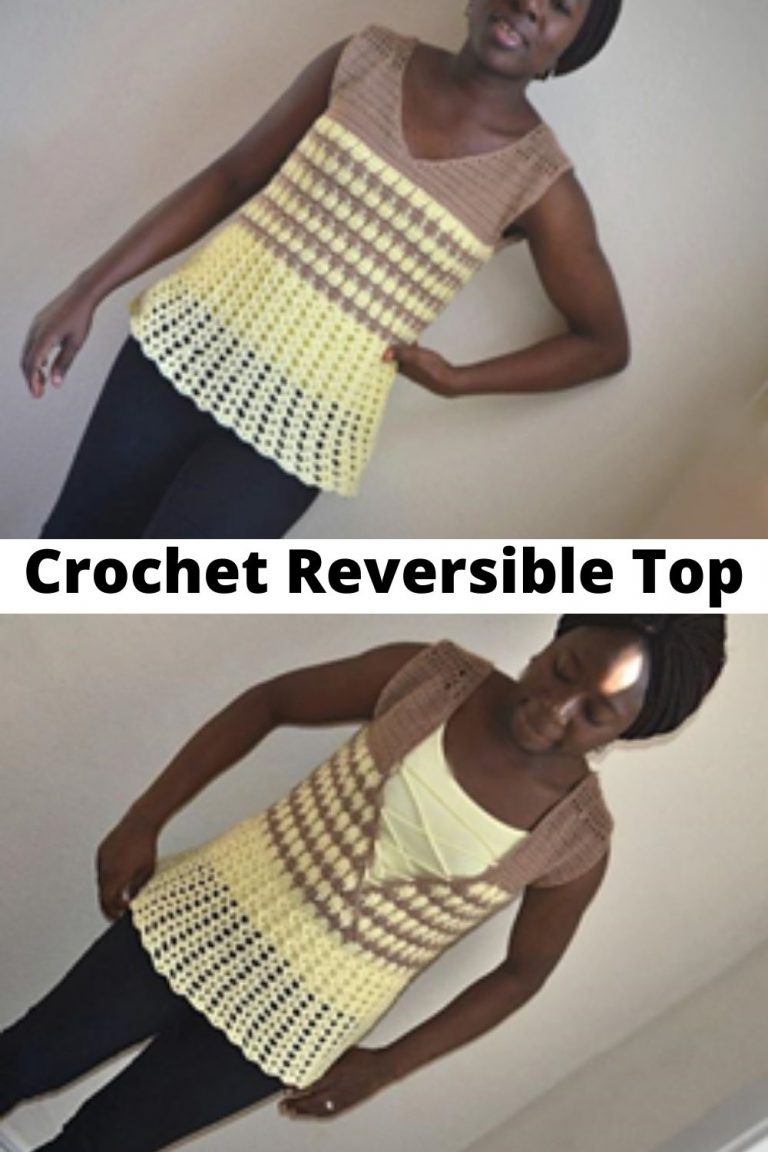
Checkout the lightweight vest I designed last year.
Construction Overview
The Lavender Lane Hooded Vest is designed with simplicity and structure in mind.
- Worked flat in rows from the waist upwards
- Made in sections:
- Back panel
- Front panels (left and right)
- Hood is added after body construction
- Finished with:
- Front ribbing
- Lower ribbing
This step-by-step approach makes it ideal for beginners while still producing a polished, professional finish.
Adjusting Your Vest for a Perfect Fit
This design is fully customizable — so you can achieve a perfect fit for your body.
Back Panel Fit Check
After the first few rows, measure your work. It should equal half your bust measurement.
Armholes
Too tight? Add more repeats before fastening off
Too loose? Reduce the number of repeats
Make sure to replicate the same adjustments for the front panels.
Hood Fit
Increase or decrease the number of repeats for a comfortable fit
Vest Length
Adjust the length by adding or reducing repeats before shaping the armholes
Free Crochet Pattern (Single Size)
The free version below includes instructions for one size (XS) to help you get started quickly.
If you’d like:
- All 9 sizes
- Printable, ad-free PDF
- Easy-to-follow formatting
✨ Grab the full pattern here → Etsy and also on Ravelry
Styling Ideas for Your Hooded Vest
The Lavender Lane Vest is incredibly versatile:
- Layer over a fitted long sleeve top for a clean everyday look
- Pair with jeans and boots for a casual autumn outfit
- Wear open for a relaxed vibe or buttoned for structure
- Style with dresses for a cozy feminine finish
Pro Tips for Best Results
- Use a soft, drapey yarn for a more polished finish
- Check the gauge early to avoid resizing later
- Keep stitch tension consistent for an even texture
- Block your finished vest for a professional look
What is included in the PDF
✔ Full size range XS–5XL
✔ Cleaner layout for easy crocheting
✔ Printable format
✔ Lifetime access
✔ No ads!
👉 Upgrade to the full pattern here on ETSY and also on Ravelry
Share Your Project
I’d absolutely love to see your version of the Crochet Lavender Lane Hooded Vest 💜
- Tag me on social media
- Share in the community
- Pin your project to Pinterest
How to Crochet Lavender Lane Hooded Vest
Section 1 – Back panel
Chain 60
Row 1: Sc in 2nd chain from hook and in each ch across, turn. 59 sc
Row 2: Ch 2 (counts as first st + ch 1, here and throughout), *skip next st, sc in next st, ch 1; repeat from *to last sc, sc in last st, turn. 30 sc, 29 ch sps
Row 3: Ch 2, *sc in next ch 1 space, ch 1, skip next sc; repeat from *to last sc, sc in first ch 2 of row 1, turn.
30 sc, 29 ch sps
Rows 4 – 38: Rep row 3.
Fit check:
Length = Your piece should measure about 11”
Do not fasten off.
Shape armhole
Row 39: Ch 1, sl st through the next 3 sts and 3 ch sps, ch 2, *sc in next ch 1 space, ch1, skip next sc; repeat from *to last 3 ch sps, leave the remaining stitches unworked, turn.
24 sc, 23 ch sps
Rows 40 – 63: Ch 2, *sc in next ch 1 space, ch 1, skip next sc; repeat from *to last ch sp, sc in ch sp of row below, turn.
24 sc, 23 ch sps
Fit check:
Your piece should measure about – 19”
Edging
Ch 1, sc in each st around, (sc, ch 1, sc) at each corner, 1 sc in each sc st and ch sp, join with a sl st to the beginning ch.
Fasten off.
Section 2: Front panel
Right side
Chain 24
Row 1: Sc in 2nd chain from hook and in each ch across, turn. 23 sc
Row 2: Ch 2, *skip next st, sc in next st, ch 1; repeat from *to last sc, sc in last st, turn. 12 sc, 11 ch sp
Row 3: Ch 2, *sc in next ch 1 space, ch 1, skip next sc; repeat from *to last sc, sc in first ch 2 of row 1, turn. 12 sc, 11 ch sp
Rows 4 – 38: Rep row 3.
Fit check:
Make sure to have a similar height to the back panel.
Do not fasten off.
Shape armhole
Row 39: Ch 2, *sc in next ch 1 space, ch1, skip next sc; repeat from *to last 3 ch sps, sc in next st, leave the remaining stitches unworked, turn.
9 sc, 8 ch sp
Rows 40 – 63: Ch 2, *sc in next ch 1 space, ch 1, skip next sc; repeat from *to last ch sp, sc in ch sp of row below, turn.
9 sc, 8 ch sp
Edging
Ch 1, sc in each st around, (2 sc, ch 1, 2 sc) at each corner, 1 sc in each sc st and ch sp, join with a sl st to the beginning ch.
Fasten off.
Section 2: Front panel
Left side
Start as with the right panel, rep Rows 1 – 38
Row 39: Ch 2, *sc in next ch 1 space, ch 1, skip next sc; repeat from *to last ch sp, sc in ch sp of row below, turn.
Shape armhole
Rows 40: Ch 1, sl st through the next 3 sts and 3 ch sps, ch 2, *sc in next ch 1 space, ch1, skip next sc; repeat from *to last ch sp, sc in ch sp of row below, turn.
9 sc, 8 ch sp
Rows 41 – 63: Ch 2, *sc in next ch 1 space, ch 1, skip next sc; repeat from *to last ch sp, sc in ch sp of row below, turn.
9 sc, 8 ch sp
Edging
Ch 1, sc in each st around; (2 sc, ch 1, 2 sc) at each corner; 1 sc in each sc st and ch sp; join with a sl st to the beginning ch.
Fasten off.
Shoulder Seam
- Place the front (right and left) panels on the back panel.
- Secure the shoulders with stitch markers.
- Flip the panels to the wrong side, with the wrong side facing you, and join the two panels using either a darning needle or a crochet hook and mattress stitch or sl st, starting from the edge towards the neckline, leaving 4 (4, 4, 5, 5, 6, 6, 8, 8) ch sts each on the front panels unjoined.
- Fasten off.
- Repeat the joining on the other side.
Check fit
Try the vest on, making sure the hood space is a good fit. If not, adjust the number of stitches joined at the shoulder seam.
The band adds about 2” to the hood
Joining the front to the back panel
Side seam(s)
- With the wrong side facing you, sew the outer edge of the front and back panels together.
- Fasten off. Optional: leave a tail long enough for seaming
- Repeat on the other side.
Hood
- Crocheting across the stitches left from the right side of the front panel, back panel, and left side of the front panel in rows.
- Join yarn with a sl st to the tip of the front panel.
Row 1: Ch 1, sc in each st across, turn.
Row 2: Ch 2, *skip next st, sc in next st, ch 1; repeat from *to last sc, sc in last st, turn.
Row 3: Ch 2, *sc in next ch 1 space, ch 1, skip next sc; repeat from *to last sc, sc in first ch 2 of row 1, turn.
Row 4 – 32: Rep Row 3
Adjust the repeats for a longer or shorter hood.
Last row: Ch 1, sc in each st across, Fasten off.
Edging
Crocheting across the edging of the hood (three sides)
Join yarn with a sl st to the base of the hood foundation chain.
Ch 1, sc in each st around, aim for 2 sc at each corner, 1 sc in each sc st, and 2 sc in each ch st
Fasten off, leaving a tail long enough for seaming the hood shut.
Fold the hood in half and sew stitch for stitch using your preferred method.
Section 3 – Inner Band
Crocheting across the edges of the front panels and across the hood.
Join the yarn to the lower band of the vest, with the right side facing.
Crocheting in rows.
Row 1: Ch 1, sc in each st across, turn.
Row 2: Ch 2, hdc in each st across, turn.
Row 3: Ch 2, *FPdc around next st, BPdc around next st, rep from * to the end of the row, turn.
Row 4: Ch 2, *BPdc around next st, FPdc around next st, rep from * to the end of the row, turn.
Rows 5 – 6: Rep Rows 3 – 4.
If adding buttons – Button holes
Continue to repeat rows 3 – 4 if you would prefer to skip the adding buttons.
Row 7: Ch 2, *FPdc around next st, BPdc around next st**, rep from * until the right side of the Cardi, continue the repeat for another 8 sts, {ch 2, skip next 2 sts, (FPdc around next st, BPdc around next st)}, rep ( ) 2 more times, rep { } 3 more times, rep from * to ** to the end of the row, turn.
Note: Adjust the number of skipped sts for bigger buttons
Row 8: Ch 2, *BPdc around next st, FPdc around next st, rep from * until you get to the button hole space, 2 dc in ch 2 sp**, rep from * until ** the end, turn.
Row 9: Ch 2, *BPdc around next st, FPdc around next st, rep from * to the end of the row, turn
Section 4 – Bottom Band
Crocheting across the foundation chain of the front and back panels and the inner bands.
Crocheting in rows.
Row 1: Ch 1, sc in each st across, turn.
Row 2: Ch 2, hdc in each st across, turn.
Row 3: Ch 2, *FPdc around next st, BPdc around next st, rep from * to the end of the row, turn.
Row 4: Ch 2, *BPdc around next st, FPdc around next st, rep from * to the end of the row, turn.
Rows 5 – 9: Rep Rows 3 – 4.
Crocheting around the whole vest – bottom band and the front panels across the hood.
Round 1: Ch 1, sc in each st around, (sc, ch 2, sc) at each corner, join with a sl st to the beginning chain
Fasten off and sew in ends.
Section 5: Pockets
Make 2
Chain 24
Row 1: Sc in 2nd chain from hook and in each ch across, turn. 23 sc
Row 2: Ch 2, *skip next sc, sc in next st, ch 1, repeat from *to end, sc in the first ch, turn. 12 sc, 11 ch sp
Row 3: Ch 2, *sc in next ch-1 space, ch1, skip next sc; repeat from *to end, sc in the first ch, turn. 12 sc, 11 ch sp
Rows 4 – 16: Rep row 3.
Shaping
Row 17: Ch 2, sc in next ch 1 space, *ch 1, skip next sc; sc in next st, rep until the last 4 sts, (sctog over next st and ch 1 sp), rep ( ) 1 more time, turn. 12 sc, 9 ch sp
Row 18: Ch 2, skip next st, sc in next st, *ch 1, sc in ch 1 sp, rep from *to the end, sc in last st, turn. 11 sc, 10 ch sp
Row 19 – 32: Rep rows 17 – 18
Edging
Ch 1, sc in each st around, (sc, ch 1, sc) in each corner, join with a sl st to the beginning ch.
Fasten off.
Increase or decrease the number of repeats for the pocket.
Finishing
Pick up the vest and secure the pocket to the lower end of the front and back panels.
Join the pocket to the vest using sc or mattress stitch.
Armhole Opening Finishing
- Join yarn with a sl st to the start of the side seam.
- You are to crochet across the edges of the armhole and around the back and front panels.
Round 1: Ch 1, sc evenly across, join.
Repeat on the other side.
Sew buttons to the other side, corresponding it to the button holes.
Fasten off
Weave in ends.
1 FREE DOWNLOAD PER MONTH
WITH JUST $3 PER MONTH!
- Pick your desired pattern each month.
- It can be a new or old pattern.

2 FREE DOWNLOADS PER MONTH
WITH JUST $5 PER MONTH!
- Pick your desired patterns each month.
- It can be a new or old pattern.
- You get 2 patterns per month.

3 FREE DOWNLOADS PER MONTH
WITH JUST $8 PER MONTH!
- Pick your desired patterns each month.
- You get 3 free patterns per month.
- It can be a new or old pattern.

Join my crochet channel for daily updates at your finger tips
About the Designer
Say Hi on Instagram and Subscribe To my email List for pattern discounts and freebies. For questions, send such to [email protected]. Read more about me here.