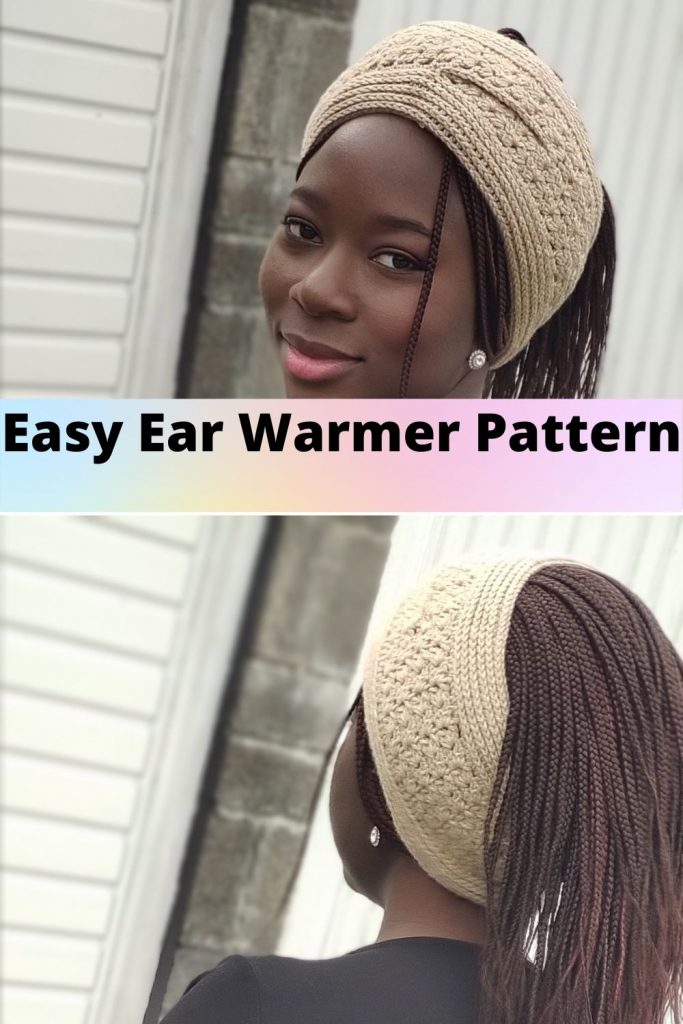
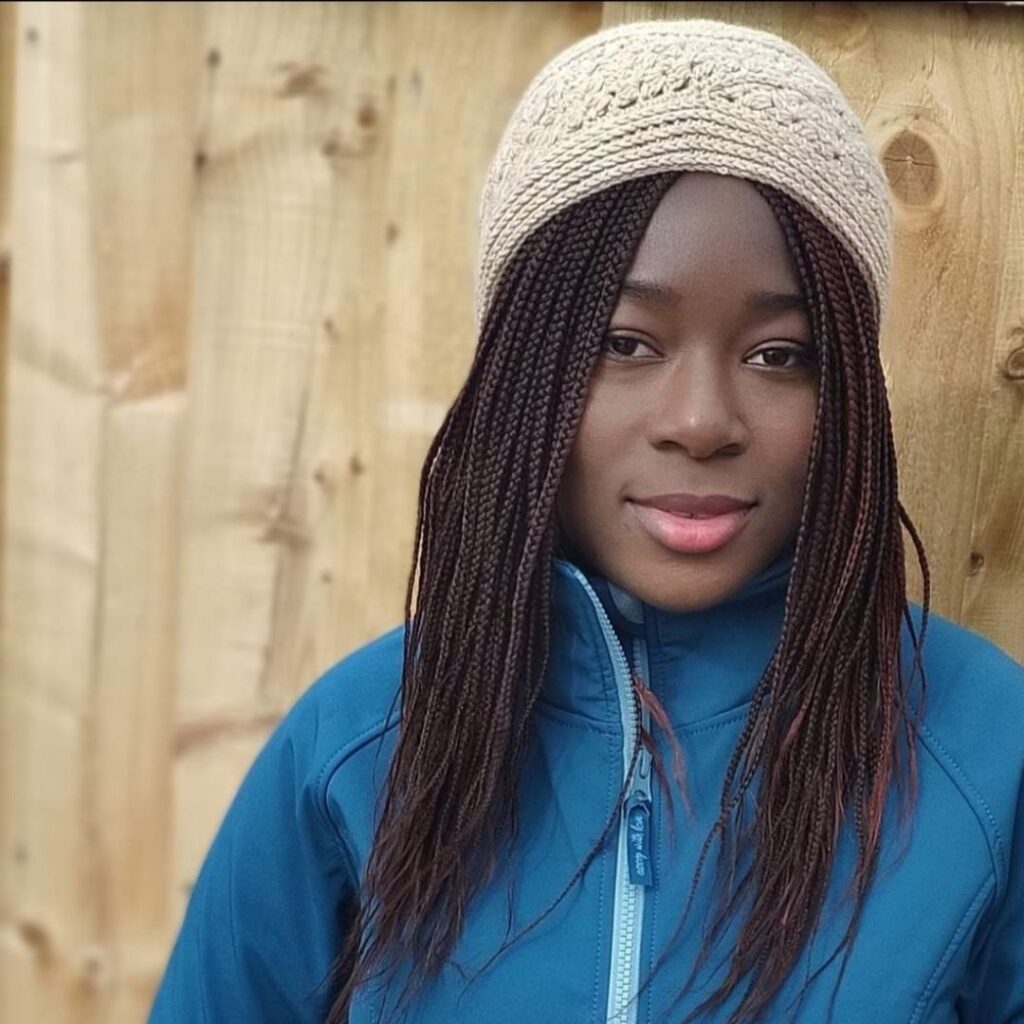
Free crochet winter headband pattern
Keep warm and cozy with this easy-to-follow free crochet winter headband pattern in different sizes. This is a quick project that will make a great gift and can be made in a little time. This simple crochet pattern is a great way to use up leftover yarn.
I hope you have fun following this free crochet pattern and styling yours as it is one of my favorite patterns.
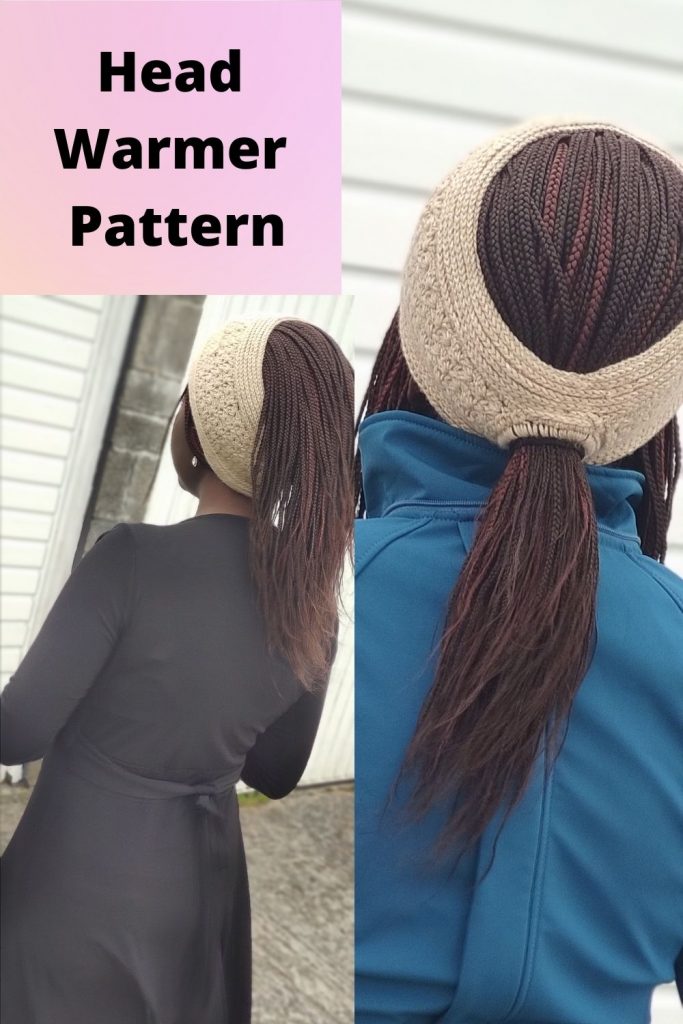
If you are looking for a warmer headband pattern, then this cozy headband is for you. It will make a perfect addition to your winter wardrobe. Scroll down for the written pattern for this Free crochet winter headband pattern.
Join us for daily free crochet patterns over the next 14 days! Have a look at the details here
Supplies needed for this free crochet winter headband pattern
Yarn Lion Brand Jeans, (100% Acrylic, 246 yards/225m per 3.5 oz/100g skein)
1 (1, 1, 1) skein of yarn
Yarn weight – Worsted weight yarn, #4
Estimated Yardage 140 (180, 220, 240) yards
Gauge – 19 sts over 10 rows = 10 cm square/4” made in dc.
Adjust hook size if necessary, to obtain gauge.
Hook and other Materials – 4 mm Crochet Hook
Elastic Hair Band (Optional)
Tapestry needle
Measuring tape
Stitch Marker
Stitch Abbreviations
This simple pattern uses basic crochet stitches
Chain(s) – ch(s)
Single crochet stitch – sc
Slip Stitch – sl st
Half double crochet –
hdc Double crochet – dc
Dc cluster = dc-cl
3rd loop of Half double crochet – 3rd loop of hdc
Special Stitch Tutorial
Dc cluster (dc-cl) = This is 2dctog, ch 1, 2dctog in the indicated stitch. This is also called Cluster V stitch
Step 1: Yarn over, and insert the hook in the indicated stitch.
Step 2: Yarn over, and pull through the stitch, you now have three stitches on your hook.
Step 3: Yarn over, and pull through the first 2 stitches on your hook. You now have 2 stitches on your hook.
Step 4: Yarn over, and insert hook into the same stitch.
Step 5: Yarn over, pull through the stitch, you now have four stitches on your hook.
Step 6: Yarn over, pull through the first 2 stitches on your hook. You now have 3 stitches on your hook.
Step 7: Yarn over, and pull through the remaining 3 sts on your hook. (dc2tog) made.
Step 8: Ch 1
Step 9: Yarn over, and insert the hook into the same stitch.
Step 10: Yarn over, and pull through the stitch, you now have three stitches on your hook.
Step 11: Yarn over, and pull through the first 2 stitches on your hook. You now have 2 stitches on your hook.
Step 12: Yarn over, and insert hook into the same stitch.
Step 13: Yarn over, and pull through the stitch, you now have four stitches on your hook.
Step 14: Yarn over, and pull through the first 2 stitches on your hook. You now have 3 stitches on your hook.
Step 15: Yarn over, and pull through the remaining 3 sts on your hook.
Second dc2tog made
Note that this stitch is not a decrease st, see the tutorial using this link
Check out this tutorial on how to work DC clusters with photos.
Notes for this easy crochet headband pattern
1. Please kindly read through the pattern before starting.
2. Similar #4 weight yarn can be substituted, please check the gauge.
3. Pattern is worked in rows (sections 1 & 2) and in rounds (section 3).
4. Chains at the beginning of the rounds/rows do count as a stitch unless stated.
5. Each dc cluster is worked in ch 1 sp stacked on the previous dc cluster.
Skill level – Intermediate
Terms – US Terminology
Finished measurement using head size
Head Circumference Height Toddler (S) 19” 4”
Child (M) 21” 4” Teen/Adult Small (L) 22” 5”
Adult Large (XL) 23” 5”
For ease of understanding, the instruction has been divided into two parts.
Part 1 – for those using elastic hair bands.
Part 2 – those omitting elastic hair band which has been typed in red
As part of the Gifts galore blog hop by my friend, you get this pattern as a free download. Use the buttons below for the code and scroll down for the download button.

Crochet head warmer crochet pattern
Section 1
If using an Elastic hair band, start from Round 1 – Crocheting around the elastic hair band.
Check this Video for how I joined the yarn to the band – Join yarn to the hair band with a sl st.
Round 1: Ch 1, 42 sc evenly around the band, join with a sl st to beginning ch. 42 sc
Working in rows from here –
Row 1: Ch 2, hdc in next 15 sts, turn. 15 hdc
Row 2: Ch 3 (counts as dc from here), *skip next 2 sts, dc-cl in next st, rep from * to last 3 sts, skip next 2 sts, dc in last st, turn. 4 dc[1]cl, 2 dc.
Row 3: Ch 3, dc-cl in each ch 1 sp across, dc in last st, turn. 4 dc-cl, 2 dc.
Rows 4 – 10 (12, 14, 16): Rep Row 3
Note = The length should be 1/3rd of your finished head circumference.
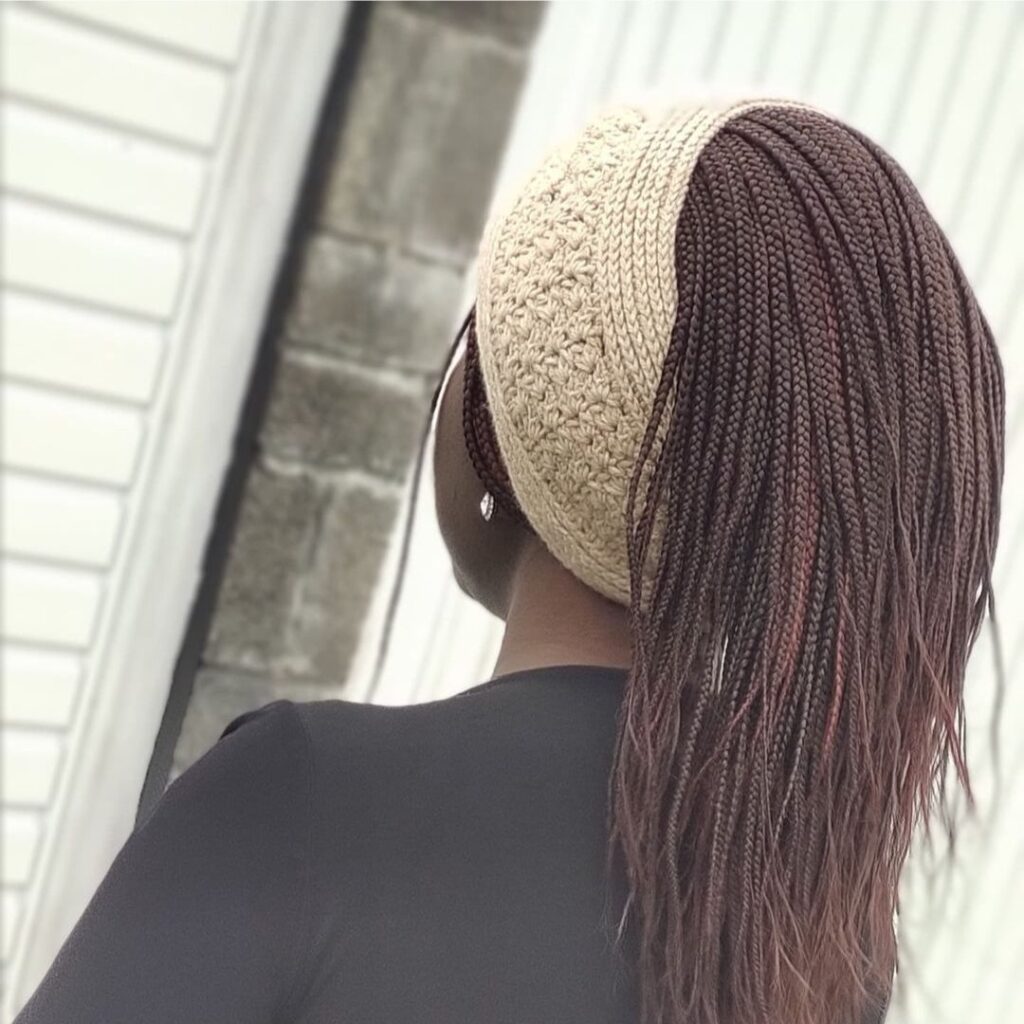
Section 2: Split for Crisscross. 1 st Half
Row 1: Ch 3, dc-cl in next 2 ch 1 sps, dc in next st, turn, leave the remaining sts unworked. 2 dc-cl, 2 dc.
Rows 2 – 11 (13, 15, 17): Ch 3, dc-cl in ch 1 sp, dc in last st, turn. 2 dc-cl, 2 dc.
Row 12 (14, 16, 18): Crocheting down the inner edges towards the stitches left unworked, ch 1, 2 sc in each st across. – Pick up the stitches unworked from the split for crisscrossing.
2nd half of the Crisscross
Row 1: Ch 3, dc-cl in next 2 ch 1 sps, dc in last st, turn. 2 dc-cl, 2 dc.
Repeat Rows 2 – 11 (13, 15, 17) as with the 1 st half.
Fasten off. Joining – Flip the 1st half over the 2nd half
Join yarn with a slip stitch to ch 3 sp on the opposite side of the 2nd half.
Row 1: Ch 3, dc-cl in next 2 ch 1 sps, continue with the other half, dc-cl in last 2 ch 1 sps, dc in last st, turn. 4 dc-cl, 2 dc
Row 2: Ch 3, dc-cl in each ch 1 sp, dc in last st, turn. 4 dc-cl, 2 dc
Rows 3 – 10 (12, 14, 16): Rep Row 2
Fit check = Check to make sure you have the desired length around your head. – If too tight, increase the repeats. – If too loose, decrease the repeats.
Row 11 (13, 15, 17): Ch 2, *hdc in first leg of dc-cl, hdc in ch 1 sp, hdc in the second leg of dc[1]cl, rep from * to last st, hdc in last st.

Section 3 – Finishing/Joining – Free crochet winter headband pattern
Pick up the elastic band from round 1.
Count 6 sts away from the end of the first half of the headband.
With a sl st, join the next sts to the next 15 sts on the elastic band.
Do not fasten off
Crocheting around the upper end of the band in round.
Round 1: Ch 2, hdc in next 6 sts left from the elastic band, 2 hdc in each st (edge) around, pick up the split for overlap from the Crisscross midway, hdc in both crisscross to secure both, hdc in each of the remaining sts around, join with a sl st to the beginning ch.
Round 2: Ch 2, in 3rd loop alone, hdc in each st around, join
Rounds 3 – 3 (3, 5, 5): Rep round 2. Round 4 (4, 6, 6): Ch 1, sl st in each st around, join
Fasten off.
Opposite side – Join yarn with a sl st to the edge of the other opening.
Rep Rounds 1 – 4 (4, 6, 6) as with the other side. Fasten off, and sew in the ends.
Part 2 – If omitting elastic hair band
Row 1: Chain 17, hdc in 3rd ch from hook and in each ch across, turn. 15 hdc
Row 2: Ch 3 (counts as dc from here), *skip next 2 sts, dc-cl in next st, rep from * to last 3 sts, skip next 2 sts, dc in last st, turn. 4 dc[1]cl, 2 dc.
Row 3: Ch 3, dc-cl in each ch 1 sp across, dc in last st, turn. 4 dc-cl, 2 dc.
Rows 4 – 15 (17, 19, 21): Rep Row 3 Note = the length should be 1/3rd of your finished head circumference.
Section 2: Split for Crisscross.
1 st Half
Row 1: Ch 3, dc-cl in next 2 ch 1 sps, dc in next st, turn, leave the remaining sts unworked. 2 dc-cl, 2 dc.
Rows 2 – 11 (13, 15, 17): Ch 3, dc-cl in ch 1 sp, dc in last st, turn. 2 dc-cl, 2 dc. 7
Row 12 (14, 16, 18): Crocheting down the inner edges towards the stitches left unworked, ch 1, 2 sc in each st across.
Pick up the stitches unworked from the split for crisscrossing.
2nd half of the Crisscross Row 1: Ch 3, dc-cl in next 2 ch 1 sps, dc in last st, turn. 2 dc-cl, 2 dc.
Repeat Rows 2 – 11 (13, 15, 17) as with the 1 st half.
Leave a long tail and fasten off.
Joining
Flip the 1st half over the 2nd half
Join yarn with a slip stitch to ch 3 sp on the opposite side of the 2nd half.
Row 1: Ch 3, dc-cl in next 2 ch 1 sps, continue with the other half, dc-cl in last 2 ch 1 sps, dc in last st, turn. 4 dc-cl, 2 dc
Row 2: Ch 3, dc-cl in each ch 1 sp, dc in last st, turn. 4 dc-cl, 2 dc
Rows 3 – 15 (17, 19, 21): Rep Row 2
Fit check = Check to make sure you have the desired length around your head.
If too tight, increase the repeats.
If too loose, decrease the repeats.
Row 11 (13, 15, 17): Ch 2, *hdc in first leg of dc-cl, hdc in ch 1 sp, hdc in the second leg of dc[1]cl, rep from * to last st, hdc in last st.
Section 3 – Finishing/Joining
Turn to the wrong side.
With either mattress stitch or sl st, sew both ends of sections 1 and 3 together.
Do not fasten off.
Turn to the Right side.
Crocheting around the headband edges
Round 1: Ch 2, 2 hdc in each st (edge) around, pick up the split for overlap from the Crisscross midway, hdc in both crisscrosses to secure both, hdc in each of the remaining sts around, join with a sl st to the beginning ch.
Round 2: Ch 2, in 3rd loop alone, hdc in each st around, join
Rounds 3 – 3 (3, 5, 5): Rep round 2. Round 4 (4, 6, 6): Ch 1, sl st in each st around, join
Fasten off.
Opposite side – Join yarn with a sl st to the edge of the other opening.
Rep Rounds 1 – 4 (4, 6, 6) as with the other side. Fasten off, and sew in ends.
There you have your winter crochet headband. Happy crocheting.
Have a look at more crochet winter headband patterns, perfect projects for cold weather
Quick crochet headband = made using super bulky yarn
Simple crochet ear warmer – will make a perfect gift, made using simple stitches.