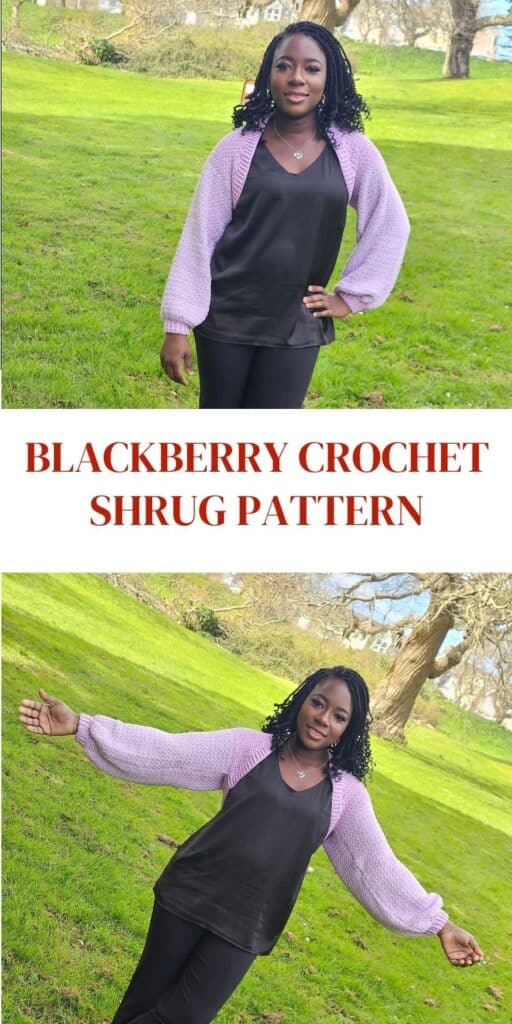
Blackberry Crochet Shrug Pattern
The Blackberry Crochet Shrug is a stylish layering piece that blends comfort, versatility, and elegance. This shrug is the kind of garment you’ll reach for on breezy mornings, cool evenings, or when you simply want to add a handmade touch to your outfit.

Its relaxed fit and cozy sleeves make it both flattering and practical, while the stitch pattern adds beautiful texture that stands out in any yarn color.
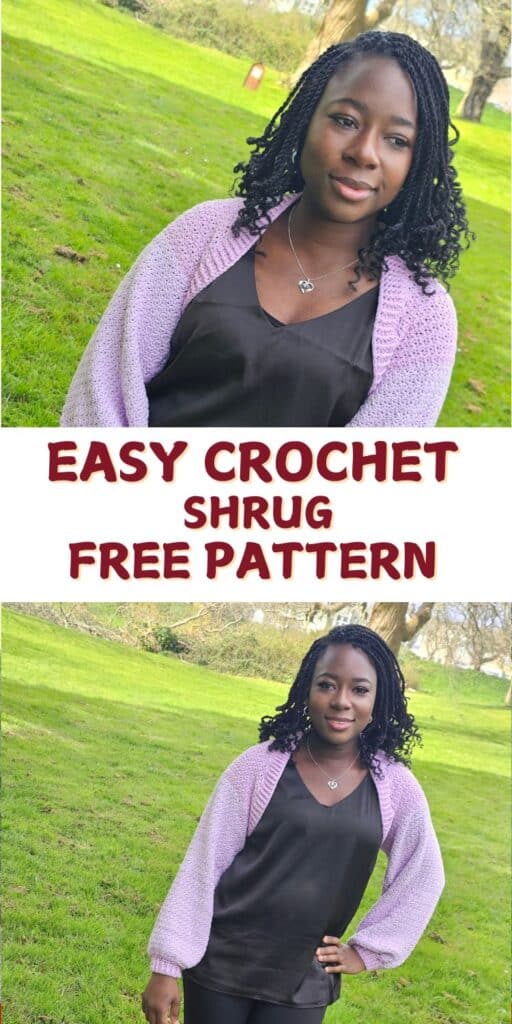
How to Style the Blackberry Shrug
This shrug is as versatile as it gets.
Pair it with jeans and a tank top for a casual day out, throw it over a dress for a date night look, or wear it with trousers and a blouse for a chic office-ready outfit.
The simplicity of the design allows it to blend seamlessly into your wardrobe, while the balloon sleeves make it a standout handmade piece.
Have a look at this cocoon made usign any yarn and this cute retro sleeve shrug.
Blackberry Shrug
Materials
Yarn – Coboo DK weight, #3 lightweight (51% Cotton, 49% Rayon from bamboo, 232 yd/212 m per 3.5 oz/100g skein)
Estimated Total Yardage
900 (1000, 1200, 1300, 1400, 1500, 1600, 1700, 1800) Yards
Hook – 4.5 mm Crochet Hook
16 sts and 12 rows = 4”/ 10 cm square before blocking.
Chain 17, follow the instructions for the pattern for 12 rows and measure.
Pattern Notes
- Please kindly read through the pattern before starting.
- The stitch count is written after each row/round, with the smallest XS written first and the others in parentheses ().
- Stitch count written in black is for all sizes, but at some points, the stitch XS (S, M, L, XL, 2XL, 3XL, 4XL, 5XL) counts are color-coded for clarity, i.e.
Difficulty Level – Intermediate
Terms – US Terminology
Stitches Abbreviations
Chain/chains – ch/chs
Chain space – ch sp
Stitch(es) – st(s)
Slip Stitch – sl st
Single Crochet – sc
Double crochet – dc
Front Post Double crochet – FPdc
Back Post Double crochet – BPdc
Front Post Half Double crochet – FPhdc
Back Post Half Double crochet – BPhdc
Special Stitches
Lemon peel crochet stitch
Sizing and fitting of the Blackberry Crochet Shrug Pattern
Finished Measurements
Size(s) and color codes – XS (S, M, L, XL, 2XL, 3XL, 4XL, 5XL)”
Bust Measurement: 30 (34, 38, 42, 46, 50, 54, 58, 62)”
Armhole Circumference: 14 (14, 16, 16, 16, 16, 18, 18, 18)”
Length of shrug: 8 (8, 10, 10, 12, 12, 14, 14, 14)”
The modeled garment is shown in M, with about 1” of Positive Ease.
Construction Notes
- This shrug is made in 3 sections.
- Section 1: Sleeves, made flat in rows.
- Section 2: Sleeve extension with the front panel shaping done on one side. The remaining sts are then joined together.
- The last section is where you work a few rounds of edging around the stitches left on the back and front openings from section 2.
Picking a size:
Use your bust measurement
The model’s top is an M on a model with an M bust, with 1” of positive ease on me.


1 FREE DOWNLOAD PER MONTH
WITH JUST $3 PER MONTH!
- Pick your desired pattern each month.
- It can be a new or old pattern.

2 FREE DOWNLOADS PER MONTH
WITH JUST $5 PER MONTH!
- Pick your desired patterns each month.
- It can be a new or old pattern.
- You get 2 patterns per month.

3 FREE DOWNLOADS PER MONTH
WITH JUST $8 PER MONTH!
- Pick your desired patterns each month.
- You get 3 free patterns per month.
- It can be a new or old pattern.

Join my crochet channel for daily updates at your finger tips
How to Crochet A Shrug Pattern
Section 1: Sleeve – make 2
Chain 85 (85, 85, 101, 101, 101, 109, 109, 109)
For a fitted shrug, go down a size.
Row 1: Ch 1, sc in each st across, turn. 84 (84, 84, 100, 100, 100, 108, 108, 108) sc
Row 2: Ch 1, sc in first st, dc in next, *sc in next st, dc in next st, repeat from * the end, turn. 42 (42, 42, 50, 50, 50, 54, 54, 54) sc/dc
Note:
The width should measure about: 14 (14, 16, 16, 16, 16, 18, 18, 18”
Adjust the length of the sleeves by reducing or increasing the repeats.
Rows 3 – 47 (51, 55, 59, 59, 59, 69, 69, 49): Rep Row 2
Cuff
Row 1: Ch 2, hdc2tog across, turn. 42 (42, 42, 50, 50, 50, 54, 54, 54) hdc
Row 2: Ch 2, *hdc2tog, hdc in next 2 sts, rep from * across, turn.
- Check the fit around your wrist.
- If too loose, repeat Row 2
- If perfect, proceed to Row 3
Row 3: Ch 2, hdc in st across, turn.
Row 4: *FPhdc in next stitch, BPhdc in next st, repeat from * end of the row, turn. 22 (22, 22, 26, 26, 26, 28, 28, 28) FPdc, 21 (21, 21, 25, 25, 25, 27, 27, 27) BPdc
Row 5: *BPhdc in next st, FPhdc in next stitch, repeat from * end of the row, turn. 22 (22, 22, 26, 26, 26, 28, 28, 28) FPdc, 21 (21, 21, 25, 25, 25, 27, 27, 27) BPdc
Rows 6 – 12: Rep Row 4 – 5
Section 2: Body extension
Right sleeve
Join yarn with a sl st to the foundation chain.
Row 1: Ch 1, sc in first st, dc in next, *sc in next st, dc in next st, repeat from * to end, turn.
Row 2: Ch 1, dc in first st, sc in next, *dc in next st, sc in next st, repeat from * to the last 3 sts, dc in next st, leave the remaining sts unworked, turn.
Row 3: Ch 1, sc in first 3 sts, *dc in next st, sc in next st, repeat from * to end, dc in last st, turn.
Row 4: Ch 1, sc in first st, *dc in next st, sc in next st, repeat from * to the last 3 sts, dc in next st, leave the remaining sts unworked, turn.
Rows 5 – 12 (12, 14, 14, 16, 16, 18, 18, 18): Rep rows 3 – 4
The remaining sts should measure about 8 (8, 10, 10, 12, 12, 14, 14, 14)”
Left sleeve
Follow the instructions as for the sleeves until you get to the shoulder.
Row 1: Ch 1, sc in first st, dc in next, *sc in next st, dc in next st, repeat from * to the end, turn.
Row 2: Ch 1, sc in first 3 sts, *dc in next st, sc in next st, repeat from * to end, dc in last st, turn.
Row 3: Ch 1, sc in first st, *dc in next st, sc in next st, repeat from * to the last 3 sts, dc in next st, leave the remaining 2 sts unworked, turn.
Row 4: Ch 1, sc in first 3 sts, *dc in next st, sc in next st, repeat from * to end, dc in last st, turn.
Rows 5 – 12 (12, 14, 14, 16, 16, 18, 18, 18): Rep rows 3 – 4
If you have adjusted the number of repeats on the right side, repeat those on this sleeve also.
Joining the side
- Place the panels next to each other with the short end of the sleeves (back panel) next to each other.
- Join yarn with a sl st to the tip of the panel.
- Using your crochet hook and into the back loop of panel A and front loop of panel B, sc across.
- Fasten off
Trim
- Crocheting around the right and left sleeves and the back panel openings.
- Don’t worry about the staggered layers across the front opening; these will even out after a few rounds.
- Join yarn with a sl st to the tip of the sleeve opening.
- Make sure to distribute the sts evenly across the staggered short rows.
Round 1: Ch 1, sc in each st around, join with a sl st to the beginning chain.
Round 2: Ch 1, hdc in each st around, join with a sl st to the beginning chain.
Round 3: Ch 1, *FPdc, BPdc, rep from * around, join with a sl st to the beginning chain.
Fit check: Try the shrug on.
If it puckers around your armpit at the back, work (FPdc2tog, BPdc2tog) twice on each side of the lower end of the back panel.
Sew side seams on each side.
Weave in ends.
Block to measurement.
About the Designer
Say Hi on Instagram and Subscribe To my email List for pattern discounts and freebies. For questions, send such to [email protected]. Read more about me here.