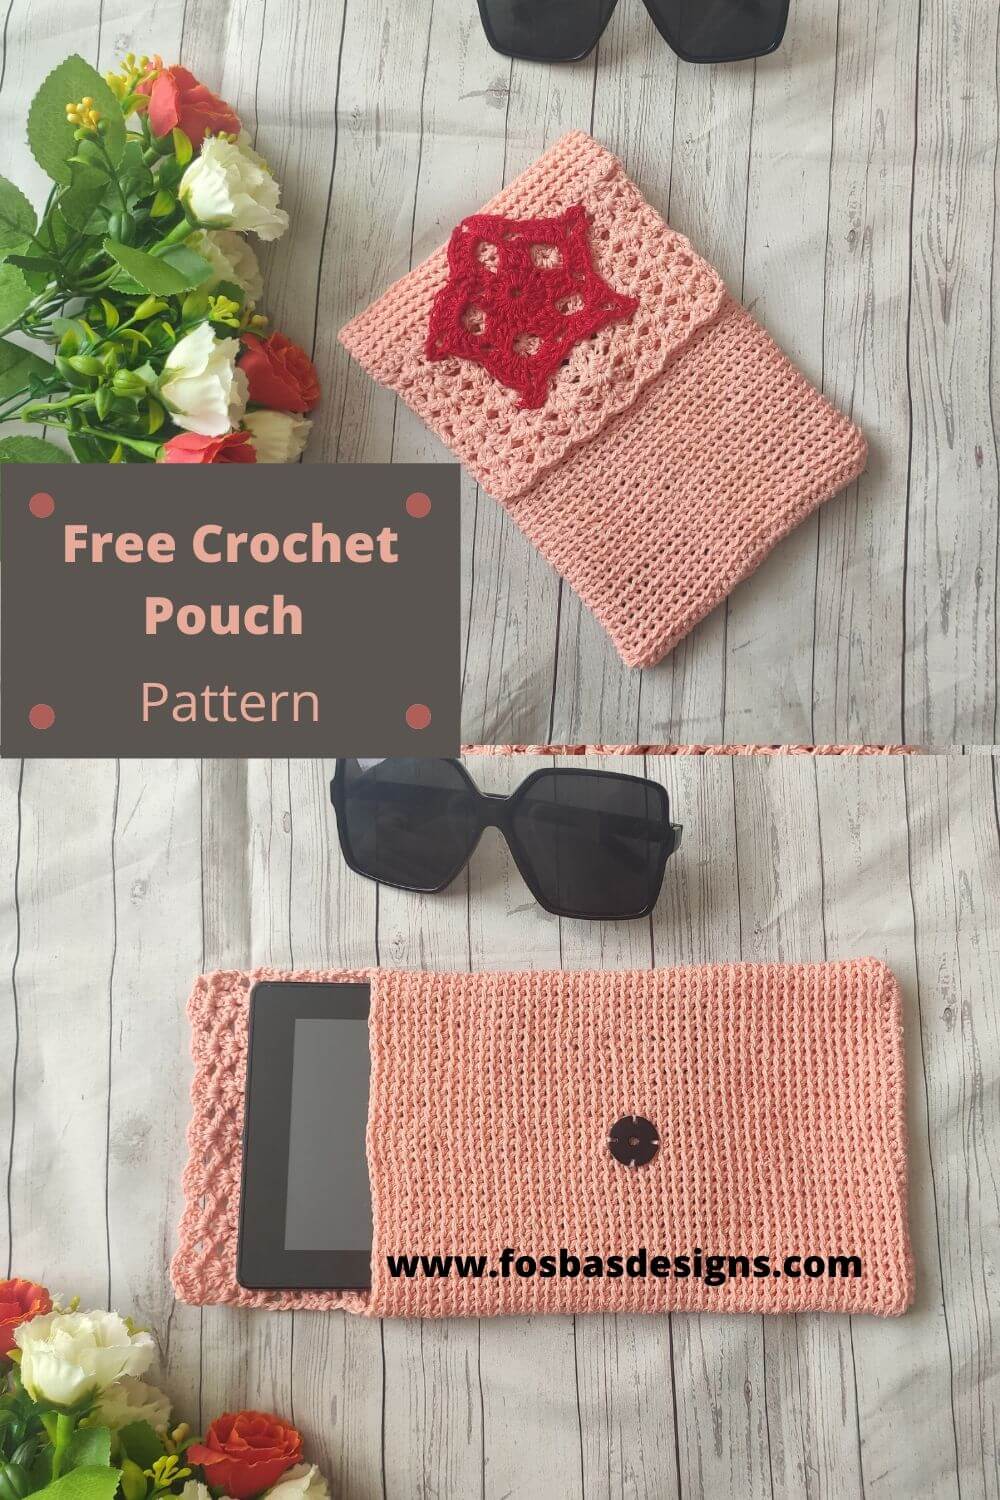
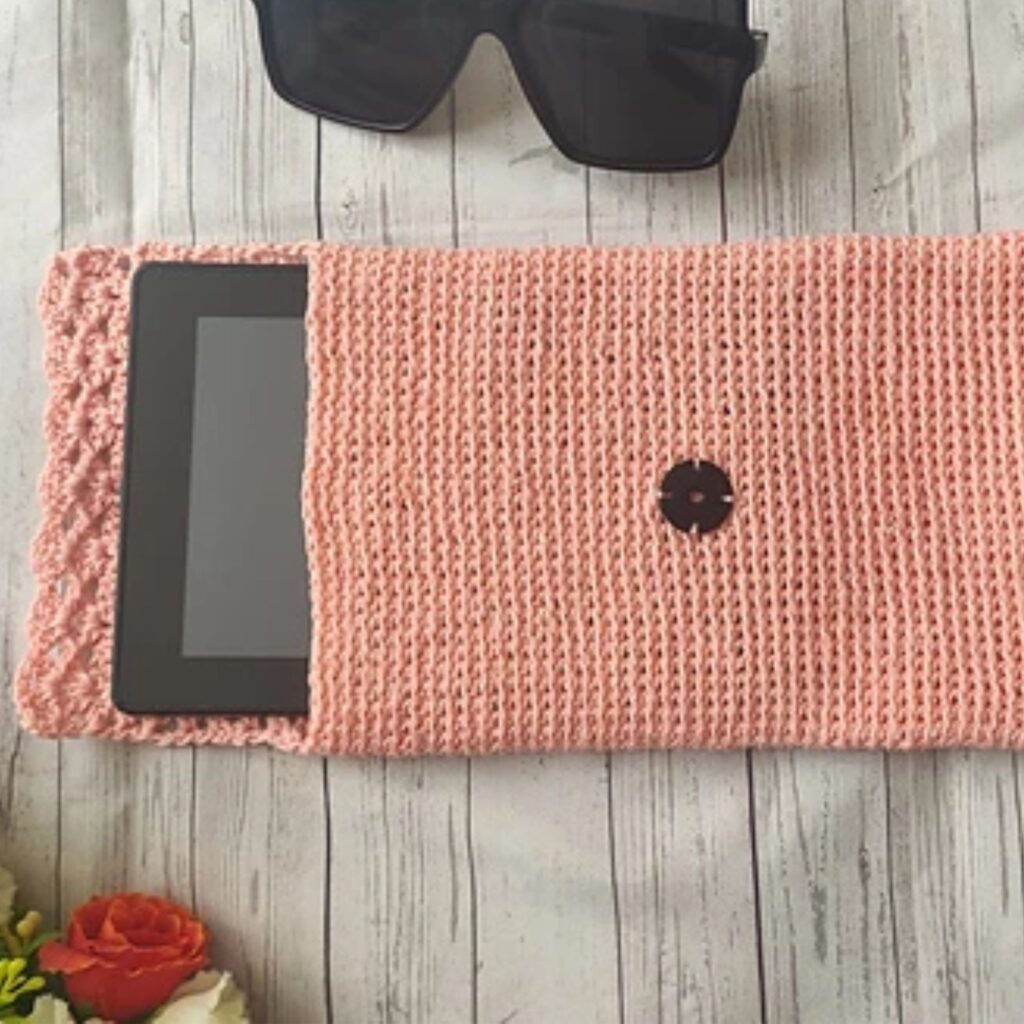
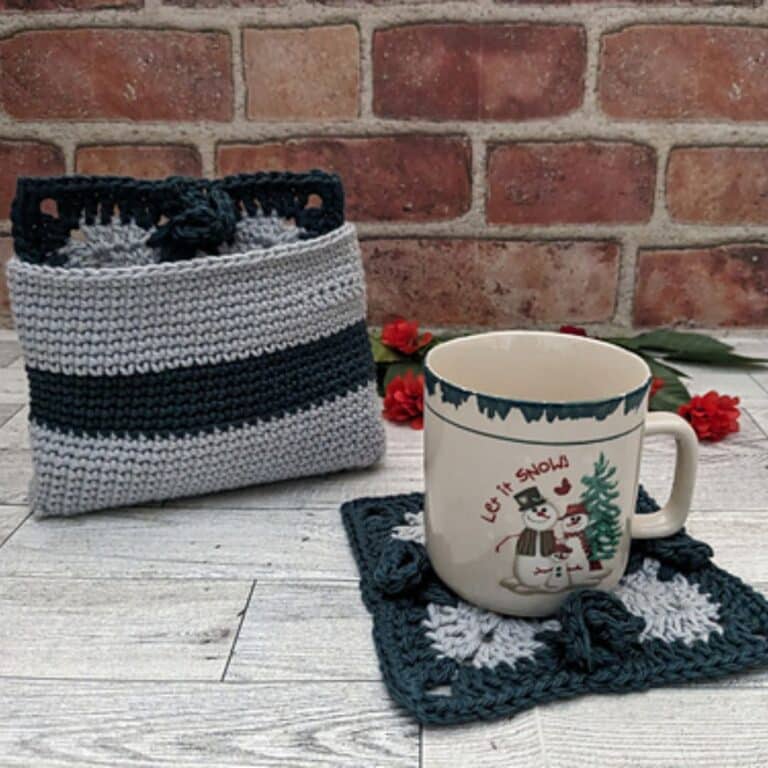
Crochet small Pouch Pattern : Free Bag Pattern
On today’s episode of quick crochet makes is this beautiful crochet small pouch free pattern. This by far is one of the easiest projects I love making.
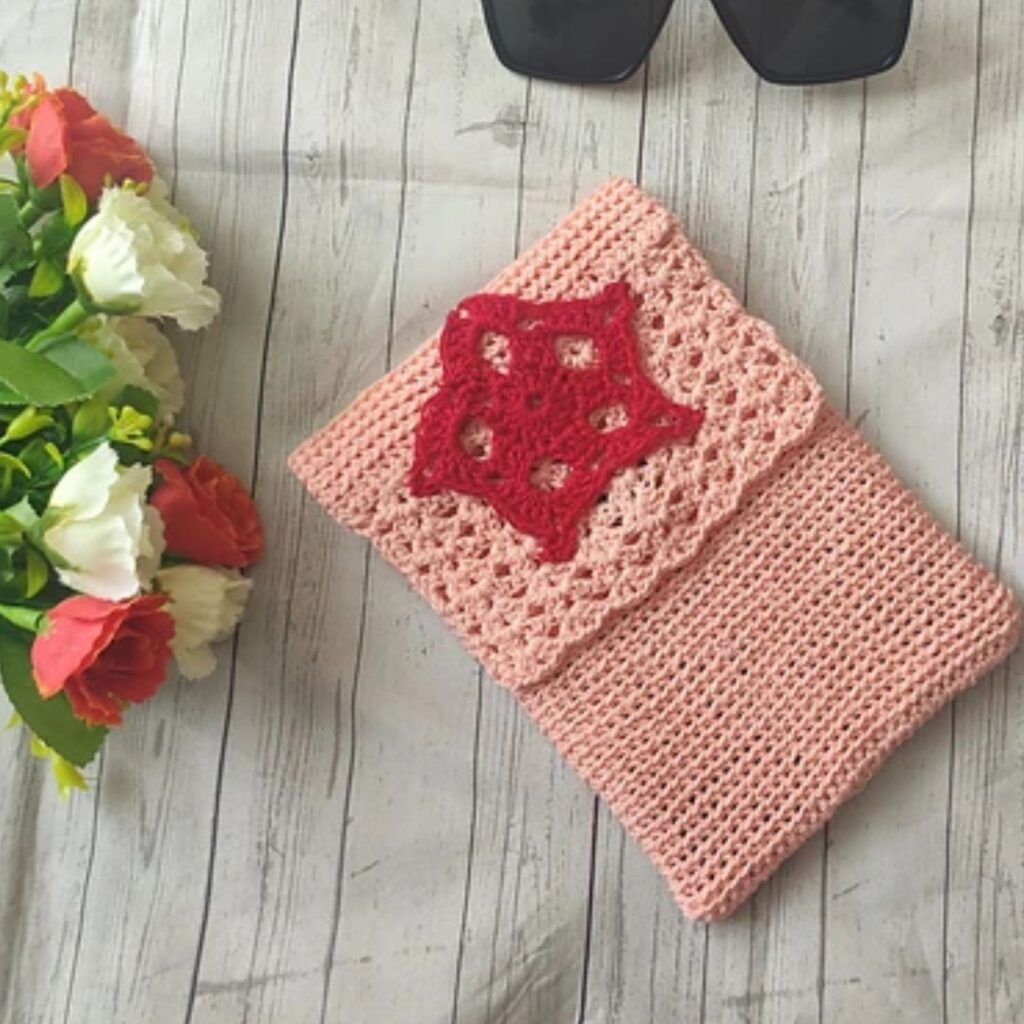
Have you ever made a crochet small pouch? I love that it serves different functions and age groups. This pouch for instance, can be used by all age groups for different functions.
You can use this crochet pouch as sun glass case, coin purse, make bag and even keep your ipad in this.

The most vaccinating thing about this pouch pattern is that you can make this with practically any yarn! Yes, from Fingering weight to double knit to worsted weight yarn. You can also make your pouch as wide and long as you’d love.
Adjustments – you can customize your pouch into a beautiful clutch or into a bigger bag!
Checkout my Wip bag free pattern Here
Supplies for the crochet small pouch pattern
- Yarn
Knitcraft It’s Only Natural Light, DK Yarn, #3 light weight (100% Cotton, 115 yards/105m per 1.75 oz/50g skein).
- Ball in Peach = Main Color (MC)
- Ball in Red = Contrasting Color (CC)
Estimated Yardage needed to make this crochet small pouch
120 yards of Main Color
20 yards of Contrasting Color
- Hook and other materials
- Size H/ (5 mm) Crochet Hook
- Yarn needle
- Snap Button (2 cm)
Gauge
20 sts over 18 rows = 10 mm/4” made in sc
Gauge is not important to this project.
Pattern Notes
- Please kindly read through the pattern before starting.
- Any yarn weight can be substituted, make your starting chains your desired size.
- Chains at the beginning of Section 2 and 3, counts as stitch.
Adjustments
1. Starting chain should be the width you are happy with.
2. Length: increase or decrease the repeats for a desired length of pouch.
Difficulty level – Intermediate
Terms – US Terminology
Stitch Abbreviations
Chains – chs
Single Crochet – sc
Double crochet – dc
Back Loop Only – BLO
Skip – sk
Repeat – rep
Finished Measurement
6” Base (length) by 13” Height
Petal = 3.5” across
Grab the Ad free pattern on Ravelry
Instructions for the easy crochet small pouch pattern
Section 1: Body
Round 1: With MC, chain 34, sc in 2nd ch from hook and in each chain across, turn, working on the opposite side of the chain, sc in next 33 chains, join with a sl st to first ch. 66 sc
Round 2: Ch 1, sc in each st around, join with a sl st to beginning ch. 66 sc
Round 3: Working in BLO, sc in each st around, place st marker in last st and move up with each round. 66 sc
Rounds 4 – 35: Rep Round 3.
You can work Row 3 till desired length.
Do not fasten off.
Section 2 (Flap)
Place stitch marker on 1st and 33rd sts
Row 1: Ch 1, working in both loops, sc in next 33 sts, turn. 33 sc
Row 2: Ch 3, *skip next 3 sts, [2 dc, ch 1, 2dc] in next st, rep from * 6 more times, skip next 3 sts, dc in last st, turn. 7 V dc, 2 dc
Row 3: Ch 3, *working in next ch 1 sp, [2dc, ch 1, 2dc], rep from * to skip last 2 sts, dc in last st, turn. 7 V dc, 2 dc
Rows 4 – 9: Repeat Row 3
Fasten off
Fasten off, sew in ends.
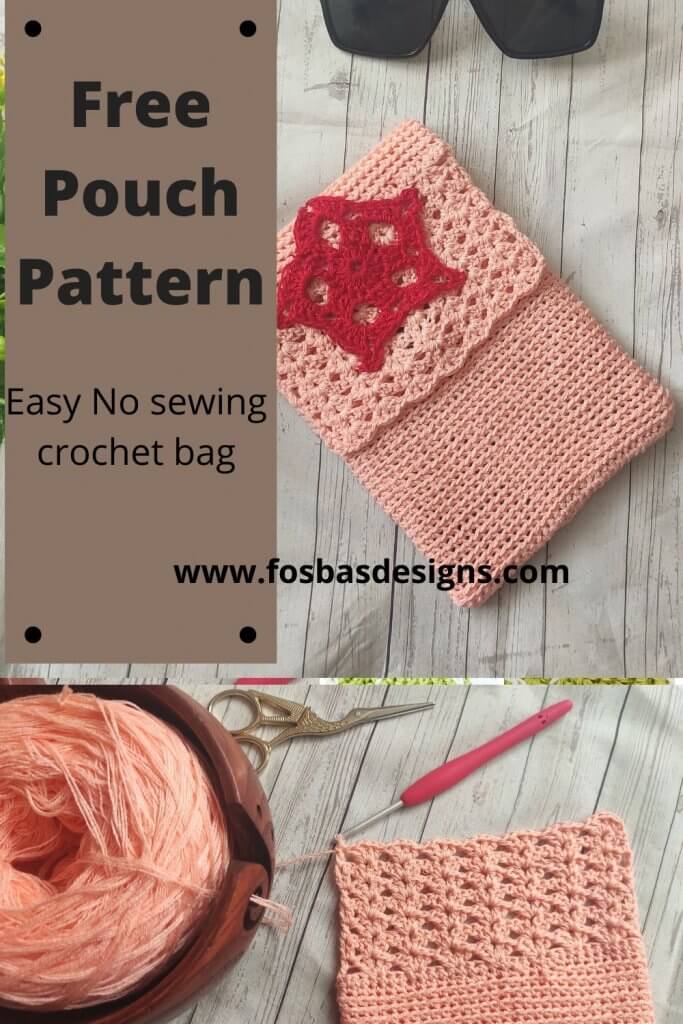
Section 3 – Applique
Chains at the beginning of the rounds counts as a stitch
Round 1: With CC, Make a magic ring, (or Ch 4, join with a sl st to first ch to form a ring), ch 3 (counts as first dc here and throughout), 14 dc in to magic ring, join with a sl st to beginning ch. 15 dc
Round 2: Ch 3, dc in next st, *ch 5, dc in next 3 sts, rep from * to last st, ch 5, dc in last st, join with a sl st to top of ch 3.
5 ch sps, 15 dc
Round 3: Ch 3, sk first st, *in next chain space work (4 dc, ch 5, 4 dc in ch sp), sk next 3 sts, rep from * to end, join with a sl st to top of ch 3.
5 ch sps, 40 dc
Fasten Off.
Weave in ends.
Finishing
- With the pouch on the wrong side, join yarn with a sl st to the base (round 1).
- With both sides together, sc on both sides together. (33 sc)
- Fasten off.
- Turn pouch to right side
- Sew the 5 sides of the applique on the lace part (flap)
Button (snap Button)
- Sew the snap buttons on the flat and the other side on the body of the pouch.
Get the pattern on Ravelry with step by step pictures
Thank you fro making this crochet small pouch Pattern, I would love to see your beautiful makes from this pattern.
One Comment
Comments are closed.