Easy crochet clutch pattern
Have you ever made a crochet clutch before? Well, this is more of a wallet than a crochet clutch but can also be adapted into being a clutch. Read through for how to do this.
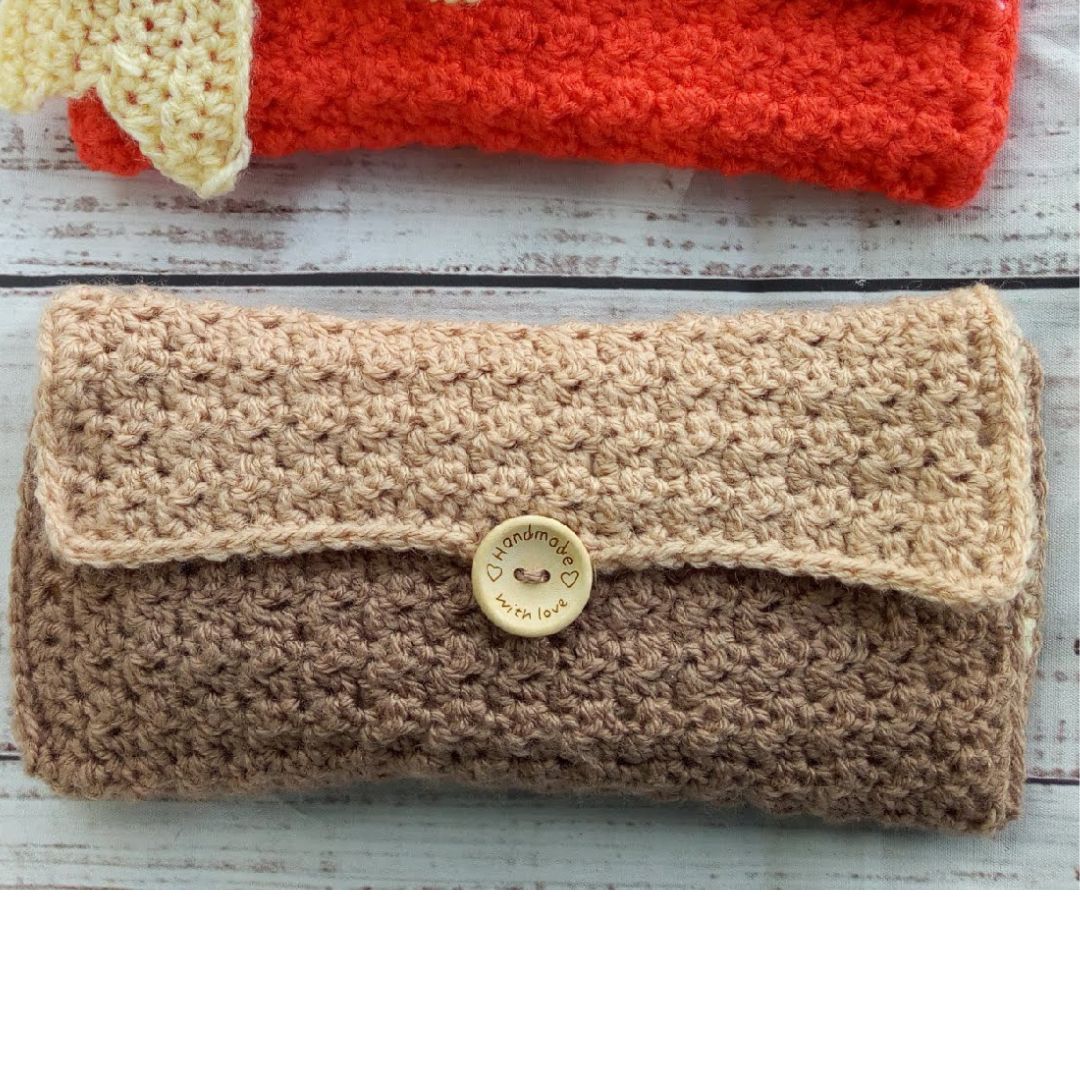
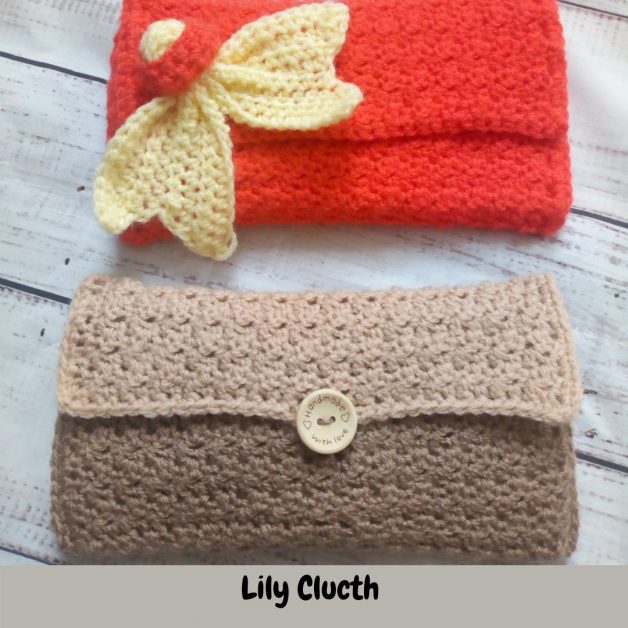
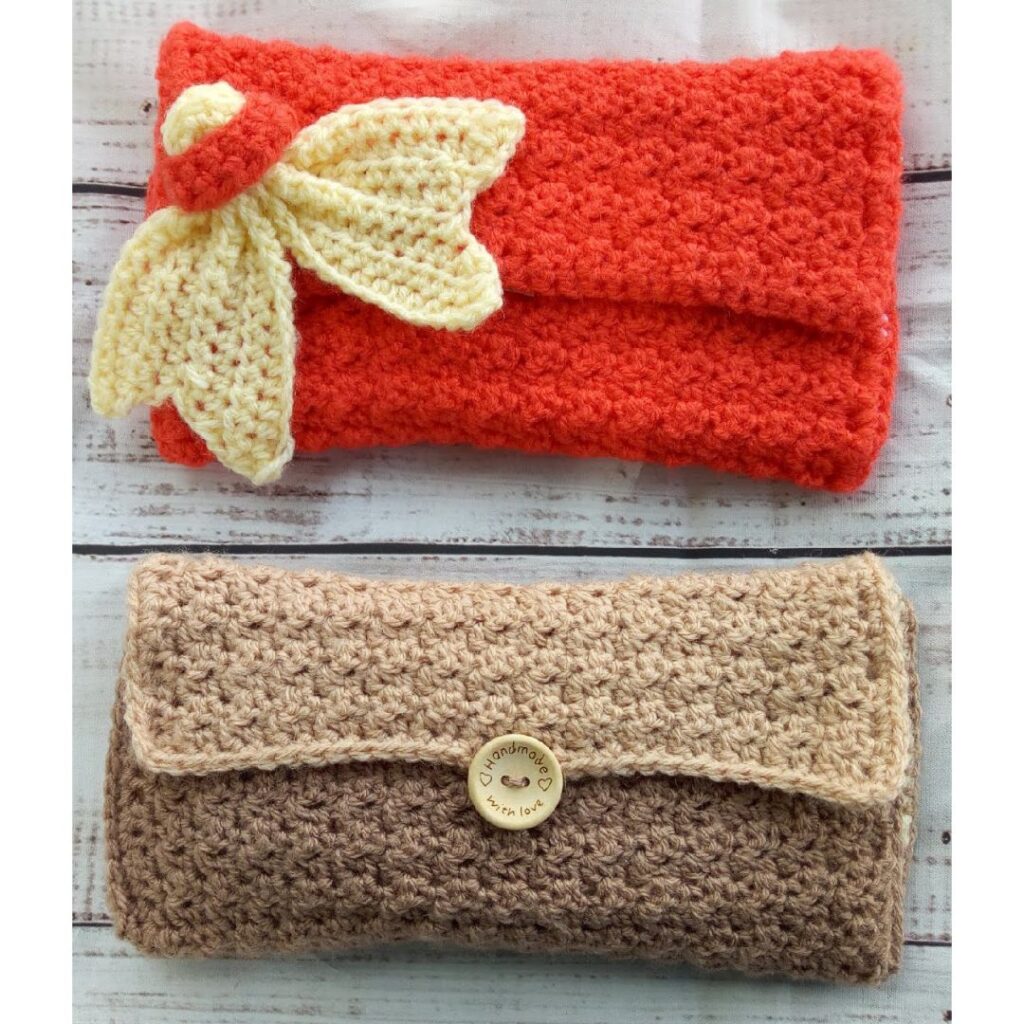
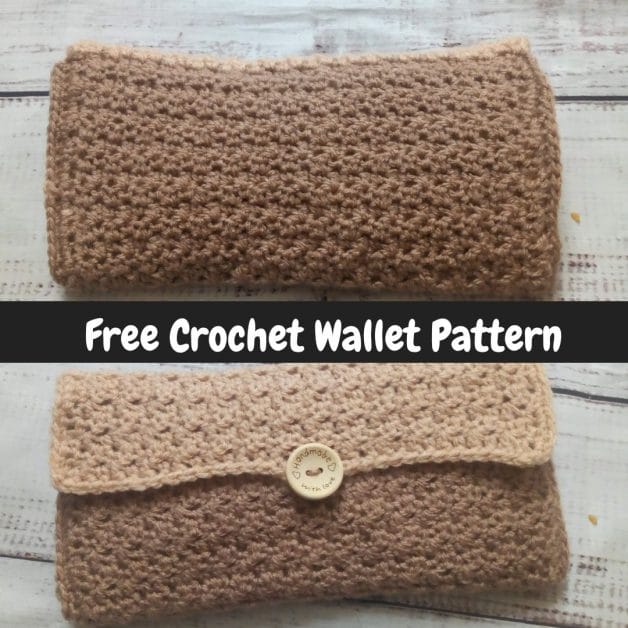
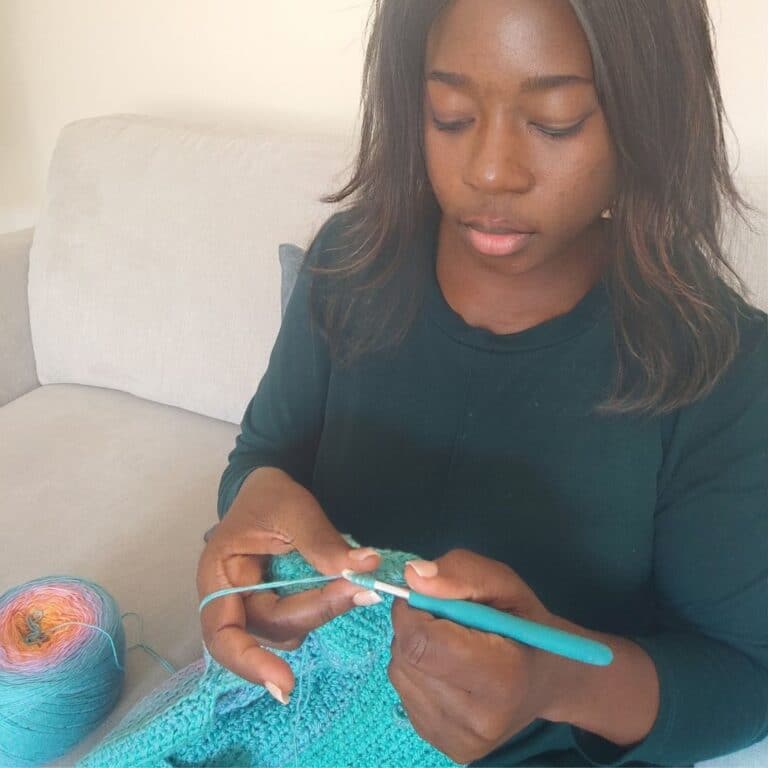
A few years back, I designed this crochet clutch and I couldn’t be happier with the outcome. I mean, this wallet has so many compartments to keep different items like money, cards, phone, and so on.
There are 2 main variations to this beautiful pattern. All instructions for doing so are provided in the pattern. I couldn’t decide which I love the most, so I decided to make two. Does that happen to you?
Let’s talk about crochet accessories, shall we? These are super easy crochet makes that can complement any dressing in different shapes and sizes. I love how to crochet accessories work up so fast and to talk about how easy it is to customize them to fit different personalities makes them so appealing. Which crochet accessory have you made before? I love earrings, necklaces, bags, bow ties, and headbands to mention a few.
Since you love this easy crochet clutch pattern, you might also love the following easy crochet patterns here on my blog.
Crochet bow tie (matching mum and son headband and bow tie pattern)
Crochet Sunglass pouch pattern
Easy crochet boot cuff pattern
Yarn choice
For this easy crochet wallet pattern, you can use absolutely any yarn of your choice. Kindly bear in mind that a change in yarn weight from what was suggested would mean a totally different size of the clutch. You are welcome to alter the starting chains and repeats to fit your yarn choice.
The prototype was made using DK, you can make yours in any weight you want, the only thing to keep in mind is that the finished size would be different from the provided dimensions with any other weight of yarn.
Get the Ad-free PDF copy of this pattern on Ravelry
Materials for lily crochet clutch pattern
Yarn
Lion Brand Coboo, DK weight, #3 (51% Cotton, 49% Rayon, 232 yards/212 m per 3.5 oz/100g Ball)
Estimated Yardage
180 yards in Main Color
80 yards in Contrasting Color
Hook and other Materials
– 5 mm Crochet Hook.
– Button/Velcro
Gauge
12 sts over 12 rows = 4”/10 cm Square made in hdc, before blocking.
Adjust hook size if necessary, to obtain gauge.
Pattern Notes
- Please kindly read through the pattern before starting.
- Similar #3 weight yarn can be substituted, please check the gauge.
- Ch 2 does not count as a stitch.
- Please note that I made 2 different wallets and have used both pictures from these in the pattern.
Difficulty Level – Intermediate
Terms – US Terminology
Stitches Abbreviations
Ch(s) – Chain(s)
St – stitch
sc – Single Crochet
hdc – Half double crochet
hdc2tog – half double crochet 2 together
hdc3tog – half double crochet 3 together
dc – Double crochet
sl st – slip stitch
MC – Main Color
CC – Contrasting Color
Finished Measurements
Opened – 12.5” by 8.5”
Folded – 12.5” by 4”
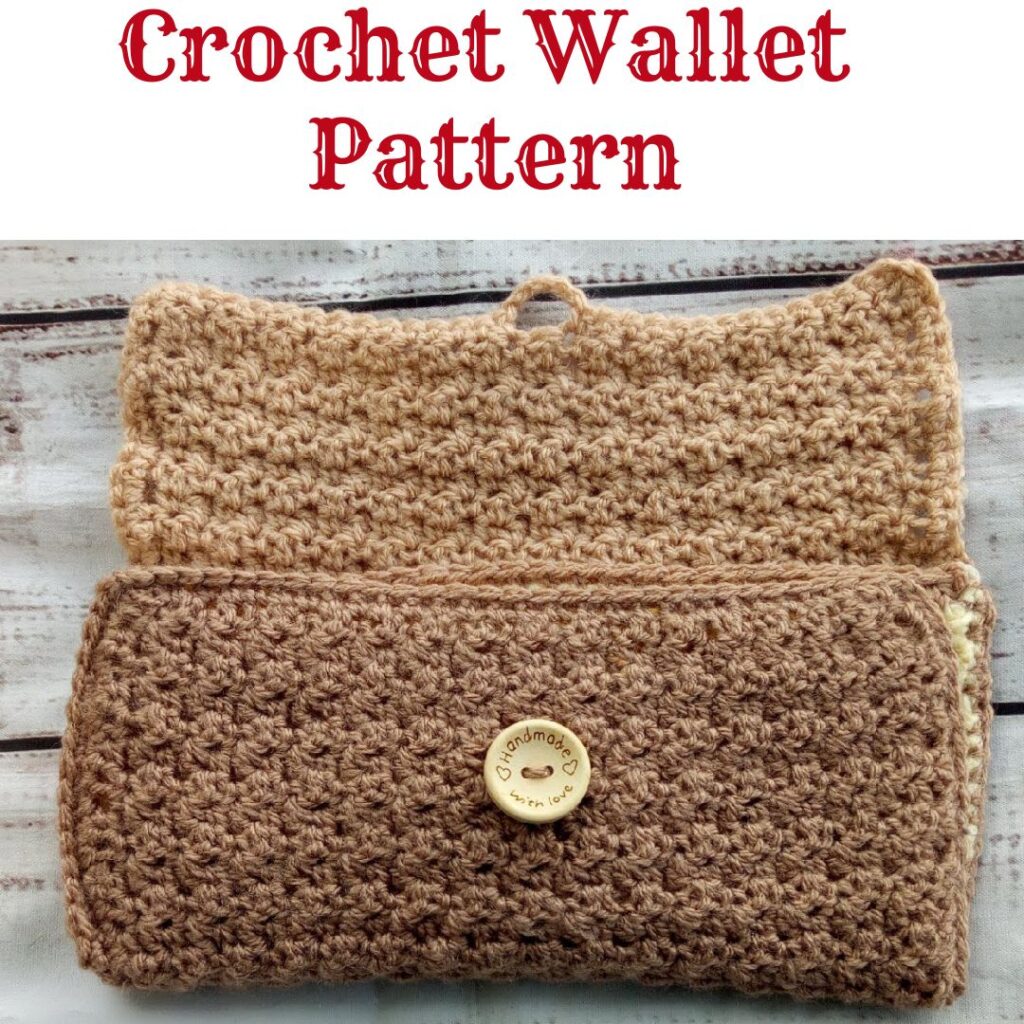
Construction Notes
- The wallet is worked in 2 sections.
- Section 1 – The cover, is crocheted in rows and in one piece.
- Section 2 – the inner part is also crocheted in rows with different pcs made and then sewed to the cover made in section 1.
Adjustments
- Length: increase or decrease the repeats in section 1, you would also need to replicate any changes made in section 1 when making the pieces in section 2 as you would prefer.
Instruction for this clutch pattern
Section 1 – Outer cover
With MC, Chain 35
Row 1: Sc in 2nd ch from hook, dc in next st, *sc in next st, dc in next st, rep from * to the end of the row, turn. 17 sc, 17 dc
- Note – You’ll end with a dc, and always start with sc
- Sc is made on dc of the previous row and dc is made on sc
Row 2: Ch 1, sc in first st, dc in next st, *sc in next st, dc in next st, rep from* to the end of the row, turn. 17 sc, 17 dc
Rows 3 – 20: Rep Row 2
Edging and buttonhole
Ch 1, turn work by 90°, working down the sides, *sc in each st along the edges, ch 1 at the corner, rep from * to 4th side, sc into next 16 sts, ch 5, skip 2 sts, sc into last 16 sts. Join with a sl st into the first ch.
Skip ch 5 if using Velcro
Fasten off.
Section 2 – Inner Lining Layers (3)
- Using CC for the body and MC for the last row.
- Make 2 – label as A and B
Add this to your Ravelry’s queue
Pin this easy clutch crochet pattern to your favorite board on Pinterest
If you want to leave yours a clutch, then skip the layers and proceed to join the sides of your just-completed panel. For the wallet version, continue with the instructions below.
First Layer
- Label as A
Chain 34
Row 1: Hdc in 3rd ch from hook and in each of the remaining chs, turn. 32 hdc
Row 2: Ch 2, hdc in each st across, turn. 32 hdc
Row 3 – 13: Rep Row 2
Fasten off CC, join MC
Row 14: Rep Row 2
Fasten off.
Second layer
- Label as B
- Repeat Rows 1 – 14.
Third layer
- Label as C
Chain 34.
Get the PDF of this easy crochet wallet on Ravelry for stepwise pictures
Row 1: Hdc in 3rd ch from hook and in each of the remaining chs, turn. 32 hdc
Row 2: Ch 2, hdc in each st across, turn. 32 hdc
Rows 3 – 10: Rep Row 2
Fasten off CC, join MC
Row 11: Rep Row 2
Fasten off.
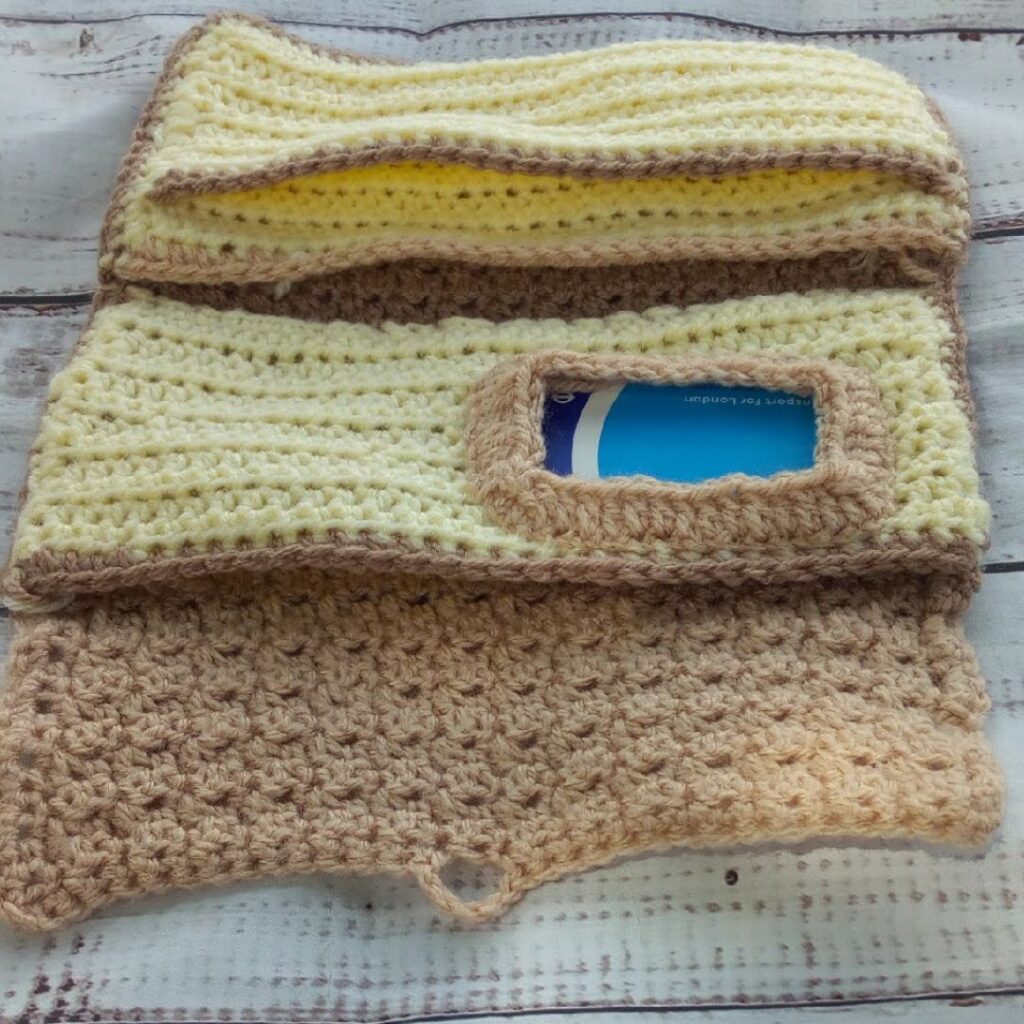
Cardholder
Using MC, chain 52, join with a sl s to the first chain to make a circle
Round 1: Ch 2, *hdc in next 8 chs, hdc3tog, hdc in next 12 sts, hdc3tog, repeat from * till the end of the row, join with a sl st to the 2nd Ch.
Leave a long yarn for sewing
Using a yarn needle, sew in the outer edges of the cardholder to A (one of the layers), do not sew the inner edges as you’ll pass your card through it.
Fasten off.
Section 3 – Bow
Using CC
Chain 52
Row 1: Hdc in 3rd ch from hook, hdc in the remaining chains, turn. 50 hdc
Row 2: Ch 1, hdc2tog, hdc in the remaining sts till last 2 sts, hdc2tog, turn. 48 hdc
Rows 3 – 5: Rep Row 2. 42 hdc
Row 6: Ch 1, 2 hdc in first st, hdc in the remaining sts till last st, hdc, turn. 48 hdc
Row 3 – 5: Repeat Row 6. 50 hdc
Fasten off.
BAND
Using MC, chain 11 – join to make a ring
Round 1: Ch 3, dc in each ch around, join with a sl st with the 3rd ch. 11 dc
Fasten off.
To assemble—
Bow – Fold the bow in half, with the center pinched, pass the pinched part of the bow through the band and sew it together
Wallet –
- Place C over A, using CC, join/sew with a sl st/mattress st to last row.
Ch 1, sc across the sides (short sides and bottom edge, leaving the 4th opening unsewn. Place this on the lower end of the outer layer.
Secure the edges with stitch markers.
These slots would be for checkbook or cash
- Place B 2 rows above the first liner, and secure the edges with a stitch marker.
- Using MC and working around the wallet, with the inside of the wallet facing you, attach yarn with a sl st at the edge, Ch 1, sc around the sides
Fasten off
Sew in edges.
Button/Velcro
Fold the wallet over the liners made.
Sew in button/Velcro on the outer cover
I hope you have fun making your own version of this Lily crochet clutch pattern, do tag me with your makes.
Frequently asked questions about this pattern – Easy crochet wallet/clutch pattern
- Can I substitute any other type of yarn with the same weight? YES, I have only used Stylecraft yarn as that is the yarn available to me. You are welcome to use any other brand of yarn at your disposal.
- Can I use another weight of yarn? It is not advisable to use another weight of yarn as this Clutch measurements, the gauge was based on #3 Double Knit (DK) weight yarn and also tested using a similar weight. However, for the experienced crocheters, you might want to measure as you crochet. Do bear in mind that if you use any other weight of yarn, you might need to adjust your starting chains and the number of repeats.
- I have never made a crochet clutch before, how easy is this pattern? This is my very wallet design but I can assure you, it won’t be my last as I enjoyed every bit of the designing process and I am confident you can make yours also. I have also provided information on how to customize your own wallet so that it fits your personality.
- Can I use more colors than suggested in the pattern? Sure, you are welcome to make your own versions of this wallet in colors of your choice. No matter the color(s) you decide on using, this scarf would come out so beautiful.
- How long does it take to crochet this? In as much as we all crochet at different speeds, I would suggest to budget between 5 days to 1 week. The time it would take you to complete your wallet depends on so many things like – the size you are making, the speed at which you crochet, and the amount of time at your disposal.
Don’t forget to tag me with your makes from this easy crochet clutch pattern on @crochet_foasbas (on Instagram)
I can’t wait to see your beautiful versions of this crochet wallet, when you do make yours, do tag me on my social media handles. I love seeing your interpretations of my crochet patterns.


One Comment