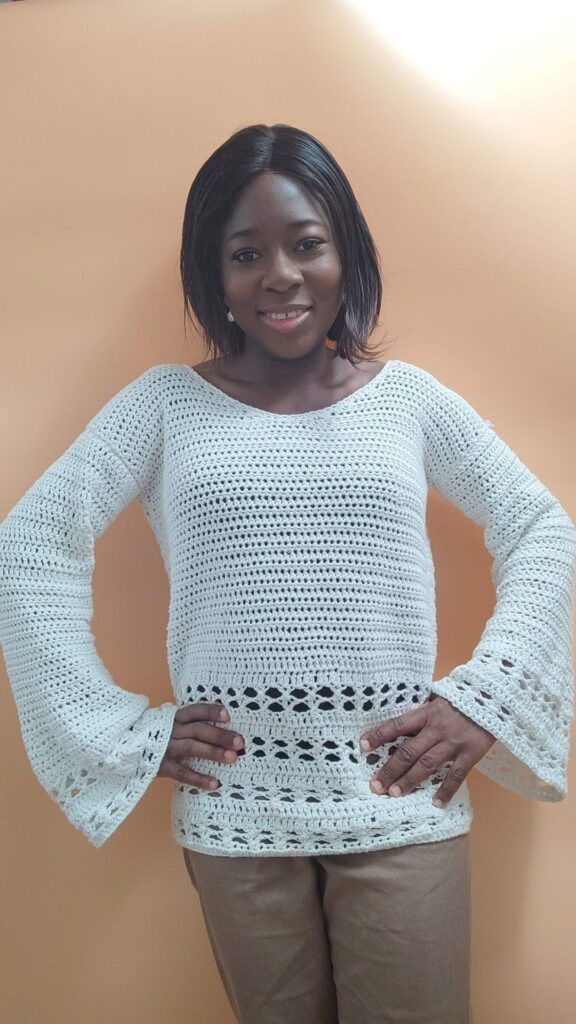
Crochet Bell Sleeve Sweater free pattern
When simplicity meets with elegant details, the result is always spectacular. This is exactly what you get with this crochet bell sleeve sweater free pattern.
Colleen crochet Bell sleeve sweater is a beginner-friendly project as it uses a combination of basic crochet stitches.

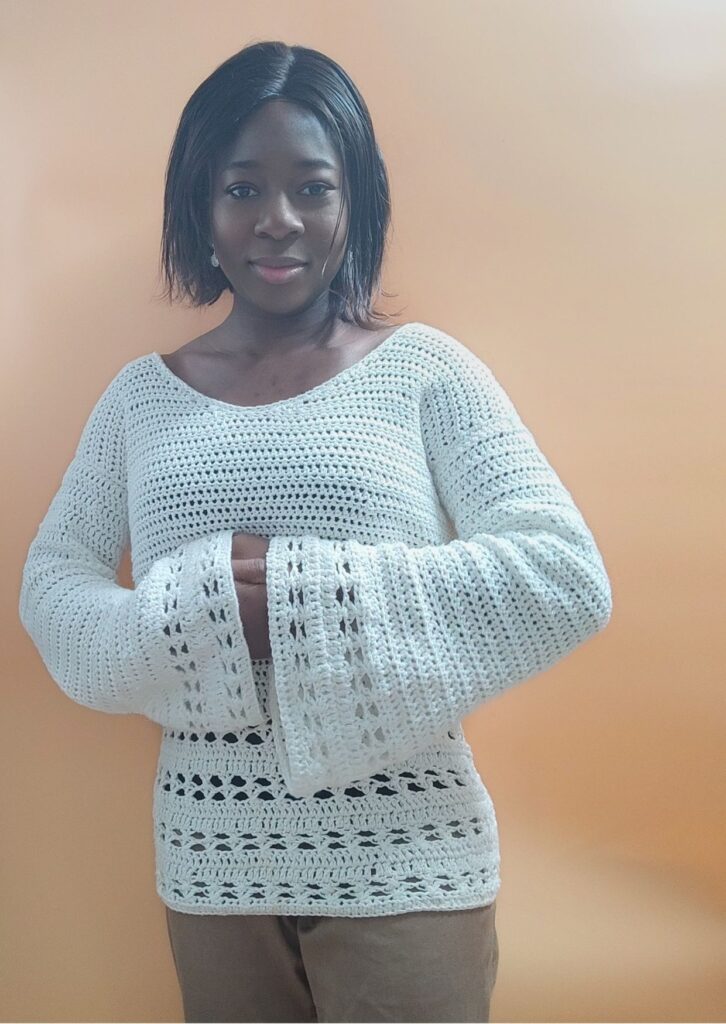
If you have never made any crochet project with bell sleeves, you should give this sweater a trial.
A few weeks ago, the colleen flared Tunnic was published, and since then, I knew I wanted a bell sleeve sweater Using similar concept.
Have a look at other crochet garments and accessories perfect for the whole year.
Finished Measurement for colleen bell sleeve sweater
Size(s) and color codes – XS (S, M, L, XL, 2XL, 3XL, 4XL, 5XL)
Bust Measurement: 30 (34, 38, 42, 46, 50, 54, 58, 62)”
Length of Sweater: 22 (24, 24, 24, 26, 26, 28, 28, 30)”
Arm hole Measurement: 7.5 (8, 8, 8.5, 8.5, 9, 9, 9.5, 10)”
Length of Sleeves: 18 (20, 20, 20, 20, 20, 20, 20, 20)”
Circumference of Sleeves at the widest part: 23 (24 24, 25, 25, 26, 26, 27, 28)”
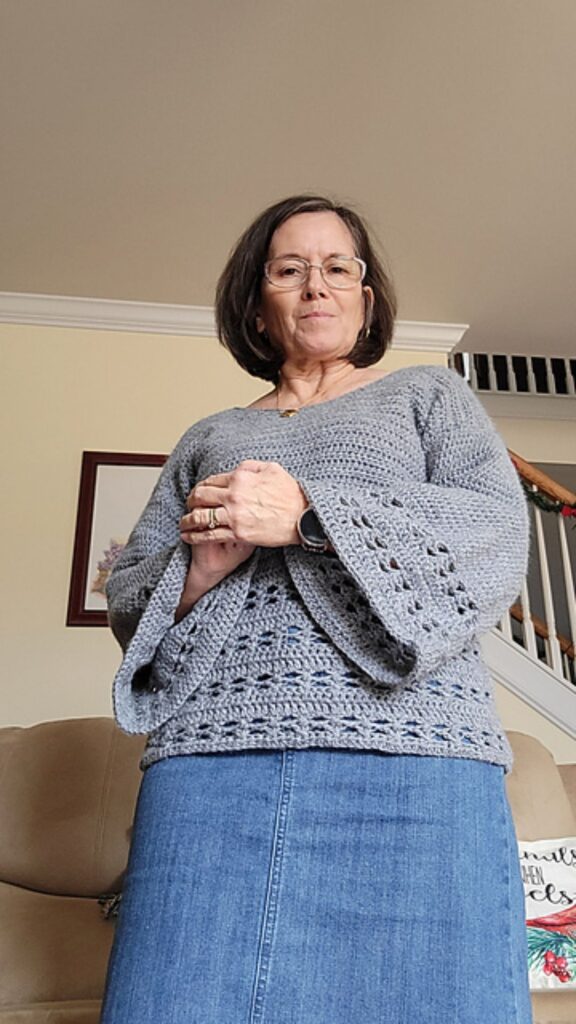
Modeled garment is shown in M, with about 2” of Positive Ease
Supplies needed for this easy crochet bell sleeve sweater free pattern
Yarn – Any #4 weight yarn can be used. When picking your yarn, look out for a yarn with a good drape! This would make the bell sleeves come out beautiful.
The prototype was made using 2 strands of #2, listed below.
Hobbii Twister Solid (55% Cotton, 45% Acrylic, 437 yards/ 400 m per 3.5 oz/100g Ball)
Estimated Yardage for your bell sleeves sweater
900 (1000, 1100, 1200, 1300, 1400, 1500, 1600, 1700) Yards
Hook and other Materials for this crochet bell sleeve sweater
6 mm Crochet Hook for the lace details
5 mm Crochet Hook – for the remaining part (optional)
Stitch markers – 2 pieces
Gauge – 13 sts over 10 Rows = 4” across, made using hdc, before blocking.
Adjust hook size, if necessary, to obtain gauge.
Crochet bell sleeve free pattern notes
- Please kindly read through the pattern before starting.
- Any other #4 weights can be substituted.
- Stitch count is written after each row/round with the smallest XS written first and the other in the ().
- Stitch count written in black is for all sizes but at some points, the stitch counts are color-coded for clarity, i.e. XS (S, M, L, XL, 2XL, 3XL, 4XL, 5XL)
Difficulty Level – Intermediate
Terms – US Terminology
Stitch used for this crochet bell sleeve pattern
Chain/chains – ch/chs
Single crochet – sc
Half double crochet – hdc
Double crochet – dc
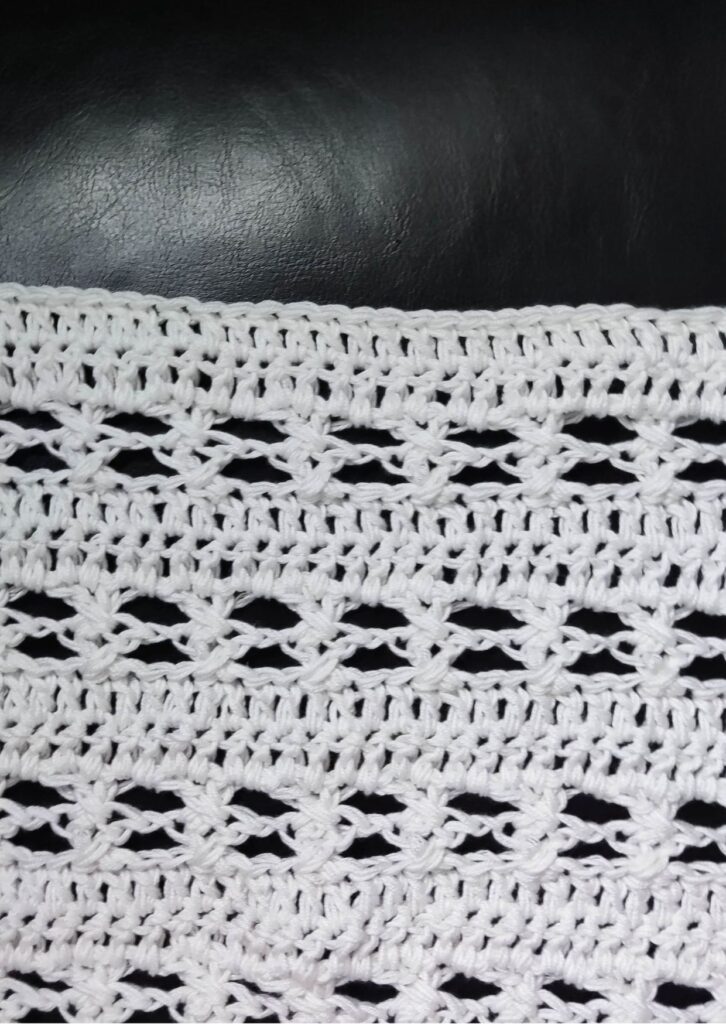
Special Stitch used for the lace details in this crochet bell sleeve sweater
Crossed double crochet lace (xdcl) Foundation row
*ch 1, skip next 3 sts, dc in next st, ch 1, crocheting over the dc just made, dc in second skipped stitch
First crossed double crochet lace made. Repeat from * across.
How to work the second crossed double crochet lace
Next row of crossed double crochet lace (xdcl) = *ch 1, skip ch1 -sp, next st and next ch 1-sp, dc in next st (this is the first leg of xdcl made into the 4th stitch), ch 1, crocheting over the dc just made, dc in the second leg (st) stitch.
First crossed double crochet lace made. , Repeat from * across.
Note – when making the second row of xdcl, you only crochet into the dc stitches and skip all chain 1 spaces.
Construction note
This sweater is made in 2 sections- Section 1 – Front and Back panels and section 2 – the sleeves are made and joined to the main panels
The Collen Bell Sleeve Sweater is available as a free pattern, scroll down for the pattern. If you would prefer the print friendly version with lots of stepwise photos, you can get it on either Etsy or Ravelry.
Bell sleeve sweater pattern on Ravelry
How to crochet a bell sleeve sweater – The instruction
Section 1 – Front and Back Panels
Make 2 pieces
With 6 mm Crochet hook
Chain 53 (61, 69, 77, 85, 93, 101, 109, 117)
Row 1: Hdc in 3rd chain from hook and in each ch across, turn. 51 (59, 67, 75, 83, 91, 99, 107, 115) hdc
Row 2: Ch 2 (do not count as a stitch here and throughout the pattern), dc in first st, *ch 1, skip next 3 sts, dc in next st, ch 1, dc in 2nd skipped st, rep from * until last 2 sts, ch 1, skip next st, dc in last st, turn.12 (14, 16, 18, 20, 22, 24, 26, 28) xdcl, 2 dc
Refer to the special stitch section on completing the second row of xdcl stitch.
Row 3: Ch 2, dc in first st, xdcl across, dc in last st, turn.12 (14, 16, 18, 20, 22, 24, 26, 28) xdcl, 2 dc
Regard the chain 1 spaces as a st and work into them.
Row 4: Ch 2, dc in each st across, turn. 51 (59, 67, 75, 83, 91, 99, 107, 115) dc
Row 5: Ch 2, dc in each st across, turn. 51 (59, 67, 75, 83, 91, 99, 107, 115) dc
Row 6: Repeat Row 2
Row 7: Repeat Row 3
Rows 8 – 9: Repeat Row 4 -5
Row 10: Repeat Row 2
Row 11: Repeat Row 3
Rows 12 – 13: Repeat Row 4 -5
Row 14: Repeat Row 2
Row 15: Repeat Row 3
Rows 16 – 17: Repeat Row 4 -5
Note – You might want to switch to a hook size smaller as the next couple of rows would add 1-2”
Rows 18 – 41 (41, 45, 45, 45, 47, 47, 49, 49): Ch 1, hdc in each st across, turn. 51 (59, 67, 75, 83, 91, 99, 107, 115) hdc
Increase or reduce the number of repeats accordingly.
Neckline shaping
Place stitch markers on the 24 (28, 32, 36, 40, 44, 48, 52, 56) st and 28 (32, 36, 40, 44, 48, 52, 56, 60) stitch
Right side
Crocheting towards the first stitch marker
Note that you are not crocheting into the stitches with the marker.
Row 1: Ch 1, hdc in each of the sts until 6 sts before the marker, hdc2tog 3 times, turn. 20 (24, 28, 32, 36, 40, 44, 48, 52) hdc
Row 2: Ch 1, hdc2tog, hdc in each of the sts across, turn. 19 (23, 27, 31, 35, 39, 43, 47, 51) hdc
Row 3: Ch 1, hdc in each st until the last 2 sts, hdc2tog, turn. 18 (22, 26, 30, 34, 38, 42, 46, 50) hdc
Rows 4 – 5: Repeat Rows 2 – 3
Row 6: Repeat Row 2. 15 (19, 23, 27, 31, 35, 39, 43, 47) hdc
Stop reducing
Row 7: Ch 1, hdc in each st across, turn. 15 (19, 23, 27, 31, 35, 39, 43, 47) hdc
Rows 8 – 10 (12, 14, 14, 16, 18, 18, 18, 18): Repeat Row 7.
Fasten off.
Left Side
Join yarn with a slip stitch to the stitch next to the second stitch marker, crocheting towards the edge.
Crocheting from the 2nd stitch marker.
Row 1: Ch 1, hdc2tog 3 times, hdc in each of the remaining sts, turn. 20 (24, 28, 32, 36, 40, 44, 48, 52) hdc
Row 2: Ch 1, hdc in each of the sts until the last 2 sts, hdc2tog, turn. 19 (23, 27, 31, 35, 39, 43, 47, 51) hdc
Row 3: Ch 1,hdc2tog, hdc in each sts across, turn. 18 (22, 26, 30, 34, 38, 42, 46, 50) hdc
Rows 4 – 5: Repeat Rows 2 – 3
Row 6: Repeat Row 2. 15 (19, 23, 27, 31, 35, 39, 43, 47) hdc
Stop reducing
Row 7: Ch 1, hdc in each st across, turn. 15 (19, 23, 27, 31, 35, 39, 43, 47) hdc
Rows 8 – 10 (12, 14, 14, 16, 18, 18, 18, 18): Repeat Row 7.
Fasten off.
Make the second panel
Shoulder seam(s)
Turn both panels made in section 1 to the wrong side.
- Fold the front panel over the back panel.
- Join yarn with a slip stitch to the tip/end of the neckline.
- Ch 1, sc over both sides, towards the shoulder tip.
- Fasten off, repeat on the other side.
Neckline Opening
Crocheting around the whole neckline
Round 1: Ch 1, sc in each st around the whole neckline opening, join with a sl st to the beginning chain
Round 2: Ch 1, sc in each st around, join with a sl st to the beginning chain
Try your sweater on, if the neckline is too wide, proceed to round 3 below.
If the neckline is perfect, fasten off.
Round 3: Ch 1, *sc2tog, SC in next 6 STS, repeat from * to end, join with a slip stitch to the beginning chain.
Round 4: Ch 1, sl st around, join with a sl st to the beginning ch.
Fasten off.
Side Edging
Crocheting across the side, for easy seaming
With the right side facing, join yarn with a sl st to the start of front panel
Crochet across the edge of the front panel and continue with the back panel.
Row 1: Ch 1, *sc in next st, 2 sc in next, rep * across the side of the front panel towards the shoulder seam and continue to the back panel
Fasten off
Repeat on the other side of the main panel
Side seam(s)
- Turn both panels to the wrong side.
- With the front panel over the back panel, and the wrong side facing you and the right side facing each other.
- Measure 7.5 (8, 8, 8.5, 8.5, 9, 9, 9.5, 10)” from the shoulder tip downwards.
- Place stitch markers on the point (1st on the front panel, the 2nd on the back panel), over both panels.
- Join yarn with a sl st to the stitch with the marker.
- Using either a needle or hook and either mattress stitch or sl st, sew the remaining sts on both panels together.
- Repeat on the other side. Fasten off.
Section 2 – How to crochet Crochet Bell Sleeves
- Join yarn with a sl st to the stitch with the first marker, crocheting towards the next marker.
- For a better fit, you could go down or up the sizes.
- Note that your stitch counts may vary from the ones provided below if you have adjusted the length of your sleeves opening.
Round 1: Ch 1, sc in each st around the whole sleeve opening, join with a sl st to the beginning chain. 50 (52, 52, 56, 56, 60, 60, 64, 65) sc
Rounds 2 – 26: Ch 1, hdc in each st around, join with a sl st to the beginning chain. 50 (52, 52, 56, 56, 60, 60, 64, 65) hdc
Continue the repeats until you have a length at the elbow
Round 27: Ch 1, *2 hdc in next st, hdc in next st, rep from * to end, join with a sl st to the beginning chain. 75 (78, 78, 84, 84, 90, 90, 96, 98) hdc
Rounds 28 – 31: Ch 1, hdc in each st around, join with a sl st to the beginning chain. 75 (78, 78, 84, 84, 90, 90, 96, 98) hdc
Optional – for a wider sleeve
- Ch 1, *2 hdc in next st, hdc in next 2 sts, rep from * to end, join with a sl st to the beginning chain.
Round 32: Ch 2, dc in first st, xdcl across, skip the last 2 (1, 1, 3, 3, 1, 1, 3, 1), ch 1, join with a sl st to the beginning chain.18 (19, 19, 20, 20, 22, 22, 21, 22) xdcl, 1 dc
Round 33: Ch 2, dc in first st, xdcl across, join with a sl st to the beginning chain.18 (19, 19, 20, 20, 22, 22, 21, 22) xdcl, 1 dc
Regard the chain 1 spaces as a st and work into them.
Round 34: Ch 2, dc in each st across, join with a sl st to the beginning chain. 72 (77, 77, 79, 79, 89, 89, 91, 97) dc
Round 35: Rep Round 34
Rounds 36 – 37: Ch 2, dc in first st, xdcl across, join with a sl st to the beginning chain.18 (19, 19, 20, 20, 22, 22, 21, 22) xdcl, 1 dc
Rounds 38 – 39: Repeat Round 34
Round 40: Ch 1, sl st in each st around, join with a sl st to the beginning ch.
Fasten off.
Repeat on the other side.
Block your finished sweater
I love seeing your interpretation of my patterns, when you make yours from this easy crochet bell sleeve free pattern, kindly tag me