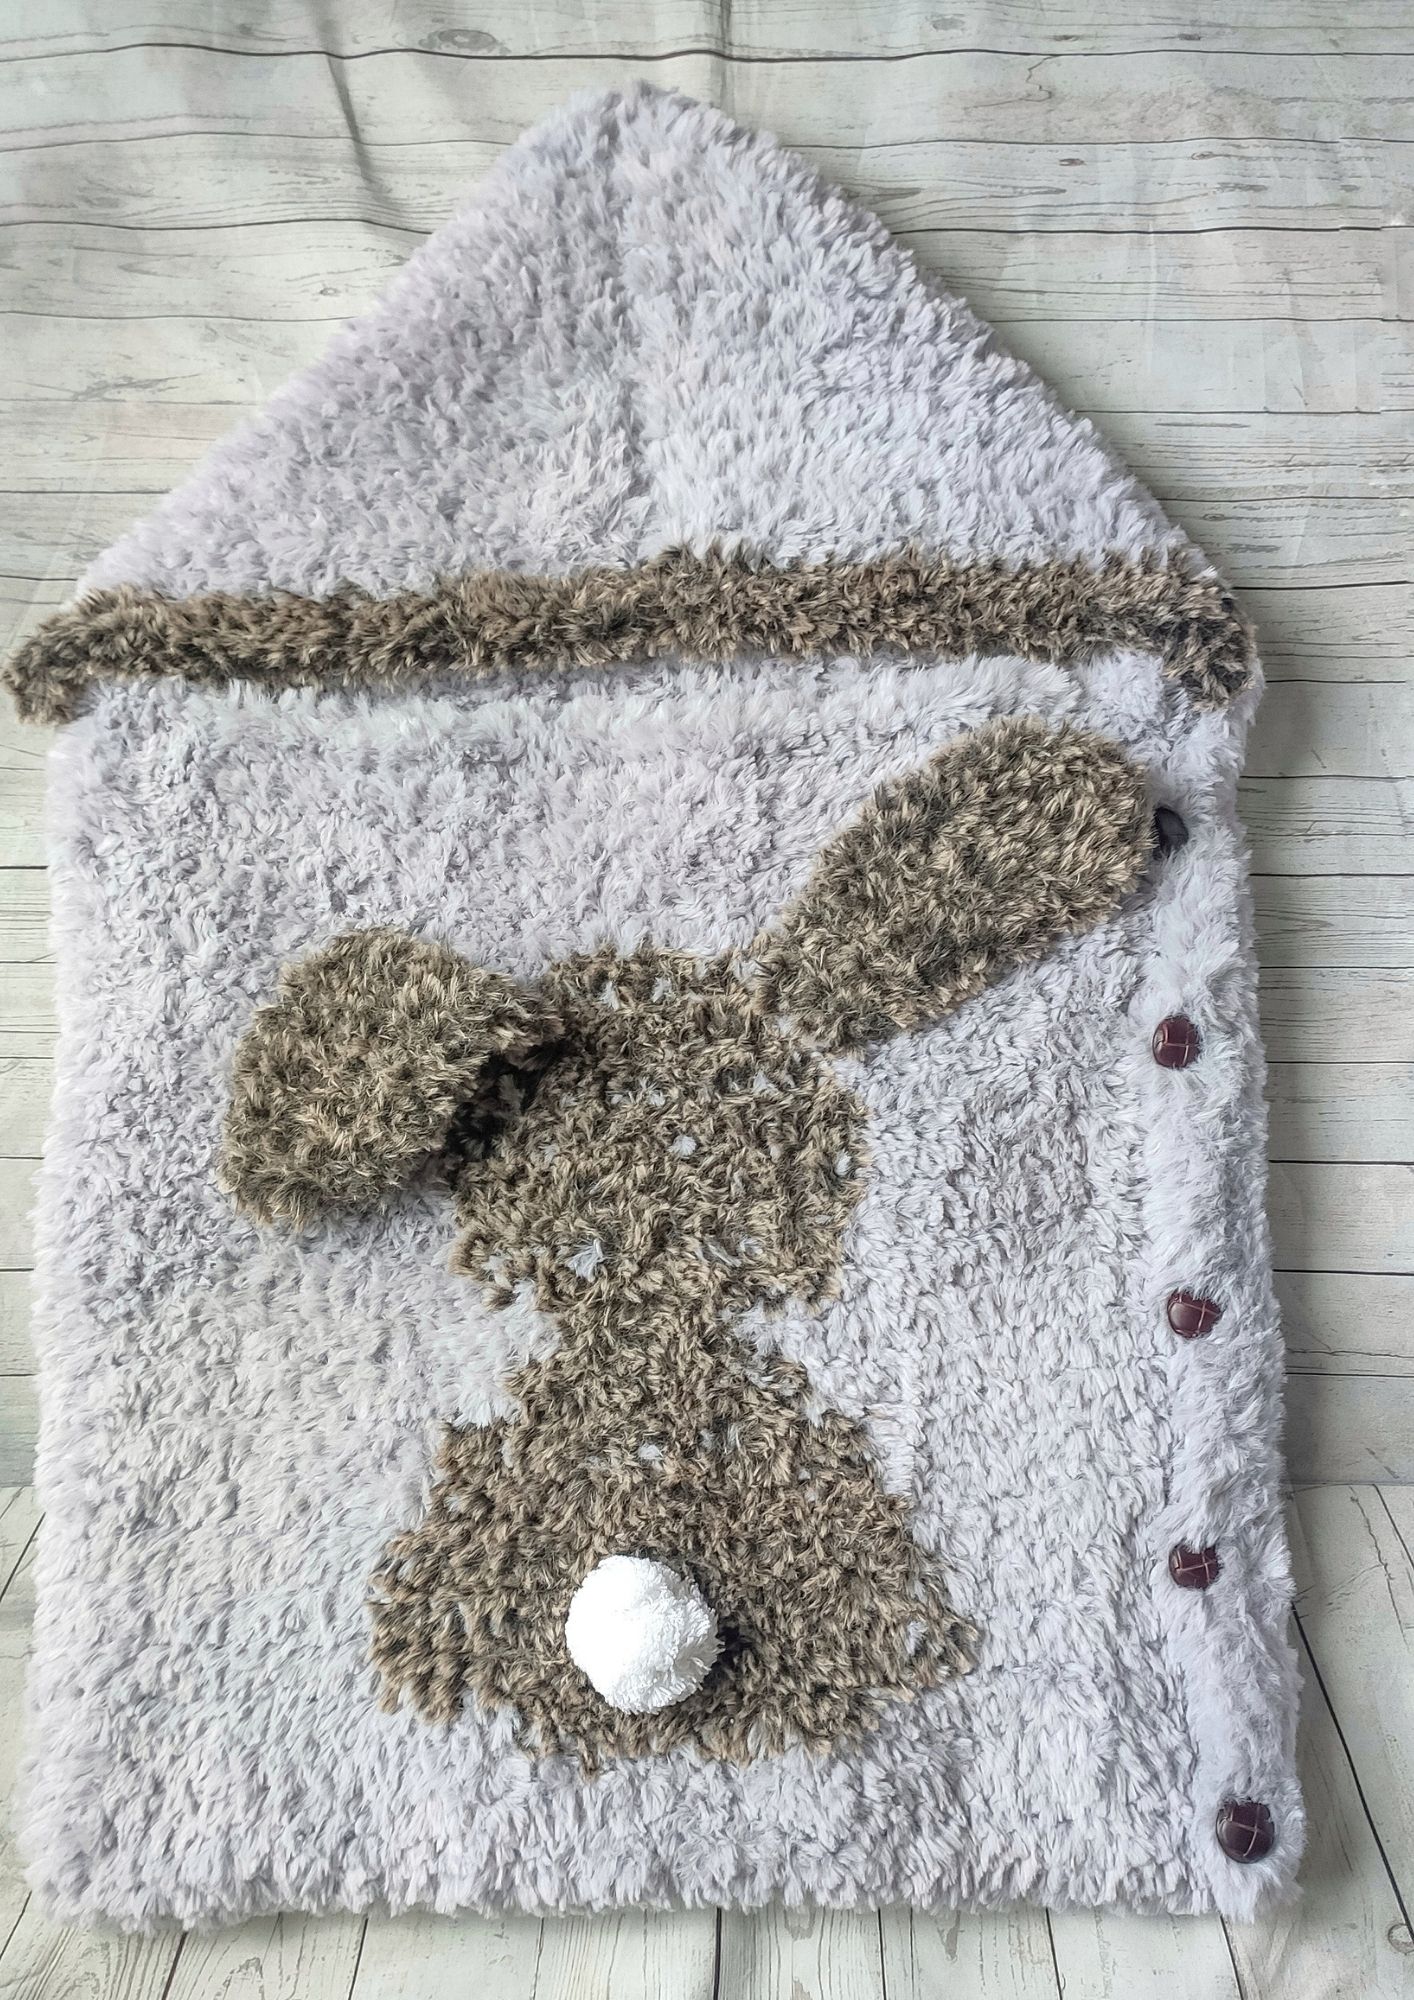
Crochet Free Sleeping Sack Pattern
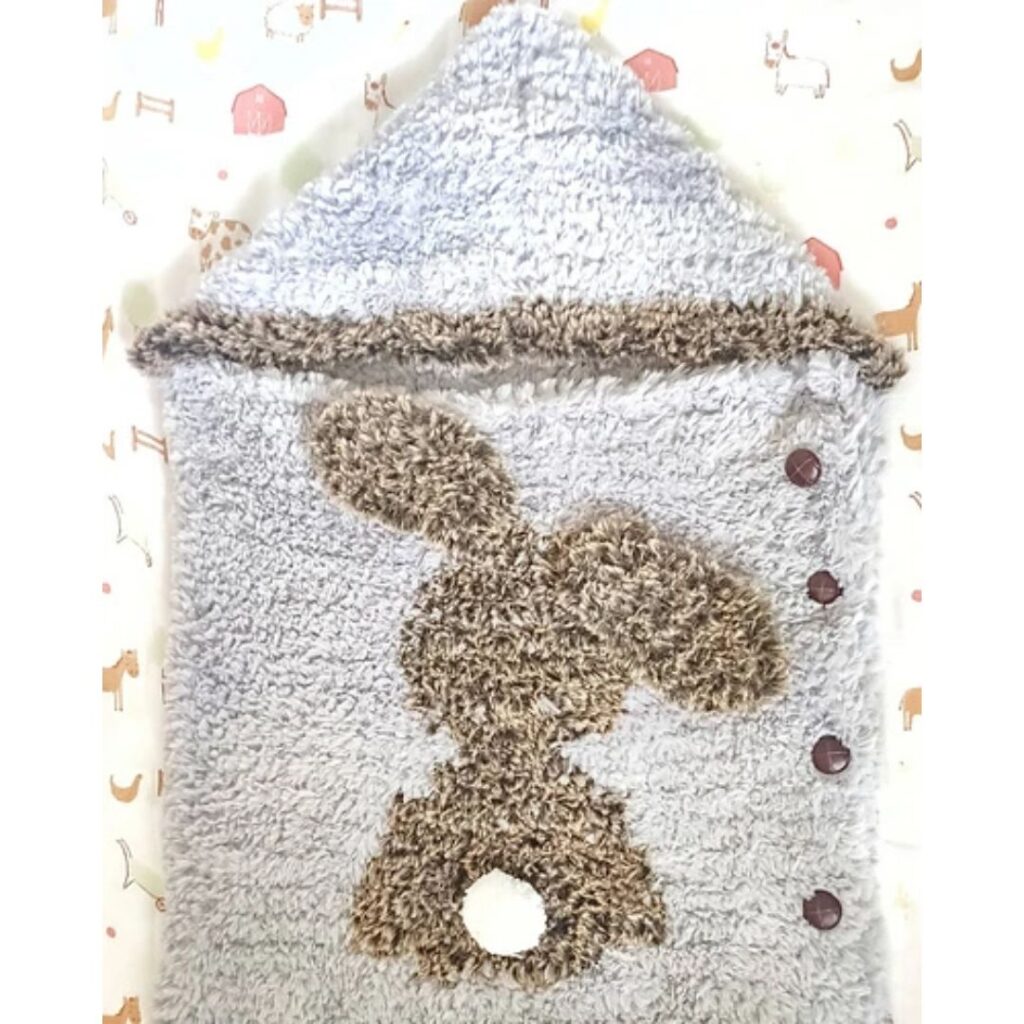
I have always wanted to design a sleeping sack. When I had my first son, I sewed him a cute sleeping sack. Since I developed my crocheting skills, I made a crochet version and went for a BUNNY theme. It’s incredible how much can be achieved using wool.

Disclaimer: Please monitor babies when putting them in crochet sleeping bags. Do not over-dress babies to avoid too much heat.
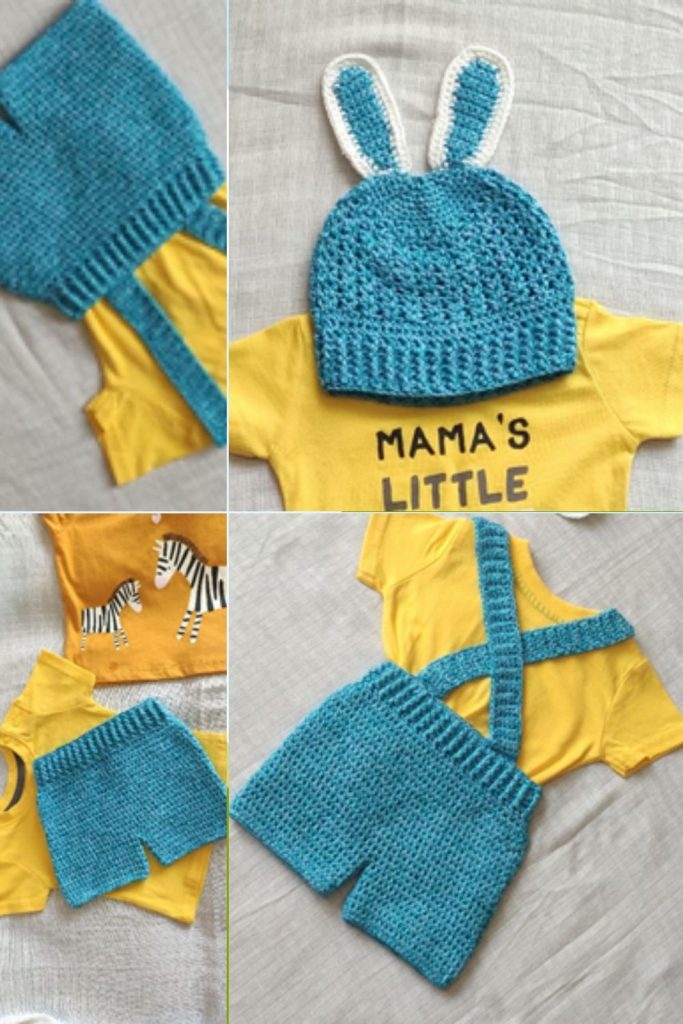
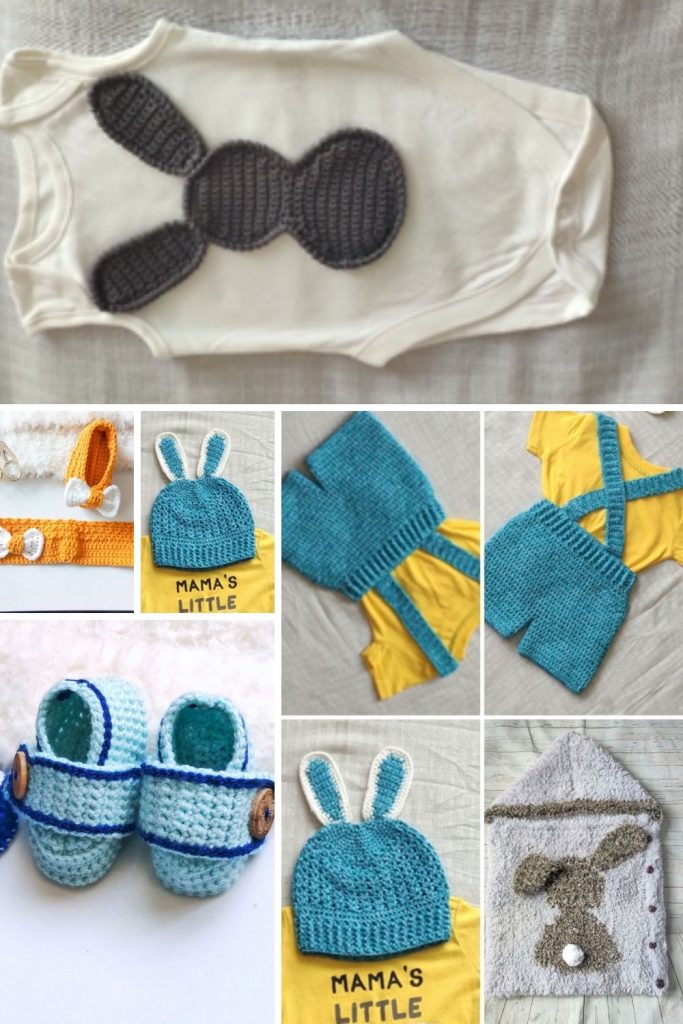
Since designing this sleeping sack pattern, I have created some other items with the same theme – BUNNY.
Cute Baby Romper Pattern, Crochet shorts, crochet Bunny beanie, and Applique. The Bundle includes:
- Romper
- Bunny Beanie
- Bunny Shorts
- Pretty in Blue Baby Booties
- Bow tie Baby Booties
- Applique pattern
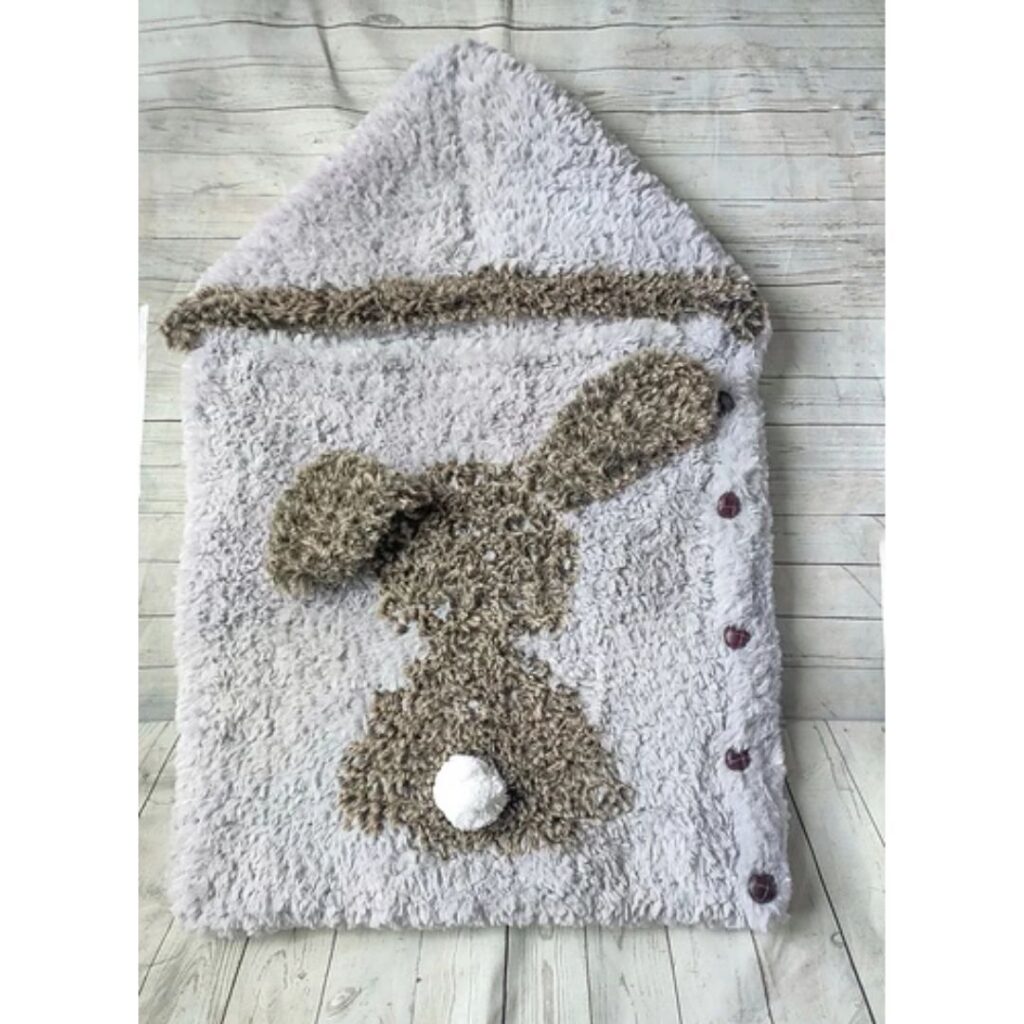
- Bunny Sleeping Sack
Yarn Inspiration for this free crochet sleeping sack pattern
I wanted a soft, fluffy feel for this sleeping bag and created the texture using the beautiful fur yarn WeCrochet sent to me.
Have you ever tried Fur yarn? Don’t worry if you haven’t; I have made a detailed post with 24 tips and tricks to help you use fuzzy yarn like a PRO. Read more about it here. You can substitute this yarn with any other type of yarn—preferably a similar weight to achieve the required measurements.
Don’t want to miss a thing, be the first to be in the know and subscribe here.
Materials for this Bunny Sleeping Bag
Yarn
Fable Fur, Super Bulky weight, #6 (100% Polyester, 71 yards, 3.5 oz/100g Ball)
Sample made using 2 colors –
Ursa (A), Falke (B)
Estimated Yardage
XS
A = 6Balls / 21 oz / 600 g/ 426 yd / 390 m
B = 1 Ball / 3.5 oz / 100 g /71 yd
S
A = 7 Balls / 24.5 oz / 700 g / 497 yd / 454 m
B = 1 Ball / 3.5 oz / 100 g /71 yd
M
A = 8 Balls / 28 oz/ 800 g / 568 yd / 519 m
B = 1 Ball / 3.5 oz/ 100 g / 71 yd / 65 m
Hook and other Materials
– 8 mm Crochet Hook.
– Buttons = 4(5, 6) pcs, 3 cm each
Gauge
8 sts over 5 rows = 4”/10 cm Square made in hdc, before blocking.
Adjust hook size if necessary, to obtain gauge.
Pattern Notes
- Please kindly read through the pattern before starting.
- Similar #6 weight yarn can be substituted; please check the gauge.
- Ch 2 does not count as a stitch.
Difficulty Level – Intermediate
Terms – US Terminology
Stitches Abbreviations
Ch(s) – Chain(s)
Hdc – Half Double Crochet
Rep – Repeat
Finished Measurements
Sizes/Color – XS(S, M)
| Age of Child in Months | Height of Child | Dimension of Sleeping Bag (Including Hood) | |
| XS = 0-3 | 48 – 56 cm | 26” | |
| S = 3-6 | 56 -68 cm | 30” | |
| M = 6-12 | 68 – 89 cm | 34” | |
Construction Notes
- This sleeping bag is worked in 2 sections.
- Section 1 – The front panel is made with the 2 colors, after which the back panel with the hood is made.
- Joining – the ends of the hood is then joined/sewed together.
Adjustments/fittings
- Length: increase or decrease the repeat rows on the front panel; remember to replicate this when making your back panel.
- Hood: Reduce or Increase the number of repeats for a more comfortable fit.
Schematics – Refer to the PDF for the Schematics
Bunny Sleeping Bag Instructions
Section 1: Front Panel
Front Panel
With A, chain 31(41, 51)
Row 1: Sc in 2nd ch from hook and in each ch across, turn. 30(40, 50) sc
Rows 2 – 3 (5, 7): Ch 1, sc in each ch across, turn. 30(40, 50) sc
The next rows are crocheted using both colors – A & B.
Row 1: Ch 1, (A) sc 16, (B) sc 8, (A) sc 16, turn. 30(40, 50) sc
Row 2: Ch 1, (A) sc 14, (B) sc 12, (A) sc 14, turn. 30(40, 50) sc
Row 3: Ch 1, (A) sc 11, (B) sc 2, (A) sc 1, (B) sc 12, (A) sc 1, (B) sc 2, (A) sc 11, turn. 30 (40, 50) sc
Row 4: Ch 1, (A) sc 10, (B) sc 20 (A) sc 10, turn. 30 (40, 50) sc
Row 5 – 7: Rep Row 4
Rows 8 – 9: Ch 1, (A) sc 11, (B) sc 18, (A) sc 11, turn. 30 (40, 50) sc
Rows 10 – 12: Ch 1, (A) sc 13, (B) sc 14, (A) sc 13, turn. 30 (40, 50) sc
Rows 13 – 15: Ch 1, (A) sc 15, (B) sc 10, (A) sc 15, turn. 30(40, 50) sc
Rows 16 – 17: Ch 1, (A) sc 17, (B) sc 8, (A) sc 17, turn. 30 (40, 50) sc
Bunny Head – Refer to the PDF for Pictures
Row 18: Ch 1, (A) sc 14, (B) sc 12, (A) sc 14, turn. 30 (40, 50) sc
Rows 19 – 20: Ch 1, (A) sc 13, (B) sc 14, (A) sc 13, turn. 30 (40, 50) sc
Rows 24 – 29: Ch 1, (A) sc 12, (B) sc 16, (A) sc 12, turn. 30 (40, 50) sc
Rows 30 – 32: Ch 1, (A) sc 13, (B) sc 14, (A) sc 13, turn. 30 (40, 50) sc
Rows 33 – 34: Ch 1, (A) sc 14, (B) sc 12, (A) sc 14, turn. 30 (40, 50) sc
Row 35: Ch 1, (A) sc 15, (B) sc 10, (A) sc 15, turn. 30 (40, 50) sc
Row 36: Ch 1, (A) sc 17, (B) sc 8, (A) sc 17, turn. 30 (40, 50) sc
Rows 37 – 43 (47, 51): Ch 1, sc in each st across, turn. 30(40, 50) sc
Do not Fasten Off.
Section 2: Back Panel and Hood
- Increase or reduce the chains for a longer or shorter hood.
Row 1: Ch 21 (27, 33), sc in 3rd ch from hook and in each ch across, continue with the side of the Front Panel, turn. 50(66, 82) sc
Rows 2 – 38 (44, 50): Ch 1, sc in each st across, turn. 50 (66, 82) sc
Increase or decrease the repeats till you have the same width as the front panel, ending on the lower end of the back panel.
Button Holes
Row 39 (46, 53): Ch 1, sc in first st, *ch 2, skip next 2 sts, sc in next 5(6, 7) sts, rep from * 4(5, 6) more times, join Color B, sc in remaining sts, turn.
Hood Trim
Continue with B.
Rows 1 – 2: Ch 1, sc in next 25 sts, turn.
Fasten off.
Hood Trim – Join B with a sl st to the beginning of Row 1 of the Back panel and hood.
Bunny Ears
With B.
Row 1: Chain 4, sc in 2nd ch from hook, turn. 3 sc
Row 2: Ch 1, sc in each st across, turn. 3 sc
Row 3: Ch 1, 2 sc in first st, sc in next st, 2 sc last st, turn. 5 sc
Row 4: Ch 1, sc in each st across, turn. 5 sc
Rows 5 – 7: Rep Row 4
Row 8: Ch 1, sc in next 4 sts, 2 sc in last st, turn. 6 sc
Row 9: Ch 1, sc in each st across, turn. 6 sc
Rows 10 – 12: Rep Row 9
Row 13: Ch 1, 2 sc in first st, sc in each of the remaining sts, turn. 7 sc
Row 14: Ch 1, sc2tog, sc in next st 3 sts, sc2tog, turn. 5 sc
Row 15: Ch 1, sc2tog, sc in next st st, sc2tog, turn. 3 sc
Row 16: Ch 1, sc in each st across, turn. 3 sc
Fasten off.
Make the second ear.
Finishing
Hood
- Fold halfway and sew together.
Pom
– Make a Pom with the color of your choice and attach it to the lower part of the body (front panel)

I can’t wait to see your beautiful versions popping up on my feed, do tag me on Instagram – @crochet_fosbas with your beautiful sleeping sacks.
More crochet projects that use more than one color
About the Designer
Say Hi on Instagram and Subscribe To my email List for pattern discounts and freebies. For questions, send such to [email protected]. Read more about me here.

2 Comments