Crochet V Neck Sweater Free Pattern
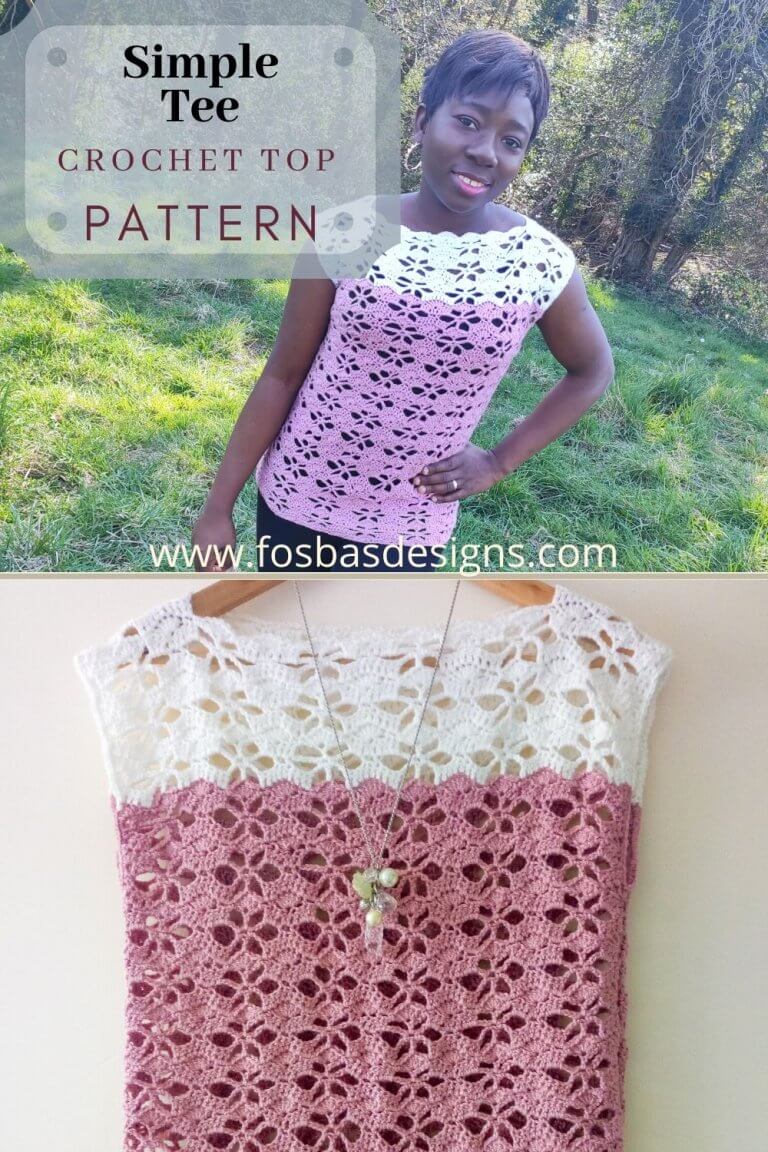
A lady can never have enough sweaters, especially when they are handmade. This Crochet V-neck sweater was designed to be fitted, and I love every inch of it. I hope you do love it as much as I do.

My mood mainly decides the fit and type of my sweaters. I know this seems trivial to some, but I love the option of dressing for maximum comfort, which is provided by crochet sweaters and cardigans.

More V neck crochet sweaters on the blog
Bell sleeve sweater free pattern
Reversible Granny V-neck sweater

Crochet V Neck Sweater Free Pattern Details
Materials
Yarn: Any Worster (#4) weight yarn in colors of your choice can be used.
This prototype was made using Lion Brand Jeans, Worsted weight, #4 (100% Acrylic, 246 yd/225 m per 3.5 oz/100g Ball)
Estimated Total Yardage
1000 (1100, 1200, 1300, 1400, 1500, 1600, 1700, 1800) Yards
Hook – 6 mm Crochet Hook
Difficulty Level – Intermediate
Terms – US Terminology

Gauge
15 sts over 8 Rows = 4 x 4” made in dc, before blocking.
Pattern Notes
- Please kindly read through the pattern before starting.
- Beginning chains do not count as a stitch throughout the pattern.
- Stitch count is written after each row/round, with the smallest XS written first and the other in the ().
- Stitch count written in black is for all sizes, but at some points, the stitch counts are color-coded for clarity, i.e. XS (S, M, L, XL, 2XL, 3XL, 4XL, 5XL).
- 26 (30, 34, 38, 42, 46, 50, 54, 59) xdc, means you match each color to the following sizes XS (S, M, L, XL, 2XL, 3XL, 4XL, 5XL).
- The count in black is for all the sizes, i.e. 2 dc.

Stitches Abbreviations
Chain/chains – ch/chs
Chain Space – ch sp
Stitch(es) – st(s)
Slip Stitch – sl st
Double Crochet – dc
Front Post Double Crochet – FPdc
Back Post Double Crochet – BPdc
Double crochet two stitches together – dc2tog
Crossed double crochet – xdc
Special Stitches
Crossed double crochet – skip next stitch, dc in next stitch, crocheting over the dc just made, work dc into the skipped stitch.
Here is a detailed tutorial on crocheting the crossed double crochet stitch = How to crochet the Crossed Double Crochet – Fosbas Designs
Crochet Fitted Sweater Free Pattern Finished Measurements
Size(s) and color codes – XS (S, M, L, XL, 2XL, 3XL, 4XL, 5XL)
Bust Measurement: 30 (34, 38, 42, 46, 50, 54, 58, 62)”
Armhole Circumference: 11 (12, 13, 14, 14, 15, 16, 18, 20)”
Length of Sweater: 22”
The modeled garment is shown in M, with about 1” of Positive Ease
Construction Notes
- This sweater is made in flat (rows), after which the panels are joined together at the shoulder seam and at the sides.
- The project is worked from the waist/hips (depending on how long you want yours to be) upwards, with the neckline then shaped.
- The sleeves are made in rows/flat and joined to the bodies.
Adjustments
- The pattern is graded using the bust measurement.
- You can increase or reduce the repeats before shaping the neckline.
- The length of the sleeves can also be adjusted for a perfect fit. See the note in section 2.

You can get the print-friendly pattern on either Ravelry or Etsy. At checkout, use “Funto” for a 20% discount.


1 FREE DOWNLOAD PER MONTH
WITH JUST $3 PER MONTH!
- Pick your desired pattern each month.
- It can be a new or old pattern.

2 FREE DOWNLOADS PER MONTH
WITH JUST $5 PER MONTH!
- Pick your desired patterns each month.
- It can be a new or old pattern.
- You get 2 patterns per month.

3 FREE DOWNLOADS PER MONTH
WITH JUST $8 PER MONTH!
- Pick your desired patterns each month.
- You get 3 free patterns per month.
- It can be a new or old pattern.

How to Crochet V Neck Sweater Free Pattern
Front Panel
Chain 56 (64, 72, 80, 88, 96, 104, 112, 120)
Row 1: Dc in 3rd ch from hook and in each ch across, turn. 54 (62, 70, 78, 86, 94, 102, 110, 118) dc
Rows 2 – 6: Ch 2, dc in each st across, turn. 54 (62, 70, 78, 86, 94, 102, 110, 118) dc
Rows 7 – 12: Ch 2, dc in first st, xdc across until the last st, dc in the last st, turn. 26 (30, 34, 38, 42, 46, 50, 54, 59) xdc, 2 dc
Rows 13 – 18: Ch 2, dc in each st across, turn. 54 (62, 70, 78, 86, 94, 102, 110, 118) dc
- For a waist-length sweater, skip to the shape for the neckline below.
- The prototype was made to Row 30.
- If you want a longer sweater, add more repeats as written below:
Rows 19 – 24: Ch 2, dc in first st, xdc across until the last st, dc in the last st, turn. 26 (30, 34, 38, 42, 46, 50, 54, 59) xdc, 2 dc
Rows 25 – 30: Ch 2, dc in each st across, turn. 54 (62, 70, 78, 86, 94, 102, 110, 118) dc
Section 2
- Shape for the neckline
Right side
For all sizes
Row 31: Ch 2, dc in first st, xdc in next 12 (14, 16, 18, 20, 22, 24, 26, 28) sts, dc2tog, leave the remaining sts unworked, turn.
12 (14, 16, 18, 20, 22, 24, 26, 28) xdc, 2 dc
Row 32: Ch 2, dc2tog, dc in next st, xdc across until the st, dc in last st, turn. 11 (13, 15, 17, 19, 21, 23, 25, 27) xdc, 3 dc
Row 33: Ch 2, dc in first st, xdc across until the 2 sts, dc2tog, turn. 11 (13, 15, 17, 19, 21, 23, 25, 27) xdc, 2 dc
Rows 34 – 35: Rep Rows 32 and 33
Row 36: Rep Row 32
Stop decreasing
Rows 37 – 42: Ch 2, dc in each st across, until the last 2 sts, turn. 21 (25, 29, 33, 37, 41, 45, 49, 53) dc
- Remove/add a few more rows of decrease for a thicker or thinner strap.
- Skip to edging for a shorter neckline.
- The prototype adds 3 more rows, as written below.
Rows 43 – 45: Ch 2, dc in first st, xdc across until the last st, dc in the last st, turn.
Fasten off
Left side
Join yarn with a sl st to the edge of the piece, crocheting towards the center.
Repeat Rows 31 to 45 as with the right side.
Edging
- Crocheting around the whole piece.
Round 1: Ch 1, sc in each st around, aim for 2 sc in each ch sp/dc st around, (sc, ch 1, sc) at each corner, join
Fasten off.
Sweater Lower Band
- Join yarn with a sl st to the beginning of the foundation chain.
- Crocheting in rows.
Row 1: Ch 1, *FPdc around next st, BPdc around next st, rep from * to the end of the row, turn.
Row 2: Ch 1, *BPdc around next st, FPdc around next st, rep from * to the end of the row, turn.
Rows 3 – 6: Rep Rows 1 – 2.
Back Panel
Chain 56 (64, 72, 80, 88, 96, 104, 112, 120)
Row 1: Dc in 3rd ch from hook and in each ch across, turn. 54 (62, 70, 78, 86, 94, 102, 110, 118) dc
Rows 2 – 6: Ch 2, dc in each st across, turn. 54 (62, 70, 78, 86, 94, 102, 110, 118) dc
Rows 7 – 12: Ch 2, dc in first st, xdc across until the last st, dc in the last st, turn. 26 (30, 34, 38, 42, 46, 50, 54, 59) xdc, 2 dc
Rows 13 – 18: Ch 2, dc in each st across, turn. 54 (62, 70, 78, 86, 94, 102, 110, 118) dc
Rows 19 – 24: Ch 2, dc in first st, xdc across until the last st, dc in the last st, turn. 26 (30, 34, 38, 42, 46, 50, 54, 59) xdc, 2 dc
Rows 25 – 30: Ch 2, dc in each st across, turn. 54 (62, 70, 78, 86, 94, 102, 110, 118) dc
Rows 26 – 36: Ch 2, dc in first st, xdc across until the last st, dc in the last st, turn. 26 (30, 34, 38, 42, 46, 50, 54, 59) xdc, 2 dc
Rows 37 – 42: Ch 2, dc in each st across, turn. 54 (62, 70, 78, 86, 94, 102, 110, 118) dc
Rows 43 – 45: Ch 2, dc in first st, xdc across until the last st, dc in the last st, turn.
Make sure to replicate changes made from the front panel.
Lower Band
- Join yarn with a sl st to the beginning of the foundation chain.
- Crocheting in rows.
Row 1: Ch 2, *FPdc around next st, BPdc around next st, rep from * to the end of the row, turn.
Row 2: Ch 2, *BPdc around next st, FPdc around next st, rep from * to the end of the row, turn.
Rows 3 – 10: Rep Rows 1 – 2.
Notice that the back panel is longer than the front panel.
Section 2 – Sleeves
Make 2
50 (58, 58, 66, 66, 66, 72, 72, 72)
Row 1: Hdc in 3rd ch from hook and in each ch across, turn. 48 (56, 56, 64, 64, 64, 70, 70, 70) hdc
Row 2: Ch 2, dc in first st, xdc across until the last st, dc in last st, turn. 23 (27, 27, 31, 31, 34, 34, 34, 34) xdc, 2 dc
Fit check
- The width of the panel will be the same as your finished sleeve.
- Go down in size or up for a more comfortable fit.
Rows 3 – 26: Rep Row 2.
Row 27: Ch 2, *dc in first st, dc2tog, rep from * across, turn. 32 (38, 38, 43, 43, 43, 47, 47, 47) dc
If the wrist is too wide, repeat the decrease one more time.
Fit check
- The length should measure approx. 17”
- Continue repeating row 2 until your piece measures 17”
- The sleeve cuff will add 2”. You can reduce or increase the length as you prefer.
Do not fasten off.
Sleeve Band
For ease of fit check, join after the first row and continue in rounds.
Round 1: Ch 2, *FPdc around next st, BPdc around next st, rep from * to the end of round, join with a sl st to beginning ch. 32 (38, 38, 43, 43, 43, 47, 47, 47) FPdc
Rounds 2 – 6: Rep Round 1
Sleeve Edging
Ch 1, sc in each st around the panel, ch 2 at each corner.
Finishing and Joining
Shoulder seam(s)
Turn both panels made in section 1 to the wrong side.
- Place the front panel over the back panel.
- Join yarn with a slip stitch to the edge.
- Ch 1, sc over both panels.
- Fasten off and repeat on the other side.
Joining the sleeves to the bodies
- Pick up your main panel.
- Fold the main panel into two (as if you are putting it on).
- The folded edge of the sleeves should be a continuation of the folded edge of the main panel.
- Sew the edge of the sleeve to the main panel.
Sleeve Seam(s)
- With the wrong side facing you, sew the sides of the sleeves together, starting from the sleeve cuffs towards the armpit. Then, continue the instructions for the side seam as written below.
- Fasten off.
Side seam(s)
- With the wrong side facing you, sew the sides of the front and back panels together.
- Remember that the back panel is longer than the front panel when joining the side seams.
- Fasten off.
- Repeat on the other side.
Neckline Edging
Join yarn to any stitch around the neckline.
Crocheting around the V-neck and the corresponding stitches on the back panel.
Round 1: Ch 1, sc in each st around, join with a sl st to the beginning chain.
Round 2: Ch 1, sc in each st around, join with a sl st to the beginning chain.
Weave in all ends.
Block to measurement.