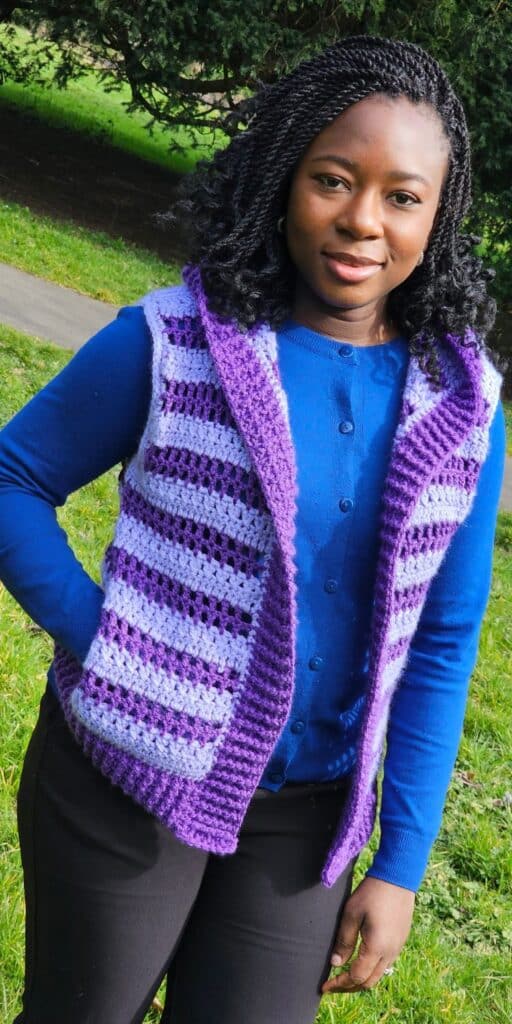
Vanna’s Crochet Hooded Vest Pattern
Looking for your next cozy crochet project? The Vannas crochet hooded vest pattern is fun and practical—and it looks as good as it feels!
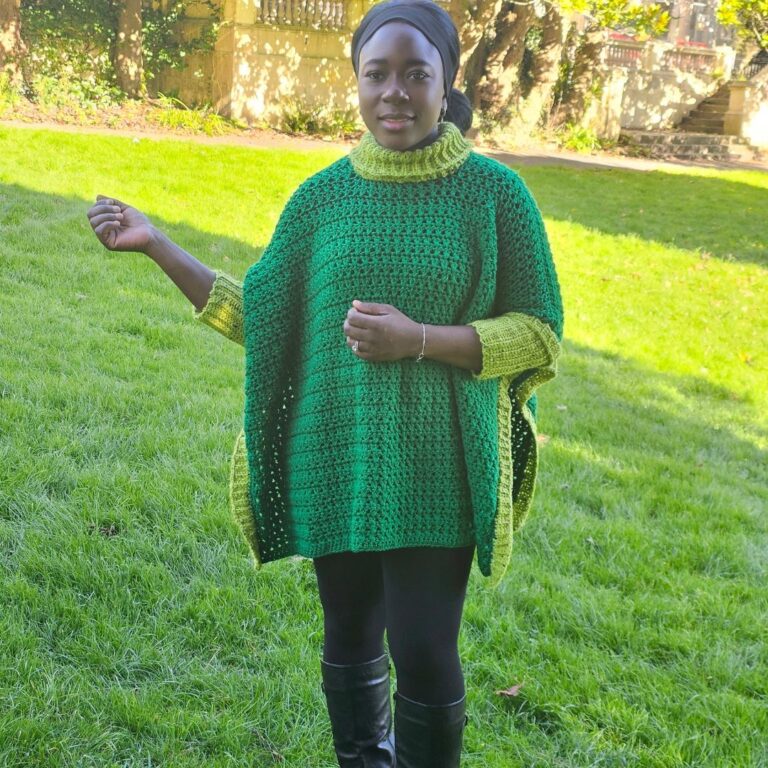
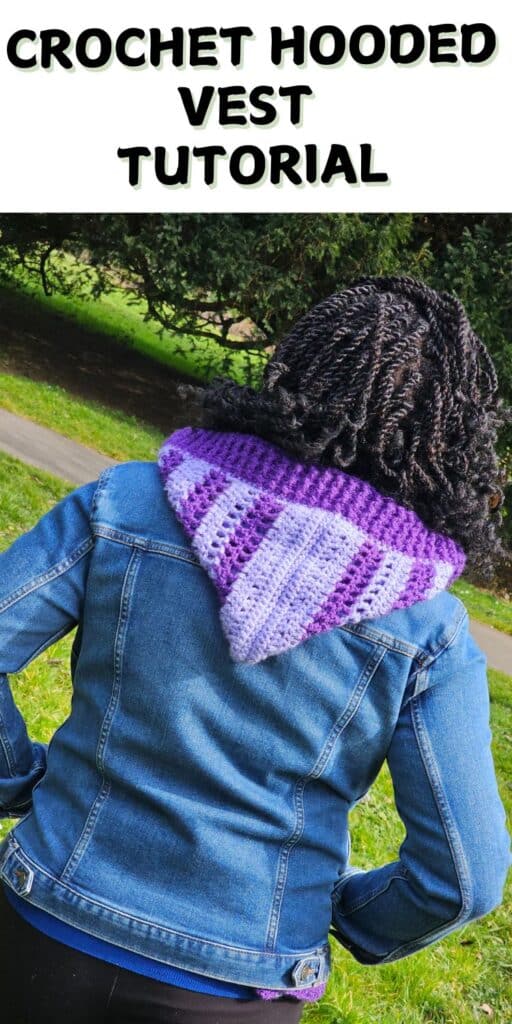
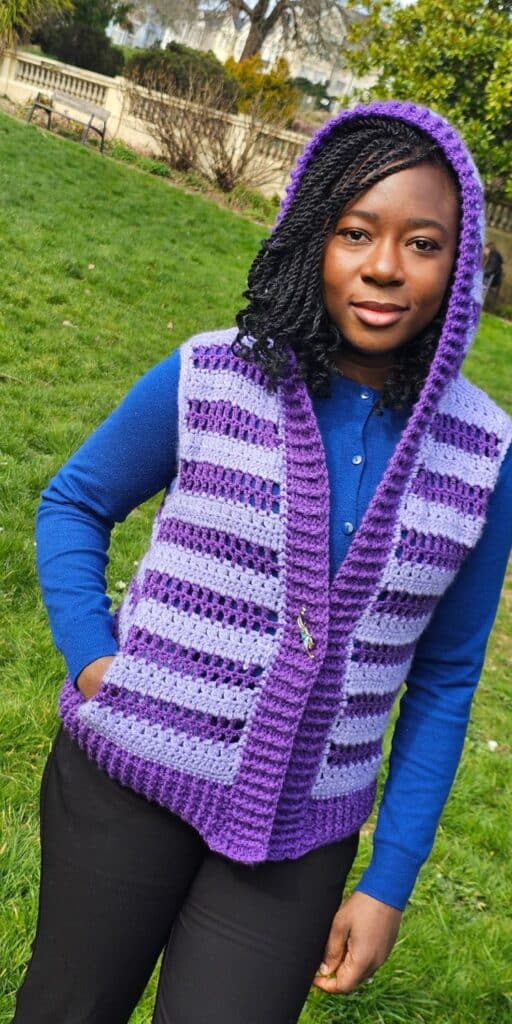
The hood adds a casual, laid-back vibe, while the clean edges and structure give it a polished finish. This crochet hooded vest pattern is another version of this swancho.
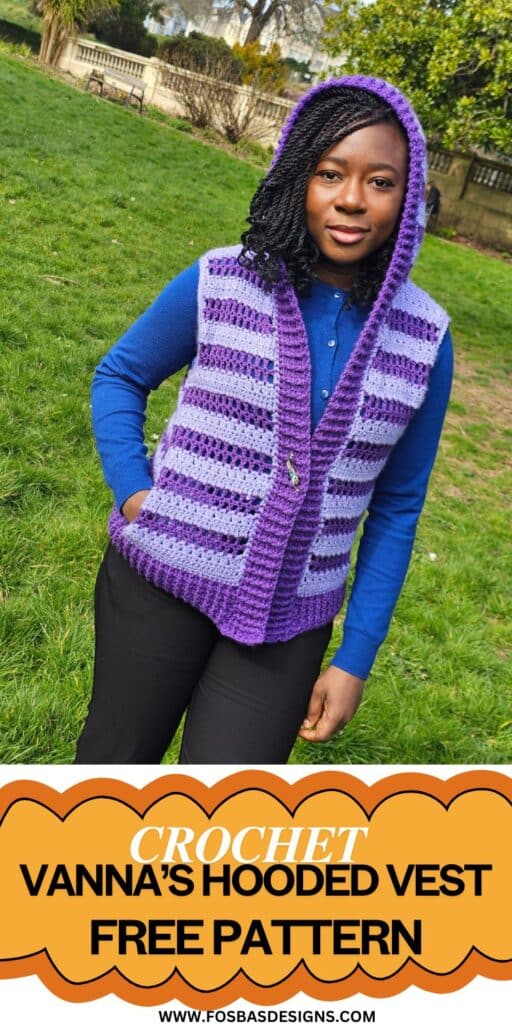
Oh, did you see that this hooded vest has a pocket? I love projects with pockets and add pockets to my projects whenever it feels right.
Other projects with pockets on the blog include:

Styling the crochet hooded vest
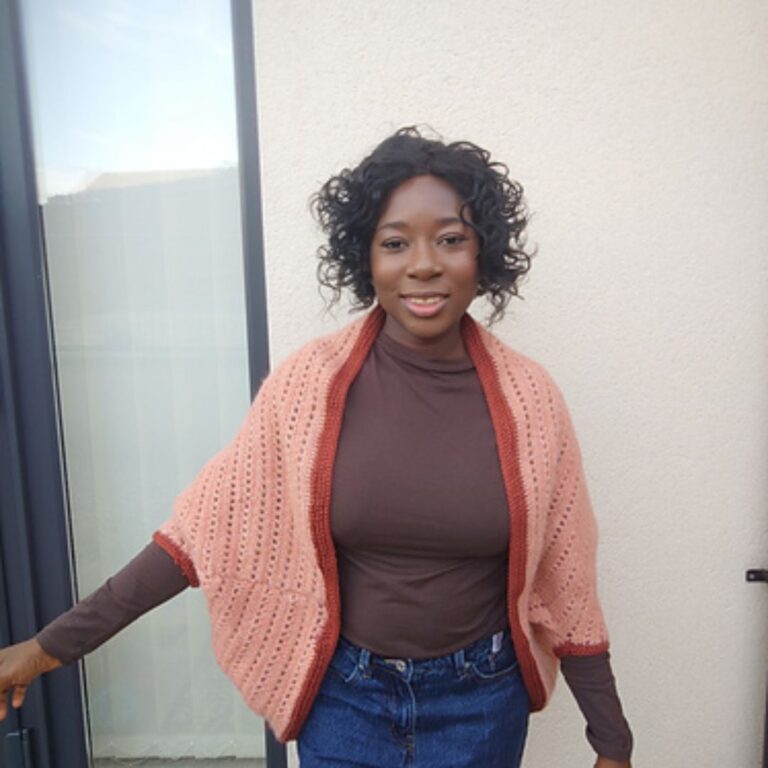
Pair it with jeans, layer it over long sleeves, or even throw it on with your favorite dress—endless possibilities.
Materials
Yarn
Made using worsted-weight yarn, it’s warm without being bulky.
Any worsted-weight yarns can be used
Brava Worsted Weight, #4 (100% Acrylic, 218 yards per 3.5oz/100g).
You can use a single or multiple colors for your project.
Main color: 600 (700, 800, 900, 1000, 1100, 1200, 1300, 1400) yards
Contrasting Color: 600 (700, 800, 900, 1000, 1100, 1200, 1300, 1400) yards
Hook – 6 mm Crochet Hook
Gauge – 12 sts over 7 rows = 10 cm/4” square made in dc
Vanna’s Crochet Hooded Vest Pattern Notes
1. Please kindly read through the pattern before starting.
2. A similar yarn weight can be substituted; please check the gauge.
Difficult – Beginner
Terms – US Terminology
Stitches Abbreviations
Chain(s) – ch(s)
Single Crochet – sc
Half double crochet – hdc
Double crochet – dc
Front Post Double Crochet – FPdc
Back Post Double Crochet – BPdc
Crossed double crochet – xdc
Special Stitches
Crossed double crochet – skip next stitch, dc in next stitch, crochet over the dc just made, work dc into the skipped stitch.
Here is a detailed tutorial on crocheting the crossed double crochet stitch = How to crochet the Crossed Double Crochet – Fosbas Designs
Finished Measurements
The Vanna’s Crochet Hooded Vest Pattern comes in 9 different sizes.
Size(s) and color codes – XS (S, M, L, XL, 2XL, 3XL, 4XL, 5XL)
Bust Measurement: 30 (34, 38, 42, 46, 50, 54, 58, 62)”
Armhole Circumference: 14 (14, 14, 16, 16, 16, 18, 18, 20)”
Length of Vest: 19 (19, 19, 21, 21, 21, 23, 23, 23)”
The modeled garment is shown in M, with about 1” of Positive Ease
Construction Notes
1. This vest is worked flat in rows, from the waist upwards.
2. The pattern works flat; you can customize the size by increasing or reducing the starting chains.

Adjustments/fittings
Length: increase or decrease the repeats for part of the Body.
Sleeve Opening:
Too tight? Add more repeats before you fasten off.
Too loose: Decrease the length of the repeats before you fasten off.
Want a print-friendly version of this pattern? It has step-by-step photos for the steps. Get a copy on either Ravelry or Etsy using the buttons below.
Use code “Vanna” for a 30% discount at checkout. Valid through May 10th


If you would prefer a cheaper alternative for my PDFs, you should join my subscription with three options.
1 FREE DOWNLOAD PER MONTH
WITH JUST $3 PER MONTH!
- Pick your desired pattern each month.
- It can be a new or old pattern.

2 FREE DOWNLOADS PER MONTH
WITH JUST $5 PER MONTH!
- Pick your desired patterns each month.
- It can be a new or old pattern.
- You get 2 patterns per month.

3 FREE DOWNLOADS PER MONTH
WITH JUST $8 PER MONTH!
- Pick your desired patterns each month.
- You get 3 free patterns per month.
- It can be a new or old pattern.

How To Crochet A Hooded Vest
Section 1- Back panel
With Color A Chain 61 (67, 73, 79, 85, 91, 97, 103, 109)
Row 1: dc in 3rd chain from hook and in each ch across, turn. 59 (65, 71, 77, 83, 89, 95, 101, 107) dc
Row 2: Ch 2, dc in the first stitch, xdc across until the last 2 sts, dc in the last 2 sts, turn. 59 (65, 71, 77, 83, 89, 95, 101, 107) dc
- Drop A, pick up B
- Do not cut yarn when instructed to switch colors to reduce the number of ends you need to sew in for smooth color changes.
- When making the last stitch, use the new color for the last yarn over and complete the stitch.
Row 3: Ch 2, dc in first st, *ch 1, skip next st, dc in next st, rep from * to end, turn. 30 (33, 36, 39, 42, 45, 48, 51, 54) dc, 29 (32, 35, 38, 41, 44, 47, 50, 53) ch sps
Fit check:
Your piece should measure about 15 (17, 19, 21, 23, 25, 27, 29, 31)”
Row 4: Ch 2, dc in first st, *skip next ch sp, ch 1, dc in next st, rep from * to end, turn. 30 (33, 36, 39, 42, 45, 48, 51, 54) dc, 29 (32, 35, 38, 41, 44, 47, 50, 53) ch sps
Drop B, pick up A
Row 5: Ch 2, dc in first st, *dc in ch 1 sp, dc in next st, rep from * to end, turn. 59 (65, 71, 77, 83, 89, 95, 101, 107) dc
Row 6: Ch 2, dc in the first stitch, xdc across until the last 2 sts, dc in the last 2 sts, turn. 59 (65, 71, 77, 83, 89, 95, 101, 107) dc
Rows 7 – 14: Rep Rows 3 – 6
Row 15: Rep Rows 3
Row 16: Rep Rows 4
Row 17: Rep Rows 5
Continue the repeats with color changes after every 2 rows until the Rectangle measures 11”
The band adds 2,” and the next few rows will add 6 (6, 6, 8, 8, 8, 10, 10, 10)”
Shape armpit
Row 18: Ch 1(does not count as a stitch), sc in next 5 sts, ch 3 (counts as first st), xdc across until the last 6 sts, dc in next st, leave the remaining sts unworked, and turn. 49 (55, 61, 67, 73, 79, 85, 91, 97) dc, 5 dc
Drop A, pick up B
Row 19: Ch 2, dc in first st, *ch 1, skip next st, dc in next st, rep from * to end, turn. 25 (28, 31, 34, 38, 40, 43, 46, 49) dc, 24 (27, 30, 33, 37, 39, 42, 45, 48) ch sps
Row 20: Ch 2, dc in first st, *skip next ch sp, ch 1, dc in next st, rep from * to end, turn. 25 (28, 31, 34, 38, 40, 43, 46, 49) dc, 24 (27, 30, 33, 37, 39, 42, 45, 48) ch sps
Drop B, pick up A
Row 21: Ch 2, dc in first st, *dc in ch 1 sp, dc in next st, rep from * to end, turn. 49 (55, 61, 67, 73, 79, 85, 91, 97) dc
Row 22: Ch 2, dc in the first stitch, xdc across until the last st, dc in the last st, turn. 49 (55, 61, 67, 73, 79, 85, 91, 97) dc
Rows 23 – 30 (30, 30, 30, 30, 34, 34, 34, 34): Rep Rows 19 – 22
Do not fasten off.
Edging
With A, ch 1, sc in each st around, aiming for 2 sc in row edge spaces and at each corner, 1 sc in each sc st, and 2 sc in each dc st. Join with a sl st to the beginning ch.
Fasten off.
Section 2: Front panel
Right side
With Color A Chain 25 (29, 33, 35, 39, 41, 45, 47, 51)
Row 1: dc in 3rd chain from hook and in each ch across, turn. 23 (27, 31, 33, 37, 39, 43, 45, 49) dc
Row 2: Ch 2, dc in the first stitch, xdc across until the last 2 sts, dc in the last 2 sts, turn. 23 (27, 31, 33, 37, 39, 43, 45, 49) dc
- Drop A, pick up B
- Do not cut yarn when instructed to switch colors for smooth color changes.
- When making the last stitch, use the new color for the last yarn over and complete the stitch.
Row 3: Ch 2, dc in first st, *ch 1, skip next st, dc in next st, rep from * to end, turn. 12 (14, 16, 17, 19, 20, 22, 23, 25) dc,
11 (13, 15, 16, 18, 19, 21, 22, 24) ch sps
Row 4: Ch 2, dc in first st, *skip next ch sp, ch 1, dc in next st, rep from * to end, turn. 12 (14, 16, 17, 19, 20, 22, 23, 25) dc,
11 (13, 15, 16, 18, 19, 21, 22, 24) ch sps
Drop B, pick up A
Row 5: Ch 2, dc in first st, *dc in ch 1 sp, dc in next st, rep from * to end, turn. 23 (27, 31, 33, 37, 39, 43, 45, 49) dc
Row 6: Ch 2, dc in the first stitch, xdc across until the last 2 sts, dc in the last 2 sts, turn.
Rows 7 – 14: Rep Rows 3 – 6
Row 15: Rep Rows 3
Row 16: Rep Rows 4
Row 17: Rep Rows 5
Continue the repeats with color changes after every 2 rows until the Rectangle measures 11”
The band adds 2,” and the next few rows will add 6 (6, 6, 8, 8, 8, 10, 10, 10)”
Shape armpit
Row 18: Ch 1, sc in next 5 sts, ch 3 (counts as first st), xdc across until the last st, dc in last st, turn.
Drop A, pick up B
Row 19: Ch 2, dc in first st, *ch 1, skip next st, dc in next st, rep from * to end, turn. Leave the 5 sts with sc unworked.
Row 20: Ch 2, dc in first st, *skip next ch sp, ch 1, dc in next st, rep from * to end, turn.
Drop B, pick up A
Row 21: Ch 2, dc in first st, *dc in ch 1 sp, dc in next st, rep from * to end, turn.
Row 22: Ch 2, dc in the first stitch, xdc across until the last st, dc in the last st, turn.
Rows 23 – 30 (30, 30, 30, 30, 34, 34, 34, 34): Rep Rows 19 – 22
Edging
Ch 1, sc in each st around, aiming for 2 sc at each corner, 1 sc in each dc st, and 2 sc in each side edge space. Join with a sl st to the beginning ch.
Fasten off.
Section 2: Front panel
Left side
With Color A Chain 25 (29, 33, 35, 39, 41, 45, 47, 51)
Row 1: dc in 3rd chain from hook and in each ch across, turn. 23 (27, 31, 33, 37, 39, 43, 45, 49) dc
Row 2: Ch 2, dc in the first stitch, xdc across until the last 2 sts, dc in the last 2 sts, turn. 23 (27, 31, 33, 37, 39, 43, 45, 49) dc
- Drop A, pick up B
- Do not cut yarn when instructed to switch colors for smooth color changes.
- When making the last stitch, use the new color for the last yarn over and complete the stitch.
Row 3: Ch 2, dc in first st, *ch 1, skip next st, dc in next st, rep from * to end, turn. 12 (14, 16, 17, 19, 20, 22, 23, 25) dc,
11 (13, 15, 16, 18, 19, 21, 22, 24) ch sps
Row 4: Ch 2, dc in first st, *skip next ch sp, ch 1, dc in next st, rep from * to end, turn. 12 (14, 16, 17, 19, 20, 22, 23, 25) dc,
11 (13, 15, 16, 18, 19, 21, 22, 24) ch sps
Drop B, pick up A
Row 5: Ch 2, dc in first st, *dc in ch 1 sp, dc in next st, rep from * to end, turn. 23 (27, 31, 33, 37, 39, 43, 45, 49) dc
Row 6: Ch 2, dc in the first stitch, xdc across until the last 2 sts, dc in the last 2 sts, turn.
Rows 7 – 14: Rep Rows 3 – 6
Row 15: Rep Rows 3
Row 15: Rep Rows 4
Row 17: Rep Rows 5
Continue the repeats with color changes after every 2 rows until the Rectangle measures 11”
The band adds 2,” and the next few rows will add 6 (6, 6, 8, 8, 8, 10, 10, 10)”
Shape armpit
Shape armpit
Row 18: Ch 2, dc in the first stitch, xdc across until the last 6 st, dc in next st, turn, leave the remaining sts unworked.
Drop A, pick up B
Row 19: Ch 2, dc in first st, *ch 1, skip next st, dc in next st, rep from * to end, turn.
Row 20: Ch 2, dc in first st, *skip next ch sp, ch 1, dc in next st, rep from * to end, turn.
Drop B, pick up A
Row 21: Ch 2, dc in first st, *dc in ch 1 sp, dc in next st, rep from * to end, turn.
Row 22: Ch 2, dc in the first stitch, xdc across until the last st, dc in the last st, turn.
Rows 23 – 30 (30, 30, 30, 30, 34, 34, 34, 34): Rep Rows 19 – 22
Edging
Ch 1, sc in each st around, aim for 2 sc at each corner, 1 sc in each dc st and 2 sc in each row edge ch sp, join with a sl st to the beginning ch.
Fasten off.
Shoulder Seam
- Place the front (right and left) panels on the back panel.
- Secure the shoulders with stitch markers.
- Flip the panels to the wrong side, with the wrong side facing you, and join the two panels starting from the edge towards the neckline, leaving 8 (10, 12, 12, 14, 16, 16, 18, 20) sts each on the front panels unjoined.
- This should leave 30 (22, 20, 22, 20, 22, 20, 22, 20) sts open for neck across the back and 10 (10, 10, 12, 12, 14, 14, 16, 18) sts on each front.
- Fasten off.
- Repeat the joining on the other side.
Check fit
Try the vest on, making sure the hood space is a good fit. If not, adjust the number of stitches joined at the shoulder seam.
Hood
Join Color B with a sl st to the tip of the front panel.
Row 1: Ch 1, sc in each st across the right side of the front panel, continue to the back panel, sc in each st, continue to the left side of the front panel, sc in each st across, turn
Row 2: Ch 2, dc in first st, *ch 1, skip next st, dc in next st, rep from * to end, turn.
Row 3: Ch 2, dc in first st, *skip next ch sp, ch 1, dc in next st, rep from * to end, turn.
Drop B, pick up A
Row 4: Ch 2, dc in first st, *dc in ch 1 sp, dc in next st, rep from * to end, turn.
Row 5: Ch 2, dc in the first stitch, xdc across until the last st, dc in the last st, turn.
Rows 6 – 21: Rep Rows 2 – 5
Adjust the repeats for a longer or shorter hood.
Last row: Ch 1, sc in each st across, Fasten off.
Edging
Crocheting across the edging of the hood (three sides)
Join yarn with a sl st to the base of the hood foundation chain.
Ch 1, sc in each st around, aim for 2 sc at each corner, 1 sc in each sc st and 2 sc in each dc st
Fasten off, leaving a tail long enough for seaming the hood shut.
Fold the hood in half and sew stitch for stitch using your preferred method.
Pocket(s)
With color of your choice, chain 21
Round 1: Ch 1, sc in 2nd ch from hook and in each ch across, continue on the other side of the chain, sc in each ch across, join with a sl st to the beginning ch. 40 sc
Rounds 2 – 9: Ch 2, sc around, join with a sl st to the beginning ch. 40 sc
Increase or decrease the number of repeats for the pocket.
Finishing
Pick up the vest and secure the pocket to the lower end of the front and back panels.
Join the pocket to the vest using sc or mattress stitch.
Joining the front to the back panel
Side seam(s)
- With the wrong side facing you, sew the outer edge of the front and back panels together.
- Fasten off.
- Repeat on the other side.
Section 3 – Bottom Band
Crocheting across the foundation chain of the front and back panels.
Join Color B with a sl st to the edge/foundation chain of the left panel.
Crocheting in rows.
With Color B
Row 1: Ch 2, *FPdc around next st, BPdc around next st, rep from * to the end of the row, turn.
Row 2: Ch 2, *BPdc around next st, FPdc around next st, rep from * to the end of the row, turn.
Rows 3 – 7: Rep Rows 1 – 2.
Increase or decrease the number of repeats until you have your desired length.
Do not fasten off.
Section 4 – Inner Band
Crocheting across the edges of the front panels and across the hood.
Continue from the lower band.
Crocheting in rows.
With Color B
Row 1: Ch 2, *FPdc around next st, BPdc around next st, rep from * to the end of the row, turn.
Row 2: Ch 2, *BPdc around next st, FPdc around next st, rep from * to the end of the row, turn.
Rows 3 – 7: Rep Rows 1 – 2.
Correspond to any changes in the number of rows as with the lower band.
Fasten off and sew-in ends.
Armhole Opening Finishing
- Join yarn with a sl st to the start of the side seam.
- You are to crochet across the edges of the armhole and around the back and front panels.
Round 1: Ch 1, sc evenly across, join.
Repeat on the other side.
Fasten off
Weave in ends.
Block to measurement.
There you have Vanna’s Crochet Hooded Vest Pattern.
I would love to see your version made from this pattern.
Share your progress and finished photos with the community using the links below.
About the Designer
Say Hi on Instagram and Subscribe To my email List for pattern discounts and freebies. For questions, send such to [email protected]. Read more about me here.