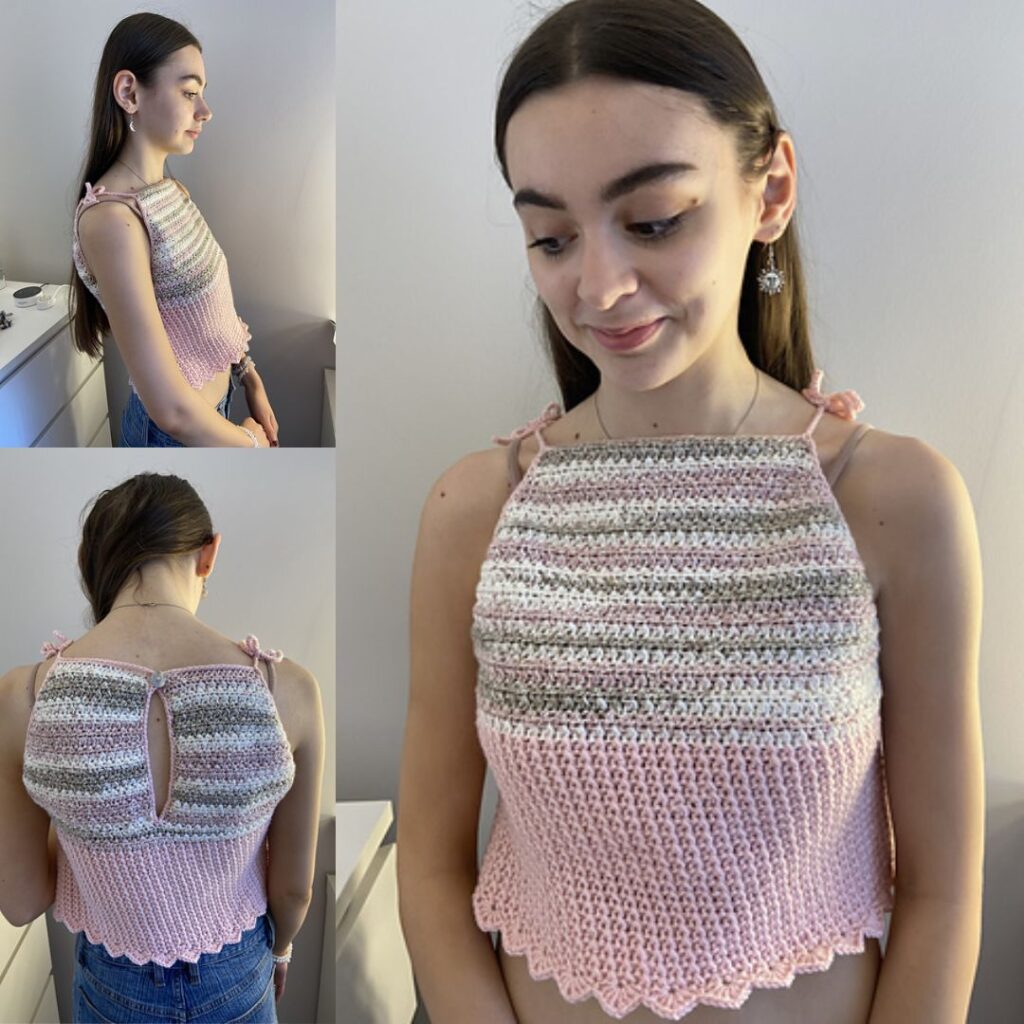
Crochet Halter Top Free Pattern
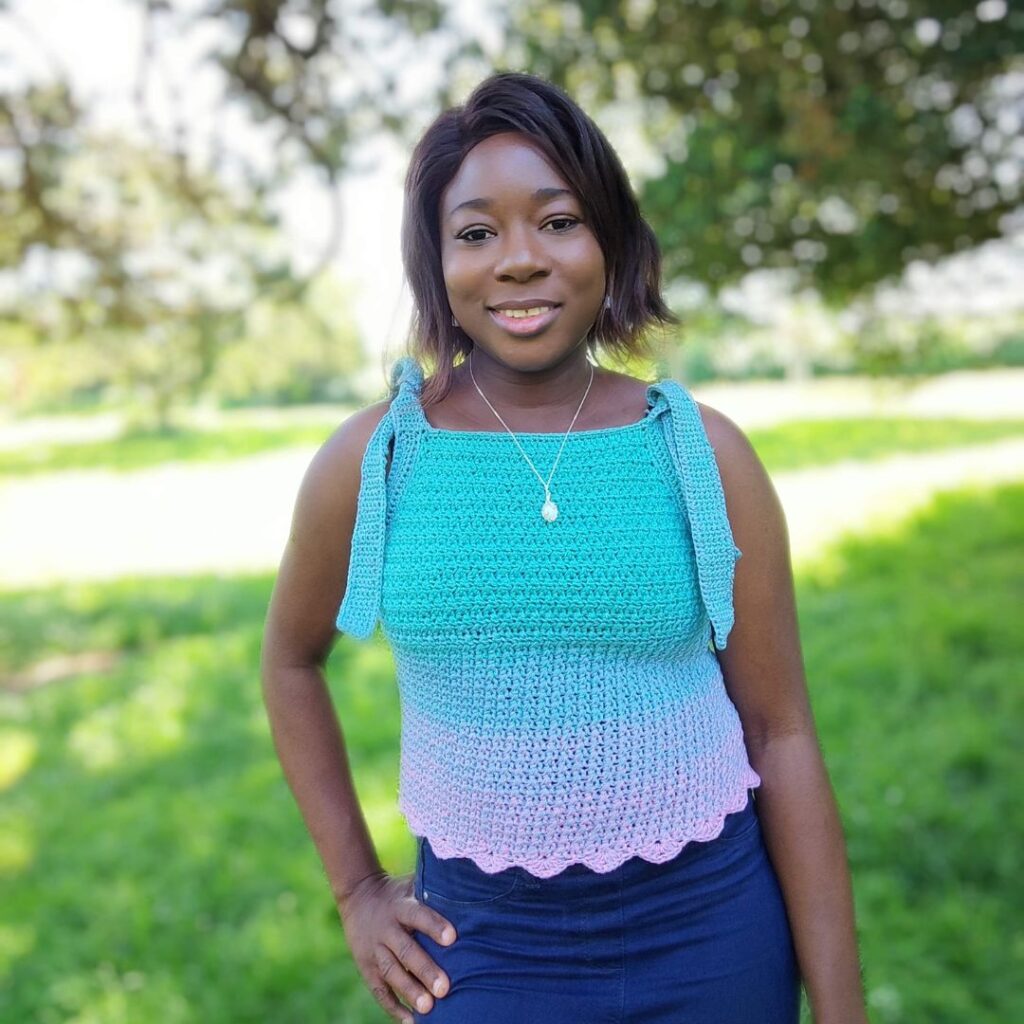
It’s time for another fun project, this time it is the Halter Top Pattern. This crochet top is everything I have sketched! I hope you enjoy your top as much as I do.
Crocheting your own garments is a rewarding task, get your materials ready and let’s make this project together. This is a free pattern, scroll down for the instruction. You can get the Ad-free version on Etsy and Ravelry.

Crochet Halter Top Free Pattern
As part of the summer vibes blog hop, this crochet halter top pattern is available as a free download today only. You can get the whole bundle so as not to miss out on any project.

Other fun crochet tops on the blog

Finished Measurements for the halter top free pattern
Size(s) – XS (S, M, L, XL, 2XL, 3XL, 4XL, 5XL)
Bust Measurement: 30 (34, 38, 42, 46, 50, 54, 58, 62)”
Armhole Circumference: 11 (12, 13, 14, 14, 15, 16, 18, 20)”
Length of Top: 18 (20, 20, 20, 22, 22, 22, 22, 22)”
The modeled garment is shown in M, with about 1” of Positive Ease

Supplies needed for this easy halter top pattern
Yarn – This pattern is designed and tested using #3 DK weight yarn. The prototype was made using Hobbii Twister #2 (55% cotton, 45% acrylic, 1000 m (1,094 yds) per 250 g (8.8 oz). Please note that I doubled the yarn to get a #3 DK weight.
Estimated Total Yardage
700 (800, 900, 1000, 1100, 1300, 1400, 1500, 1600) Yards
Hook – 4.5 mm Crochet Hook
Gauge
18 sts over 12 Rows = 4 x 4” made in xhdc, before blocking.
Instructions for the gauge
Row 1: Chain 20, hdc in 3rd ch and in each ch across, turn. 18 hdc
Rows 2 – 12: Ch 1, hdc in first st, xhdc in each st across until the last st, hdc, in the last st turn. 2 hdc, 8 xhdc
Adjust hook size if necessary, to obtain gauge.
Halter Top Pattern Notes
- Please kindly read through the pattern before starting.
- Beginning chains do not count as a stitch throughout the pattern.
- Stitch count is written after each row/round with the smallest XS written first and the other in the ().
- Stitch count written in black is for all sizes but at some points, the stitch counts are color-coded for clarity, i.e. XS (S, M, L, XL, 2XL, 3XL, 4XL, 5XL)
Difficulty Level – Intermediate
Terms – US Terminology
Stitches Abbreviations
Chain/chains – ch/chs
Single Crochet – sc
Half double crochet – hdc
Crossed half double crochet – xhdc
Slip Stitch – sl st
Special Stitches
Crossed half double crochet – *skip next st, hdc in next st, crocheting over the hdc just made, work hdc into the skipped st, rep from * to the end
Shell – (3 dc, ch 2, 3 dc) in indicated stitch
Construction Notes
- This top is worked in 2 sections.
- Section 1 – bust/upper part – Starts from the neckline and is made in rows (3 pieces) after which the 3 pcs are connected and continued in round.
- Section 2 – The body of the top in rounds.
- No sewing is needed.
Pattern Instruction for this easy crochet halter top
Front panel
Chain 42 (42, 42, 48, 48, 48, 54, 54, 54)
Row 1: Hdc in 3rd ch from the hook and in each ch across, turn. 40 (40, 40, 46, 46, 46, 52, 52, 52) hdc
Row 2: Ch 1, 2 hdc in first st, xhdc across until the last st, 2 hdc in last st, turn. 19 (19, 19, 22, 22, 22, 25, 25, 25) xhdc, 4 hdc
Row 3: Ch 1, 2 hdc in first st, hdc in next st, xhdc across until the last 2 sts, hdc in next st, 2 hdc in last st, turn. 19 (19, 19, 22, 22, 22, 25, 25, 25) xhdc, 6 hdc
Rows 4 – 11 (17, 21, 23, 27, 31, 35, 39, 41): Rep Rows 2 – 3
Count after the last row = 27 (33, 37, 38, 47, 51, 57, 61, 63) xhdc, 6 hdc
Rows 12 (18, 22, 24, 28, 32, 36, 40, 42) – 15 (21, 25, 27, 31, 35, 39, 43, 45): Ch 1, hdc in first st, xhdc across until the last st, hdc in last st. 29 (35, 39, 40, 49, 53, 59, 63, 65) xhdc, 2 hdc
Fasten off and set aside
Part B – Back Panels
Back panel – Right side
Chain 22 (22, 22, 24, 24, 24, 28, 28, 28)
Row 1: Hdc in 3rd ch from the hook and in each ch across, turn. 20 (20, 20, 22, 22, 22, 26, 26, 26) hdc

Row 2: Ch 1, 2 hdc in first st, xhdc across until the last st, hdc in last st, turn 9 (9, 9, 10, 10, 10, 12, 12, 12) xhdc, 3 hdc
Row 3: Ch 1, hdc in first st, xhdc across until the last 2 sts, hdc in next st, 2 hdc in last st, turn. 9 (9, 9, 10, 10, 10, 12, 12, 12) xhdc, 4 hdc
Rows 4 – 11 (17, 21, 23, 27, 31, 35, 39, 41): Rep Rows 2 – 3
Row 12 (18, 22, 24, 28, 32, 36, 40, 42): Rep Row 2
Count after the last row = 14 (17, 19, 21, 23, 25, 27, 29, 30) xhdc, 3 hdc
Row 13 (19, 23, 25, 29, 33, 37, 41, 43): Ch 1, hdc in first st, xhdc across until the last 2 sts, hdc in next st, 2 hdc in last st, turn. 14 (17, 19, 21, 23, 25, 27, 29, 30) xhdc, 4 hdc
Fasten off, set aside.
Back panel – Left side
Chain 22 (22, 22, 24, 24, 24, 28, 28, 28)
Row 1: Hdc in 3rd ch from the hook and in each ch across, turn. 20 (20, 20, 22, 22, 22, 26, 26, 26) hdc
Row 2: Ch 1, hdc in first st, xhdc across until the last st, 2 hdc in last st, turn 9 (10, 10, 11, 11, 11, 13, 13, 13) xhdc, 3 hdc
Row 3: Ch 1, 2 hdc in first st, hdc in next st, xhdc across until the last st, hdc in last st, turn. 10 (10, 10, 11, 11, 11, 13, 13, 13) xhdc, 4 hdc
Rows 4 – 11 (17, 21, 23, 27, 31, 35, 39, 41): Rep Rows 2 – 3
Row 12 (18, 22, 24, 28, 32, 36, 40, 42): Rep Row 2
Count after the last row = 14 (17, 19, 21, 23, 25, 27, 29, 30) xhdc, 3 hdc
Row 13 (19, 23, 25, 29, 33, 37, 41, 43): Ch 1, 2 hdc in first st, hdc in next st, xhdc across until the last st, hdc in last st, turn. 14 (17, 19, 21, 23, 25, 27, 29, 30) xhdc, 4 hdc
Fasten off.
To join both right and left panels
- Join yarn with a sl st to the opposite side (the part with the increase)
- Stop increasing.
- Arrange both the Right and Left panels as seen below, and place the straight edges (the part without increase) next to each.
Row 14 (20, 24, 26, 30, 34, 38, 42, 44): Ch 1, hdc in first st, xhdc in over next 2 sts, xhdc across until the last st, hdc in last st, pick up the right panel, hdc in next st, xhdc across until the last 3 sts, xhdc in next 2 sts, hdc in last st, turn. 30 (36, 40, 44, 48, 52, 56, 60, 62) xhdc, 4 hdc
Row 15 (21, 25, 27, 31, 35, 39, 43, 45): Ch 1, hdc in first st, xhdc across until next 2 hdc, (last st on the right panel), xhdc in the 2 sts, xhdc across until the last st, hdc in the last st, turn. 31 (37, 41, 45, 49, 53, 57, 61, 63) xhdc, 2 hdc
Increase or decrease the repeats for a perfect fit.
Part C – Body
- Join the front and back panels and continue crocheting in the round.
- For a smooth transition, skip the beginning chain and do not join after each round.
- Continue from the back panels and pick up the front panel using the instruction for round 1 below.
Round 1: Skip the first st, xhdc across until the last st (on the back panel), using the last st and the first st of the front panel, xhdc over the 2 sts, Continue on the front panel, xhdc across until the last st (on front panel), using the last st and the first skipped st of the front panel, xhdc over the 2 sts, 61 (74, 83, 87, 100, 108, 118, 126, 130) xhdc
Place a stitch marker and move it with each round.
Round 2: Xhdc around, move stitch marker. 61 (74, 83, 87, 100, 108, 118, 126, 130) xhdc
Rounds 3 – 23 (25, 27, 27, 29, 29, 33, 33, 39): Rep round 2
Continue the repeats until you have a desirable length.
Sl st to the next st to close the height gap.
Edging
Round 1: Ch 3, *shell in same st, skip next 2 sts, sc in next st, skip next 2 sts, rep from * to the end, join
Fasten off
Set aside and work around the neckline and make the straps so you can check the fit of your dress as you continue.
The neckline and armhole finishing
- Join yarn with a sl st to the start of the left panel.
- You are to crochet across the foundation (starting chain), down to the edges of the armhole, and upwards toward the foundation chain on the front panel back to the back panels until you get to the starting chain for the edging.
Round 1: Ch 1, sc evenly across, aim for 2 sc in each hdc sp, (sc, ch 2, sc) at each corner, join.
Do not fasten off
Buttonhole
Ch 4, skip the next 3 sts, sc in the next 2 sts, sl st in the next 3 sts
Fasten off.
Sew the button to the opposite side.
Fasten off
Weave in ends.
Check fit
If the Sleeve opening is too wide, continue below.
- Join yarn with a sl st to the front panel’s edge of the foundation row.
- Crocheting down from the neckline to the armhole and upwards towards the neckline on the back panel.
- One side of the sleeve at a time.
Row 1: Ch 2, *sc2tog, sc in next 5 sts, rep from * across the sleeve opening, turn.
Row 2: Ch 2, sc in each st until the end, turn.
Row 3: Ch 1, sl st in each st across, turn.
Fasten off
Ties/Straps
- On each tip of the neckline, one side at a time.
- You need four ties in all.
Option 1 – Tiny Straps
Double your yarn, join with a sl st, and make 70 (80, 90, 100, 110, 120, 130, 140, 150) sts using the I-cord method (Video to come)
Option 2 – Thicker straps
Row 1: Ch 1, sc in first 4 sts, turn
Rows 2 – 30 (30, 36, 40, 40, 50, 50, 60, 60): Ch 1, sc in st across, turn.
Fasten off.
Add more rows until you have a long enough length for the ties.
Edging
- Join yarn with a sl st to the base of the strap
- Crocheting across the long edge, and to the other long edge
Row 1: Ch 1, sc in each st evenly across, aim for (sc, ch 1, sc) in each corner.
Fasten off.
Repeat the strap on the remaining 3 sides.
Weave in ends.
Fasten off
Weave in ends
I will love to see your makes from this Crochet Halter Top Pattern.