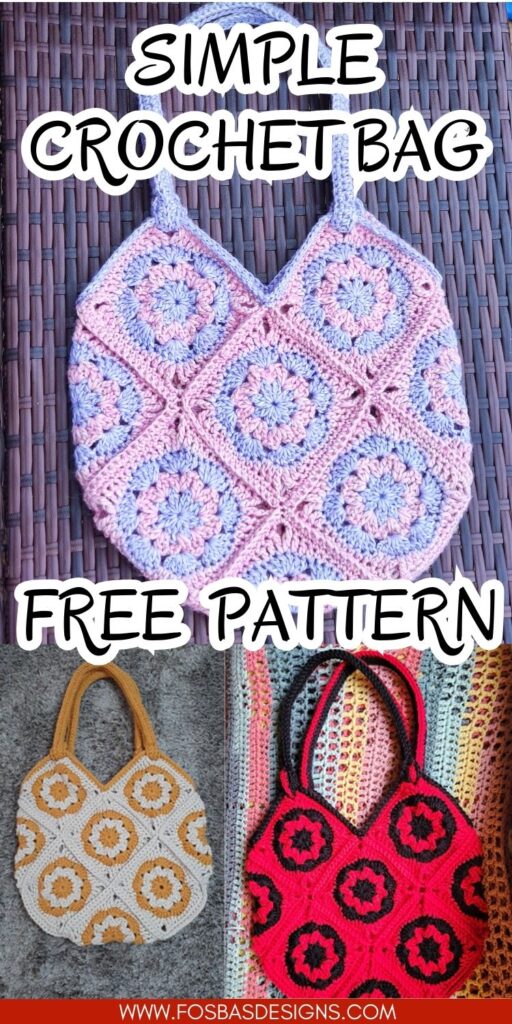
Easy Granny square crochet bag pattern
I am excited to share a beautiful bag with you today: the Granny Square Crochet Bag Pattern. This combines the classic Granny square and the African flower square method.
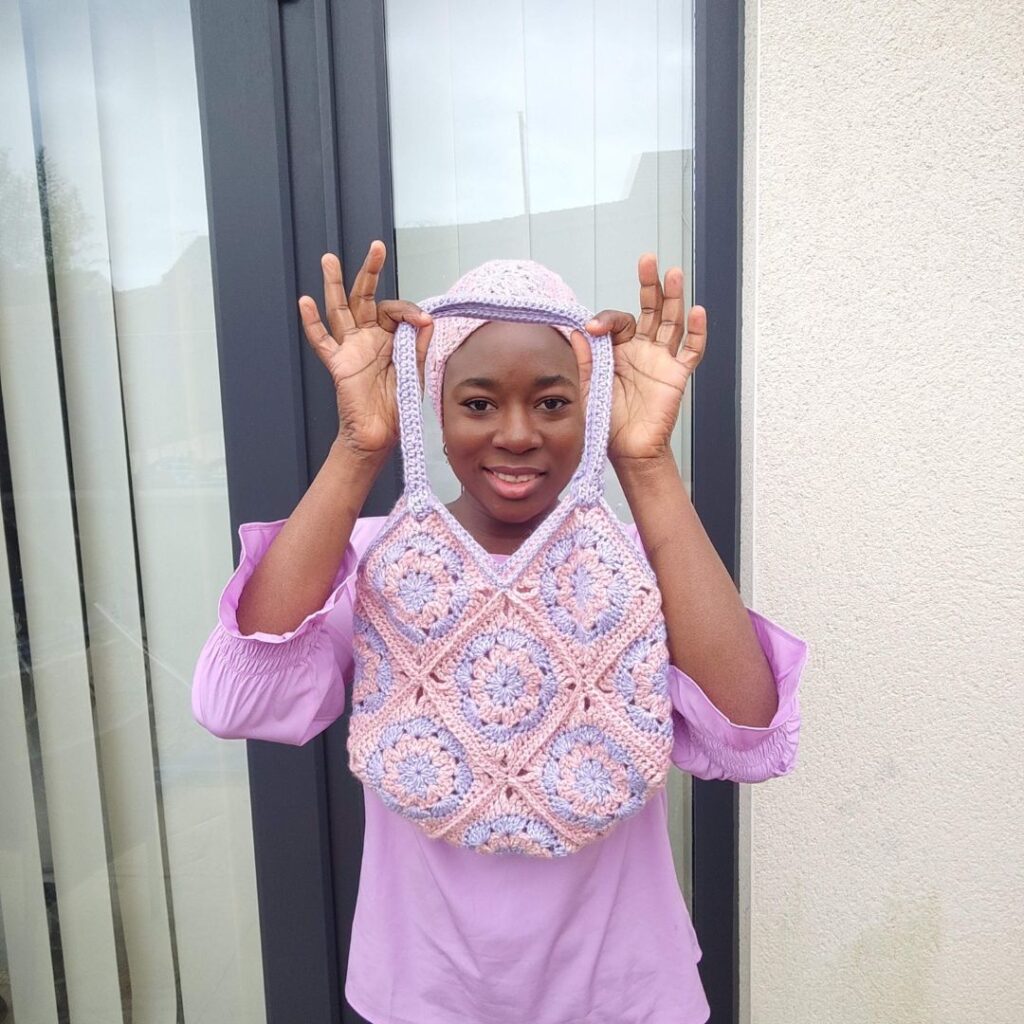
This beautiful market bag has always received great compliments each time I take it out shopping. A confident beginner crocheter would be able to make the classic granny squares.
Learn the basic granny squares pattern here.
This is a free crochet granny bag pattern; scroll down for the instructions. You can grab the pdf pattern on Ravelry or Etsy.


Best yarn for square bag patterns
A cotton yarn is a popular choice for granny square bags due to their durability and ease of care. The acrylic yarn or a blend of cotton and acrylic is close to this. However, you can choose any yarn type that suits your preference or the bag’s intended use.
For this project, worsted-weight yarn is the suggested yarn weight. If substituting another yarn weight, you might want to adjust the hook size accordingly, but remember that your Granny square crochet bag might come out in a different weight.
More free crochet bag patterns on the blog:
1. Beach Crochet tote bag that use bobble/puff stitches
Supplies needed for this crochet project
Yarn – Yarn – Hobbii Portobello, Worsted weight, #4 (60% Cotton, 28% Acrylic, 12% Wool, 120 m (131 yds) per 50 g (1.75 oz) Ball)
Estimated Total Yardage
Main Color (MC) Purple = 450 Yards
The second color (CC) Peach = 300 yards
Hook – 6 mm Crochet Hook
Stitch marker
Gauge – 15 sts over 8 Rows = 4 x 4” made in dc, before blocking.
Granny square free crochet pattern notes
- Please kindly read through the pattern before starting.
- Beginning chains count as a stitch throughout the pattern.
Skill Level – Intermediate
Terms – US Terminology
Special stitches
Chain/chains – ch/chs
Chain space – ch sp
Stitch(es) – st(s)
Slip Stitch – sl st
Single Crochet – sc
Double crochet – dc
Third loop – This is the loop just below the front front loop.
A close up photo for this has been attached below.
Finished Measurements
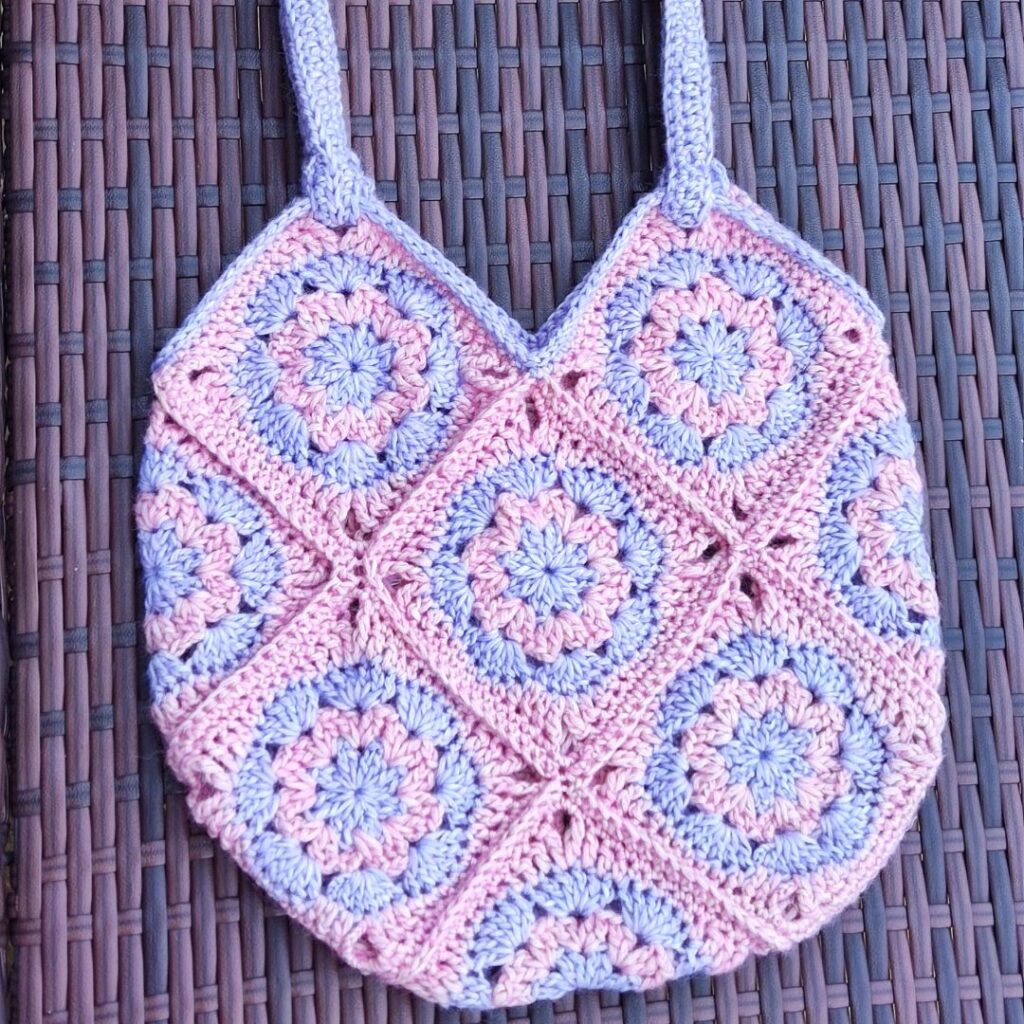
Each square measures about 6”
Bag measures 12” at the widest point and 10” at the deepest post.
Handle = 9”
How to crochet the Granny square crochet bag pattern
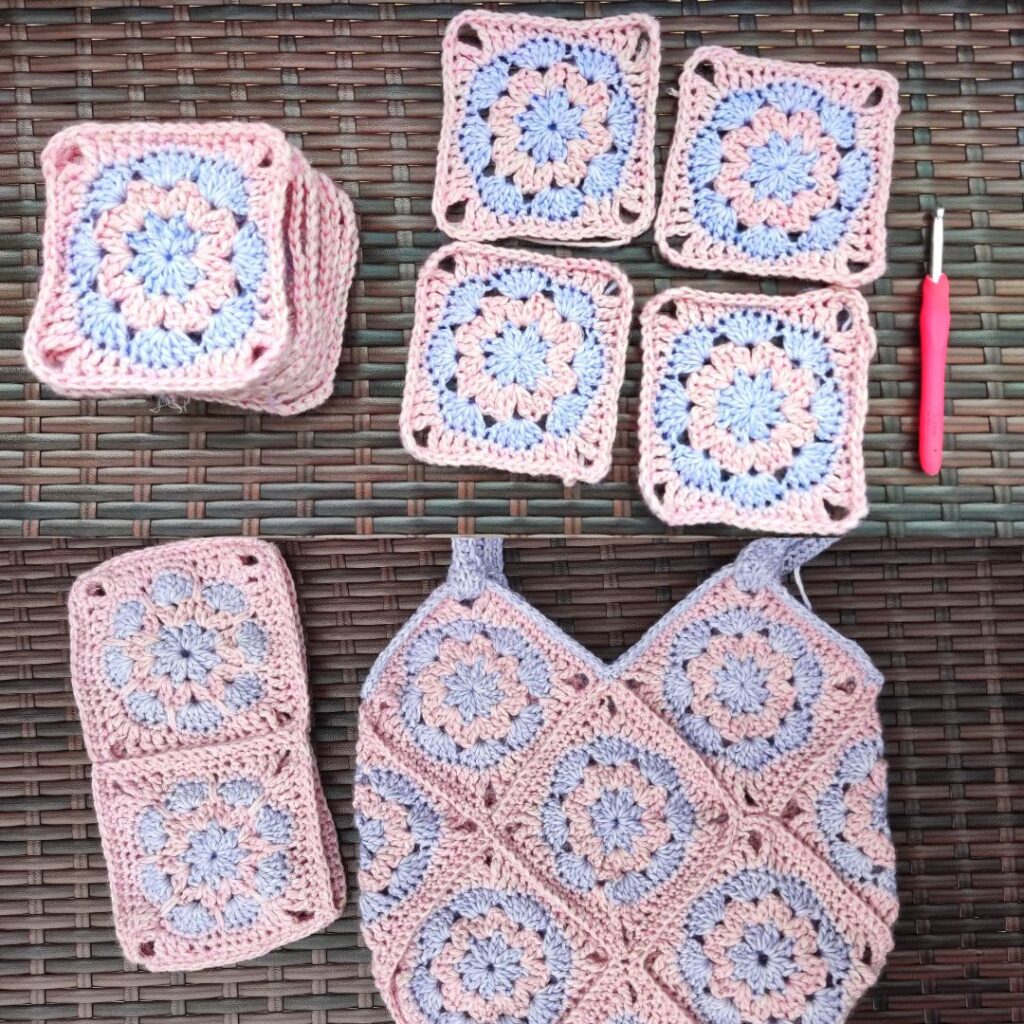
- This project is done in squares – you need 13 squares in all.
- The squares are then joined together.
- The handle is made in rows – You need two and then sew these to the bag.
Granny square tote bag free pattern
Section 1 – Squares
Make 13 pieces
Round 1: With MC, make a Magic ring, ch 3 (counts as the first dc, here and throughout), dc, *ch 1, 2 dc, rep from * 6 more times, ch 1, join with a sl st to the beginning ch. 16 dc, 8 ch sps
Close the ring tightly.
Fasten off or drop yarn.
Join CC to any of the ch sps.
Round 2: Ch 3, dc, ch 1, 2 dc in ch 1 sp,*(2 dc, ch 1, 2 dc) in each ch 1 sp around, join. 32 dc, 8 ch sps
Fasten off CC and join MC to any of the ch sps.
Round 3: Ch 3, 5 dc in ch 1 sp, *6 dc each ch 1 sp, join. 48 dc
Fasten off MC and join CC, to any of the 3rd dc in the group of 6 dc from the round below.
Round 4: Ch 7 (counts as the first tr + ch 3), tr in same st, *dc in next 2 sts, hdc in next st, sc in next 5 sts, hdc in next st, dc in next 2 sts, (tr, ch 3, tr) in next st, rep from * 2 more times, dc in next 2 sts, hdc in next st, sc in next 5 sts, hdc in next st, dc in last 2 sts, join with a sl st to the 4th ch of the ch 7 starting chain. 8 tr, 16 dc, 8 hdc, 20 sc, 4 ch-3 sps.
Round 5: Ch 1, sc in each st around, aim for 3 sc in each ch 3 sp. 64 sc. Fasten off
Joining the squares together
- Mark the edges with stitch markers.
- Use a crochet hook and a single crochet to connect the sides of the squares.
Finishing
Joining the squares together.
Several methods for joining granny squares include slip stitch, single crochet, or sewing them together with a yarn needle. This pattern, however, uses the single crochet stitches for joining.
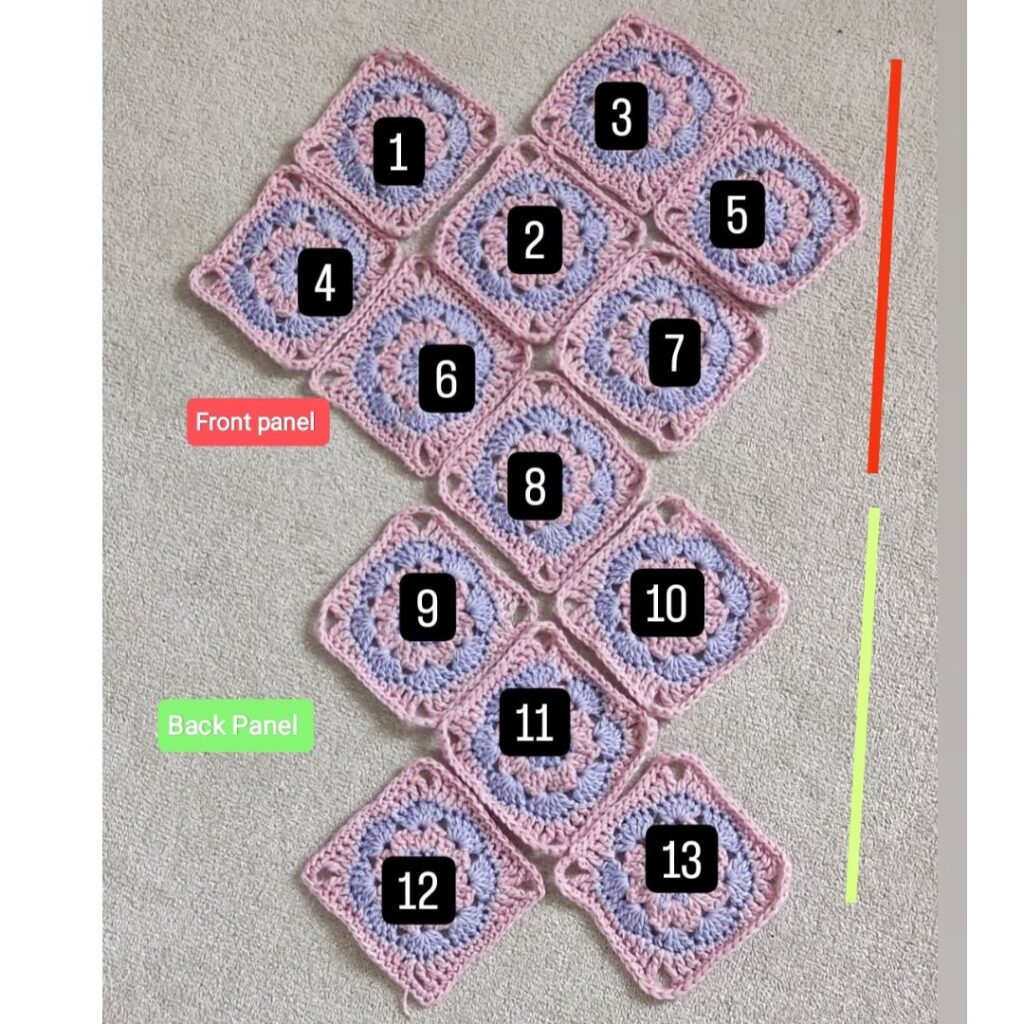
Step 1: Square bag layout – Arrange the squares as shown above.
Step 2: Using your crochet hook and CC, join the squares together using a single crochet stitch over both sides; continue until you have joined the sides of the arranged squares together. All joining should be on the right side and across the four loops – 2 loops on each of the squares. This gives a beautiful “braid”.
Step 3: Gently fold the arranged squares over each other. Join the sides of the remaining two squares left to the joined squares.
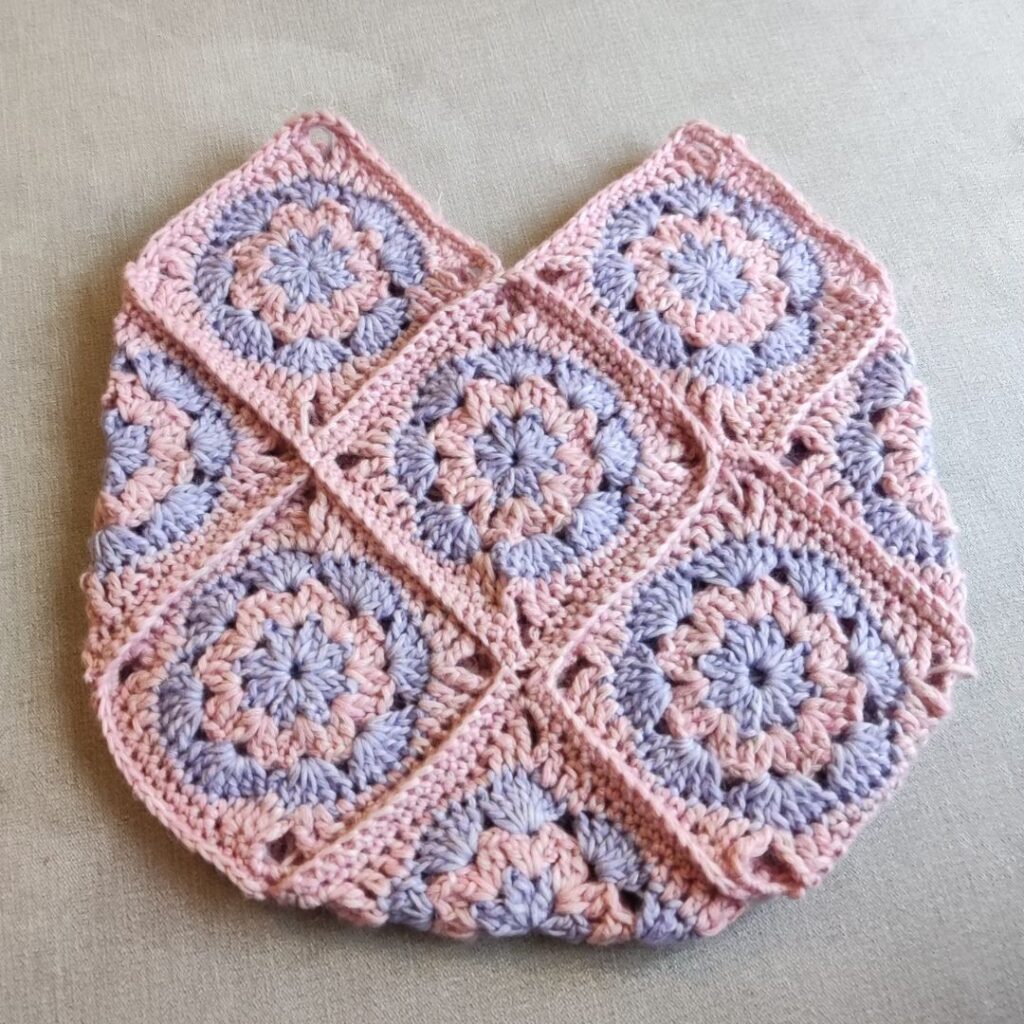
Step 4: Join MC with a sl st to any of the sts on the bag’s opening.
Edging
Row 1: Ch 1, sc in each st around the top edge, join with a sl st to the beginning ch.
Row 2: Ch 1, sl st in each st around, join with a sl st to the beginning ch.
Handle: Make 2
With MC, ch 84
Row 1: Hdc in 3rd ch from hook and in each ch across, turn. 82 hdc
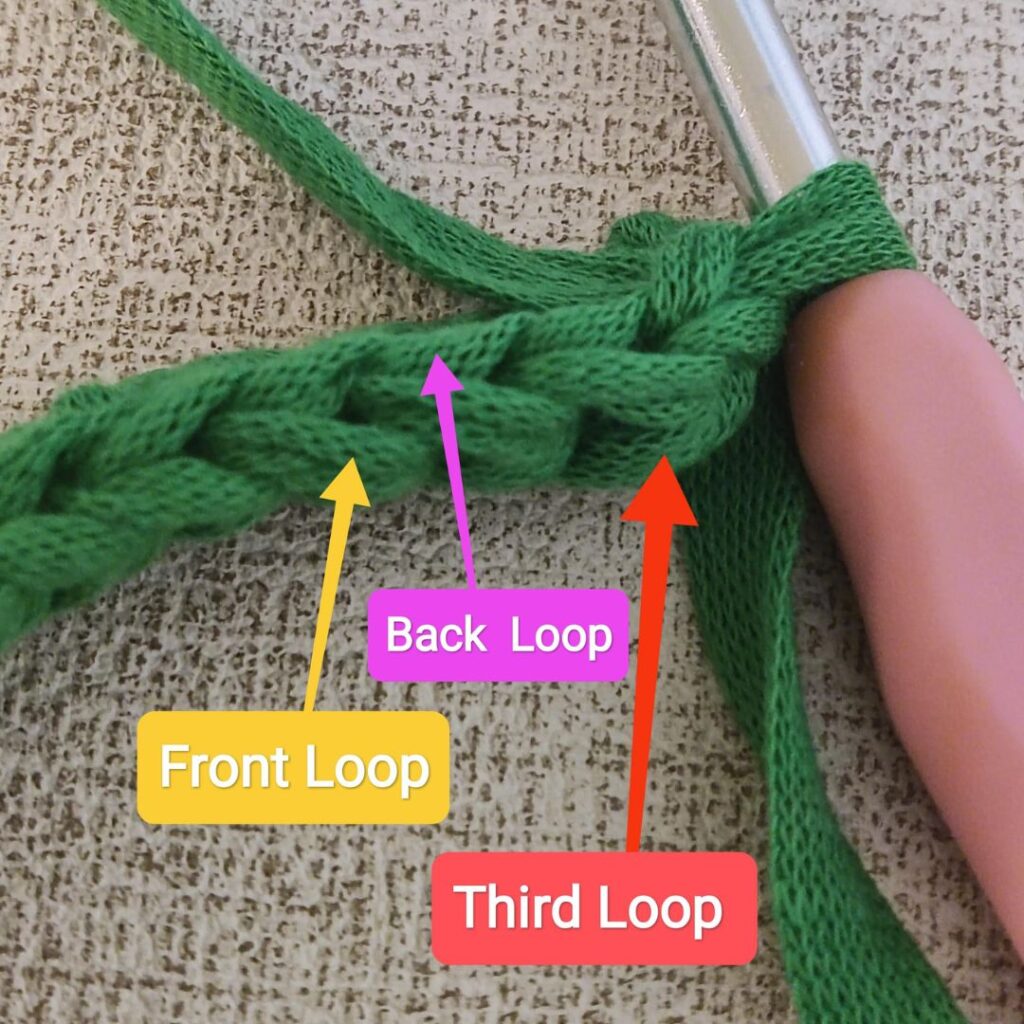
Row 2: Ch 2, in the third loop, hdc in each st across, turn.
Row 3: Ch 2, in back loop, hdc in each st across.
To join the handles to the bag,
Step 1: Pick up one end of the handle and pass it through the right side of the bag at any of the ch 2 sps.
Step 2: Fold the lower 2“ over the ch sp and sew together. Do not fasten off.
Step 3: Sew the sides of the handle together until the lower 2”.
Step 4: Repeat steps 1, 2, and 3
Fasten off.
Repeat with the other handle.
Sew in all ends.
- How many granny squares do I need for a bag?
- The number of granny squares needed can vary depending on the size of the bag you wish to create. A standard, medium-sized bag may require 13 squares.
- Can I use different granny square patterns within the same bag?
- Absolutely! Mixing and matching different granny square patterns can add a unique touch to your bag. Just ensure the squares are consistent in size for easy assembly.
- How do I join the granny squares together?
- There are several methods for joining granny squares, including slip stitch, single crochet, or sewing them together with a yarn needle. The choice depends on the finish you desire and the pattern instructions.
- Do I need a lining for my crochet bag?
- While not always necessary, adding a fabric lining can provide extra stability and durability, especially for bags intended to carry heavier items. The blog post may offer tips on adding a lining.
- How do I care for my granny square bag?
- Care instructions can vary depending on the yarn used. Generally, most crochet bags can be gently hand-washed in cold water and laid flat to dry. Check the yarn label for specific care guidelines.
- Can I adjust the size of the bag?
- Yes, you can easily adjust the size by altering the number of granny squares used or adjusting the size of each square. The blog post may include suggestions for customization.
- What tools will I need to start this project?
- You’ll need a crochet hook suitable for the yarn you’re using, a yarn needle for weaving in ends and joining squares, scissors, and optionally, materials for a lining.
- Where can I find inspiration for color schemes?
- Look to nature, fashion trends, or online platforms like Pinterest for color combination ideas. The beauty of granny squares is their ability to blend multiple colors harmoniously.
I can’t wait to see your interpretation of this classic charm of granny squares. Whether you stick to traditional patterns or experiment with colors and textures, the finished project from this Granny square crochet bag pattern will turn heads and become a beloved addition to your collection.