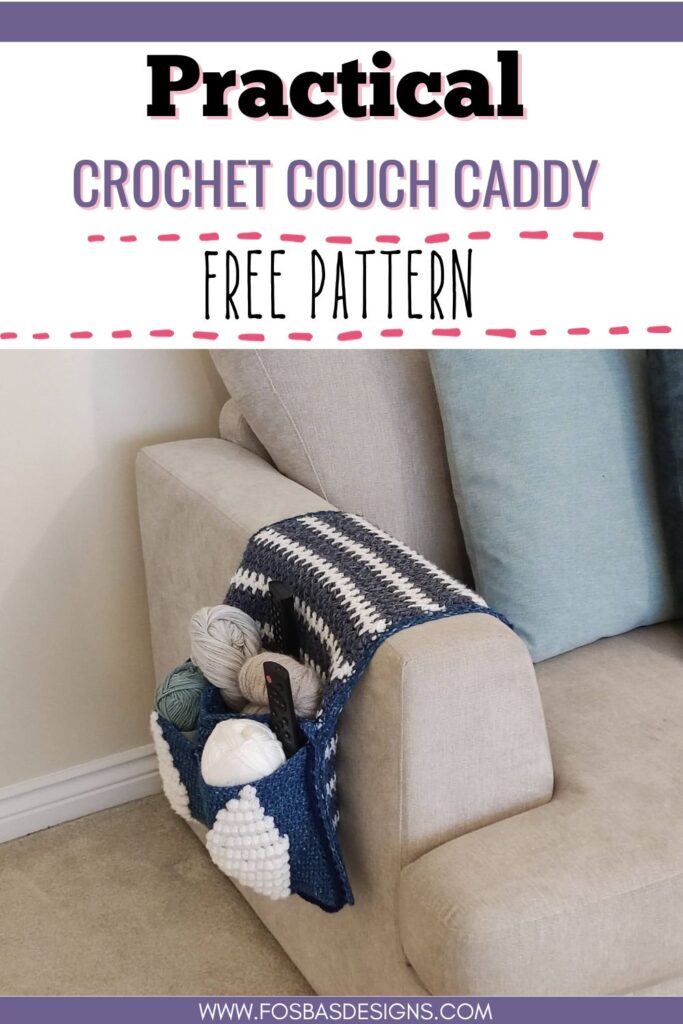
Practical Crochet Armchair Caddy Free Pattern
The crochet armchair caddy pattern was inspired to keep our remotes in one place but the truth is, this has been more functional than I thought!
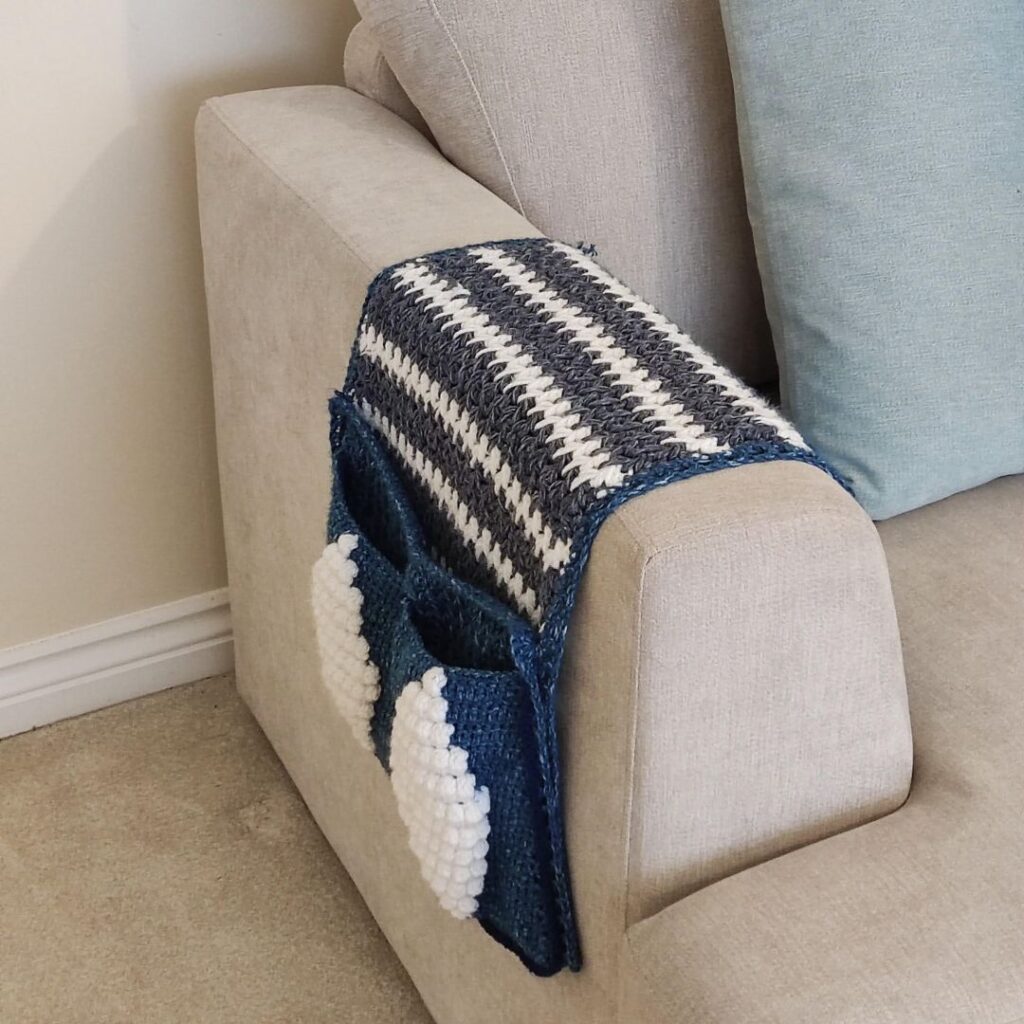
I can keep more than the remotes, things like my yarns, hooks, and current crochet projects can be kept in this crochet caddy while sitting comfortably in my armchair.
How to make the crochet armchair caddy
Supplies needed for the crochet caddy
Yarn – You need a medium-weight yarn. Made this prototype using Lion Brand Jeans, Worsted weight, #4 (100% Acrylic, 246 yards/225 m per 3.5 oz/100g Ball)
Estimated total yardage
6 Balls/21 oz/600g / 1,350 m /1,476 yards
Colors Main color (B) = 4 Balls in Blue
Contrasting Color (A) = 2 Balls in white
Crochet hook and other materials
- 5 mm Crochet Hook
- Yarn needle
Gauge
17 sts over 12 rows = 10 cm square/4” made in stitch pattern (Section 1).
Adjust hook size if necessary, to obtain gauge.
Armchair caddy pattern notes
- Please kindly read through the pattern before starting.
- Any #4 weight yarn can be substituted
- Chains at the beginning of Rows do not count as a stitch.
Skill Level – Intermediate
Crochet Terms – US Terminology
The finished armchair caddy
Main Panel = 45” by 70”
Pocket = 6 x 8”
Stitches Abbreviations
Chain(s) – ch(s)
Double crochet – dc 3
Double crochet 5 stitches together – dc5tog Half Double Crochet – hdc
Bobble Stitch – Bobble st Right Side –(RS) Wrong Side – (WS)
Beginning Feather stitch – Beginning Feather st Feather stitch – Feather st
Special Stitches
Half Double Crochet Yarn over, insert into stitch, yarn over, and pull up a loop, you will have three loops on the hook. Yarn over, and pull through the remaining three loops.
Beginning Feather stitch and Feather stitch
Here’s a Video on how to work the Feather Stitch – https://youtu.be/J-_n3KmuZNw
Construction Notes
1. This couch caddy is worked in rows, with the main part worked in Section 1.
2. The Pockets are then crocheted and joined/sewed to the main panel.
Adjustment
1. Length: increase or decrease the repeat rows of the panel till you have a good length across your armchair.
2. For a Wide or slim panel adjust starting chains in multiples of 2 + 1
Written Instruction for the Crochet Armchair Caddy
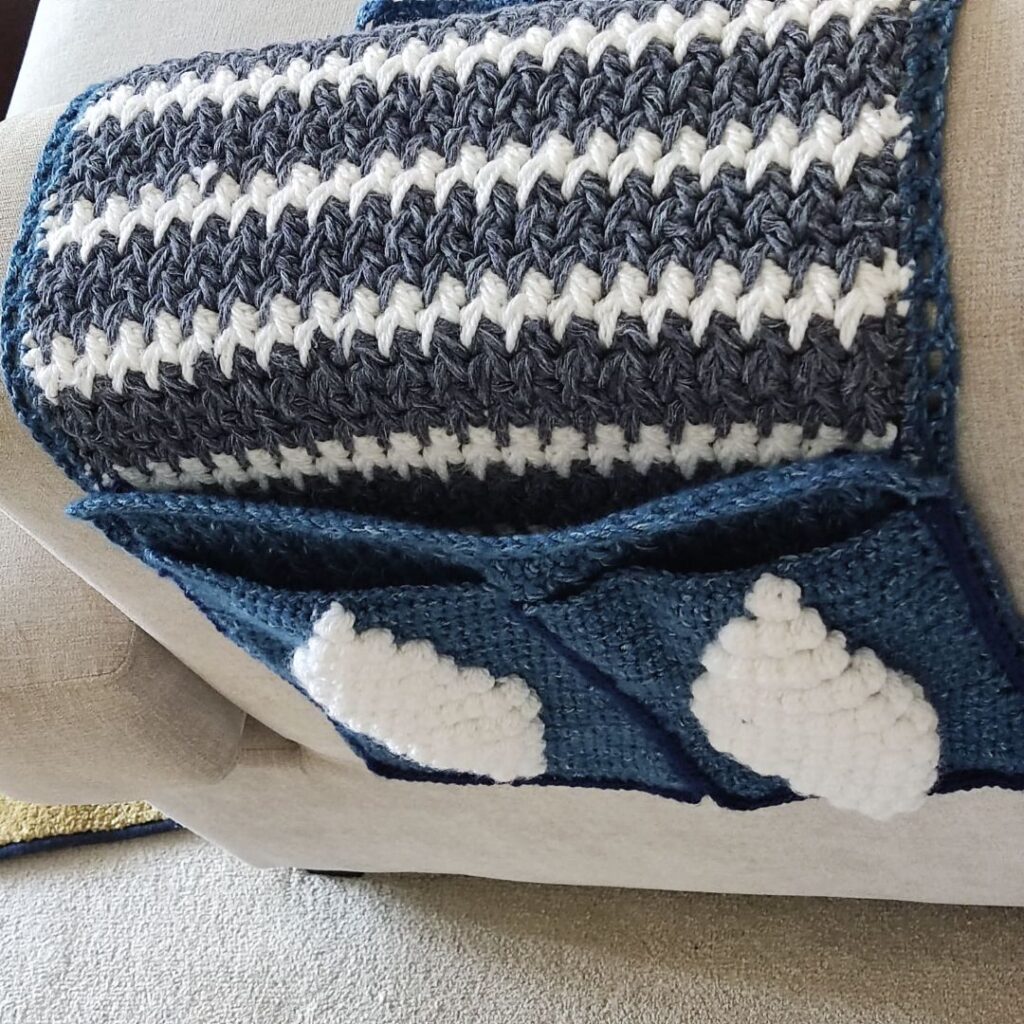
Section 1: Main Panel
With A, Chain 45 – work in multiples of 2 + 1
Row 1: Hdc in 3rd ch from hook, and in each chain across, turn – 43 hdc.
Row 2: Ch 1, hdc in 1st st, *ch 1, skip next st, hdc in next st, repeat from * to the end, turn. 22 hdc, 20 ch-sp.
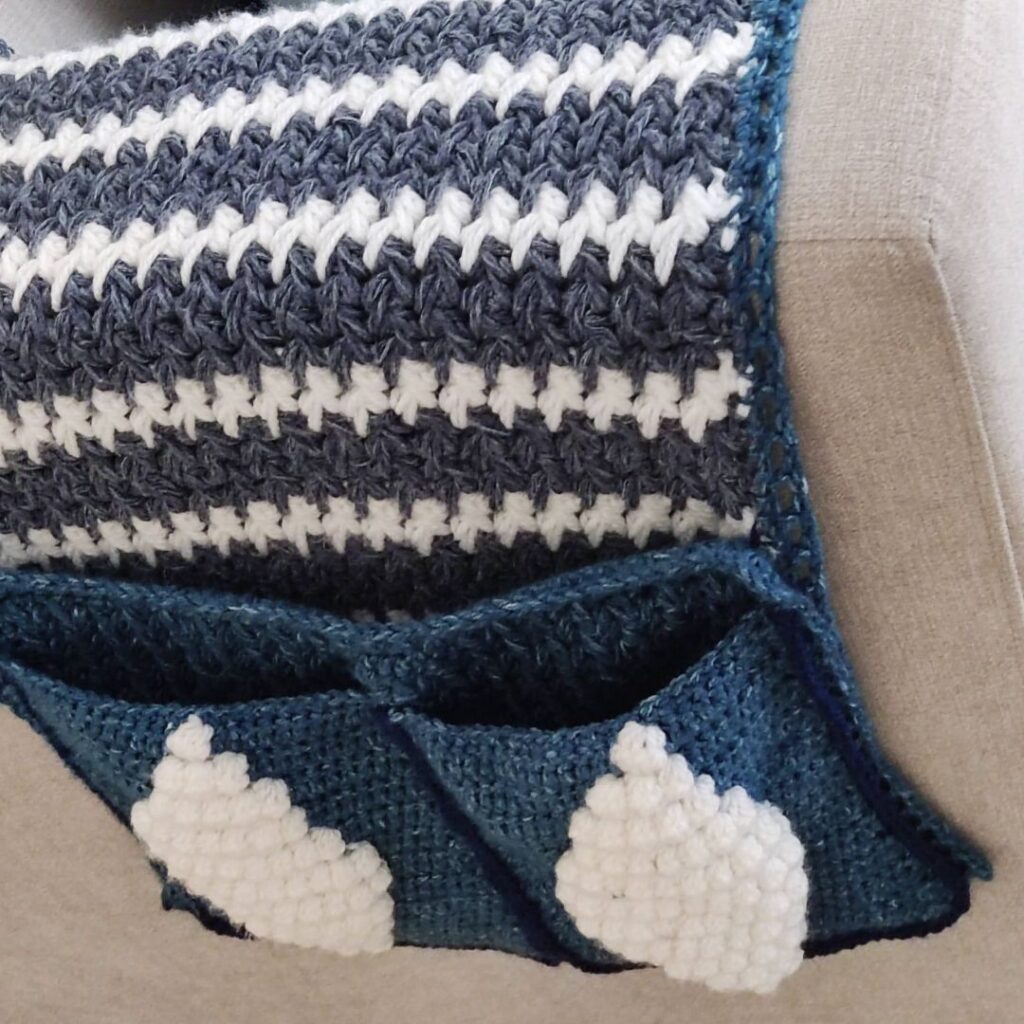
Row 3: Ch 1, hdc in 1st st, ch 1, work a beginning feather st, ch 1, *work feather st, ch 1, repeat from * to last st, hdc in last st, turn. 20 feathers st, 2 hdc.
Row 4 – 154: Repeat Row 3 Or until you reach your desired length long enough across the couch arm. Note that 10” will be used as a ]pocket.
For color changes, I alternate blue and white at the middle.
Final row: Ch 1, hdc in 1st st, *hdc in ch-1 sp, hdc in feather st: repeat from * to end, hdc in last st, turn. 43 hdc.
Do not fasten off.
Border
Round 1: Ch 2, *hdc in next 43 sts, ch 2, hdc in each st across the long edge, ch 2, rep from * one more time, join with a sl st to beginning ch.
Round 2: Ch 4 (counts as dc + ch 1), *skip next st, dc in next, ch 1, rep from * across the short edge, (dc, ch 1, dc, ch 1, dc, ch 1) in last st at the corner, **skip next st, dc in next, ch 1, rep from ** across long edge, (dc, ch 1, dc, ch 1, dc, ch 1) in last st at the corner, rep from * to end, join with a sl st to last st.
Fasten off. Weave in ends.
Section 2: Pocket (Make 2)
Note
1. Each Bobble stitch is worked using the Main Color.
3. You can go up a hook size with the bobbles.
4. When working on the Bobbles, carry A along, crocheting over it.
5. Go down a size for smaller size Pockets. 6. Here’s a Video showing how to make the Pocket using Bobble Stitch – https://youtu.be/QrmU8v6lCP0
With A, chain 27
Row 1 (RS): Hdc in 3rd ch from hook, hdc in each ch across, turn. 25 Hdc.
Row 2 (WS): With A, Ch 2, dc in first 12 sts, with B – 1 Bobble st, with A, dc in last 12 sts, turn. 24 dc, 1 Bobble st
Row 3 (RS): Ch 1, sc in each st across, turn. 25 sc
Row 4 (WS): Ch 2, dc in first 11 sts, with B 1 Bobble st in next 3 sts, with A, dc in last 11 sts, turn. 22 dc, 3 Bobble sts.
Row 5 (RS): Ch 1, sc in each st across, turn. 25 sc
Row 6 (WS): Ch 2, dc in first 10 sts, with B, 1 Bobble st in next 5 sts, with A, dc in last 10 sts, turn. 20 dc, 5 Bobble sts.
Row 7 (RS): Ch 1, sc in each st across, turn. 25 sc
Row 8 (WS): Ch 2, dc in first 9 sts, with B, 1 Bobble st in next 7 sts, with A, dc in last 9 sts, turn. 18 dc, 7 Bobble sts.
Row 9 (RS): Ch 1, sc in each st across, turn. 25 sc
Row 10 (WS): Ch 2, dc in first 8 sts, with B, 1 Bobble st in next 9 sts, with A, dc in last 8 sts, turn. 16 dc, 9 Bobble sts.
Row 11(RS): Ch 1, sc in each st across, turn. 25 sc
Row 12 (WS): Ch 2, dc in first 7 sts, with B, 1 Bobble st in next 11 sts, with A, dc in last 7 sts, turn. 14 dc, 11 Bobble sts.
Row 13 (RS): Ch 1, sc in each st across, turn. 25 sc
Row 18 (WS): Ch 2, dc in first 7 sts, with B, 1 Bobble st in next 11 sts, with A, dc in last 7sts, turn. 24 dc, 11 Bobble sts.
Row 19 (RS): Ch 1, sc in each st across, turn. 25 sc
Row 20 (WS): Ch 2, dc in first 8 sts, with B, 1 Bobble st in next 9 sts, with A, dc in last 8 sts, turn. 16 dc, 9 Bobble sts.
Row 21 (RS): Ch 1, sc in each st across, turn. 25 sc
Row 22 (WS): Ch 2, dc in first 9 sts, with B, 1 Bobble st in next 7 sts, with A, dc in last 9 sts, turn. 18 dc, 7 Bobble sts.
Row 23 (RS): Ch 1, sc in each st across, turn. 25 sc
Row 24 (WS): Ch 2, dc in first 10 sts, with B, 1 Bobble st in next 5 sts, with A, dc in last 10 sts, turn. 20 dc, 5 Bobble sts.
Row 25 (RS): Ch 1, sc in each st across, turn. 25 sc
Row 26 (WS): Ch 2, dc in first 11 sts, with B, 1 Bobble st in next 3 sts, with A, dc in last 11 sts, turn. 22 dc, 3 Bobble st.
Row 27 (RS): Ch 1, sc in each st across, turn. 25 sc
Row 28 (WS): Ch 2, dc in first 12 sts, with B, 1 Bobble st, with A, dc in last 12 sts, turn. 24 dc, 1 Bobble st
Row 29 (RS): Ch 1, sc in each st across, turn. 25 sc
Row 30: Ch 2, *hdc in each st across, turn working on the edges, ch 1, hdc in next 24 sts, ch 1, working on the across the foundation row, rep from * to end, join with a sl st to beginning ch.
Joining
Step 1
- Fold the lower end (10”) of the panel over and adjust appropriately.
- Secure with stitch markers on the 4 edges. Sc across the edges leaving the 4th (upper) part as the opening.
- Sew the sides securely
Fasten off
Step 2
The second set of pockets
- Place the pockets made in section 2 on the first pocket created.
- Place the pockets, right side up on the lower parts of the panel.
- Secure with stitch markers on the 4 edges. Sc across the edges leaving the 4th (upper) part as the opening.
- Sew the sides securely
- Place the second pocket next to the first and sew.
Fasten off.
Optional
Repeat the first step on the other side
There you go, I hope you have more fun using this Crochet Armchair Caddy or gifting it to your loved ones.