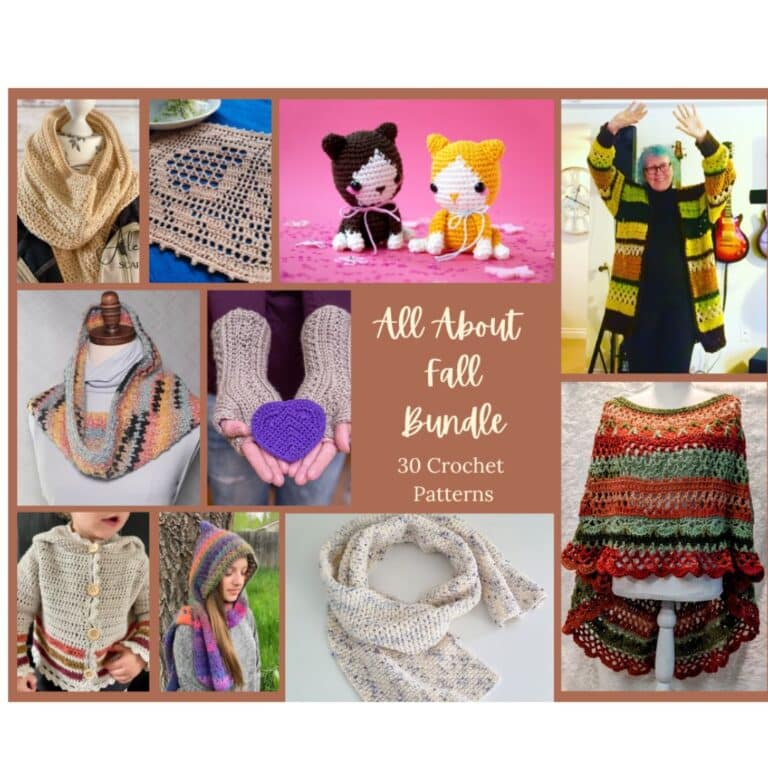
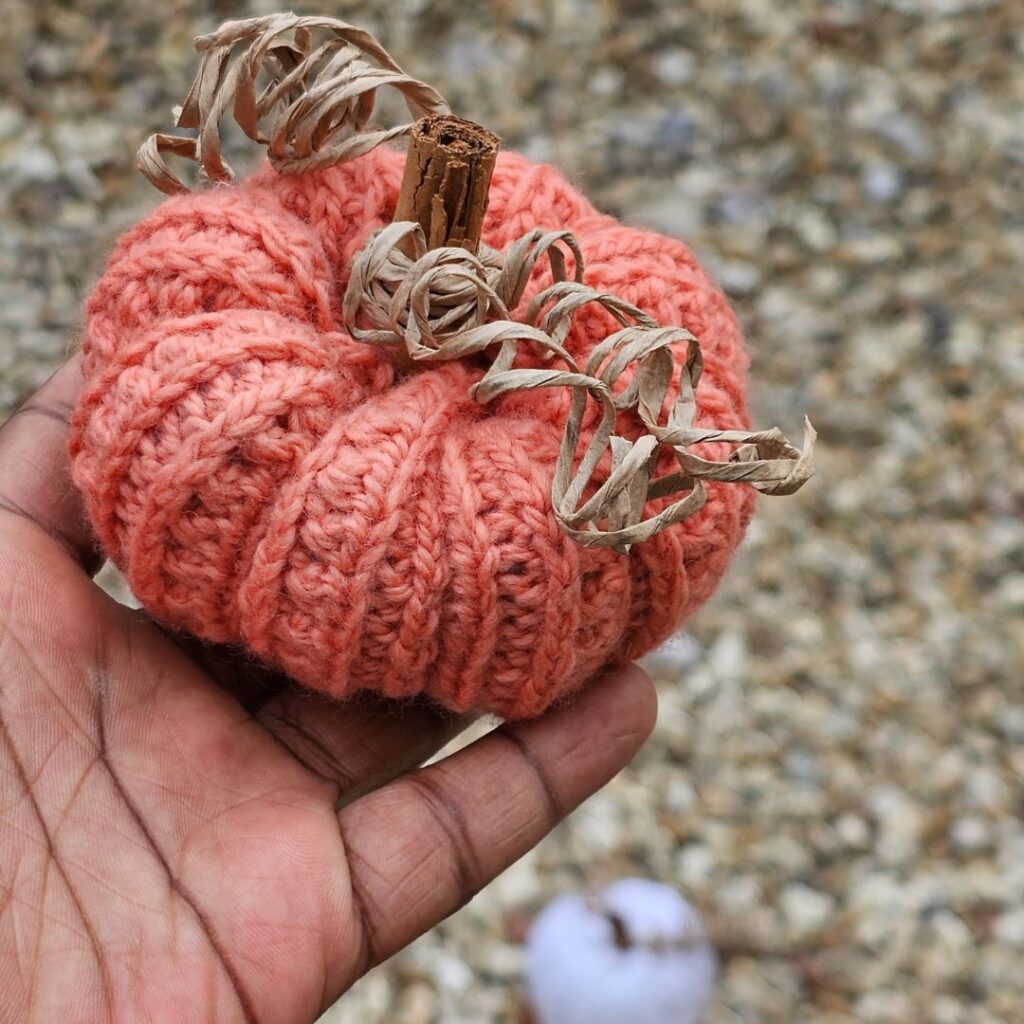
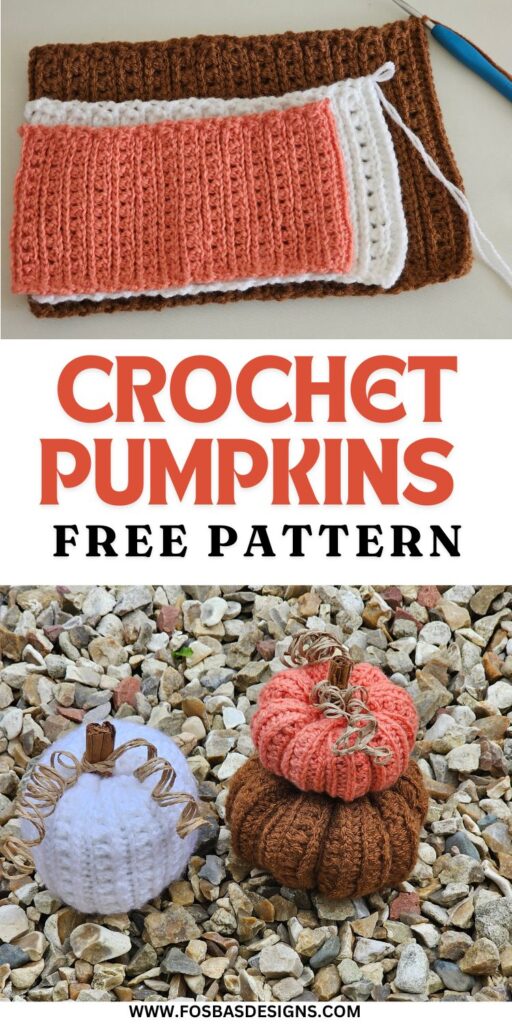
Rustic farmhouse crochet pumpkin pattern
Since it’s almost Pumpkin season, I decided to add to my collection! The rustic farmhouse crochet pumpkins come in 3 different sizes and are super easy to make.
X-Crossed Crochet Pumpkin Pattern inspiration
I fell in love with the stitch pattern and have designed several projects with this stitch combination.
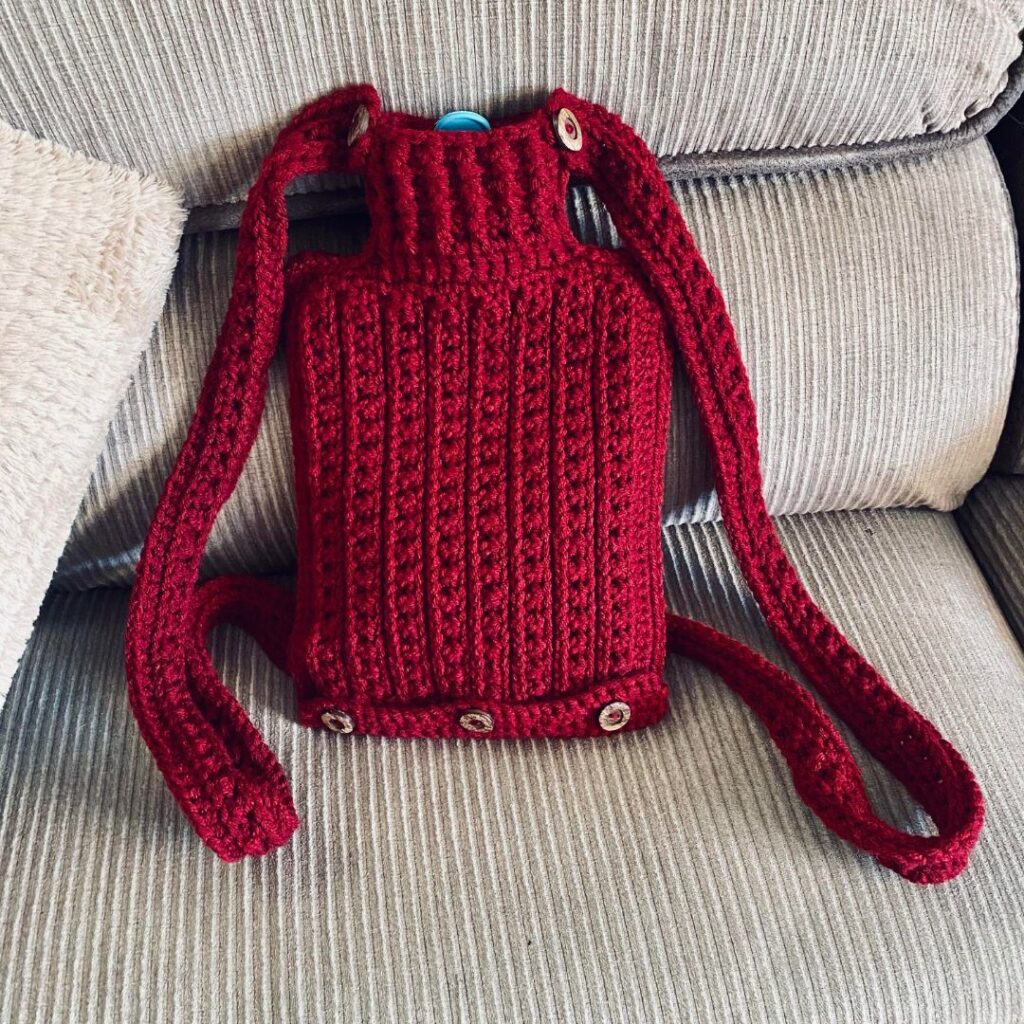
Hot Bottle Holder
Useful and functional.
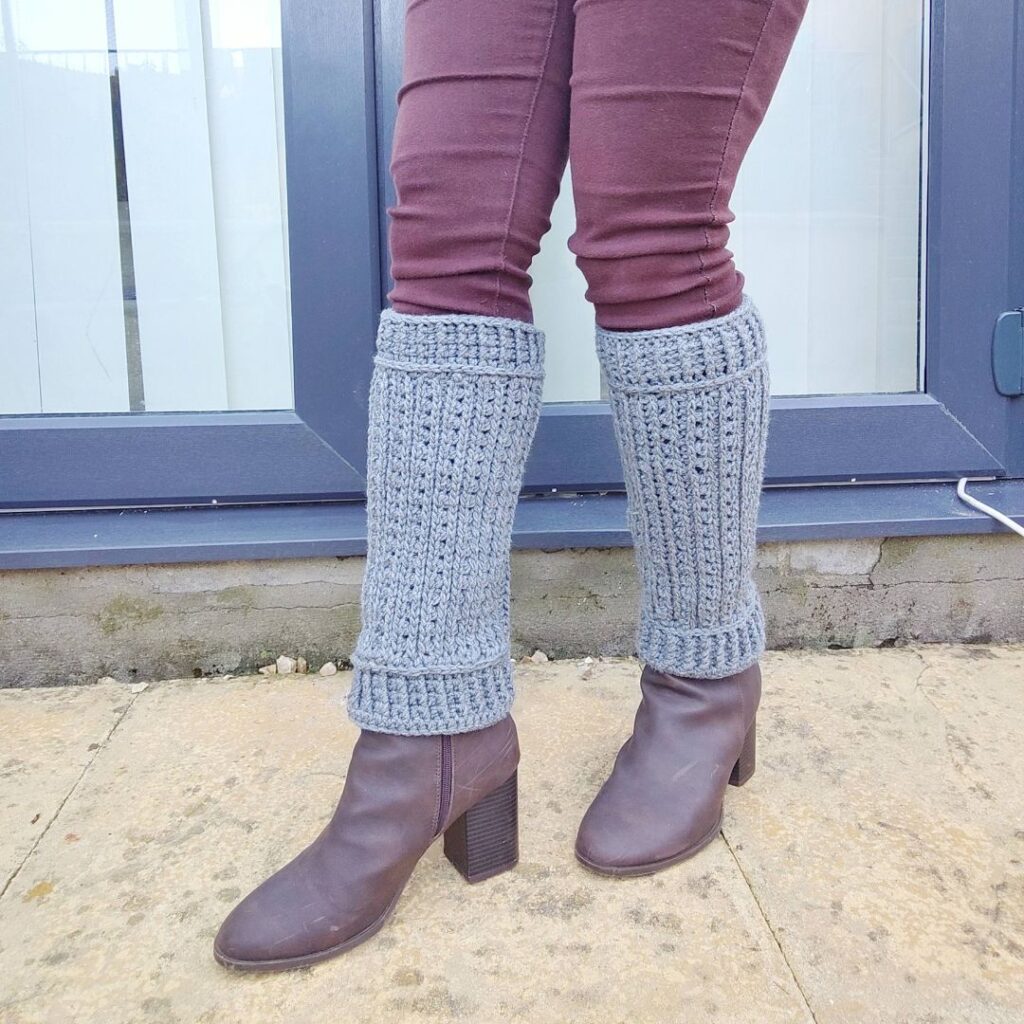
Leg warmer
Easy to customize!
Sweater Dress
Nine different sizes!

Supplies for the Rustic Farmhouse crochet pumpkin pattern
Yarn: Stylecraft Special Aran, (#4, 100% Acrylic, 196 m per 3.5 oz/100g Ball
Estimated Yardage
50 (60, 80) yards
Hook and other Materials
4 mm Crochet Hook
Glue
Tapestry needle.
Scissors.
Jute twine or Bindwire: I used bindwire for mine.
Gauge
15 sts over 10 Rows = 4” across, made using the stitch pattern before blocking.
Adjust hook size, if necessary, to obtain gauge.

Rustic farmhouse crochet pumpkin pattern: Finished Measurement
- Small: 4″ wide and 4″ tall (not parted into 8) and 3” for the parted version, including stem
- Medium: 5″ wide and 5″ tall, including stem
- Large: 6″ wide and 6″ tall, including stem
Rustic Crochet Pumpkin Pattern Notes
- Please kindly read through the pattern before starting.
- Any other #4 weight yarn can be substituted.
Skill Level – Intermediate
Terms – US Terminology
Stitches Abbreviations
Chain/chains – ch/chs
Single Crochet – sc
Half double crochet – hdc
Crossed half double crochet – xhdc
Back loop only – BLO
Front Post Half double crochet – FPhdc
Back Post Half double crochet – BPhdc
Special stitch
Xhdc – Crossed hdc – skip next st, hdc in next st, crocheting over the hdc just made, work hdc into the skipped st
Front Third Loop – This is the loop below the front loop. When you crochet into this stitch, it pushes the loops to the other side and creates beautiful braids.
Construction note
- This pumpkin is made in rows and joined together after completing section 1.
- The stalk (stick) is inserted into the pumpkin with an option to glue the stitch.
How to crochet the Rustic farmhouse crochet pumpkin pattern
With Color A, Chain 26 (30, 34)
Row 1: Hdc in 3rd ch from hook and in each ch across, turn. 24 (28, 32) hdc
Row 2: Ch 2, In both loops, hdc in first st, in front 3rd loop, xhdc across until the last st, in both loop, hdc, turn. 2 hdc, 11 (13, 15) xhdc
Row 3: Ch 2, In both loop, hdc in the first st, in back loop, hdc in each st around until the last st, hdc in last st, turn. 24 (28, 32) hdc
Rows 4 – 29 (21, 27): Repeat Rows 2 and 3
Measure your piece and continue the repeats until you have a width of 10 (12, 14)”
Do not fasten off.
Side seam
- Fold the last row lengthwise.
- With the wrong side facing you and the last row next to the foundation row.
Using a darning needle or hook, use either mattress stitch, slst, or single crochet through the back loop of both sides for a smooth joining.
Upper end
Continue on the short edges.
Turn to the right side—Crochet in rounds.
Round 1: Ch 1, sc evenly across the edges, and join.With a darning needle, gather the upper end of the Pumpkin and secure it tightly.
Join yarn with a sl st to any stitch on the lower end.
Crochet in round, on the right side
Round 1: Ch 1, sc evenly across the edges, and join. Leave a long tail of yarn for sewing. If you decide to part your pumpkin into 8 size, add more inches to the yarn left.
Stuff the Pumpkin
Next, stuff the pumpkin with fiberfill through the bottom opening. Gently fill out the shape, being careful not to overstuff—you don’t want the fiberfill peeking out through the holes of the stitches.
Gather the ends lower end of the Pumpkin
To shape your pumpkin
Once your pumpkin is stuffed, cinch up the bottom opening.
Parting the pumpkin into Eight.
Wrap yarn around the outside of the pumpkin to get the perfect shape.
- Thread a tapestry needle with matching yarn and sew a running stitch across the lower edge.
- Pass the threaded needle through the pumpkin, through the lower end to the upper end as tight as possible, and clinch the pumpkin to create an indentation.
- Keeping the yarn in the tapestry needle, wrap it over and around the pumpkin to the starting point to divide it in half.
- Pull tight and knot at the center. Now divide in half again to form 4 equal sections, wrapping the yarn up and around.
- Make a knot whenever you feel the need to hold the yarn and the end of a wrap. Divide the pumpkin two more times to make eight sections.
- Knot securely at the center and finish off, using the darning needle to hide the tail inside the pumpkin.
- Tie a knot, cut the excess yarn, and weave in the ends.
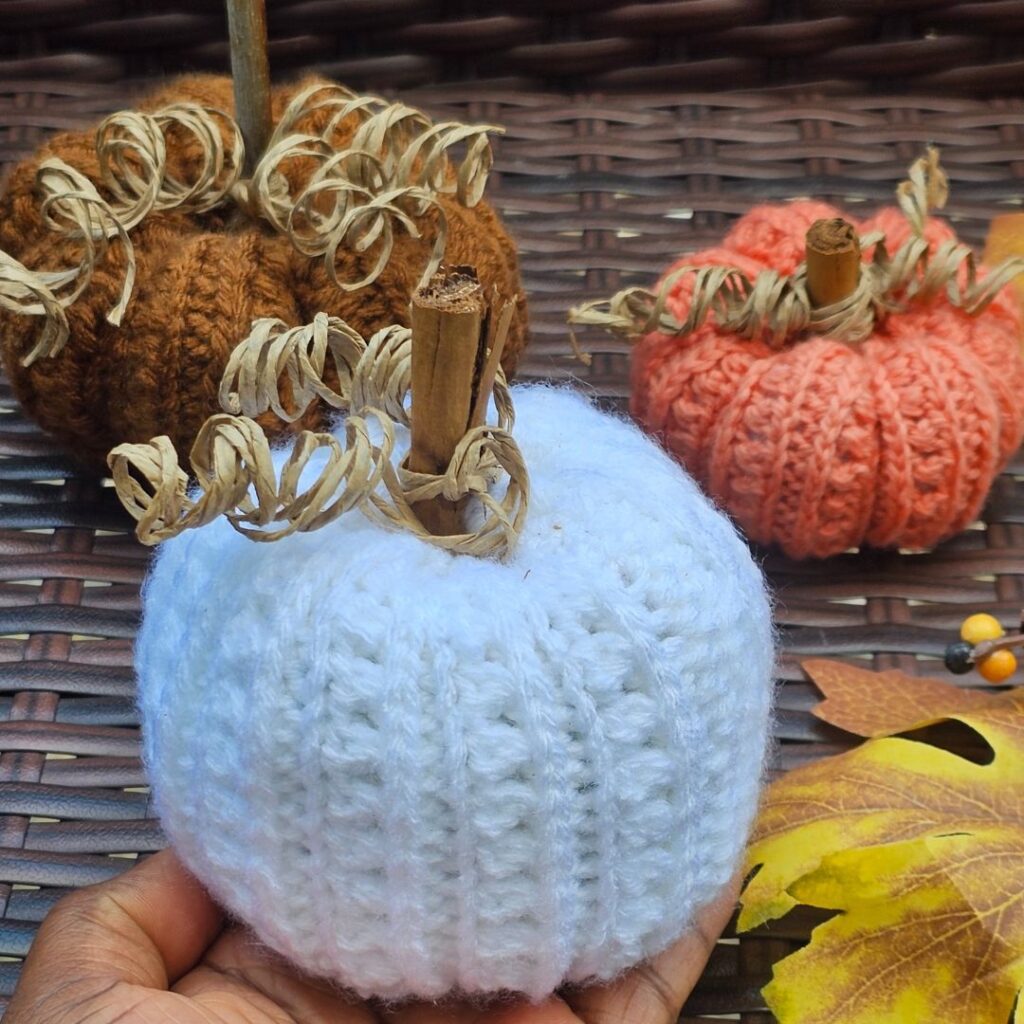
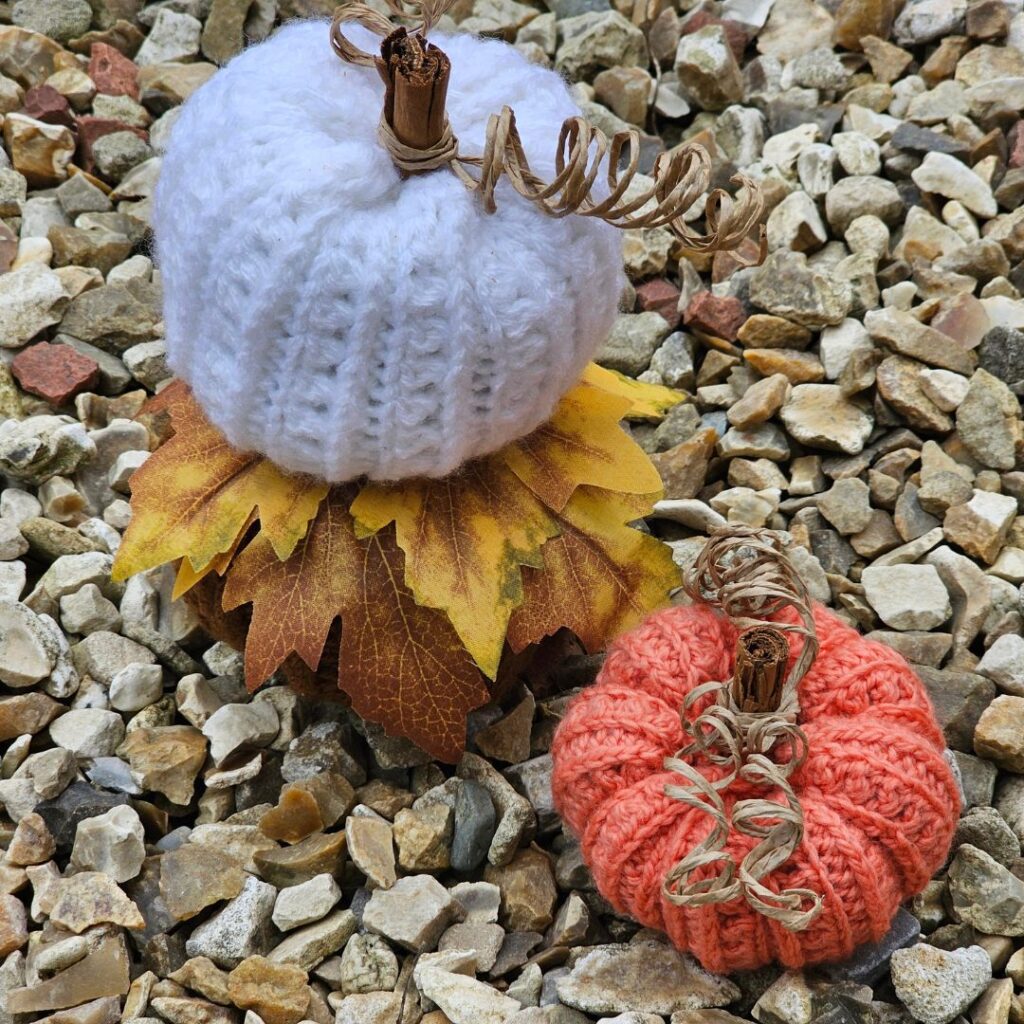
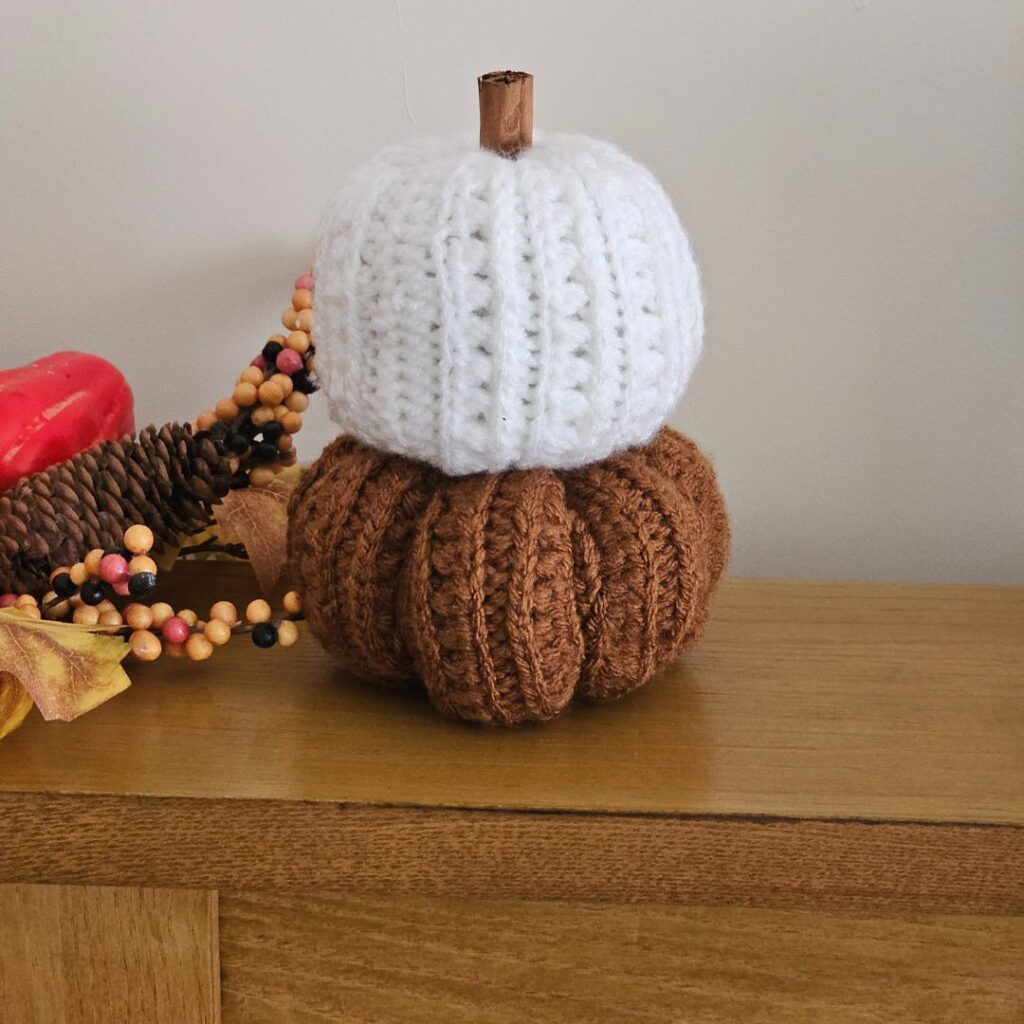
Crochet pumpkins with cinnamon stick
Adding a stick
- I prefer using Cinnamon sticks, but you can use any other branches cut to size to fit your pumpkin.
- Use your hook or finger to create some opening through the fiberfill to create a space for the stitch.
- Use a glue gun to secure cinnamon sticks in the hole of the top closure. To finish, tie a piece of twine around the cinnamon stick. Don’t use glue to remove the stick for stacking size.
- Insert the stick, secure it by winding yarn around it, and sew the yarn to the pumpkin’s body.
Creating the Twine curls
- Cut 4 pieces of twine measuring 20” each.
- Fold in half and wrap around the stitch, to secure it, leaving a long tail for the curls.
- You should have 2 sides of twine now.
- Wrap a pen around the first pair of 4 twine and gently remove the pen.
- Gently release the curls and shape them appropriately.
- Repeat the last 2 steps with the remaining twine.


There you have it, the Rustic farmhouse crochet pumpkin pattern. It is the perfect quick project to sell at craft fairs and also as a home decoration this season.
About the Designer
Say Hi on Instagram and Subscribe To my email List for pattern discounts and freebies. For questions, send such to [email protected]. Read more about me here.