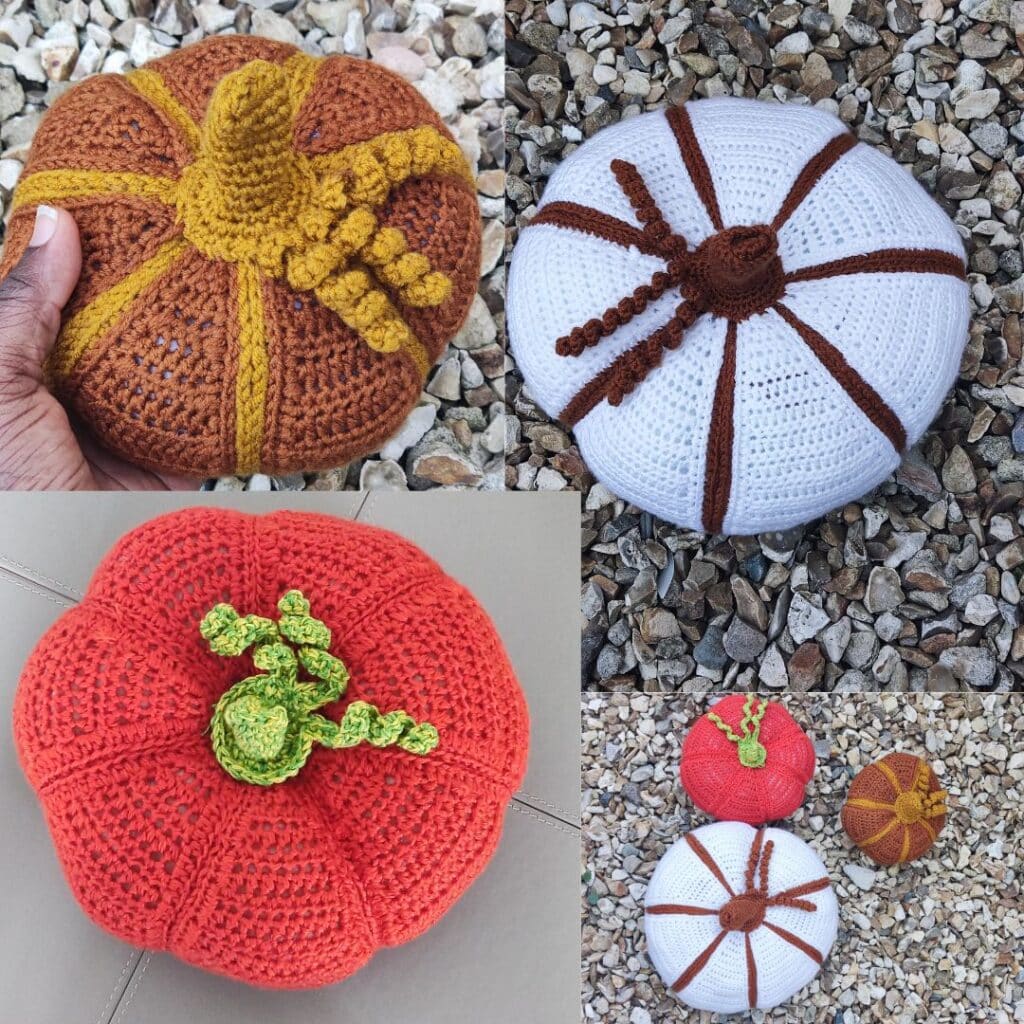
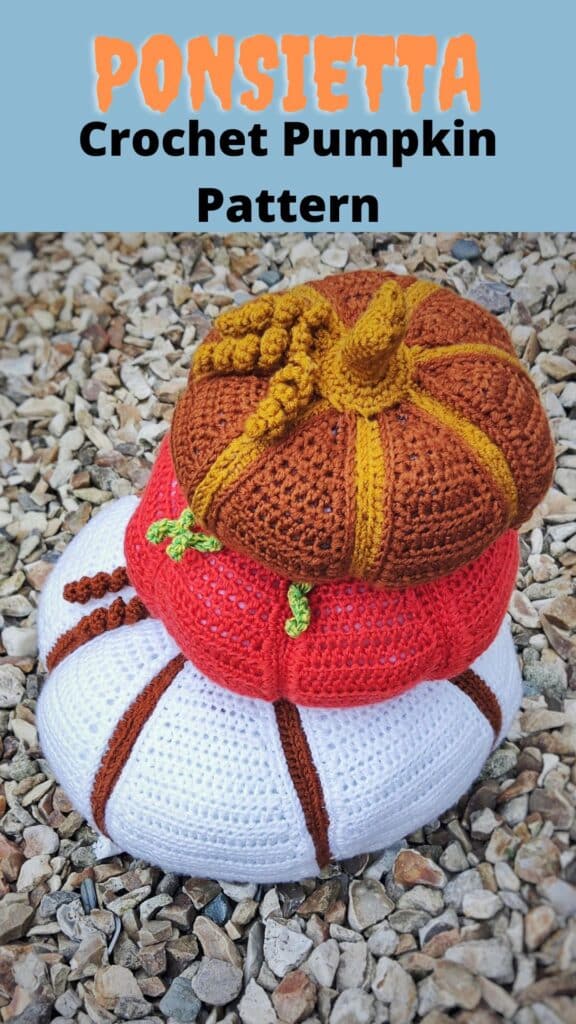
Crochet Pumpkin Free Pattern: 3 different sizes
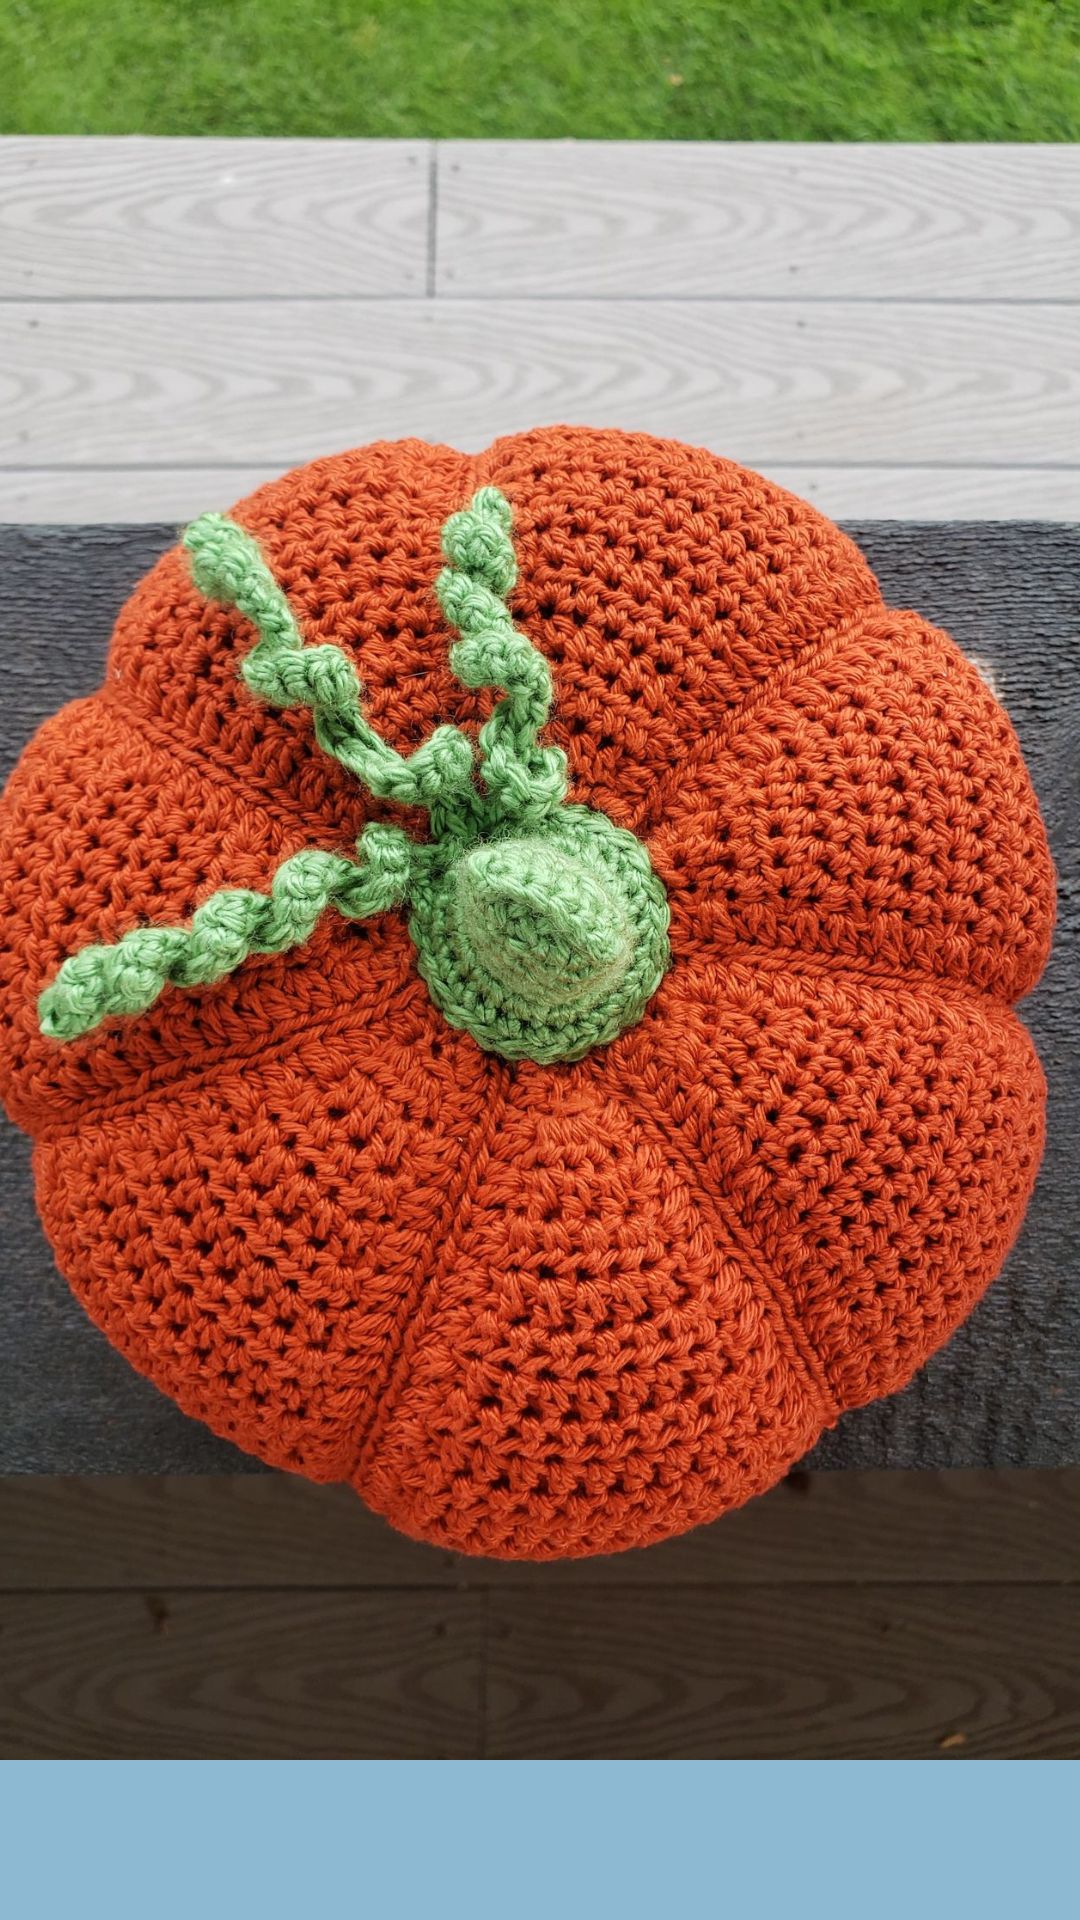
It’s time for an easy crochet pumpkin-free pattern! This is the perfect way to decorate your home this season. Crochet pumpkins are the perfect addition as you can customize them in colors, sizes, and in many more ways. I love how rich these prototypes look.
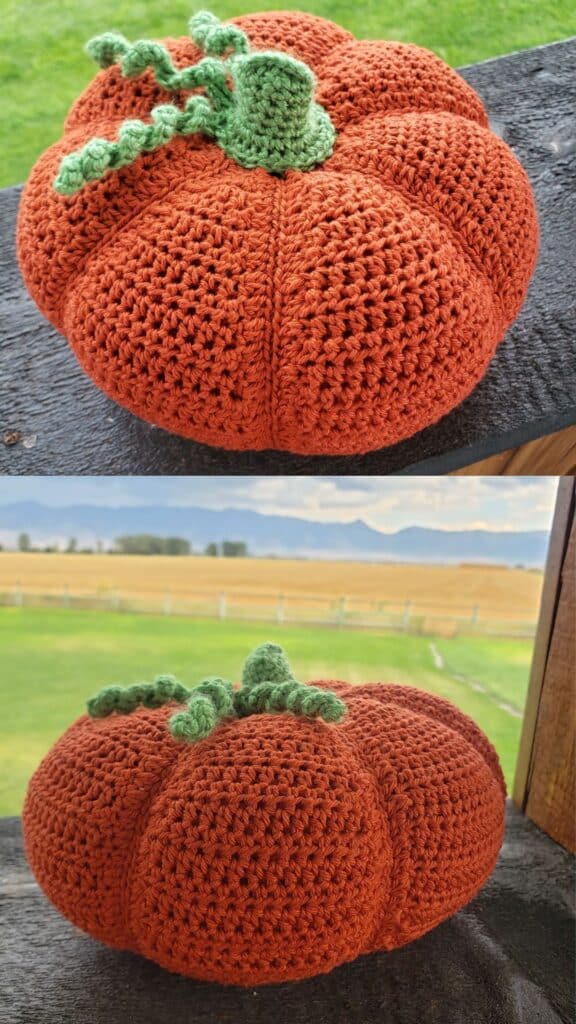
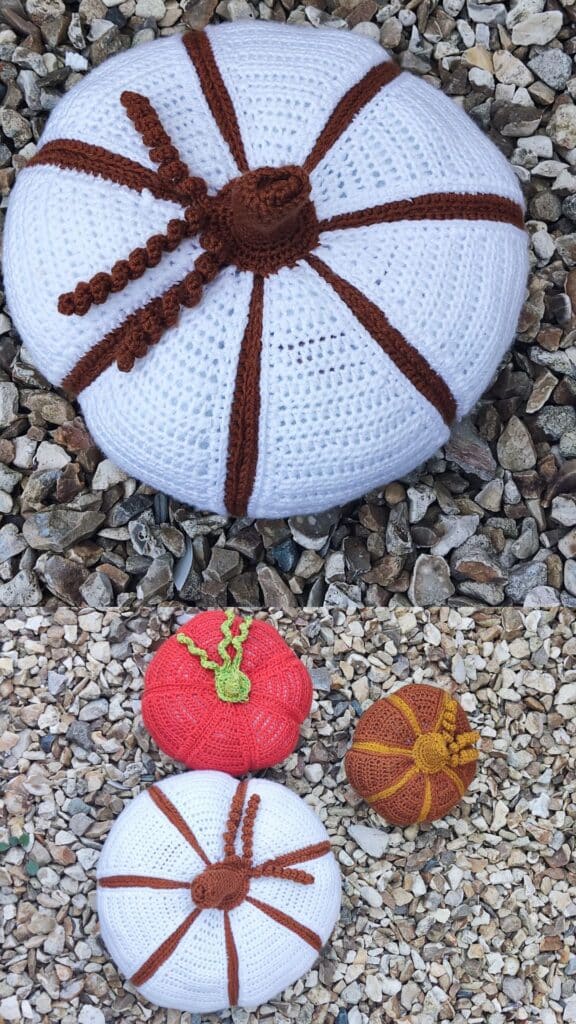
I must admit that making these beautiful crochet pumpkins seems to be addictive. The original plan was for a giant pumpkin, but I love it so much that I made 2 more. Now, you can decide to make one or two, or even ten crochet pumpkins. It is so easy to adjust the size using this free crochet pumpkin pattern.
Interested in making the three different sizes, get the ad-free pattern on Ravelry.
Since you love this crochet pumpkin-free pattern, you might also love the Wednesday inspired snood a perfect accessory for Halloween
Best yarn colors for your crochet pumpkins
Orange and its shades are the popular colors when making crochet pumpkins as these colors seem to be the closest to the actual pumpkins. This color gives a beautiful rustic farmhouse look making it perfect for home decor.
However, crochet pumpkins are not limited to orange and its shades alone, you can practically make yours in multiple colors. Apart from orange yarn, yellow, red, and natural colors are gaining popularity in the crochet community.
How to crochet a pumpkin
Crochet pumpkins are easy to make. I have provided a detailed tutorial below to help you make your own very first crochet pumpkin. With the tutorial below, you will be able to make a small, medium, and even a giant-sized crochet pumpkin!
Visit Underground Crafter for more fun Halloween crochet patterns included in this event.
Crochet pumpkin pattern – Materials needed
Lion brand Coboo – DK, #3 lightweight (51% Cotton, 49% Rayon from Bamboo, 232 yards/212m per 3.5 oz/100g skein)
Estimated Yardage
180 (240, 280) yards for the Main color
20 (30, 40) yards for Contrasting color
Hook and other Materials
US size G (4 mm) Crochet Hook
Poly fiber or scrap yarn
Darning needles
Gauge – 14 sts over 8 rows = 10 cm/4” square made in dc
Please note that gauge is not important for this project.
Pattern Notes
- Please kindly read through the pattern before starting.
- Any other #3 weight yarn can be substituted.
Difficulty Level – Intermediate
Terms – US Terminology
Stitches Abbreviations
Chain/chains – ch/chs
Single Crochet – sc
Half double crochet – hdc
MC = Main color
CC = Contrasting color
3rd loop
Finished Measurement
Small = 7’’ by 6’’ by 20’’
Medium = 9’’ by 7’’ by 22’’
Large = 11’’ by 8’’ by 24’’
Construction notes
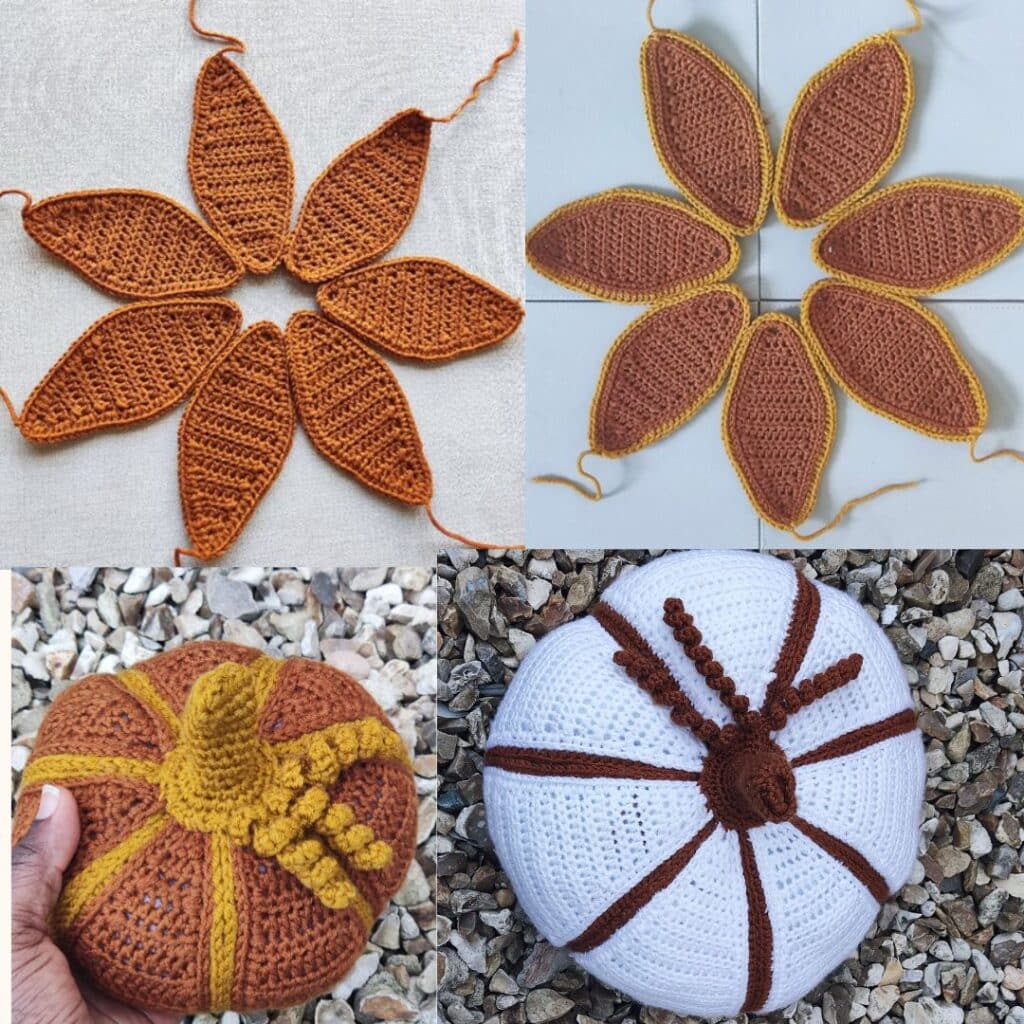
- This pumpkin is made in rows and joined together after completing the 7 pieces.
- The stalk is then made and sewn to the pumpkin.
If you love this crochet pumpkin pattern, you might also love my woven heart pillow
Pattern instructions for this crocheted pumpkin
Medium Sized crochet pumpkin
With MC
Row 1: Ch 4, hdc in 4th ch from hook, turn – 2 hdc
Row 2: Ch 1, 2 hdc in each st, turn – 4 hdc
Row 3: Ch 1, hdc in each st across, turn – 4 hdc
Row 4: Ch 1, 2 hdc in first st, hdc in each st until last st, 2 hdc in last st, turn – 6 hdc
Row 5: Rep Row 3
Row 6: Rep Row 4 – 8 hdc
Row 7: Rep Row 3
Row 8: Rep Row 4 – 10 hdc
Skip to the remaining increases if making the smaller size crochet pumpkin.
Row 9: Rep Row 3
Row 10: Rep Row 4 – 12 hdc
Row 11: Rep Row 3
Row 12: Rep Row 4 – 14 hdc
Rows 13 – 17: Ch 1, hdc in each st across, turn – 14 hdc
Add 6 more stitches (of increase) if making the giant version) The Ad-free version has more photos with the steps spelled out.
Row 18: Ch 1, hdc2tog, hdc in each st until last 2 sts, hdc2tog, turn – 12 hdc
Row 19: Ch 1, hdc in each st across, turn – 12 hdc
Row 20: Rep Row 18 – 10 hdc
Row 21: Rep 19
Row 22: Rep Row 18 – 8 hdc
Row 23: Rep Row 19
Row 24: Rep Row 18 – 6 hdc
Row 25: Rep Row 19
Row 26: Rep Row 18 – 4 hdc
Row 27: Rep Row 19
Row 28: Rep Row 18 – 2 hdc
Row 29: Ch 1, hdc in each st across.
Do not fasten off
Edging
Crocheting around the whole petal
Round 1: Ch 1, 2 hdc in each st/Ch SP around, join with a sl st to the beginning ch.
Optional – To create the beautiful contrast on the sides, continue to round 2
Fasten off MC, join CC
Round 2: Ch 1, in 3rd loop, hdc in each st around, aim for 2 hdc at the tip of the petal.
Fasten off.
Set aside and make 6 more.
Set aside and make 6 more.
To assemble your crochet pumpkin
Each petal is joined/sewn to the next.
With the ends of each over the others, join with a sl st across
To assemble
Each petal is joined/sewn to the next.
With the ends of each over the others, join with a sl st across
* Repeat the joining for all the sides of the 7 petals.
*Fill with poly fiber or scrap yarn
*With a stitch marker, pick up the tip of each ‘leaf’ and join together.
This would help with having a smooth joining.
Sew in the ends and fasten off.
How to Shape Your Crochet Pumpkin
- Create an indentation through the center of the pumpkin. Using a hook, insert your hook from the center of the pumpkin and aim to have it come out through the other side (center).
- Pass a double strand of yarn through the hook and secure it tightly.
- Pull the yarn as far as you are able to and make a few tight knots.
- These steps should create an indentation in the center of your pumpkin.
Crochet pumpkin pattern: Section 2
The stalk
There are two different sizes for the stalk.
Small size
With CC
Leave about 5 inches of yarn before starting your chains.
Chain 12, join to the 1st chain to form a circle.
Round 1: Ch 1, sc in each around, join. (12 sc)
Round 2: Ch 1, sc in each st around. (12 sc)
Rounds 3 – 5: Repeat Round 2
Do not fasten off. With the end left when starting the foundation ch, sew close both sides of the stalk together, sc over both layers to close it up.
Round 6: Ch 1, 2 sc in each st around, join. 24 sc
Round 7: Ch 1, sc in each st around, join. 24 sc
Round 8: *Ch 21, 2 sc in 2nd chain from hook and in each ch across, sl st to the stalk, sc in next st on the stalk, repeat from * two more times.
Leave a long tail of yarn for sewing, and fasten it off.
With a darning needle, sew to the pumpkin.
Large version of crochet pumpkin stalk
With CC
Leave about 5 inches of yarn before starting your chains.
Chain 20, join to the 1st chain to form a circle.
Round 1: Ch 1, sc in each around, join. (20 sc)
Round 2: Ch 1, sc in each st around. (20 sc)
Rounds 3 – 12: Repeat Round 2
Do not fasten off. With the end left when starting the foundation ch, sew close both sides of the stalk together, sc over
Round 13: Ch 1, 2 sc in each st around, join. 40 sc
Rounds 14 – 15: Ch 1, sc in each st around, join. 40 sc
Round 16: *Ch 31, 2 sc in 2nd chain from hook and in each ch across, sl st to the next st on the stalk, sc in next st on the stalk, repeat from * two more times.
Leave a long tail of yarn for sewing, and fasten off.
You can either sew the foundation stitches close as we did for the smaller stalk version or continue following the written instructions below.
Optional
Round 1: In a magic ring, ch 1, 12 dc into the magic ring, join – 12 dc
Round 2: Ch 1, 2 dc in each st around, join – 24 dc
Dew this base to the open part of the pumpkin.
With a darning need, sew to the pumpkin.
More crochet projects to check out on the blog.
Best yarn to crochet with and the ones to avoid
How to Crochet a Sweater for a Beginner
Real-time to crochet a sweater
Real-time it takes to crochet a hat
How to Crochet a Magic Ring
Crochet Teddy Bears You Can’t Resist
I hope you love your poinsettia crochet pumpkins. When you do make yours, come share it with me on Facebook