Crochet Santa Sack Pattern
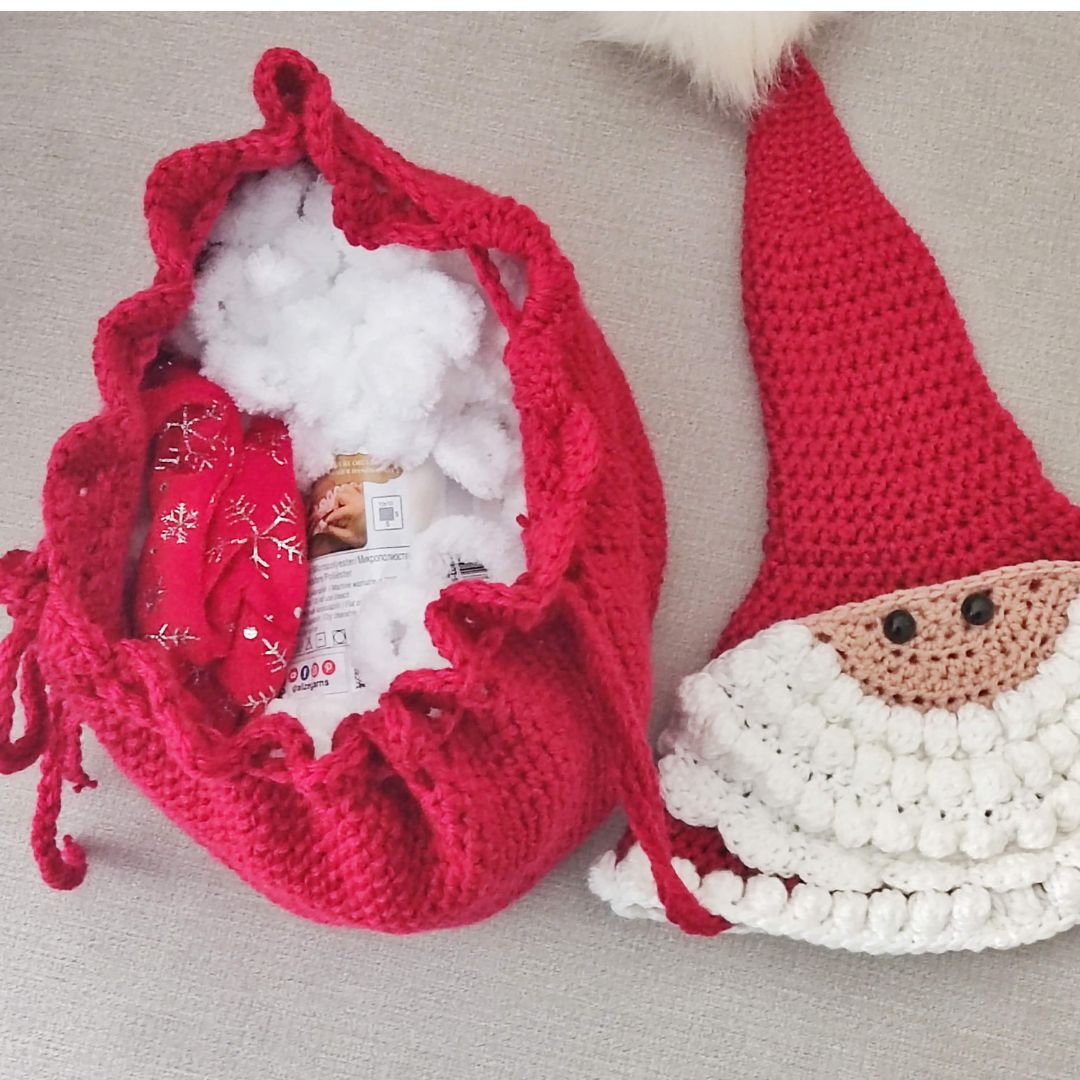
The Crochet Santa Sack Pattern is a fun project that can be used as a gift bag this season.
Santa Drawstring Bag was made after I designed the snowman sack because my boys each wanted a sack of their own. These bags will be stuffed with their Holiday goodies, and I am excited to see their faces when they open their sacks!
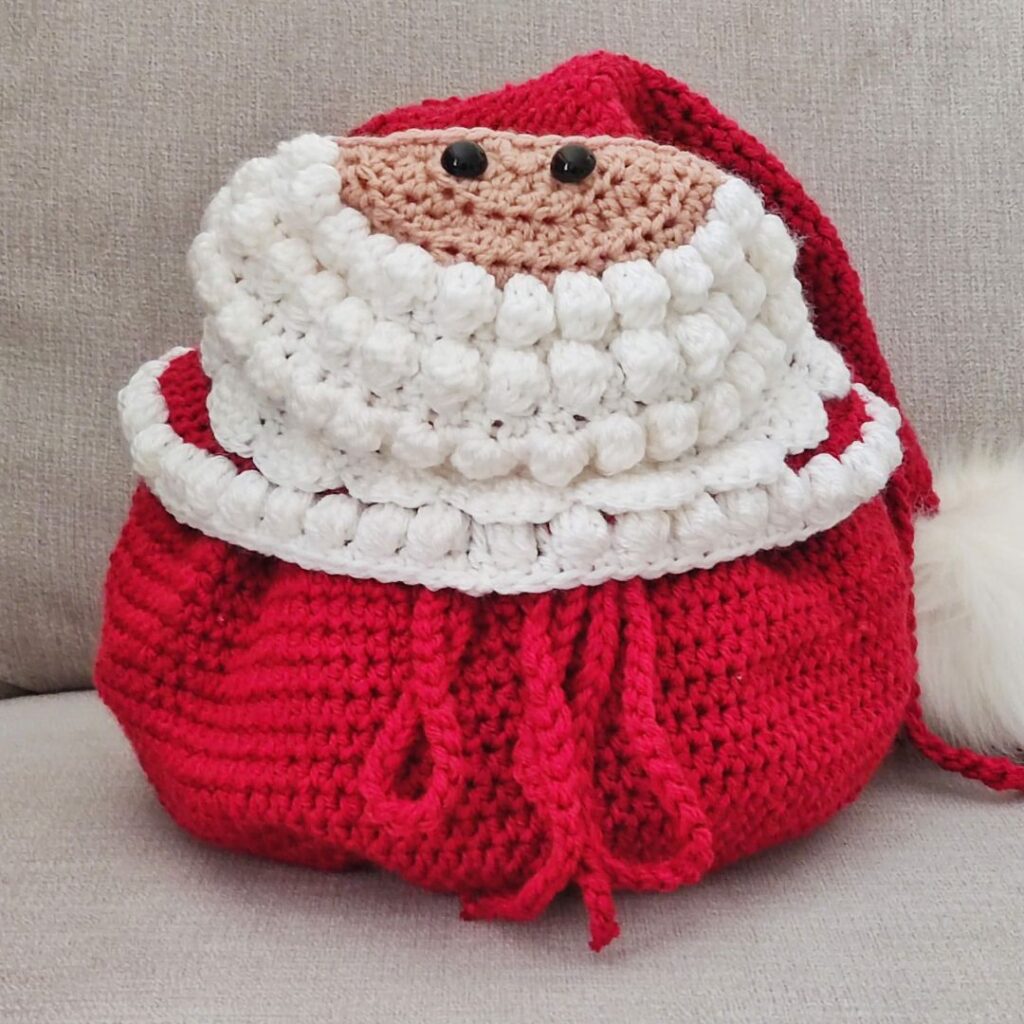
Materials needed to make a Crochet Santa Sack Pattern
Stylecraft Special Aran, (#4, 100% Acrylic, 196 m per 3.5 oz/100g Ball)
Estimated Yardage
Red = 300 yards
White = 50 yards

Scroll down for the free pattern
Get the Ad-free version on Ravelry
Hook and other materials
- 4.5 mm Crochet Hook
- Yarn needle
- 2 safety eyes – 8 mm
- Stitch marker
Gauge
14 sts over 10 rows = 4 x 4” made in hdc, before blocking.
Adjust hook size if necessary, to obtain gauge.
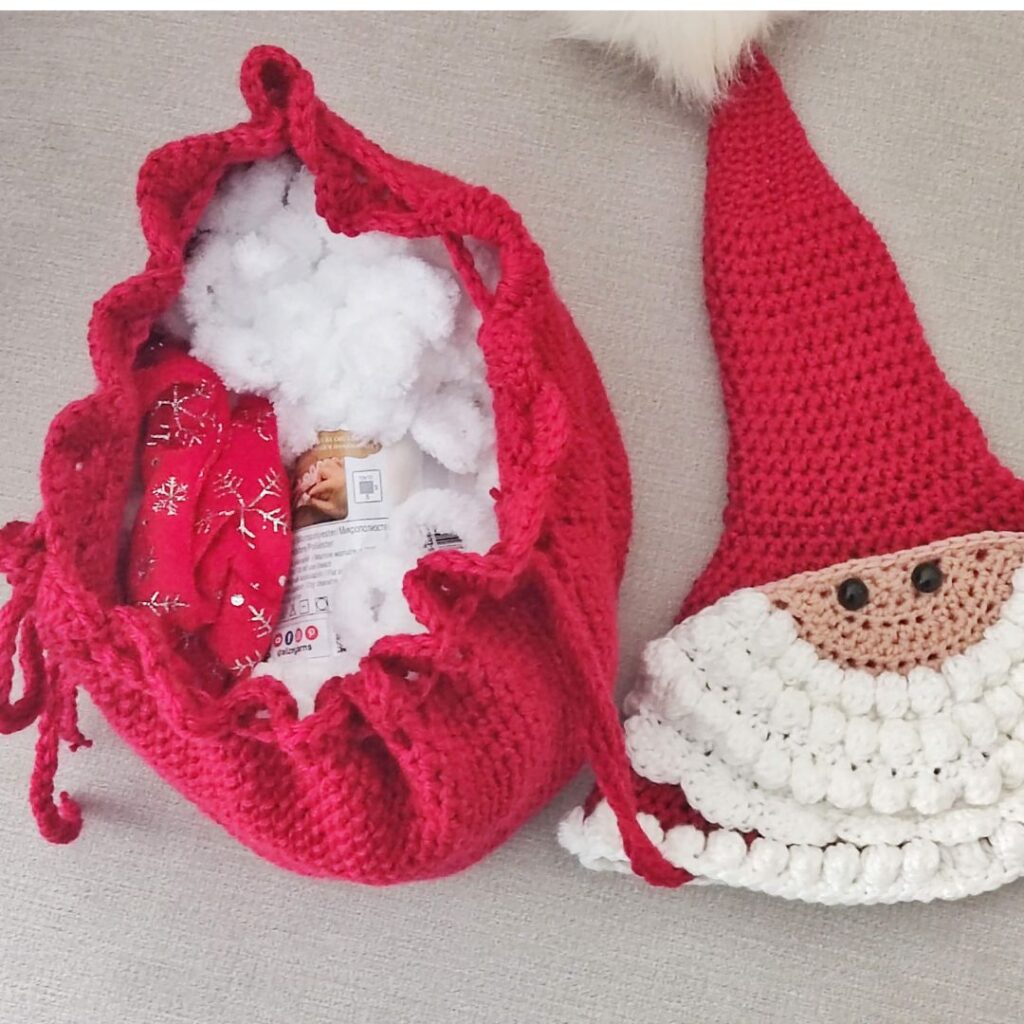
Crochet Santa Sack Pattern Notes
- Please kindly read through the pattern before starting.
- Any # 4 weight yarn can be substituted
Skill Level – Advanced Beginner
Terms – US Terminology
Stitch Abbreviations
Chain(s) – ch(s)
Stitch(es) – st(s)
Single Crochet – sc
Half Double Crochet – hdc
Double Crochet – dc
Repeat – Rep
Special stitches
Shell – 6 dc in indicated stitch
Bobble – 5 dc together
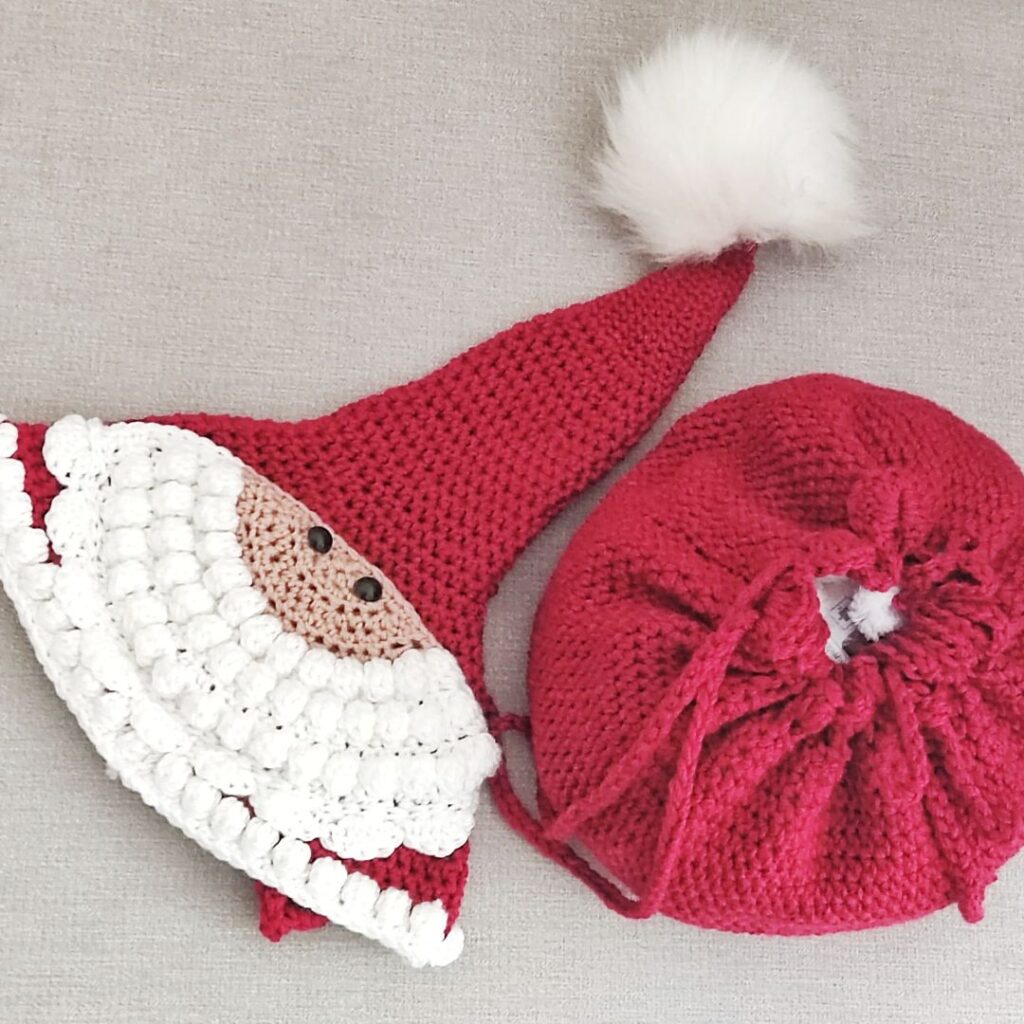
This project is made in 3 sections
- Section 1 – The bag is made in rounds.
- Section 2 – The hat is also made in rounds.
- Section 3 – Santa applique in rows.
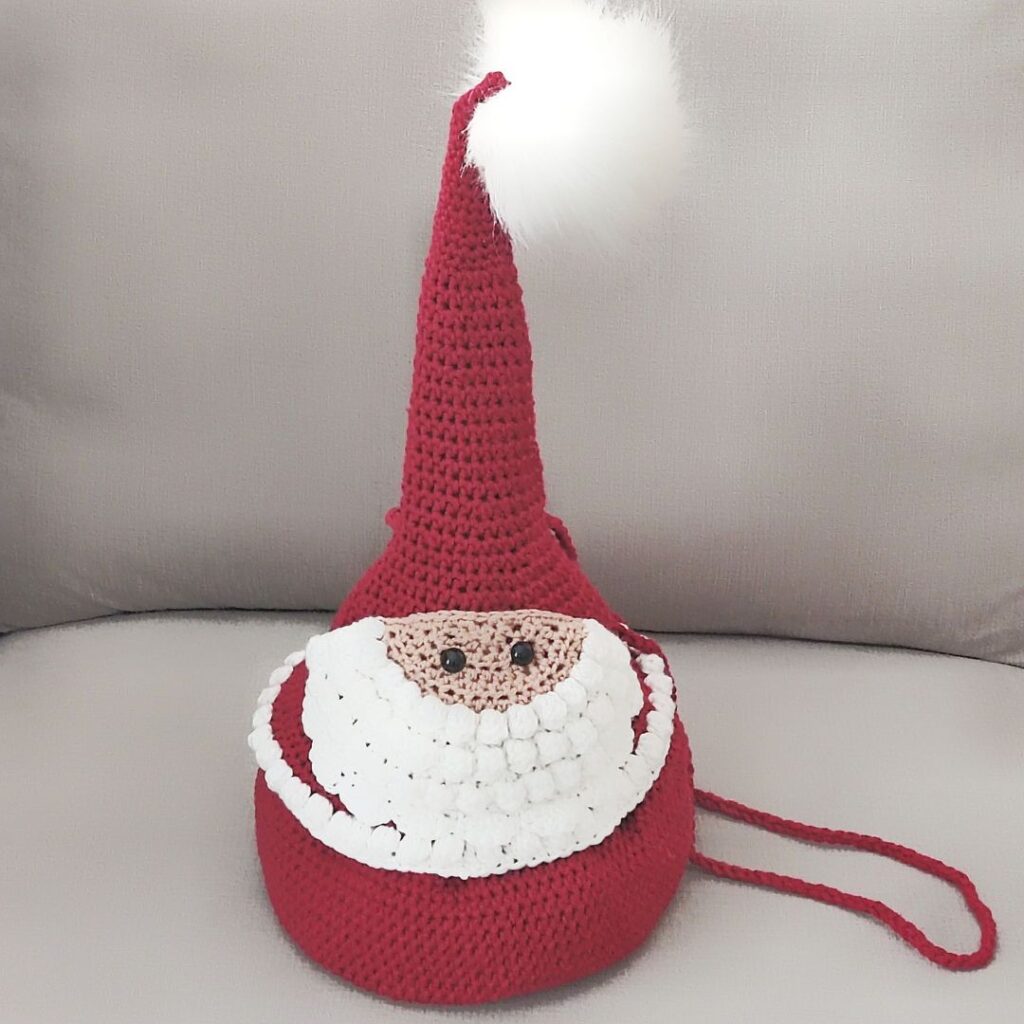
Finished measurement for the Crochet Santa Bag
Bag Base 8”
Height including the Santa Height 18”
How to Make a Crochet Santa Sack Pattern
Section 1 – Base
With Color A
Round 1: In a magic ring, ch 2 (does not count as a stitch), 12 hdc in magic ring, join with a slip stitch to the top of the first stitch of the round 12 hdc
Round 2: Ch 2, 2 hdc in each around, join. 24 hdc
Round 3: Ch 2, *hdc in next, 2 hdc in next, repeat from * around, join. 36 hdc
Round 4: Ch 2, *hdc in next 2 sts, 2 hdc in next, repeat from * around, join. 48 hdc
Round 5: Ch 2, *hdc in next 3 sts, 2 hdc in next, repeat from * around, join. 60 hdc
Round 6: Ch 2, *hdc in next 4 sts, 2 hdc in
next st, repeat from * around, join. 72 hdc
Round 7: Ch 2, *hdc in next 5 sts, 2 hdc in next, repeat from * around, join. 84 hdc
Round 8: Ch 2, *hdc in next 6 sts, 2 hdc in next, repeat from * around, join. 96 hdc
Round 9: Ch 2, *hdc in next 6 sts, 2 hdc in next, repeat from * around, join. 108 hdc
Body
Rounds 1 – 15: Ch 2, hdc around, join. 108 hdc
Edging
Round 16: Ch 4 (counts as the first dc and ch 1), skip next st, dc in next st, ch 1, rep from * around, join in top of ch 3. 54 dc/ch sp
Round 17: Ch 3 (counts as the first dc), 5 dc in first ch sp, *sc in next ch sp, 6 dc in next ch sp, rep from * around, , join. 27 shells/sc.
Fasten off.
Section 2 – Santa’s Hat
Round 1: With color A, in a magic ring, 6 sc into the magic ring. (6 sc) Place stitch marker.
[if you are not familiar with a magic ring, you can ch 2, 6 sc into 1st chain]
Round 2: sc in each st around, move stitch marker after every round. (6 sc)
Round 3:*2 sc in next st, sc in next 2 sts, repeat from * to end of the round. (8 sc)
Round 4: sc in each st. (8 sc)
Round 5: *2 sc in next st, sc in next 3 sts, repeat from * to end of the round. (10 sc)
Round 6: sc in each st. (10 sc)
Round 7: *2 sc in next st, sc in next 4 sts, repeat from * to end of the round. (12 sc)
Round 8: sc in each st. (12 sc)
Round 9: *2 sc in next st, sc in next 5 sts, repeat from * to end of the round. (14 sc)
Round 10: sc in each st. (14 sc)
Round 11: *2 sc in next st, sc in next 6 sts, repeat from * to end of the round. (16 sc)
Round 12: sc in each st. (16 sc)
Round 13: *2 sc in next st, sc in next 7 sts, repeat from * to end of the round. (18 sc)
Rounds 14: sc in each st. (18 sc)
Round 15: *2 sc in next st, sc in next 8 sts, repeat from * to end of the round (20 sc).
Round 16: sc in each st. (20 sc)
Round 17: *2 hdc in next st, hdc in next 9 sts, repeat from * to end of the round. (22 hdc)
Round 18: hdc in each st. (22 hdc)
Round 19: *2 hdc in next st, hdc in next 10 sts, repeat from * to end of the round. (24
hdc)
Round 20: hdc in each st. (24 hdc)
Round 21: *2 hdc in next st, hdc in next 11 sts, repeat from * to end of the round. (26
hdc)
Round 22: Hdc in each st. (26 hdc)
Round 23: *2 hdc in next st, hdc in next 12 sts, repeat from * to end of the round. (28
hdc)
Round 24: hdc in each st. (28 hdc)
Round 25: *2 hdc in next st, hdc in next 13 sts, repeat from * to end of the round. (30
hdc)
Rounds 26 – 28: Hdc in each st. (30 hdc)
Round 29: *2 hdc in next st, hdc in next 14 sts, repeat from * to end of the round. (32
hdc)
Round 30: Hdc in each st. (32 hdc)
Round 31: *2 hdc in next st, hdc in next 15 sts, repeat from * to end of the round. (34
hdc)
Round 32: Hdc in each st. (34 hdc)
Round 33: *2 hdc in next st, hdc in next 16 sts, repeat from * to end of the round. (36
hdc)
Round 34: *2 hdc in next st, hdc in next 17 sts, repeat from * to end of the round. (38
hdc)
Round 35: *2 hdc in next st, hdc in next 18 sts, repeat from * to end of the round. (40
hdc)
Round 36: *2 hdc in next st, hdc in next 19 sts, repeat from * to end of the round. (42
hdc)
Round 37: *2 hdc in next st, hdc in next 20 sts, repeat from * to end of the round. (44
hdc)
Round 38: *2 hdc in next st, hdc in next 3 sts, repeat from * to end of the round. (55 hdc)
Round 39: Hdc in each st. (55 hdc)
Round 40: *2 hdc in next st, hdc in next 4 sts, repeat from * to end of the round. (66 hdc)
Round 41: Hdc in each st. (66 hdc)
Round 42: *2 hdc in next st, hdc in next 5 sts, repeat from * to end of the round. (77 hdc)
Rounds 43 – 48: Hdc in each st. (77hdc)
Edging
Fasten off the Red yarn and join the White
Round 1: Ch 1, hdc in the first st, *bobble in next st, hdc in next st, rep from * until the last st, bobble in the last st, turn. 38 Bobble St, 39 hdc
Round 2: Ch 1, sc in each st around, join with a sl st to the beginning chain. 76 sc
Fasten off.
Section 3 – Applique
Face
Row 1: With C, ch 2, work 4 hdc in the 1st chain, turn. 4 hdc
Row 2: Ch 1, 2 hdc in each st across, turn. 8 hdc
Row 3: Ch 1, 2 hdc in the first st, hdc in the next st, * 2 hdc in the next st, hdc in the next st, rep from * across, turn. 12 hdc
Row 4: Ch 1, 2 hdc in the first st, hdc in each of the next 2 sts, * 2 hdc in the next st, hdc in each of the next 2 sts, rep from * across, turn. 16 hdc
Row 5: Ch 1, 2 hdc in the first st, hdc in each of the next 3 sts, * 2 hdc in the next st, hdc in each of the next 3 sts, rep from * across, turn. 20 hdc
Row 6: Ch 1, 2 hdc in the first st, hdc in each of the next 4 sts, * 2 hdc in the next st, hdc in each of the next 4 sts, rep from * across, turn. 24 hdc
Fasten off, join A
Beard
Row 7: Ch 1, dc in the first st, *bobble in next st, dc in next st, rep from * until the last st, bobble in the last st, turn. 12 dc/bobble
Row 8: Ch 1, hdc in each of the first 5 sts, *2 hdc in the next st, hdc in each of the next 5 sts, rep from * until the last st, 2 hdc in last st, turn. 28 hdc
Row 9: Ch 1, dc in the first st, *bobble in next st, dc in next st, rep from * until the end, turn. 14 dc/bobble
Row 10: Ch 1, 2 hdc in the first st, hdc in each of the next 6 sts, * 2 hdc in the next st, hdc in each of the next 6 sts, rep from * across, turn. 32 hdc
Row 11: Ch 1, dc in the first st, *bobble in next st, dc in next st, rep from * until the last st, bobble in the last st, turn. 16 dc/bobble
Row 12: Ch 1, 2 hdc in the first st, hdc in each of the next 7 sts, * 2 hdc in the next st, hdc in each of the next 7 sts, rep from * across, turn. 36 hdc
Row 13: Ch 3, 5 dc in first st, skip next st, *sc in the next st, skip next st, shell in next st, rep from * to end. 9 shells
Edging
Use similar Colors at each point.
Row 1: Crocheting across the edges (leaving out the beard), hdc in each st/edge evenly.
Fasten off.
Drawstring
With A, chain 310.
Adjust the number for a perfect fit.
To Assemble your Crochet Santa Sack
- Hat
Sew the face to the lower part of the hat
- Position the applique’s face on the hat panel and sew it onto it. You can decide to leave the upper part as a pocket!
Assemble the Drawstring
- Pick up the hat
- Pass the rope close to the top of the facial details but on the main hat, aim for an equal distance on the other side, and pass the other end through the hat’s brim.
- Thread the drawstring through the eyelets on the bag at an equal distance on the other side of the face details made, and pass the other end of the drawstring through the hat’s brim.
- Pick up the bag, pass the drawstring through the ch 1 spaces, and have both ends pass through the ch spaces equally.
- Secure the drawstring to prevent it from pulling out.
How to use
The drawstring can be used in closing or opening the bag
The remaining length [assed through the hat can be used as the handle.
The Crochet Santa Sack pattern is featured as part of the quick crochet Christmas Projects event. Have a look at the other patterns included here.


There you have your Crochet Santa Sack!

