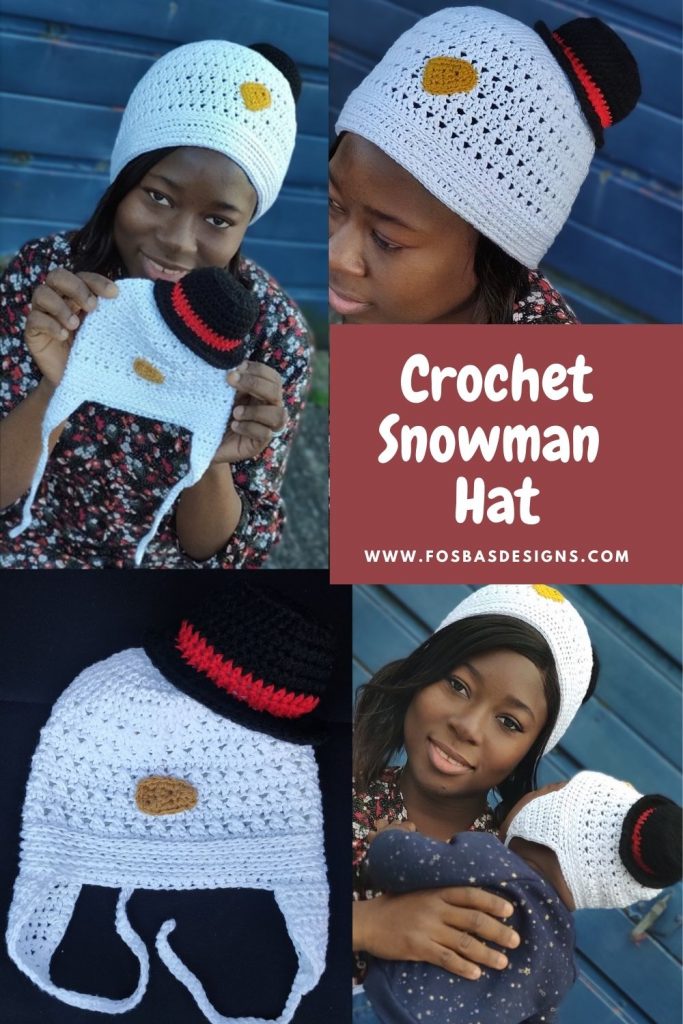
Easy Crochet Snowman Hat Pattern
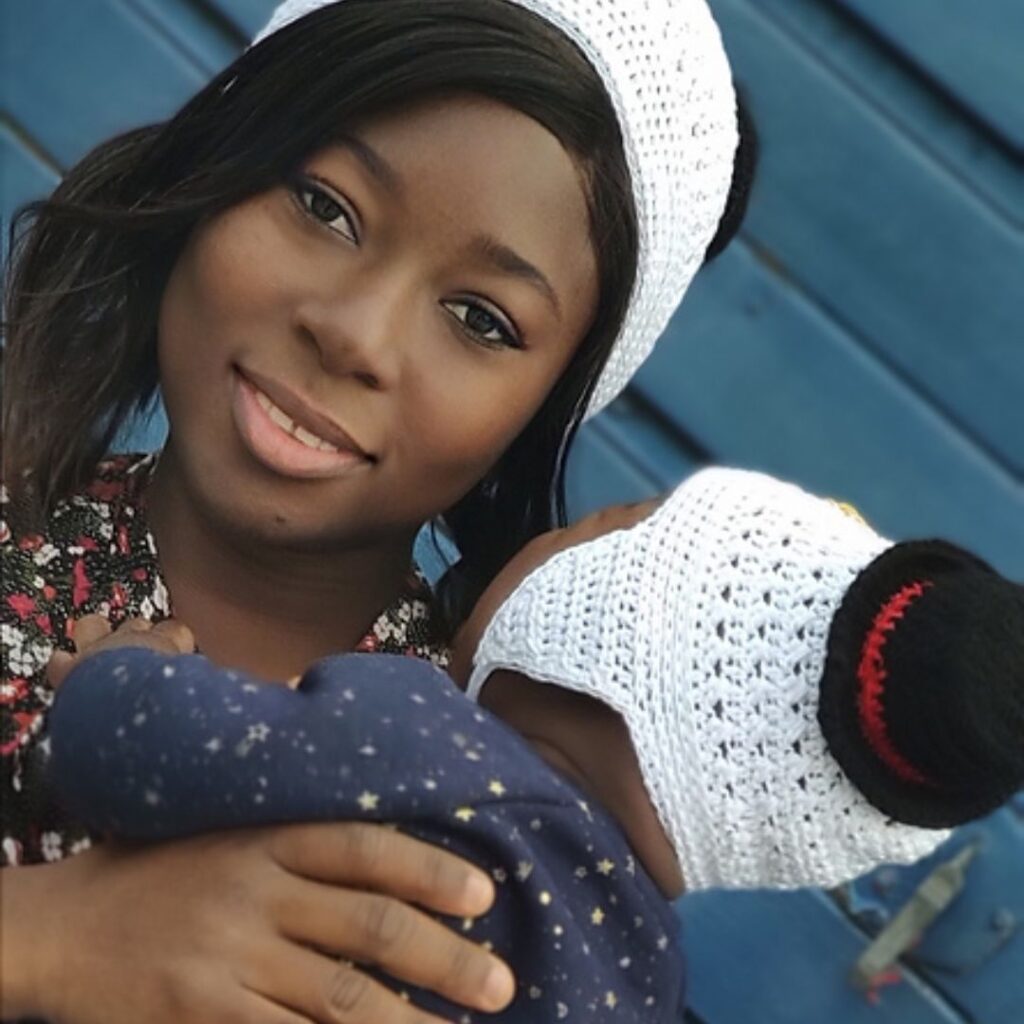
Let’s make our snowman! But this time, how about we make a crochet snowman crochet hat? I have always loved making beautiful dolls and animal characters, but I’m sure you all know I am not an Amigurumi expert.
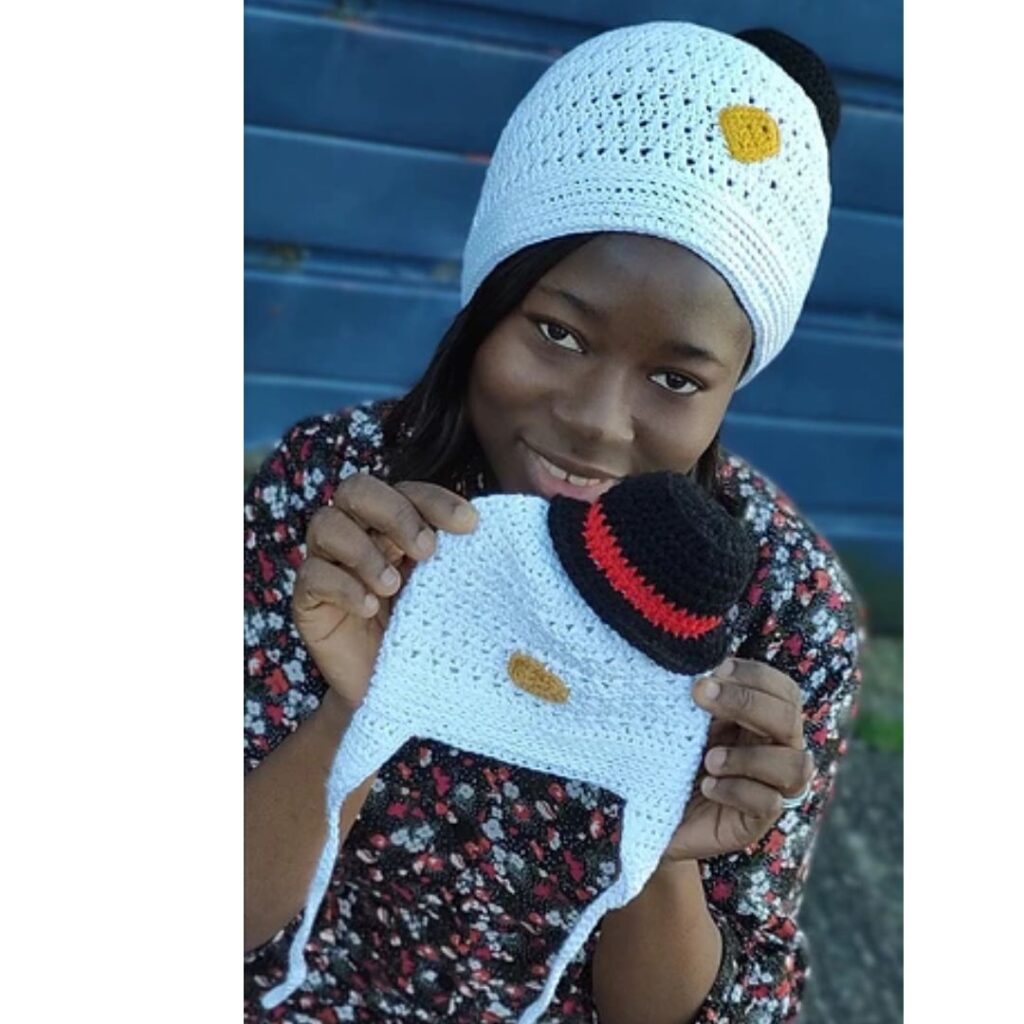
So, I went with the closest I could get – A snowman hat. With this, I am so happy with the outcome. It looks so beautiful, and twining with my baby makes this fun!
Don’t you love that the small hat on top looks cute, like a pom? I bet I prefer this to a pom. I love that you do not need a Pom for this cute hat, and my son loves it.
There are two options for the beautiful Snowman beanie pattern. You can make yours with the earflaps or omit it.
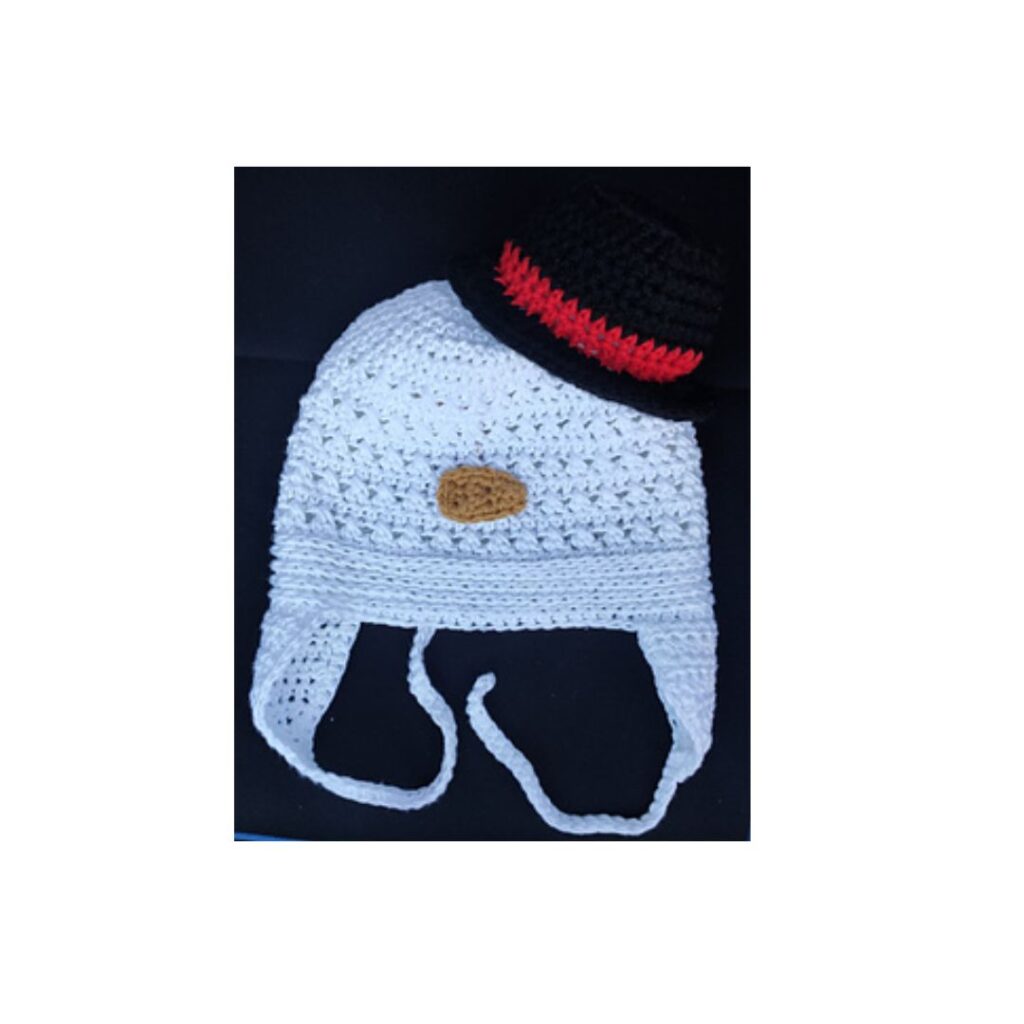
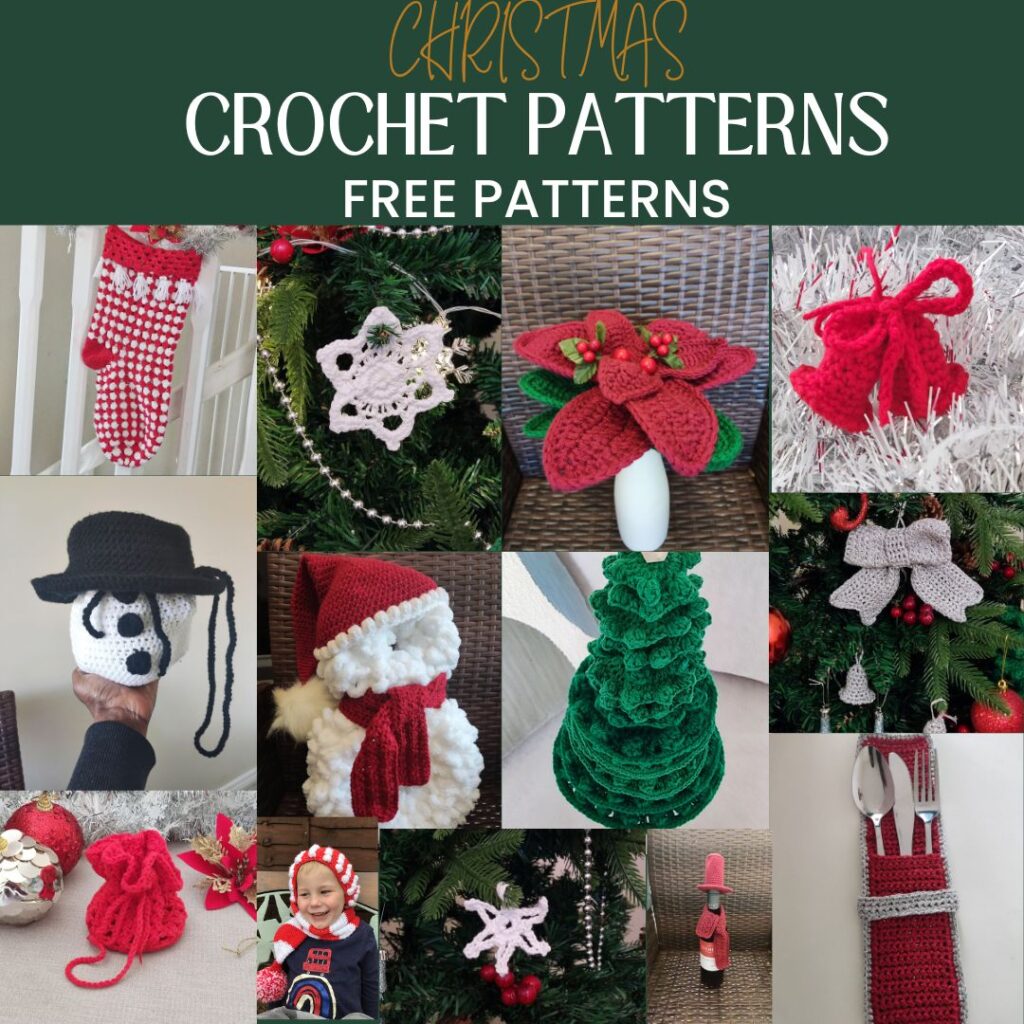
Below is a picture from one of my testers.
I love the added buttons as eyes. I told you I suck at making dolls out of yarn. That’s why I skipped adding eyes to mine. However, I have included instructions on how to do that in the pattern. All of my testers added eyes, either with buttons or yarn. I would add buttons once I get a wide black button.

Color Choice – you can make yours in colors of your choice. I’ve used 3 different colors! But that should not stop you from going the extra length with Colors.
Easy Crochet Snowman Beanie on Etsy
Snowman hat pattern on Ravelry
Since you love this cute snowman beanie, you might also love the following patterns here on my blog
One skein beanie – free on the blog
Easy Breezy beanie and cowl pattern – also free here on the blog.
Material for this cute Snowman hat pattern
Yarn – This prototype was made and tested using DK (#3) yarn.
Stylecraft Special DK, #3 lightweight (100% Acrylic, 322 yards/295m per 3.5 oz/100g skein)
ESTIMATED YARDAGE
C – White – 100 (120, 140, 160, 180, 200) yards
A – Black = 50 yards
B – Red = 30 yards
C – Mustard = 20 yards
Hook and other Materials
4 mm Crochet Hook.
Polyfiber
Buttons for eyes (optional)
Gauge
18 sts over 14 rows = 4”/10 cm Square made in hdc, before blocking.
Adjust hook size if necessary, to obtain gauge.
FINISHED MEASUREMENT
| Size | Head Circumference |
| 0 – 6mths | 15” |
| 6 – 12mths | 16” |
| Toddler | 17” |
| Child | 19” |
| Teens/Adult Small | 21” |
| Adult Large | 22” |
Hat
Small = base – 2.5”
Large = base -3”
I can’t wait to see your beautiful makes from this pattern! When you make your snowman beanie, do tag me with your photos.
The snowman hat is part of the quick Christmas crochet projects. Have a look at the other patterns included in this event.

Crochet snowman hat pattern
Section 1: Snowman hat
With Black yarn
Round 1: In a magic Ring, ch 2 (does not count as a stitch), 12 hdc in magic ring, join. 12 hdc.
Round 2: Ch 2, 2 hdc in each around, Join. 24 hdc.
Round 3: Ch 2, *hdc in next, 2 hdc in next, repeat from * around, join. 36 hdc.
Skip to the body for kids’ sizes.
Round 4: Ch 2, *hdc in next 2 sts, 2 hdc in next, repeat from * around, join. 48 hdc.
Body
Round 1: Ch 2, in BLO, hdc in each st around, join. 36 (48) hdc
Rounds 2 – 4: Ch 2,hdc in each st around, join. 36 (48) hdc
Rounds 5 – 6: With B, ch 2,hdc in each st around, join. 36 (48) hdc
Brim
Round 7: With A, in FLO, Ch 2, *2 hdc in next st, hdc in next st, rep from * to end, join. 54 (72) hdc
Round 8: Ch 2,hdc in each st around, join. 54 (72) hdc
Fasten off and weave in ends.
Section 2: Snowman Beanie
Crown
Round 1: In a magic Ring, ch 2 (does not count as a stitch), 12 hdc in magic ring, join. 12 hdc.
Round 2: Ch 2, 2 hdc in each around, join. 24 hdc.
Round 3: Ch 2,*hdc in next, 2 hdc in next, repeat from * around, join. 36 hdc.
Round 4: Ch 2, hdc in each st around, join. 36 hdc
Round 5: Ch 2, *hdc in next 2 sts, 2 hdc in next, repeat from * around, join. 48 hdc.
The diameter should be about 3. 75”
Skip to the body for 0-6mths size
Round 6: Ch 2, *hdc in next 3 sts, 2 hdc in next, repeat from * around, join. 60 hdc
Skip to the body for 6 – 12 mths size
The diameter should be about 4”
Round 7: Ch 2, *hdc in next 4 sts, 2 hdc in next, repeat from * around, join. 72 hdc
The diameter should be about 4. 25”
For Toddler size, skip to the body
Round 8: Ch 2, *hdc in next 5 sts, 2 hdc in next, repeat from * around, join. 84 hdc
The diameter should be about 4.5”
For child size, skip to the body
Round 9: Ch 2, *hdc in next 6 sts, 2 hdc in next, repeat from * around, join. 96 hdc
The diameter should be about 5”
For Teen/Adult small size, skip to the body
Round 10: Ch 2, *hdc in next 7 sts, 2 hdc in next, repeat from * around, join. 108 hdc
The diameter should be about 6”
For all the sizes –
Body
Round 1: Ch 2, hdc in each st around, join. 48 (60, 72, 84, 96, 108) hdc
Round 2: Ch 2, *skip next st, dc in next st, working around the post of the previous stitch, dc in skipped st, rep from * to end, join. 48 (60, 72, 84, 96, 108) dc
Rounds 3 – 8 (10, 10, 12, 12, 12): Rep Round 1 and 2
Round 9 (11, 11, 13, 13, 13): Rep Round 1
Brim
Round 1: Ch 2, camel st in each st around, join. 48 (60, 72, 84, 96, 108) sts
Rounds 2 – 3 (4, 6, 6, 6, 6, 6): Rep round 1
If omitting the ear flaps, fasten off here.
Do not fasten off if adding the earflaps; continue below.
Ear flaps
First flap
Row 1: Ch 2, Camel stitch in next 10 (10, 12, 14, 16, 18) sts, turn. 10 (10, 12, 14, 16, 18) hdc
Row 2: Ch 2, in both loops, hdc in each st across, turn. 10 (10, 12, 14, 16, 18) hdc
Rows 3 – 4: Rep round 2
Row 5: Ch 2, hdc2tog, hdc in each st across until the last 2 sts, hdc2tog, turn. 8 (8, 10, 12, 14, 16) hdc
Rows 6 – 7 (7, 8, 9, 10, 11): Rep round 5
Row 8 (8, 9, 10, 11, 12): Ch 2, hdc2tog twice, turn. 2 hdc
Row 9 (9, 10, 11, 12, 13): Ch 2, hdc2tog.
Do not fasten off.
Rope – Chain 27 (29, 31, 35, 37, 39), sc in 2nd ch from hook and the remaining chains.
Continue to the edge of the flap.
Make sure to have the right side facing you. Sc in each flap edge, and continue to the remaining sts on the brim.
Camel stitch in next 14 (20, 24, 28, 32, 36) sts.
Second flap – repeat as with the first flap.
Eyes
- Make 2 With Black yarn –
Round 1: In a magic Ring, ch 2, 6 hdc in magic ring, join. 6 hdc.
Fasten off.
Nose – With Mustard yarn
Row 1: Ch 4, sc in 2nd ch from hook and in each ch across, turn. 3 sc
Rows 2 – 3: Ch 1, sc in each st across, turn. 3 sc
Row 4: Ch 1, sc2tog, sc, turn. 2 sc
Row 5: Ch 1, sc in each st across, turn. 2 sc
Row 6: Ch 1, sc2tog
Edging – Ch 1, sc in each st around, with ch 1 at each corner, join with a sl st to the beginning ch.
Fasten off
Assembling
Hat on the beanie –
- Fil the hat with fiber or scrap yarn.
- Position the hat on the beanie, with the hat slanting down from the magic circle on the beanie.
- Secure with stitch markers.
- Check to make sure you are happy with the positioning.
- With mattress st or sl st, sew the hat from the loop left at the end of the hat body (second round made in red) to the beanie.
Eyes
- Locate Row 3 on the body of the beanie.
- Secure with stitch markers.
- Check to make sure you are happy with the positioning.
- Sew the eyes onto the beanie, with 4 – 8 sts between them.
Nose
- Locate row 7 on the body. Position the nose with the tip pointing towards the eye.
- Position the base of the nose just between the eyes.
- Secure with stitch markers.
- Check to make sure you are happy with the positioning.
- Sew the nose to the body of the beanie.
Fasten off
Sew in ends.


Other free chunky projects on the blog
Crochet hanging basket pattern
Crochet cowl scarf free pattern
Crochet chunky sweater pattern
Chunky Crochet Blanket Free Pattern
I would love to see your beautiful crochet snowman hat from this pattern. When you do make yours, kindly share it with me on Instagram – @crochet_fosbas