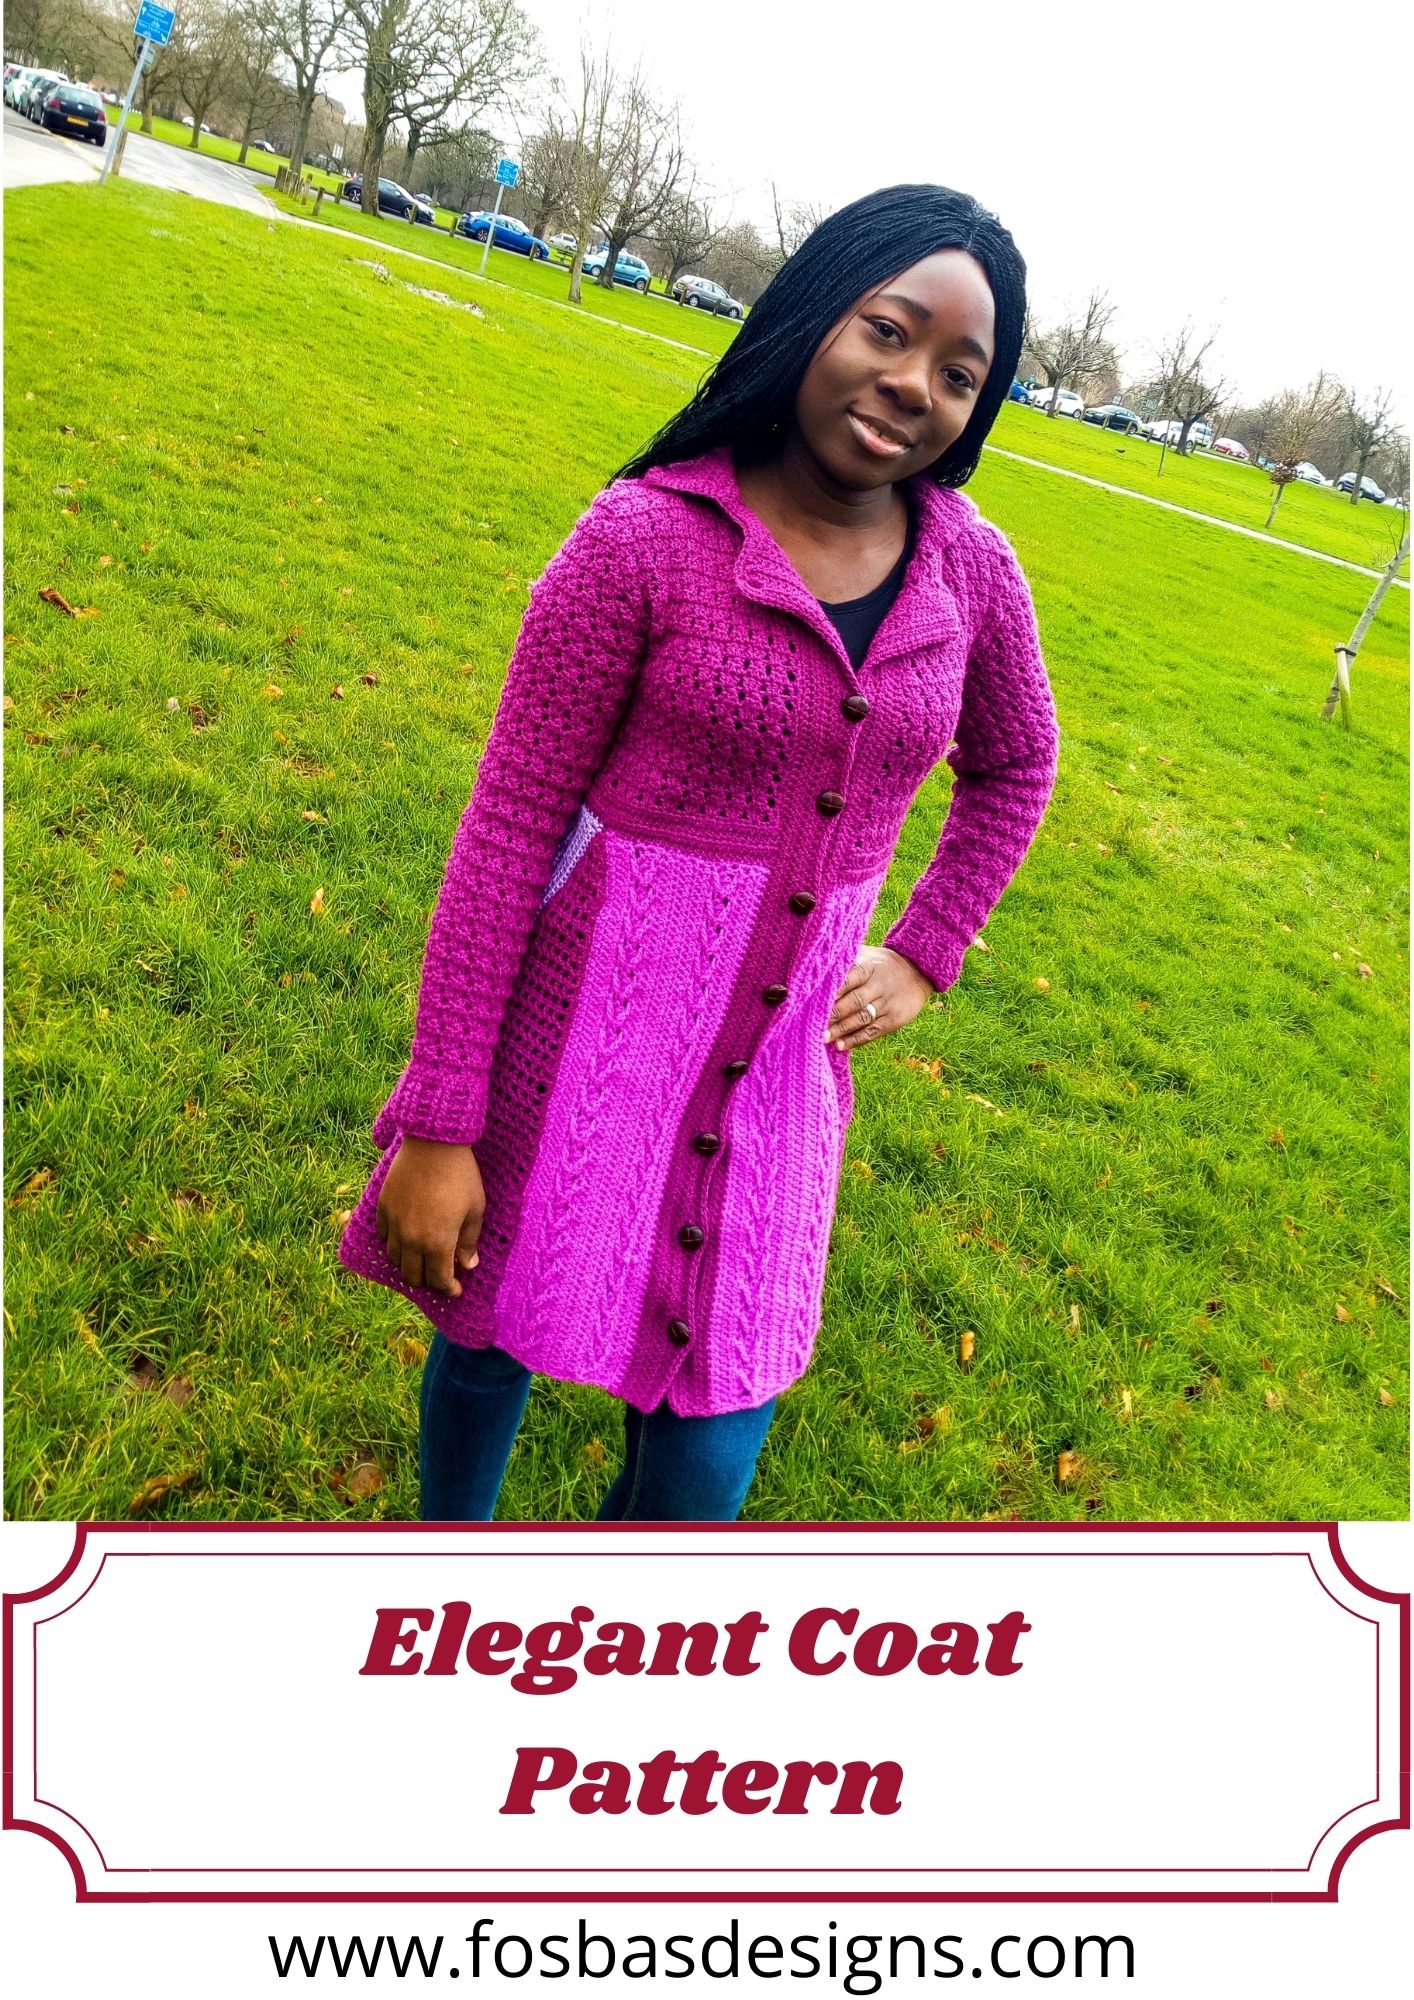
Crochet Coat Pattern
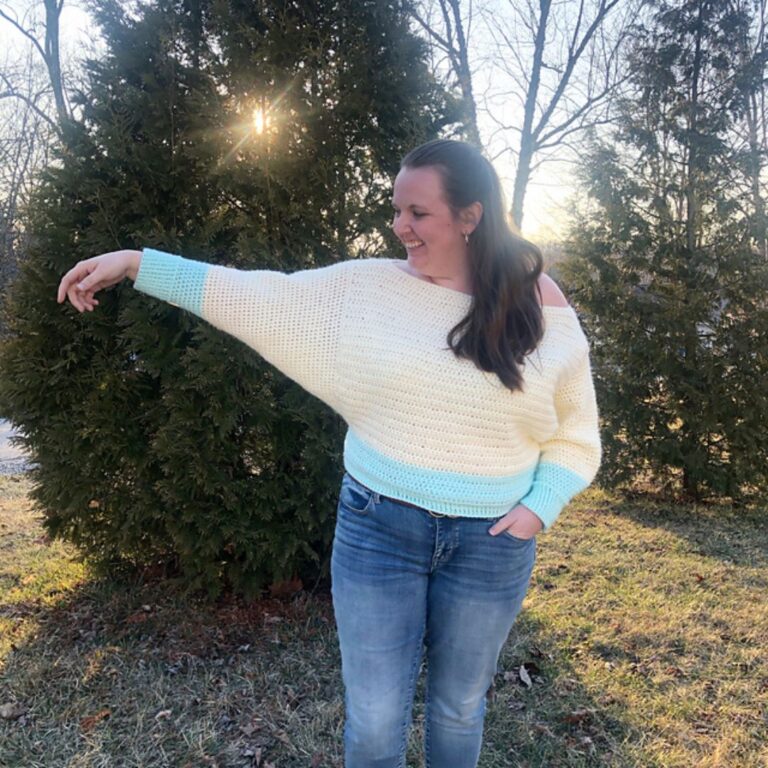
The Elegant coat is one of my favorite crochet patterns as it combines class and style. The aim behind the design was creating a crochet coat that even a beginner can make.
This crochet coat is size inclusive, graded and tested in 9 different sizes – XS through 5 XL.
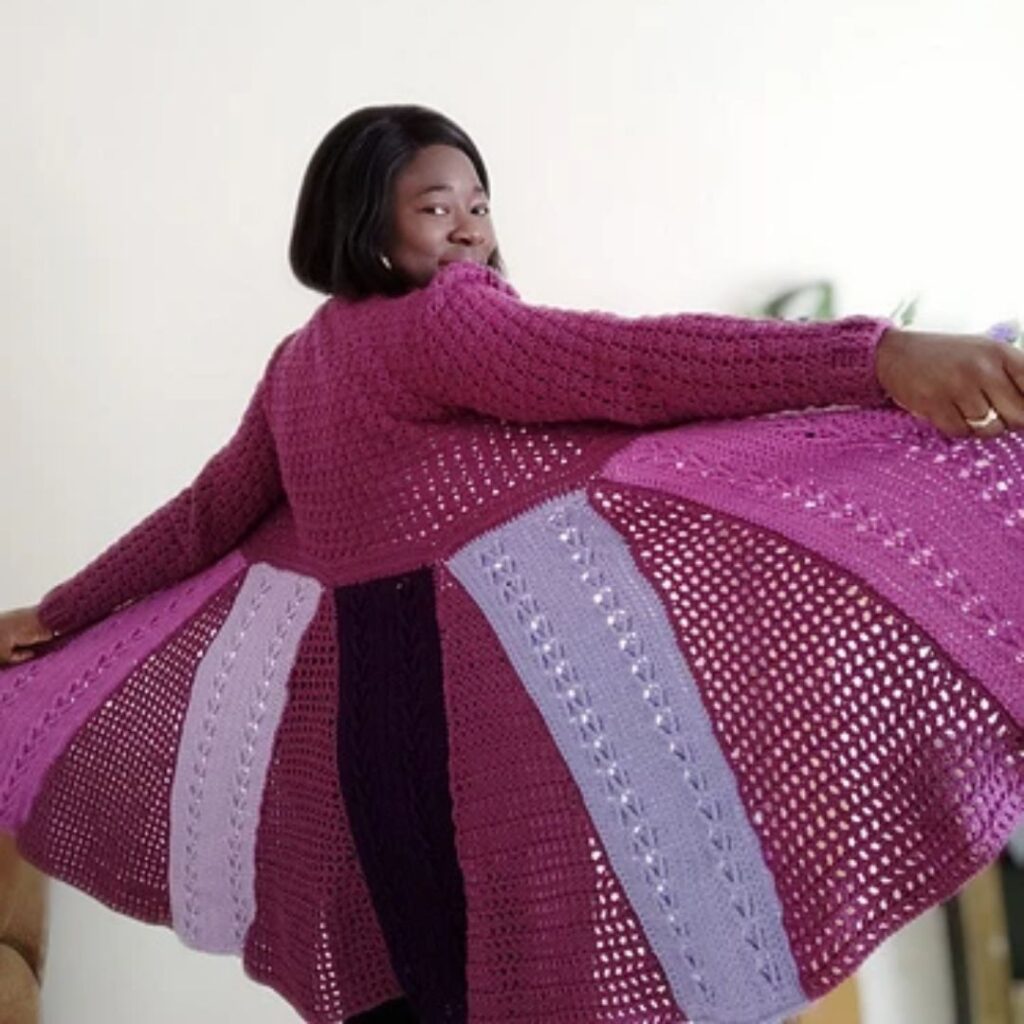
Are you ready for some cuteness? You can make this in any colors of your choice and even go color-blocking. I would love to see the colors you all come up with, kindly tag me with photos of your crochet jackets when you make a start..

Name inspiration for this crochet jacket pattern
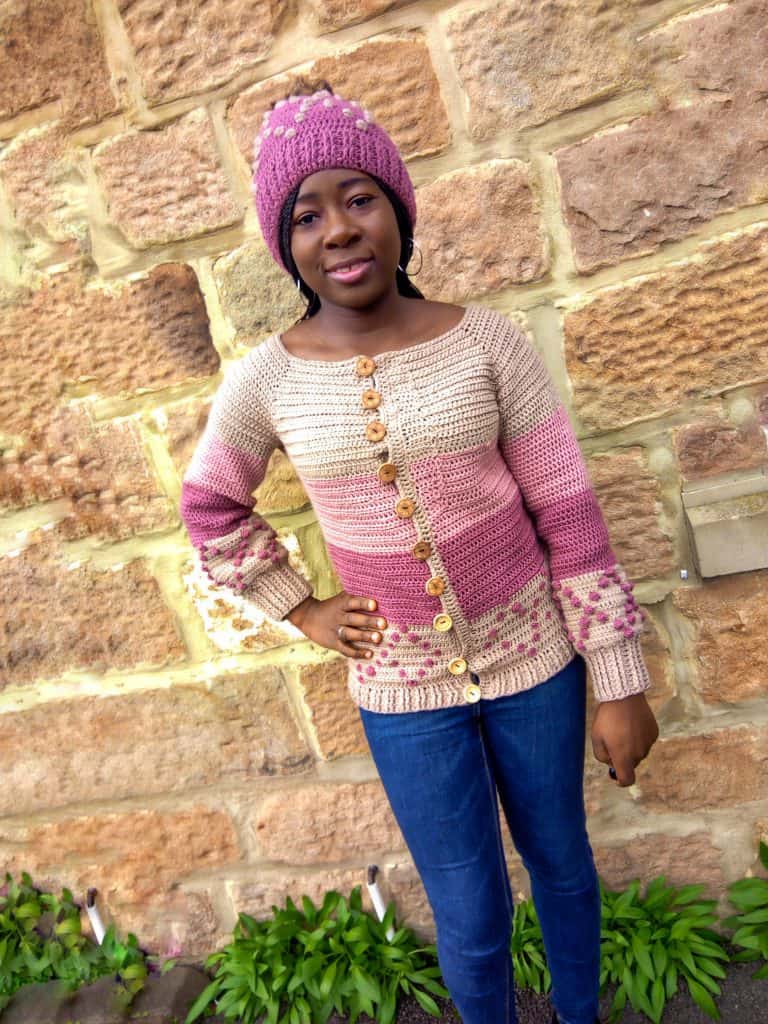
I have named this crochet jacket the “Elegant coat pattern” because it appears elegant and worthy of a gracious appearance. I hope you would wear this coat with pride and do so elegantly.
More crochet jackets designs on my blog-
Seun knee length crochet coat – free pattern
Summer crochet lightweight jacket pattern
Yarn choice for this crochet coat pattern
This pattern is written and tested using worsted-weight yarn (#4). You can make yours in any worsted worsted
The prototype used Stylecraft Special Aran; 196 m/214 yards, 100% Acrylic per 3.5 oz/100g ball.
Suggested yarn alternatives
- Chroma Worsted” target=”_blank” rel=”noreferrer noopener”>Chroma Worsted
- Brava Worsted” target=”_blank” rel=”noreferrer noopener”>Brave Worsted
Yarn Notes:
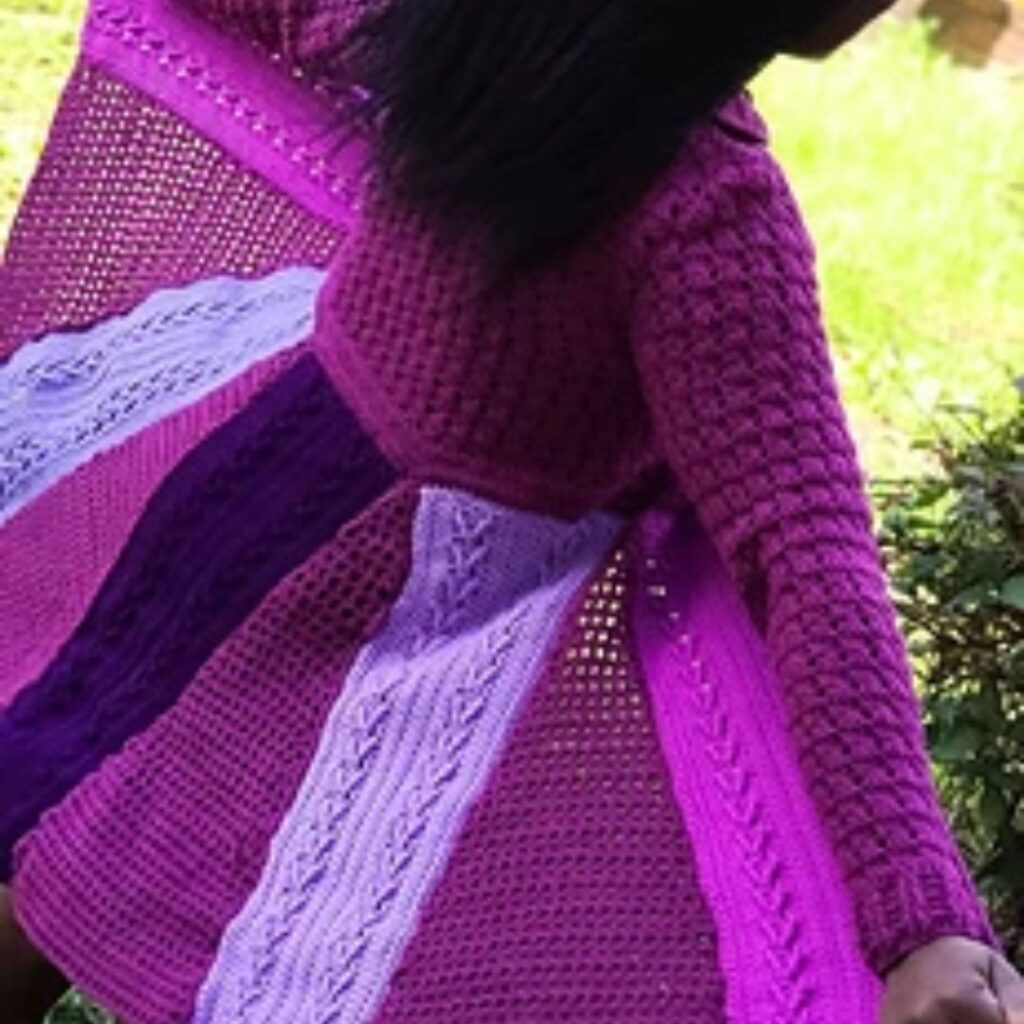
Worsted weight yarn (#4) in 5 different colors. But you can make this coat in single or multiple colors. Why not get creative?
Estimated Yardage
Color A: 6 (6, 7, 7, 8, 8, 9, 9, 10) balls in Plum = 1090 (1250, 1360, 1500, 1580, 1700, 1800, 1900, 2000) yards
Color B: 1 (1, 2, 2, 2, 2, 2, 2, 2); ball(s), in Magenta = 160 (200, 240, 270, 300, 340, 380, 400, 430) yards.
Color C: 1 (1, 1, 1, 1, 1, 1, 1, 1); ball in Wisteria = 100 (110, 120, 130, 140, 150, 160, 170, 180) yards.
Color D: 1 (1, 1, 1, 1, 1, 1, 1, 1); ball in Emperor = 100 (110, 120, 130, 140, 150, 160, 170, 180) yards.
Color E: 1 (1, 1, 1, 1, 1, 1, 1, 1); ball in Lavender = 100 (110, 120, 130, 140, 150, 160, 170, 180) yards.
Elegant crochet coat pattern on Etsy
Crochet Coat pattern on Ravelry
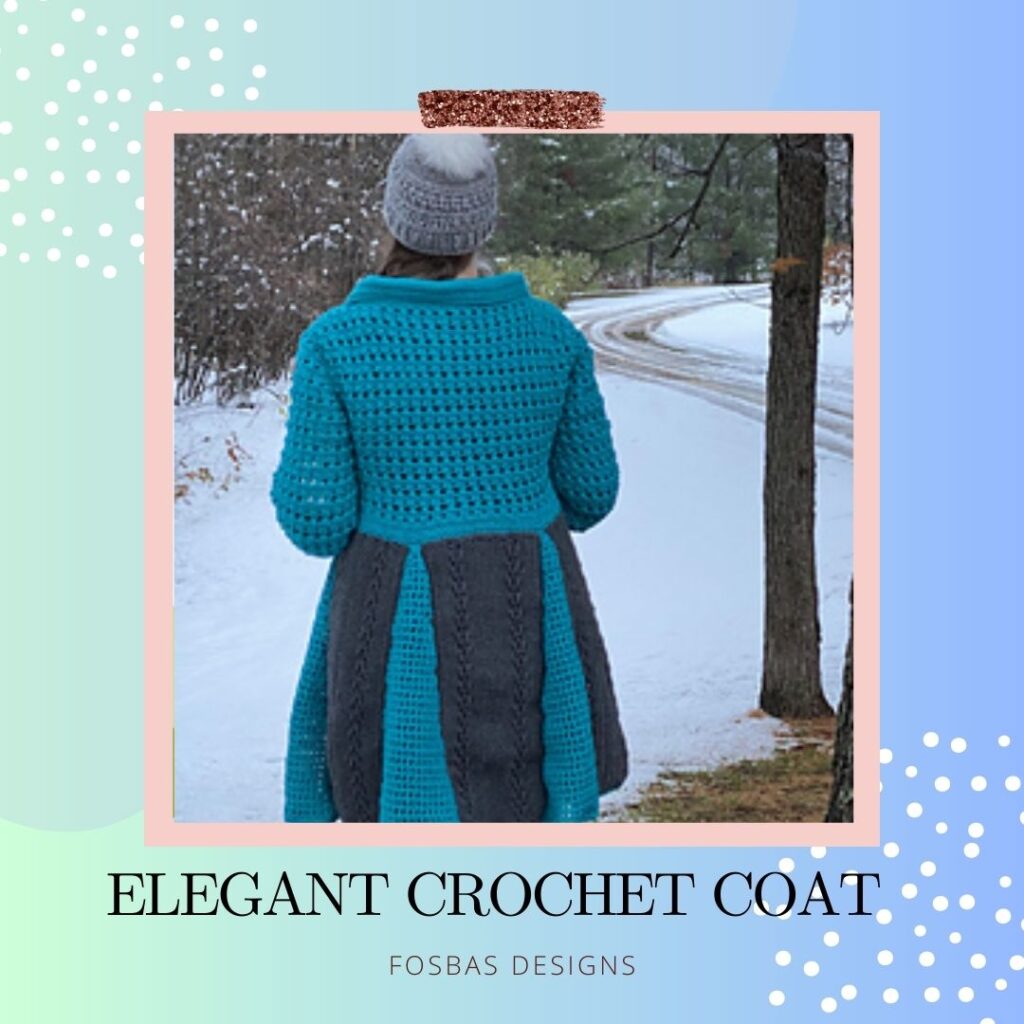
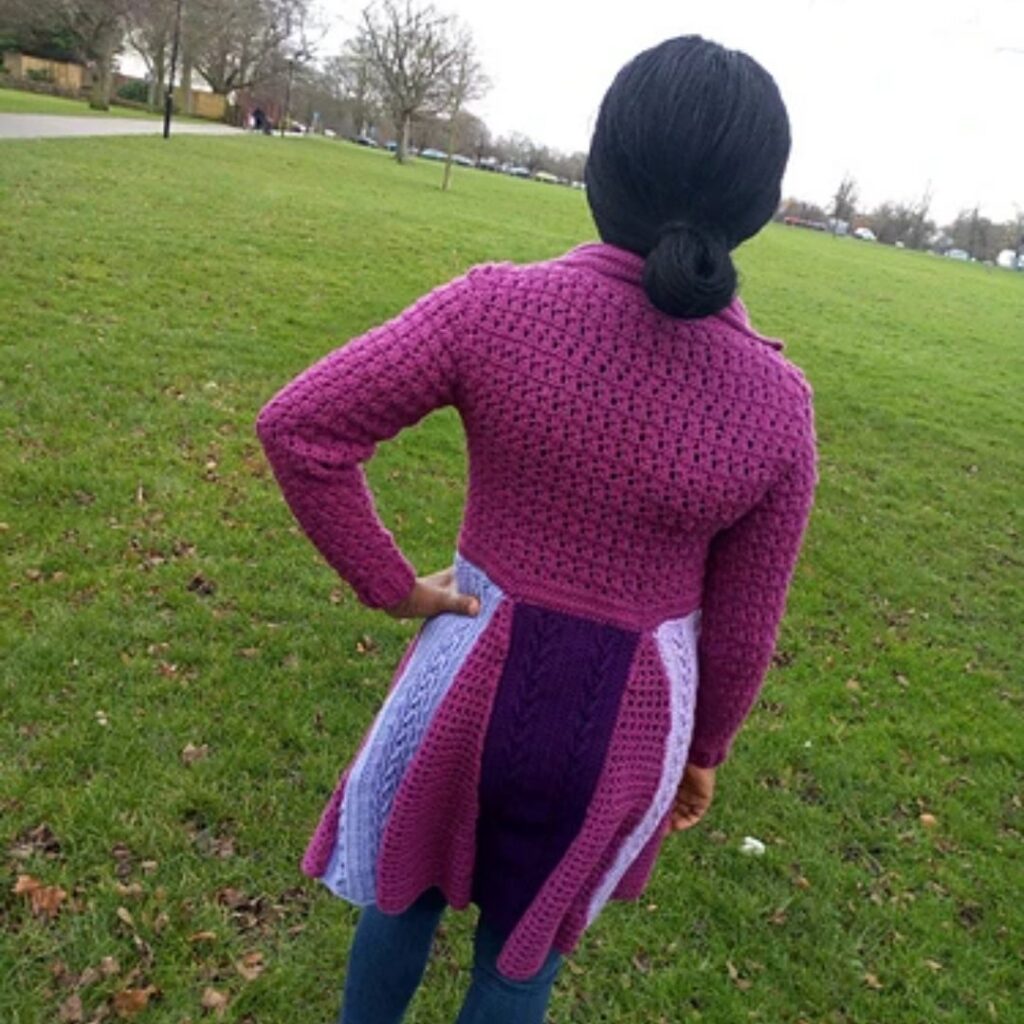
This easy-to-follow crochet coat can be styled and layered up.
Finished Measurements
Sizes Available – XS (S, M, L, XL, 2XL, 3XL, 4XL, 5XL)
Bust Measurements: 30 (34, 38, 42, 46, 50, 54, 68, 62)”
Hip Measurements: 34 (38, 42, 46, 50, 54, 58, 62, 66)”
Armhole Measurement: 15.5 (16, 16.5, 17, 17.5, 18, 18.5, 19, 19.5)”
Length of sleeve from underarm: 18 (20, 20, 20, 21, 21, 22, 22, 22)”
Modeled Garment is shown in size S, with 2.5cm/1” of positive ease
Hook: 5 mm Crochet Hook.
Guage
15 sts x 9 rows = 10 cm / 4” square in dc before blocking
Gauge is crucial to this project, take time to check gauge
Hook – Size H/8 (5 mm) Crochet Hook
Terms – US Terminology
Notions
Tapestry needle
Crochet stitch marker for central point
9 – 12 button
Stitches used for this crochet coat pattern
Chain space – ch sp
Double crochet – dc
Front Post Double Crochet – FPdc
Back Post Double Crochet – BPdc
Double Crochet 3 stitches together – dc3tog
Treble stitch – tr
Slip stitch – sl st
Special stitches
Dc cluster = 3 dc in specified stitch
Difficulty – Intermediate
Construction Notes
- This crochet coat is worked from the bottom up.
- The lower part is made in two sections, with two separate sets of panels which are then joined together to create the “flare”.
- Front and back panels are then seamed together at the shoulder.
- Sleeves are worked in rows and joined to the bodies.
The crochet coat pattern is easily adjustable in both length and bust. There are complete instructions in the pattern to do so.
The Pdf pattern has written and step-by-step pictures for the stitches used. Also included in the Pdf pattern is the schematics and charts are included at the end of the pattern.

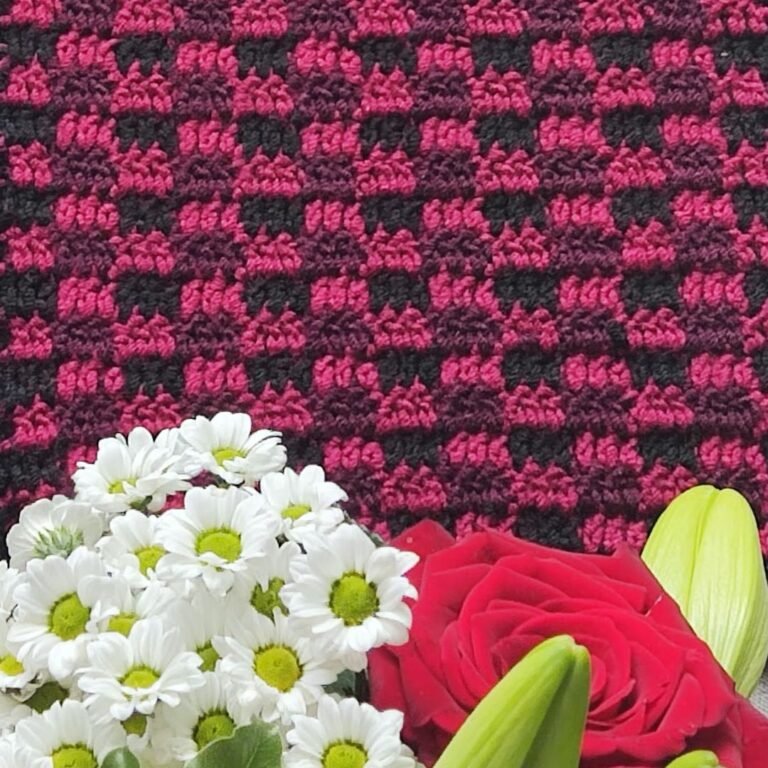
Crochet elegant coat pattern
Rectangular panels (Make 2 using B, 1 in C, D, and E)
Each Panel measures 5.5 (6.6, 7, 8, 8.5, 9.5, 10.5, 11, 12)” wide by 20” long
Chain 76
Row 1: Dc in 3rd ch from hook, dc across, turn. (74 dc)
Rows 2 – 3: Ch 3, dc across, turn. (74 dc)
Row 4: Ch 3, dc, *skip 3 sts, 1 tr in next, with the tr pushed back and working from
the front of tr just made, dc in the 3 skipped sts, rep from * to last st, dc, turn. (18 tr, 56
dc)
Row 5: Ch 3, dc, *skip 3 sts, 1 tr in next, with tr pushed towards you, working
behind tr just made, dc in the 3 skipped sts, rep from * to last st, dc, turn. (18 tr, 56 dc)
Row 6: Ch 3, dc in each st across, turn. (74 dc)
Rows 7 – 7 (9, 11, 13, 15, 17, 19, 21, 23): Ch 3, dc in each st across, turn. (74 dc)
Rows 8 (10, 12, 14, 16, 18, 20, 22, 24) – 10(12, 14, 16, 18, 20, 22, 24, 26): Rep Rows
4 to 6.
Rows 11 (13, 15, 17, 19, 21, 23, 25, 27) – 12(14, 16, 18, 20, 22, 24, 26, 28): Ch 3, dc
across, turn. (74 dc)
Turn, ch 1, and work 1 sc evenly across the short side. 21(24, 27, 30, 33, 36, 39, 42, 45 sc)
Measure to make sure you have the panel measuring – 5.5(6.5, 7, 8, 8.5, 9.5, 10.5, 11,
12)”
Make 4 more panels.
Second Panel (Triangular panels)
Make 4 Using A
Each Triangle is 20” long, 13” wide
Row 1: Ch 4 (counts as dc + ch 1) dc in 4th ch from hook, turn. (2 dc, 1 ch sp)
Row 2: Ch 4, dc in same st, ch 1, skip ch 1, dc in 3rd ch, turn. (3 dc, 2 ch sps)
Row 3: Ch 4, dc in same st, *ch 1, skip next ch sp, dc in next st, rep from * to end, turn.
(4 dc, 3 ch sps)
Rows 4 – 5: Rep. Row 3
Rows 6 – 7: Ch 4, dc in next st, *ch 1, skip next ch sp, dc in next st, rep from * to end,
turn. (6 dc, 5 ch sps)
Row 8: Ch 4, dc in same st, *ch 1, skip next ch sp, dc in next st, rep from * to end, turn.
(7 dc, 6 ch sps)
Rows 9: Ch 4, dc in next st, *ch 1, skip next ch sp, dc in next st, rep from * to end, turn.
(7 dc, 6 ch sps)
Rows 10 – 11: Ch 4, dc in same st, *ch 1, skip next ch sp, dc in next st, rep from * to
end, turn. (9 dc, 8 ch sps)
Rows 12 – 38: Rep Rows 9 – 11.
Row 39: Rep Row 9. (27 dc, 26 ch sps)
If you have adjusted the length of the rectangular panel, make sure to adjust the
length of triangular panels also.
Edges – working around each long side of the triangle, ch 1, sc evenly around the
panel (aim for 2 sc in each ch 4/dc). 78 sc
Fasten off
To assemble
With the wrong side facing you, place a triangular panel (apex pointing up) between
two rectangles, repeat for the others, you’d have 2 rectangles next to each other, i.e in
this order; B|A|C|A|D|A|E|A|B
Secure with stitch markers on both ends.
Using mattress stitch, sew them together, leaving the last 2 rectangles without joining (this is the front opening)
Fasten off.
Section 2 – Waist
Join A with a sl st to the right side of the hips just made
Row 1: Ch 2, hdc in each edge across, aim for 21(24, 27, 30, 33, 36, 39, 42, 45 hdc) in
each rectangular panel and 2 hdc in each apex of each triangle, turn. 113 (128, 143,
158, 173, 188, 203, 218, 233) hdc
Rows 2 – 4: Ch 2, hdc across, turn. 113 (128, 143, 158, 173, 188, 203, 218, 233) hdc
Row 5: Ch 3, dc in first st, skip next st, 3 dc in next st, *skip next 2 sts, 3 dc in next st,
rep from * to last 2 sts, skip next st, dc in last, turn. 37 (42, 47, 53, 57, 62, 67, 72, 77)
dc clusters, 2 dc
Row 6: Ch 3, dc, ch 1, dc3tog, * ch 2, dc3tog, rep from * to last st, ch 1, dc, turn.
38 (43, 48, 54, 58, 63, 68, 73, 78) ch sps, 37 (42, 47, 53, 57, 62, 67, 72, 77) dc3tog, 2 dc.
Row 7: Ch 3, dc in first st, *skip ch sp, 3 dc
in next, rep from * to last st, dc, turn. 37 (42, 47, 53, 57, 62, 67, 72, 77) dc clusters, 2 dc
Rows 8 – 12(14, 16, 18, 18, 20, 20, 22, 22): Rep Rows 6 and 7, ending with Row 6.
Do not fasten off.
Bust
Place stitch markers on the, 10 (11, 12, 13, 14, 16, 17, 18, 19) th ch sp on either side.
Right side
Working towards the 1st stitch marker Row 1: Ch 3, dc in first st, *skip ch sp, 3 dc
in next, rep from * to st marker, turn. (1 dc), 9 (10, 11, 12, 13, 15, 16, 17, 18) dc clusters
Row 2: Ch 3, * dc3tog, ch 2, rep from * to last st, dc, turn. (1 dc) 9 (10, 11, 12, 13, 15,
16, 17, 18) dc3tog
Row 3: Ch 3, dc in first st, *skip ch sp, 3 dc in next, rep from * to end, turn. (1 dc) 9 (10,
11, 12, 13, 15, 16, 17, 18) dc clusters
Rows 4 – 11(13, 15, 17, 19, 21, 23, 25, 27): Rep Row 2 and 3.
Shape neckline
Row 12(14, 16, 18, 20, 22, 24, 26, 28): Ch 3, *dc3tog, ch 2, rep from * till last 16 sts, dc,
turn. (1 dc) 4 (5, 6, 7, 8, 10, 11, 12, 13) dc3tog
Row 13(15, 17, 19, 21, 23, 25, 27, 29): Ch 3, dc in same st, *skip ch sp, 3 dc in next, rep
from * to end, turn. (1 dc) 4 (5, 6, 7, 8, 10, 11, 12, 13) dc clusters
Row 14(16, 18, 20, 22, 24, 26, 28, 30): Ch 3, *dc3tog, ch 2, rep from * till last st, dc in
last st. (1 dc) 4 (5, 6, 7, 8, 10, 11, 12, 13) dc3tog
Left side
With the wrong side facing, join yarn with a sl st from the edge, working toward the 2nd
stitch marker, repeat as for the right side.
Back
Working between the 2 stitch markers and on the right side, join yarn with a sl st to
first dc3tog next to stitch marker.
Row 1: Ch 3, dc, *skip ch sp, 3 dc in next, rep from * to next st marker, turn. (1 dc) 18
(21, 24, 28, 30, 31, 34, 37, 40) dc clusters Row 2: Ch 3, * dc3tog, ch 2, rep from * to
last st, ch 2, dc, turn. (1 dc) 18 (21, 24, 28, 30, 31, 34, 37, 40) dc3tog
Row 3: Ch 3, dc, *skip ch sp, 3 dc in next, rep from * to last st, dc, turn. (1 dc) 18 (21,
24, 28, 30, 31, 34, 37, 40) dc clusters
Rows 4 – 14(16, 18, 20, 22, 24, 26, 28, 30): Rep Row 2 and 3
Do not fasten off.
Shoulder seam(s)
Fold the front panels over the back panel.
Join together the first 4 (5, 6, 7, 8, 10, 11,12, 13) dc clusters towards the neckline.
• Leaving the remaining sts on the front and back panels without joining
for the collar
• You can adjust the number of stitches for a comfortable neck
opening when joining the shoulder seam.
Collar
On the right and left sides of the front panels, count 8 sts away from the skipped sts, and place stitch markers on the 8th st from the skipped stitches from the neckline from the front panel on either side.
With the right side facing and working between the 2 stitch markers, join yarn with a sl st
Row 1: Ch 2, hdc in next 7 sts, continue to the remaining sts on the front panel and across the sts on the back, hdc in next to each st across the left panel till the next st marker,
turn.
Rows 2 – 13: Ch 2, hdc in each st across, turn.
Do not fasten off.
Left Opening of Coat
Row 1: Ch 2, hdc in each edge of the collar and across the remaining sts on the neckline, ch
1, hdc in each edge on the front opening of the coat downwards, turn
Rows 2 – 5: Ch 2, hdc in each st across the left opening, turn.
Row 6: Ch 2, hdc in each st across.
Fasten off.
Buttonholes (Right side)
Row 1: Join yarn with a sl st to the edge of the right side of the collar, ch 2, hdc in each
edge and across the left sts on the neckline, ch 1, hdc in each edge on front opening (left
side), turn.
Rows 2 – 4: Ch 2, hdc across, turn.
Row 5: 2 ch, hdc in first 2 sts, *ch 3, skip next 2 sts, hdc in next 8 sts, rep from * to end, turn.
Row 6: Ch 2, hdc in each st across, with 2 hdc in each ch 3 sps.
Fasten off
Sew buttons on the left side corresponding to the button holes.
Sleeves
Row 1: Chain 38 (38, 38, 38, 38, 50, 50, 50, 50) dc in 3rd ch, dc in each ch across, turn.
36 (36, 36, 36, 36, 48, 48, 48, 48) dc
Row 2: Ch 3, *FPdc in first 2 sts, BPdc in next 2 sts, rep from * to end, turn. 18 (18,
18, 18, 18, 23, 23, 23, 23) FPdc/BPdc Pairs
Rows 3 – 5: Rep Row 2
Row 6: Ch 3, dc in each st across, turn. 36 (36, 36, 36, 36, 48, 48, 48, 48) dc
Row 7: Ch 3, 2 dc in first st, *skip next 2 sts, 3 dc in next st, rep from * to last 5 sts, skip
next st, 3 dc in next st, skip next 2 sts, 2 dc
in the last st. 4 dc, 11 (11, 11, 11, 11, 15, 15, 15, 15) dc clusters
Row 8: Ch 3, dc in first 2 sts, *ch 2, dc3tog, rep from * to last 2 sts, ch 2, dc in last 2 sts.
4 dc, 11 (11, 11, 11, 11, 15, 15, 15, 15) dc3tog
Row 9: Ch 3, dc in first 2 sts, *skip ch sp, 3 dc in next st, rep from * to last 2 sts, dc in
last 2 sts, turn. 4 dc, 11 (11, 11, 11, 13, 13,13, 15, 15) dc clusters
Rows 10 – 12: Rep Row 8 – 9, end with Row 8.
Row 13: Ch 3, 2 dc, dc, *skip ch sp, 3 dc in next, rep from * to last 2 sts, dc, 2 dc in last
st, turn. 6 dc, 11 (11, 11, 11, 11, 15, 15, 15, 15) dc clusters)
Row 14: Ch 3, dc in first 3 sts, *ch 2, dc3tog, rep from * to last 3 sts, ch 2, dc in last 3 sts,
turn. 6 dc, 11 (11, 11, 11, 11, 15, 15, 15, 15) dc3tog
Row 15: Ch 3, 2 dc, skip next st, *3 dc in next, skip ch sp, rep from * to last 3 sts, 3 dc
in next st, skip next st, 2 dc in last st, turn. 4 dc, 13 (13, 13, 13, 13, 17, 17, 17, 17) dc
Row 16: Ch 3, dc in first 2 sts, *ch 2, dc3tog, rep from * to last 2 sts, ch 2, dc in last 2 sts,
turn. 4 dc, 13 (13, 13, 13, 13, 17, 17, 17, 17) dc3tog)
Rows 17 – 28: Rep Rows 13 – 16, ending with row 16.
Stop increasing!!!
Check to have a good fit around the widest part of your arm.
• If too loose, you can frog back 2 – 4 rows for a better fit.
• If it’s too tight, rep Rows 13 – 16 once or twice.
• Make sure to check to fit.
Row 29: Ch 3, 2 dc, skip next st and next ch sp, *3 dc in next, skip ch sp, rep from * to
last 2 sts, skip next st, 2 dc in last st, turn. 4 dc, 19 (19, 19, 19, 19, 23, 23, 23, 23) dc
clusters
Row 30: Ch 3, dc in first 2 sts, * 2 ch, dc3tog, rep from * to last 2 sts, dc last 2 sts,
turn. 4 dc, 19 (19, 19, 19, 19, 23, 23, 23, 23) dc3tog
Rows 31 – 36(38, 38, 38, 40, 40, 40, 40, 40): Rep Rows 29 -30
Row 37(39, 39, 39, 41, 41, 41, 41, 41): Ch 3, skip first 2 sts and ch 2 sp, *3 dc in next st,
skip 2 ch sp, rep from * to the last cluster, skip next st, dc in last st, turn. 1 dc, 19 (19, 19,
19, 19, 23, 23, 23, 23) dc cluster
Row 38(40, 40, 40, 42, 42, 42, 42, 42): Ch 3, skip first st, dc3tog, ch 2, rep from * to end,
turn. 19 (19, 19, 19, 19, 23, 23, 23, 23) dc3tog
Row 39(41, 41, 41, 43, 43, 43, 43, 43): Ch 3, skip first dc3tog and ch 2 sp, * 3 dc in next
st, skip ch sp, rep from * to last dc3tog, dc in the last dc3tog, turn. 1 dc, 17 (17, 17, 17, 17,
21, 21, 21, 21) dc cluster
Rows 40(42, 42, 42, 44, 44, 44, 44, 44) – 52(52, 52, 54, 54, 54, 54, 56, 56): Rep Row
38(40, 40, 40, 42, 42, 42, 42, 42) – 39(41, 41, 41, 43, 43, 43, 43, 43).
Leave a long tail of yarn for sewing, cut yarn.
Repeat for the left sleeve.
Sleeve joining
- Join the sleeves to the body of your coat.
• Turn both sleeves and the body of the cardigan to the wrong side, with
the sleeve’s tip placed on the shoulder tip, work sc around both
shoulder and body of the coat, and continue to the remaining stitches on the sleeves.
• Cut yarn - Sleeve side seam:
Sew the side seam together using the mattress stitch.
Fasten off and break the yarn.
I would love to see your beautiful version of this crochet coat.
I can’t wait to see your beautiful makes! Come share your projects with me and the crochet community on Facebook and on Instagram.
Fosbas