
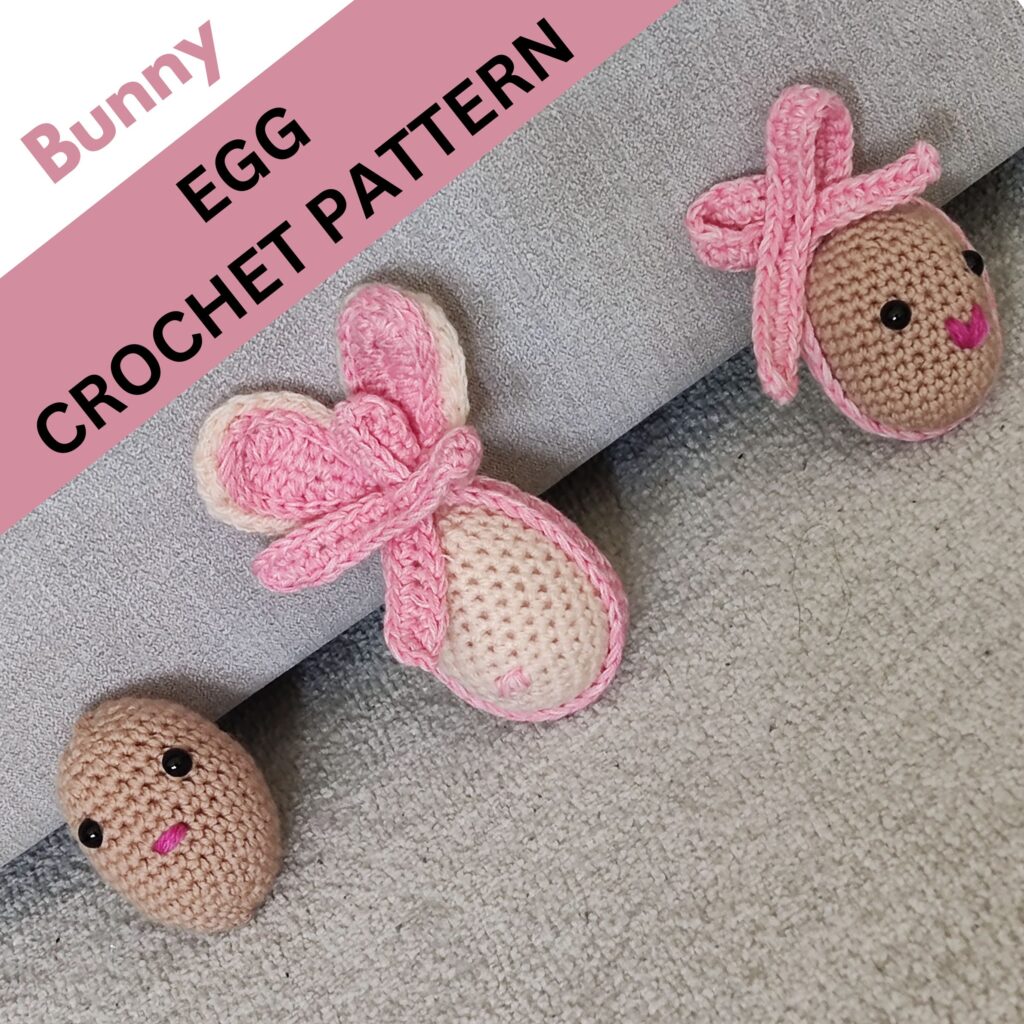
Crochet Easter Egg Free pattern
Hey, Bunny-loving friends, this amazing crochet easter egg-free pattern is the next project.
Crochet Easter eggs are small decorative eggs made using the art of crochet. They can be made in various colors and are often used as Easter decorations, gifts, or as part of Easter egg hunts. Have a look at the other Easter projects here.
This crochet Easter eggs-free pattern can be made at a sitting as it uses just a simple crochet stitch – the single crochet!
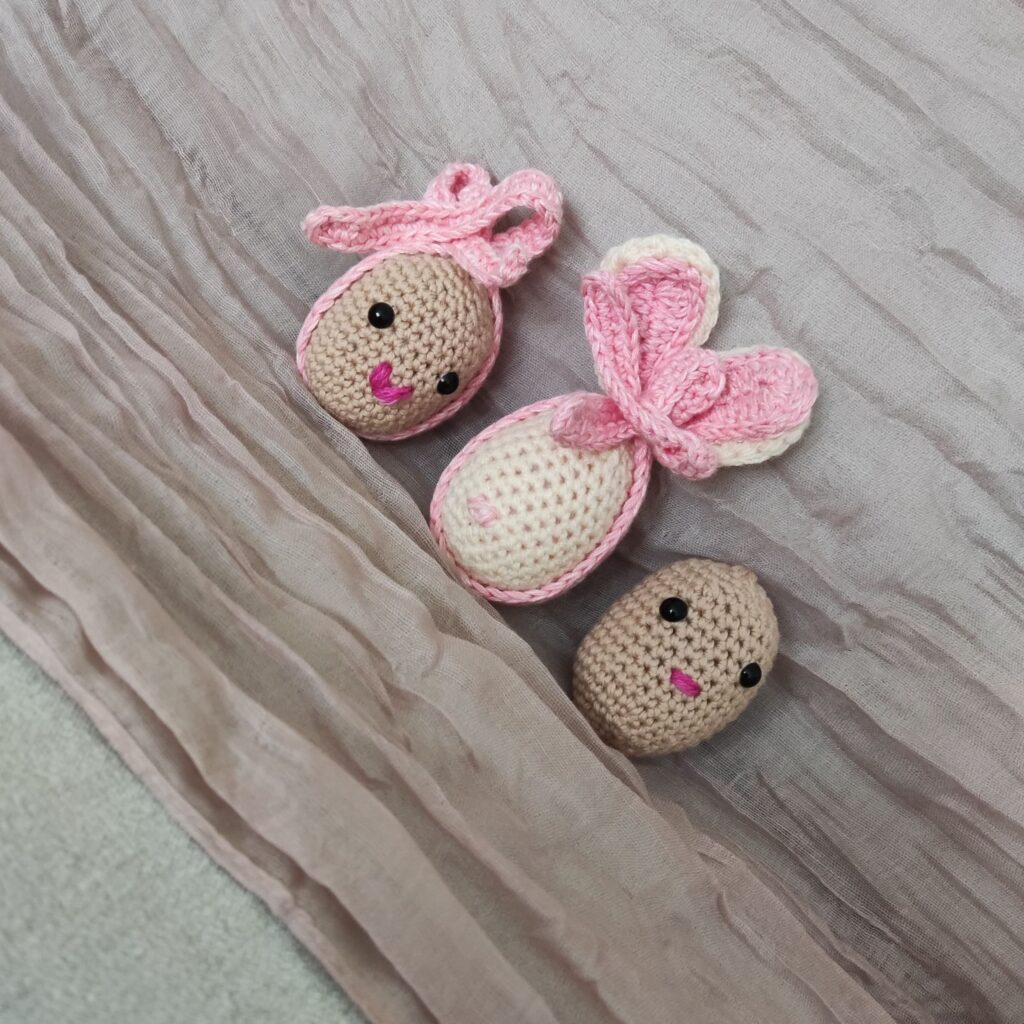
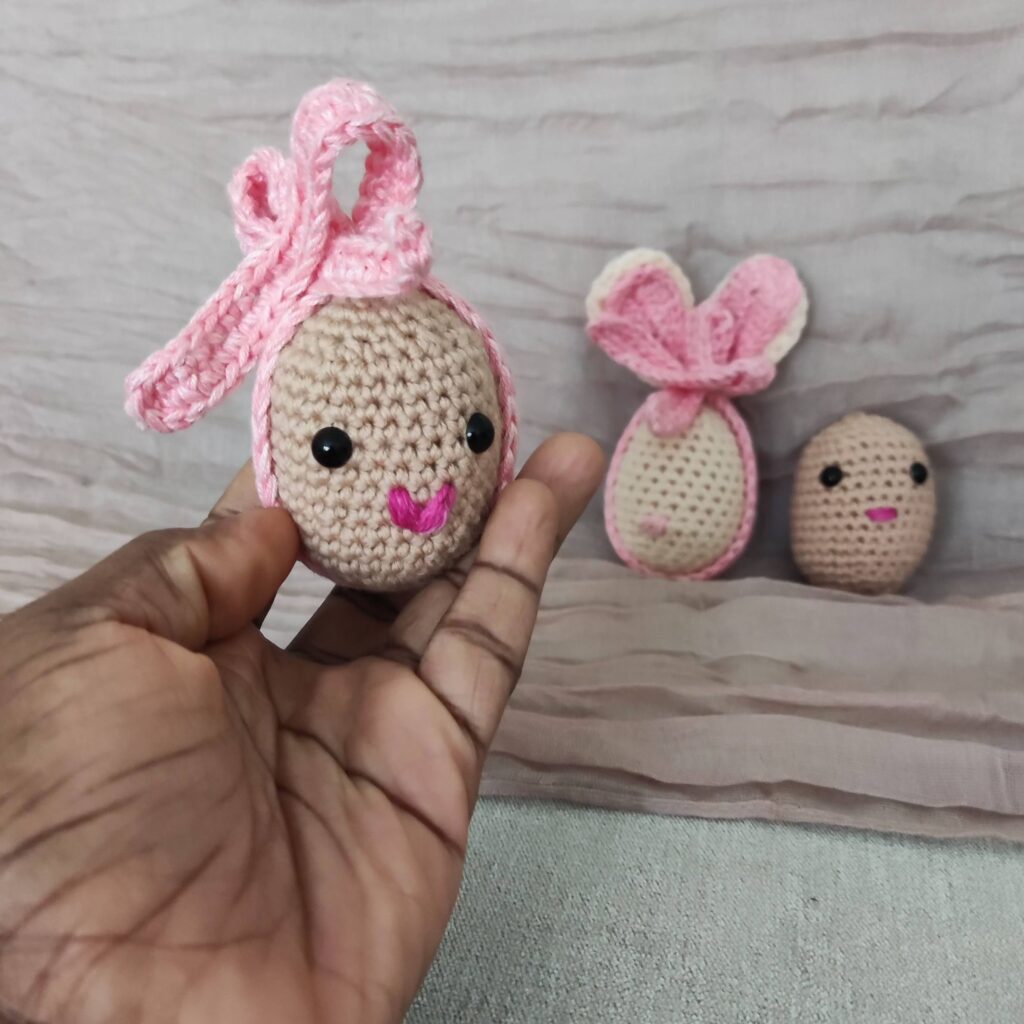
The free pattern has two sizes: the mini Easter egg and the large crochet egg. Combining these sizes would make a beautiful filling for your Easter baskets.
You can get the whole patterns included in this event right away!

As part of the Easter/Spring Hop, this pattern is among this year’s Easter special patterns, have a look at all the patterns here. Subscribe here or use the image below to get daily reminders.

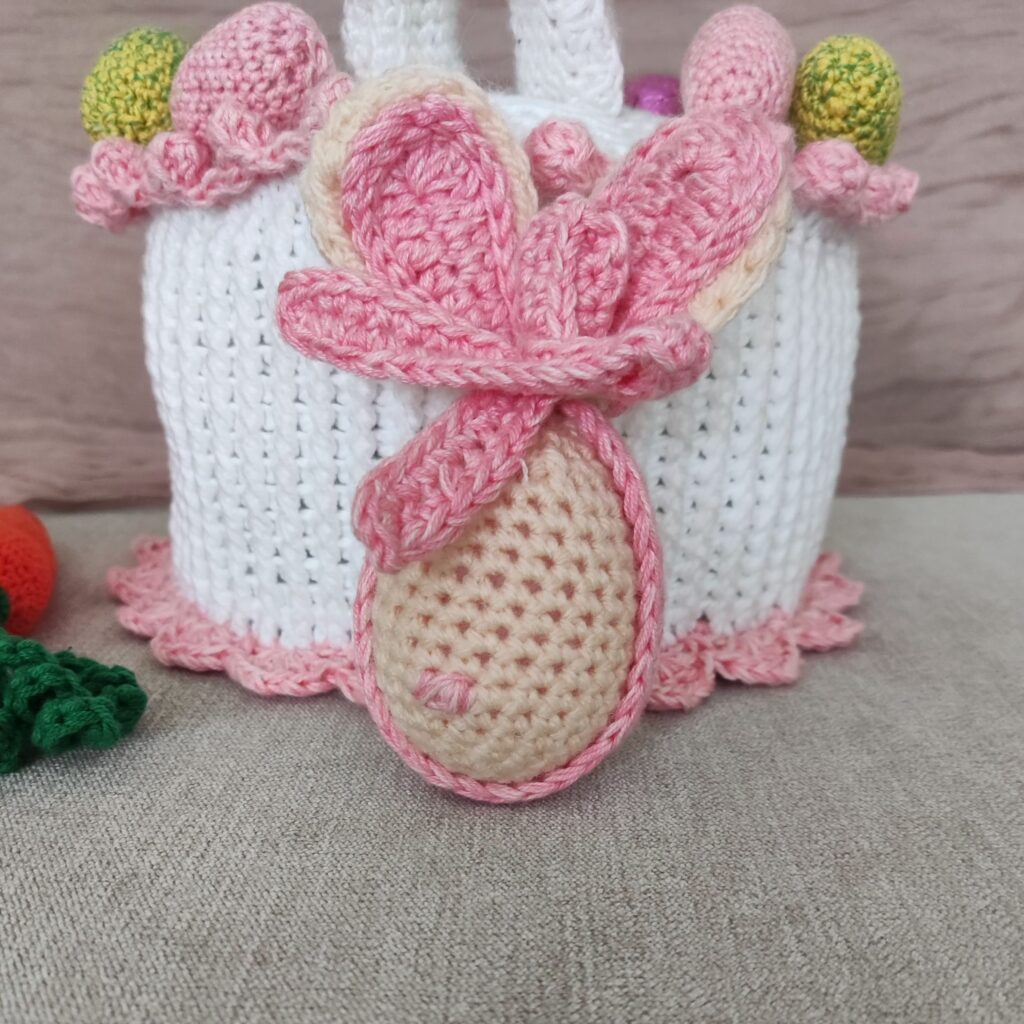
You can even hang your crochet easter eggs on branches or display them in bowls or baskets as part of Easter decorations.
Supplies needed for the crochet easter egg pattern
Hobbii Kind Feathers, #3 lightweight (100% Acrylic, 257 yards/235 m per 3.75 oz/100g Skein)
Main Color = MC
Contrasting Color = CC
Estimated Yardage
60 yards in MC
20 yards in CC
Hook
3.5 mm Crochet Hook
Other Materials
Plastic Egg or Polyfill
Safety eyes – 8 mm (2 pcs)
Embroidery thread – in pink and Black (if not using safety eyes)
Gauge
Gauge isn’t important for this project.
Crochet Easter egg pattern notes
- Please kindly read through the pattern before starting.
- Any #3 yarn weights can be substituted.
- Chains at the beginning of Rounds or Rows do not count as a stitch.
Difficulty – Easy
Terms – US Terminology
Stitches needed for this crochet easter egg pattern
Chain(s) – ch(s)
Single Crochet – sc
Half Double Crochet – hdc
Double Crochet – dc
Treble Crochet – tc
Finished Measurement
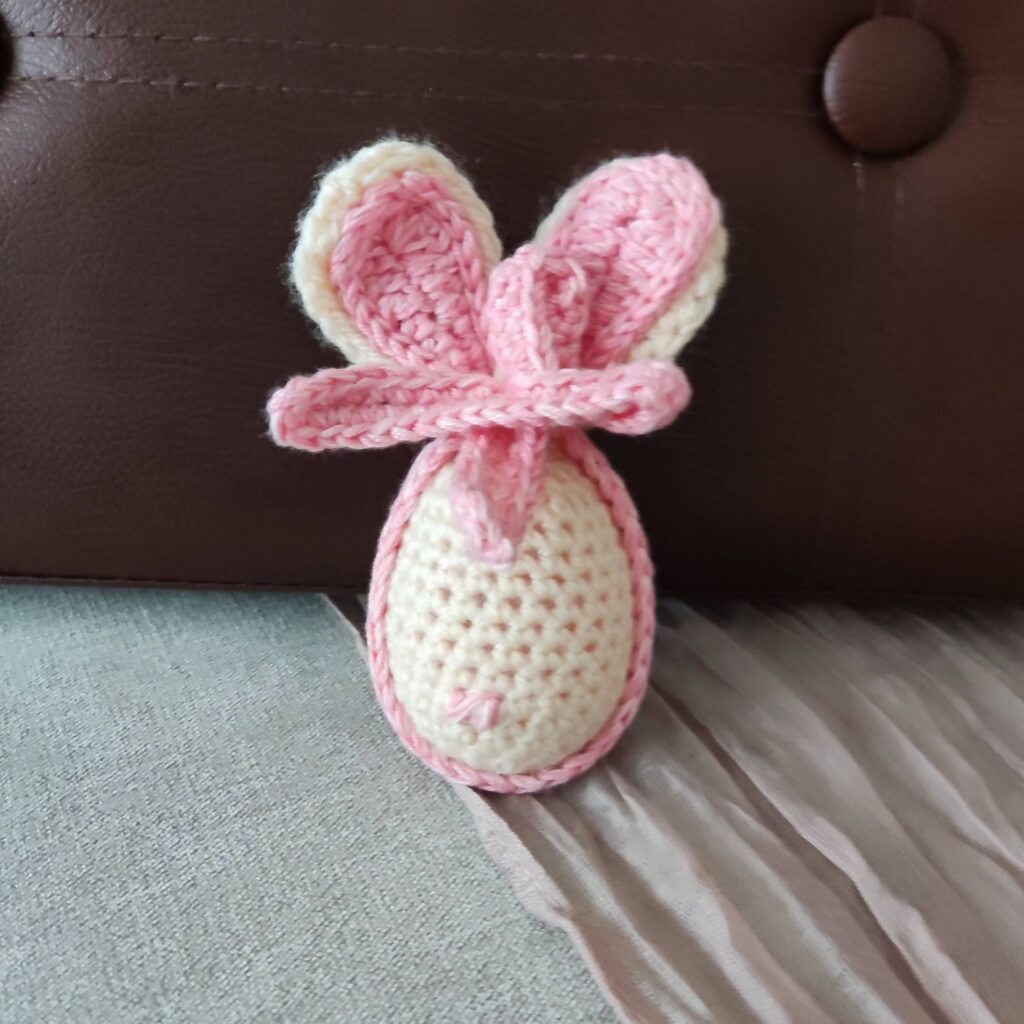
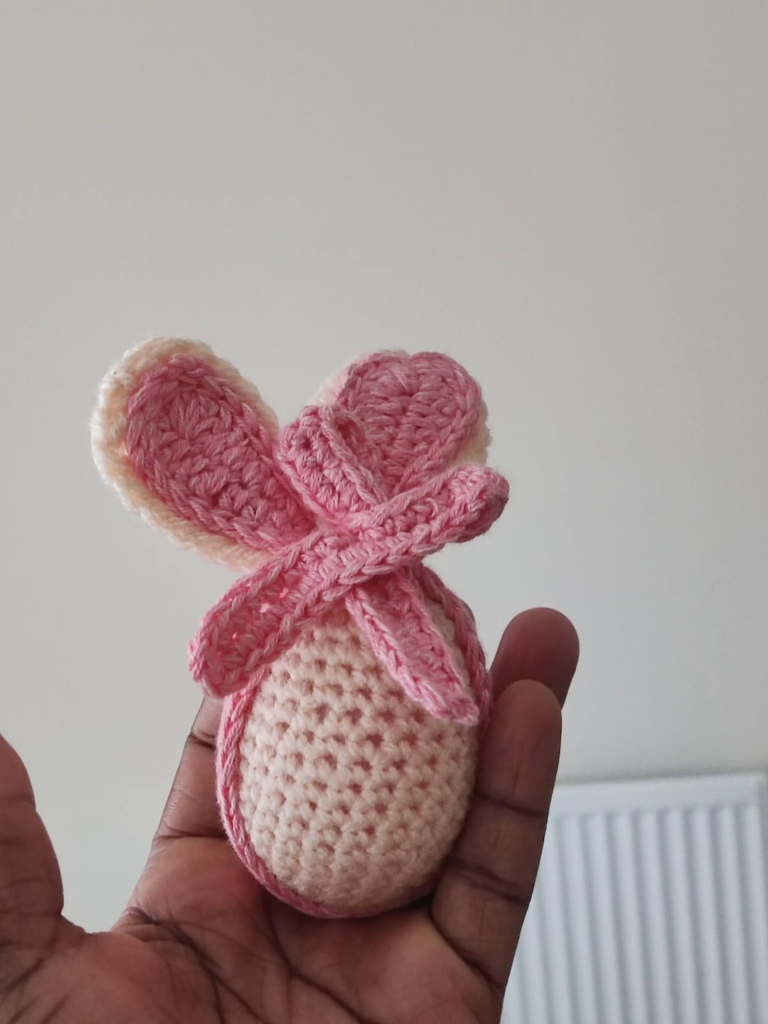
Egg – 4”
Bunny Ear – 2”
Crochet Easter Pattern Collection
How fun is having a mini collection of crochet patterns for Easter? This round up has lots of season appropriate projects.
Both big and mini crochet easter basket patterns
Crochet Carrot Amigurumi free pattern
Crochet Bunny eggs
Crochet candy dish-free pattern
All of these patterns will be available as free patterns on the blog, updated every day this week, so do not miss out on them.
Instruction for the crochet easter egg pattern
Round 1: In a magic ring, 7 sc. do not join; continue to work in a spiral throughout. Use a stitch marker to identify the first stitch of each round.
Round 2: 2 sc in each st. (14 sts)
Round 3: Sc in each st. (14 sts)
Round 4: Sc in the first st, *2 sc in next st, sc in next st, rep from * to the end of the round. (21 sts)
Round 5: Sc in each st. (21 sts)
Round 6: Sc in the first 2 sts. *2 sc in next st, sc in next 2 sts, rep from * to end of round (28 sts)
Rounds 7-15: Sc in each st. (28 sts)
Round 16: Sc in the first 2 sts, sc2tog, *sc in next 2 sts, sc2tog, rep from * to the end of the round. (21 sts)
Round 17: Sc in the first st, *sc2tog. sc in next st, rep from * to the end of the round. (14 sts)
If you would prefer to complete your egg and stuff to close it up before the facial details and sewing the accessories, continue to Round 18
Facial details
- 2 black pins for the eye details – Round 12, 6 sts apart.
- Place a Pink pin for the mouth details – Round 9, making sure to centralize it.
- Adjust the placement appropriately
Eyes
If using Safety eyes or buttons
- Attach a safety eye or sew a button in the position of each black pin.
- Repeat for the second eye.
If you prefer to embroider the eyes
- With a darning needle, embroider the eye details.
- Remove the pins
Mouth details
- With a darning needle, embroider the mouth details
- Place the plastic egg or
- Stuff egg at end of this round.
- Place the plastic egg or
- Stuff egg at end of this round.
Round 18: *sc2tog, rep from * to the end of the round. (7 sts)
Round 19: *sc2tog, rep from * to the end of the round, sc in last st (4 sts)
Remove the stitch marker and sl st into that st to correct the height difference from working in a spiral.
Leave a long tail of yarn, and sew close the remaining sts.
Fasten off
Weave in ends.
Section 2 – Bunny Ears
Make 2 in each color
With A
Chain 12
Round 1: 3 tr in 5th ch from hook, tr in next 3 chs, dc in next 2 chs, hdc in next ch, 3 sc in last ch, crocheting into the opposite side of the chains, hdc in next ch, dc in next 2 chs, tr in remaining ch, join with a sl st to the beginning ch.
Fasten off.
With B
Make 2
Chain 9
Round 1: 3 dc in 4th ch from hook, dc in next 2 chs, hdc in next 2 chs, 3 sc in last ch, crocheting into the opposite side of the chains, hdc in next 2 chs, dc in last 3 chs, join with a sl st to the beginning ch.
Fasten off.
To assemble
Place the upper part (made in B) over the base (made with A), using the surface crochet sl st technique, and secure the parts together.
Section 3 – Bow
With B, chain 105. 3 SC in the 2nd ch from hook and in each ch across until the last ch. 3 SC in the last ch. Crochet into the other side of the ch. Sc in each ch across. Join with a sl st to the beginning ch.
Leave a long tail of yarn for sewing; cut yarn
To assemble the bow
- Fold into two equal-size
- Pick up the egg and place the bow in the middle
- Secure the length of the bow around the egg tightly.
- With the remaining length, make a bow and secure it tightly.
- Fasten off.
- Sew/join the bunny ears to the egg.
Overall, I hope you love this crochet Easter egg-free pattern. These eggs are a fun and creative way to celebrate Easter and add a personalized touch to your home decor or gift-giving.

More quick 30-minute or less crochet projects you can make in a sitting can be seen below.
30 minutes crochet beanie pattern
About the Designer
Say Hi on Instagram and Subscribe To my email List for pattern discounts and freebies. For questions, send such to [email protected]. Read more about me here.
About the Designer
Say Hi on Instagram and Subscribe To my email List for pattern discounts and freebies. For questions, send such to [email protected]. Read more about me here.


Where do I sign up for the Spring/Easter hop?
Hi, you can use this link = https://landing.mailerlite.com/webforms/landing/d4y5a6