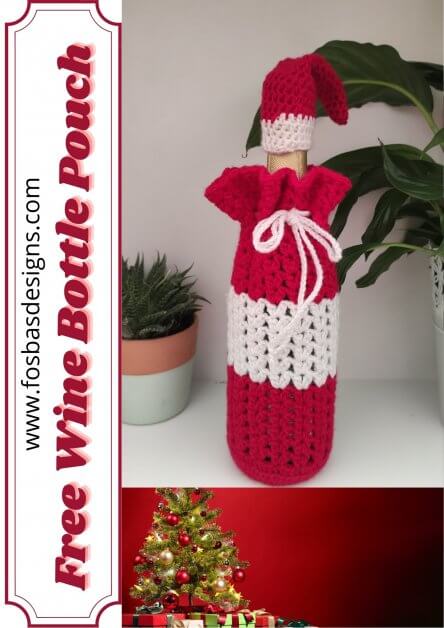
Crochet Wine Bag Pattern
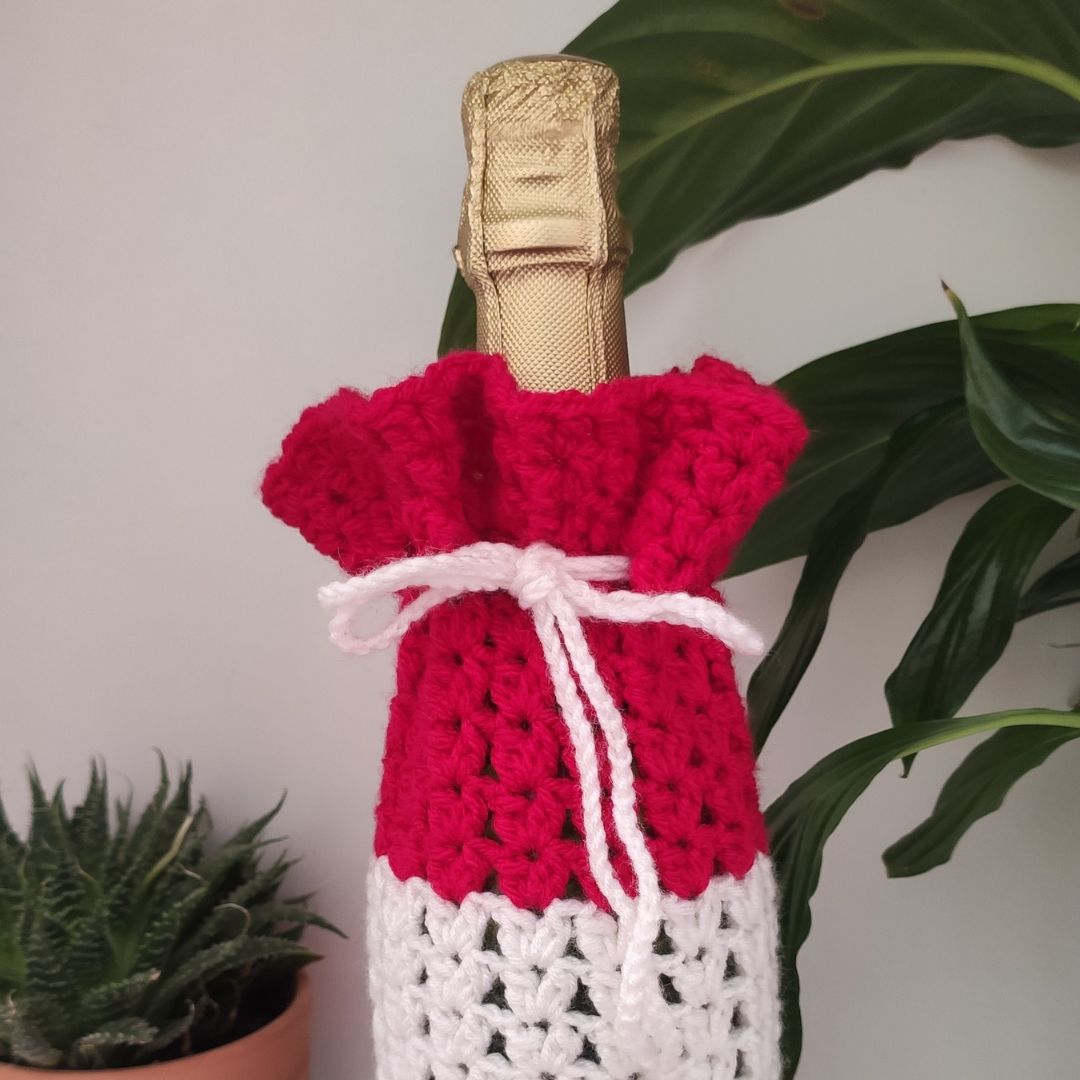
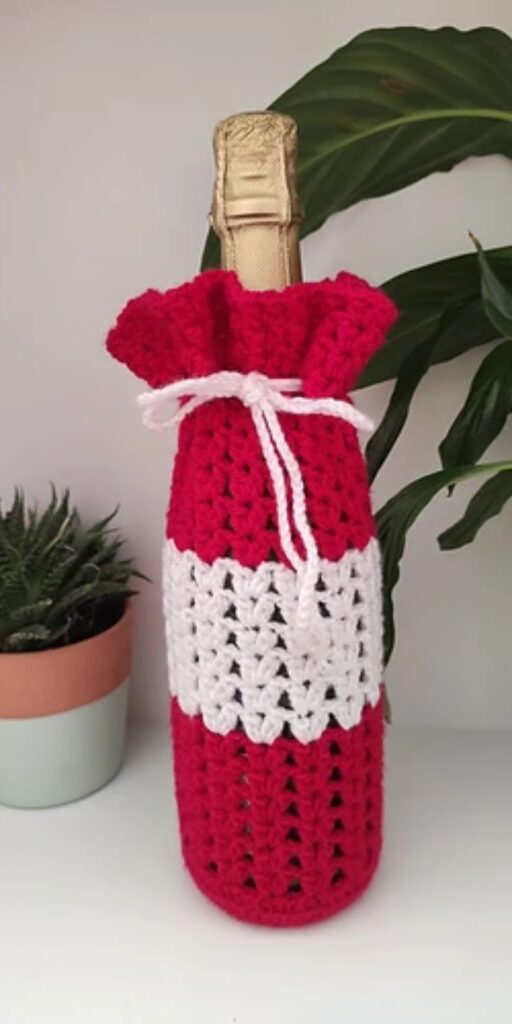
This crochet Wine Bag is so much fun to make. It is super easy to customize and works up pretty quickly. This pattern was designed specifically for you to hand out your wine in style.
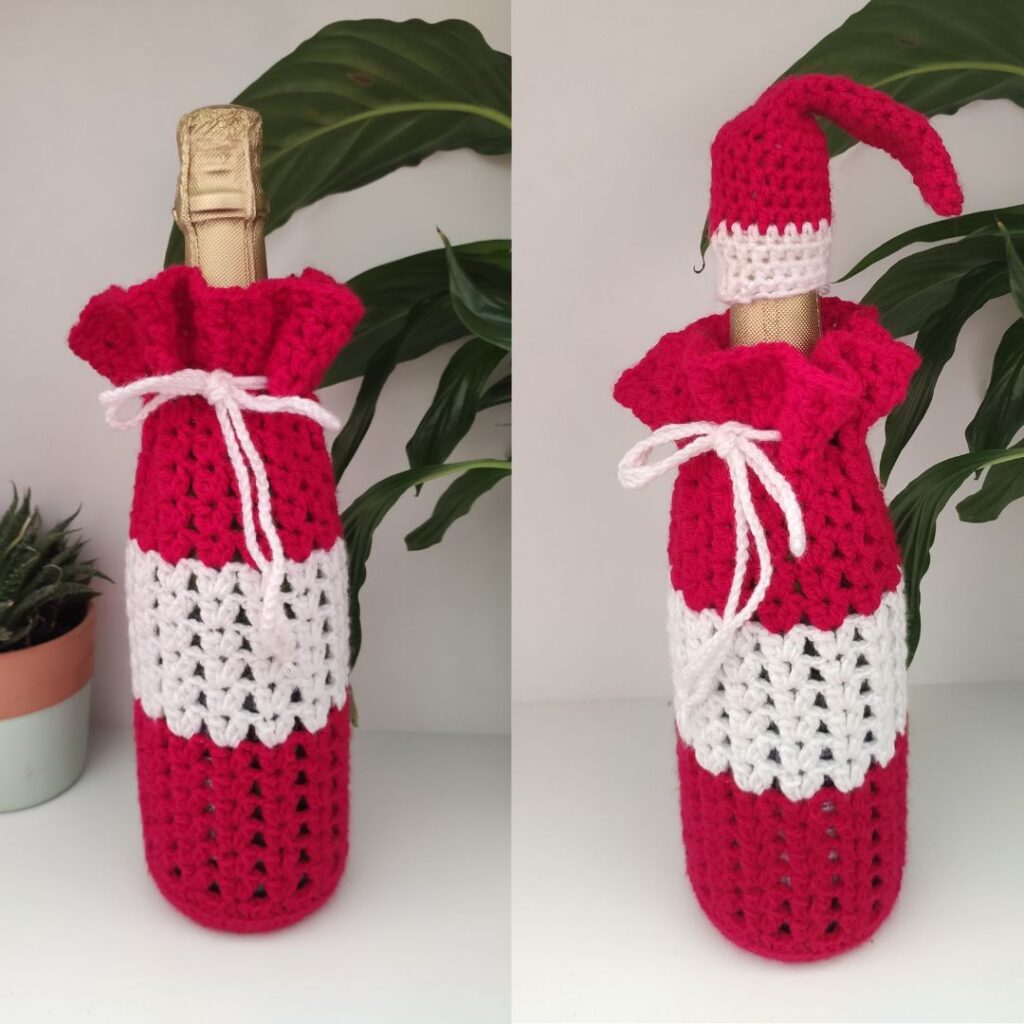
This post has an easy crochet wine bag pattern to make your gifts more personal. Now, I have to get busy making some wine bags from this pattern, as my friends are getting their wine in cute colors.
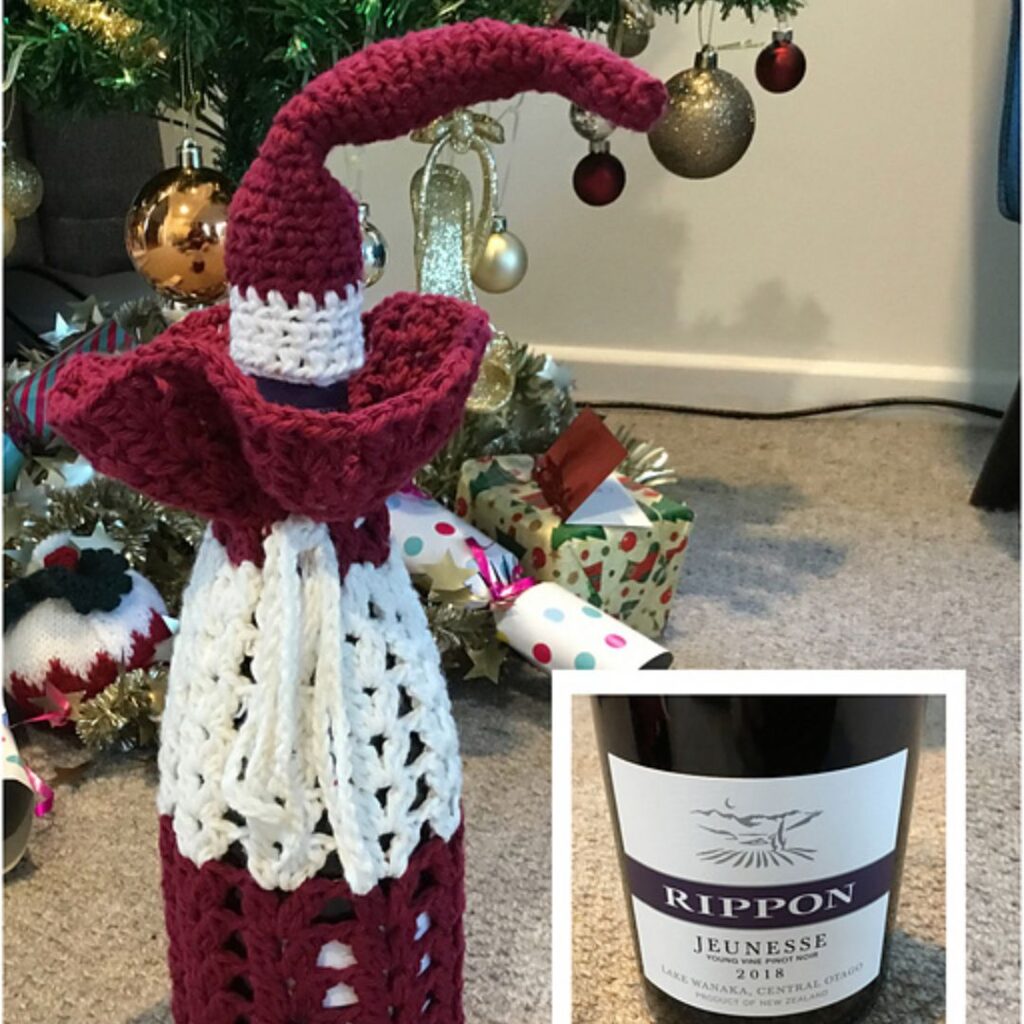
Send your wine in style with a beautiful handmade bag and a cute bottle hat.
Scroll down this post for the free version of this crochet wine bag holder. The print-friendly version is also available on Ravelry. Use the button below.
More crochet patterns on my blog to check out
Easy baby booties made in rows/flat
Crochet Shawl styled as a vest
Reversible dress styled in 12 different ways
How to crochet a bottle holder
One of the easiest crochet items to crochet is a wine bottle holder. To make your own version, you need to decide what weight of yarn you intend to use.
Get your hook and yarn ready, it is also advisable to have a wine bottle readily available so that you can check the base and height as you make the wine bottle holder.
Most crochet wine bottle holder starts from the base after which you then add the body and finish off by either adding a handle or a rope. The wine bottle holder pattern in this post uses a rope to secure the wine from dropping off.
This crochet bottle bag would also work as a beautiful water bottle bag.
Materials for this Crochet wine bag pattern
Stylecraft Special DK, #3 lightweight (100% Acrylic, 116 yards/106 m per 1.8 oz/50g Skein)
(1) Ball in Red – Main Color = MC
(1) Ball in White – Contrasting Color = CC
ESTIMATED YARDAGE – 100 yards
HOOK AND OTHER MATERIALS
- US size H (5 mm) Crochet Hook
- Yarn needle
GUAGE – 16 sts over 9 rows = 10 cm square/4” made in dc.
Crochet Wine Bottle Cover Pattern Notes
- Please kindly read through the pattern before starting.
- Any #3 weight of yarns can be substituted.
- Chains at the beginning of Rounds do not count as a stitch.
SKILL LEVEL – Easy
TERMS – US Terminology
Abbreviations used in this easy crochet wine bag pattern
Chain(s) – ch(s)
Double Crochet – dc
Double Crochet 2 stitches together– dc2tog
Double Crochet cluster – dc2tog, ch 1, dc2tog in the same stitch.
Back Loop Only – BLO
Space – sp
Skip – sk
Repeat – Rep
FINISHED MEASUREMENT
Base – 3.5” Height 10.5”
ADJUSTMENTS
If using a different weight of yarn;
1. Make the Base of your bag as wide as the base of your bottle, you can continue the sequence of increases till you have your desired measurement.
2. Height – you can repeat the pattern as instructed or decrease the repeats till you have the desired height for your wine bottle holder.
As part of the Thanksgiving Crochet Project Event, this crochet wine bag is featured. Use the images below for more details.


Instructions for the wine bottle holder pattern
Section 1 – Base, Using MC
Round 1: In a magic ring, ch 3, 12 dc, join. 12 dc.
Or ch 4, 12 dc in 4th ch from hook, join—12 dc.
Round 2: Ch 2, 2 dc in each around, join—24 dc.
Round 3: Ch 2, *dc in next, 2 dc in next; repeat from * around, join—36 dc.
Round 4: Ch 2, *dc in next 2, 2 dc in next; repeat from * around, join—48 dc
Round 5: Ch 2, *dc in next 3, 2 dc in next; repeat from * around, join—60 dc
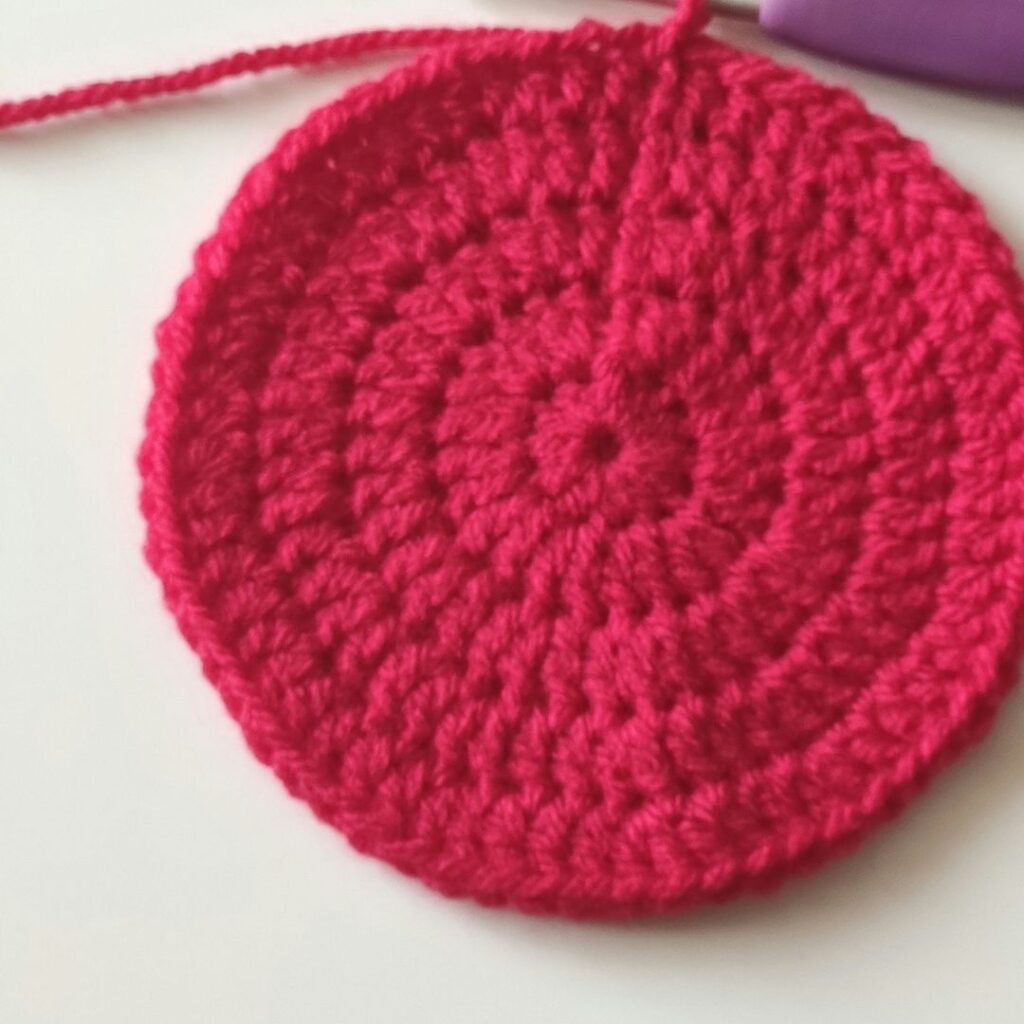
Continue to increase till your desired width
Round 6: Ch 2, in BLO, hdc in each st around, join. 60 dc
For a bigger bottle, continue this sequence till you have your desired circumference.
Section 2: Body Check out this tutorial on how to work DC clusters
Round 1: Ch 3, [dc2tog, ch 1, dc2tog] in first st, *skip next 3 sts, ch 1, [dc2tog, ch 1, dc2tog] in next st, rep from * to end of the round, ch 1, join. 15 dc clusters.
Rounds 2 – 6: Ch 3, *[dc2tog, ch 1, dc2tog] in ch 1 sp, ch 1, sk next ch 1 sp, rep from * to end, join. 15 dc clusters.
Fasten off MC, join CC
Rounds 7 – 12: Ch 3, *[dc2tog, ch 1, dc2tog] in ch 1 sp, ch 1, sk next ch 1 sp, rep from * to end, join. 15 dc clusters.
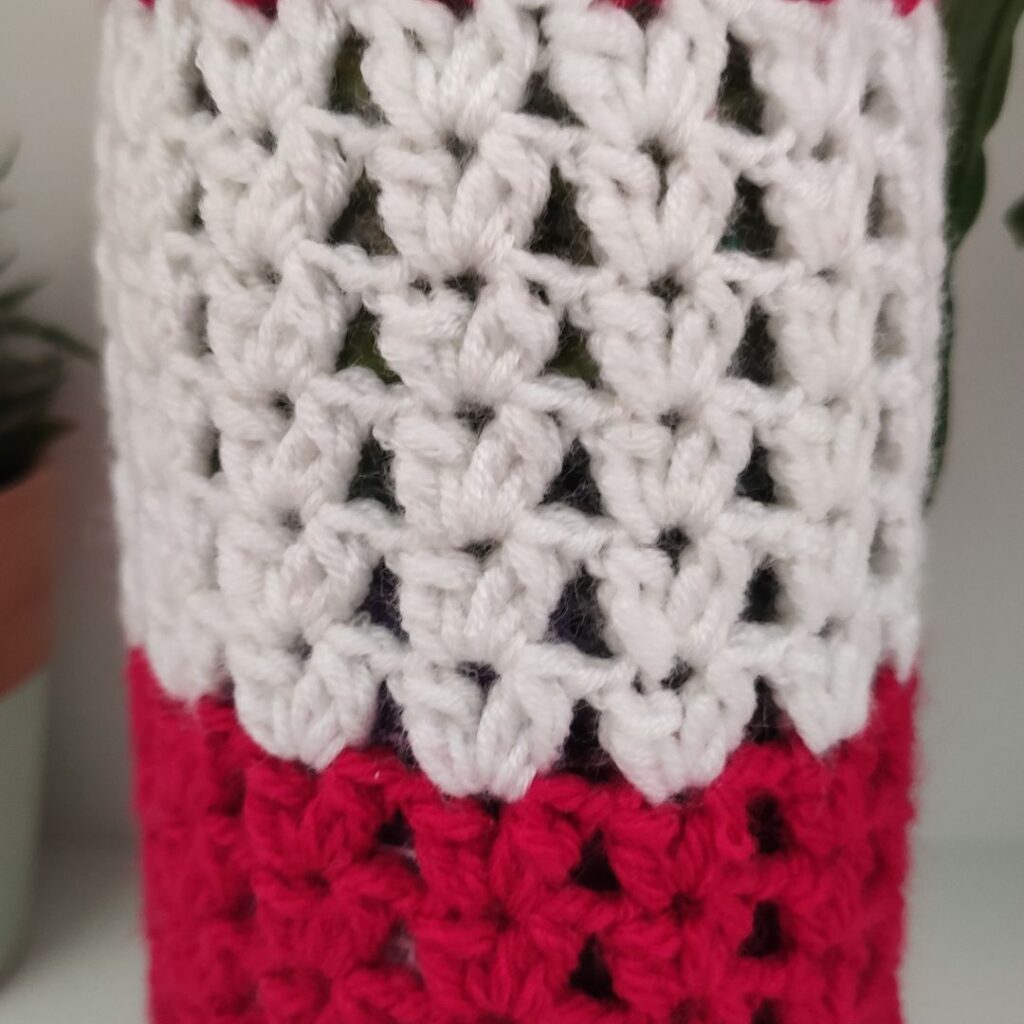
Fasten off CC, join MC
Rounds 13 – 18: Ch 3, *[dc2tog, ch 1, dc2tog] in ch 1 sp, ch 1, sk next ch 1 sp, rep from * to end, join. 15 dc clusters.
Round 19: Ch 3, *[dc2tog, ch 1, dc2tog] in each ch 1 sp, ch 1, 30 dc clusters.
Round 20 – 21: Ch 3, *[dc2tog, ch 1, dc2tog] in ch 1 sp, ch 1, sk next ch 1 sp, rep from * to end, join. 30 dc clusters.
Fasten off.
Sew in ends.
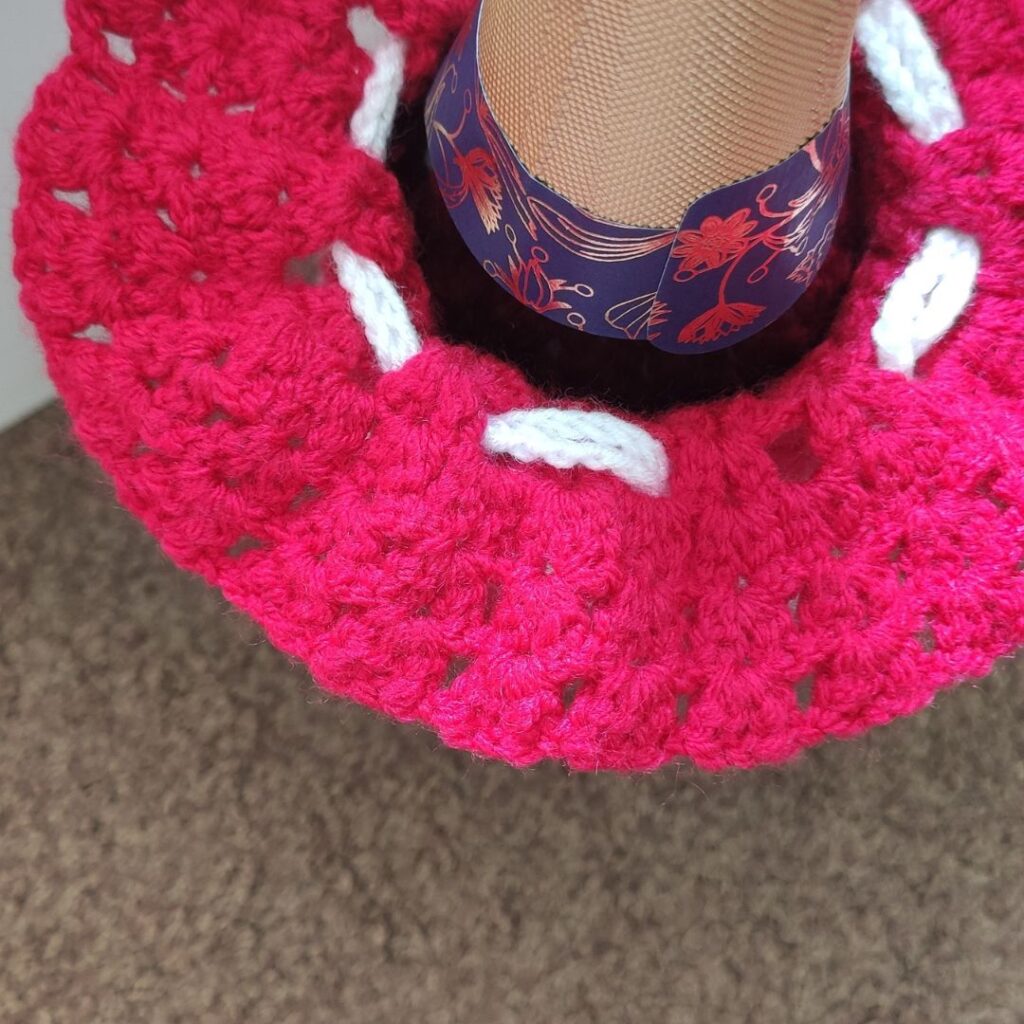
Rope – With CC Chain 200, fasten off.
Thread the rope through the ch 1 sps in Round 19.
Santa’s Hat
Round 1: With A, in a magic ring, ch 1, 4 sc into magic ring, place stitch marker and move with each round 4 sc
[if you are not familiar with a magic ring, you can ch 2, 4 sc into 1st chain]
Round 2: Place stitch marker, *2 Hdc in next st, Hdc in next, repeat from * to end of the round, move stitch marker. 6 Hdc
Rounds 3 – 5: Hdc in each st. 6 Hdc
Round 6: *2 Hdc in next st, Hdc in next 2 sts, repeat from * to end of the round. 8 Hdc
Rounds 7 – 8: Hdc in each st. 8 Hdc
Round 9: *2 Hdc in next st, Hdc in next 3 sts, repeat from * to end of the round. 10 Hdc
Rounds 10 – 14: Hdc in each st. 10 Hdc
Round 15: *2 Hdc in next st, Hdc in next 4 sts, repeat from * to end of the round. 12 Hdc
Rounds 16 – 17: Hdc in each st. 12 Hdc
Round 18: *2 Hdc in next st, Hdc in next 5 sts, repeat from * to end of the round. 14 Hdc
Rounds 19 – 21: Hdc in each st. 14 Hdc
Fasten off MC, and join CC.
Round 22 – 15: Hdc in each st. 14 Hdc
Download the print friendly version of this crochet wine bottle holder Pattern on Ravelry
I would love to see your makes from my crochet wine bottle holder pattern and the color(s) you have chosen.
Come share your makes from this easy crochet wine bag pattern with my community on Facebook. For my pattern process, come see me on Instagram and remember to tag me with your makes.


12 Comments
Comments are closed.