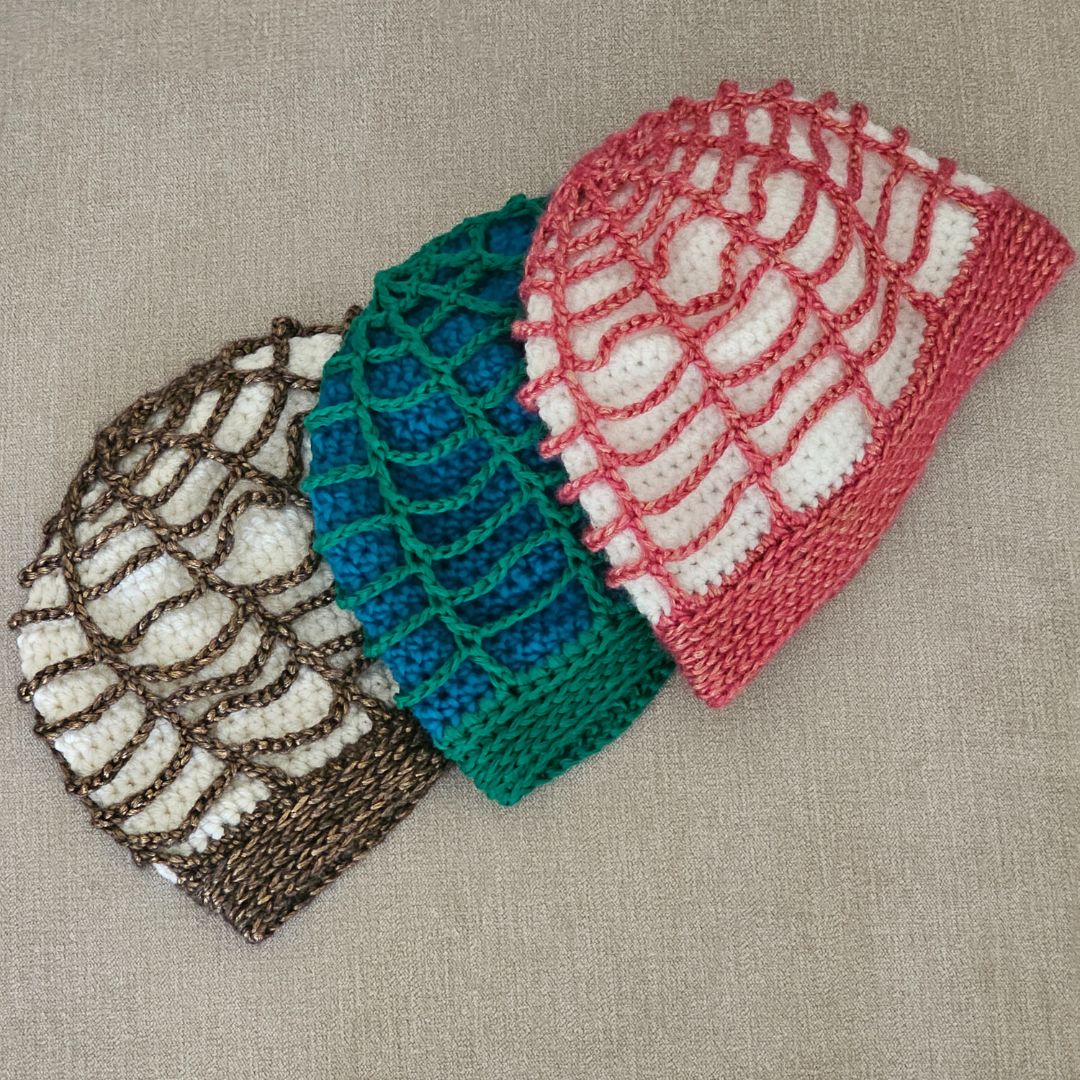
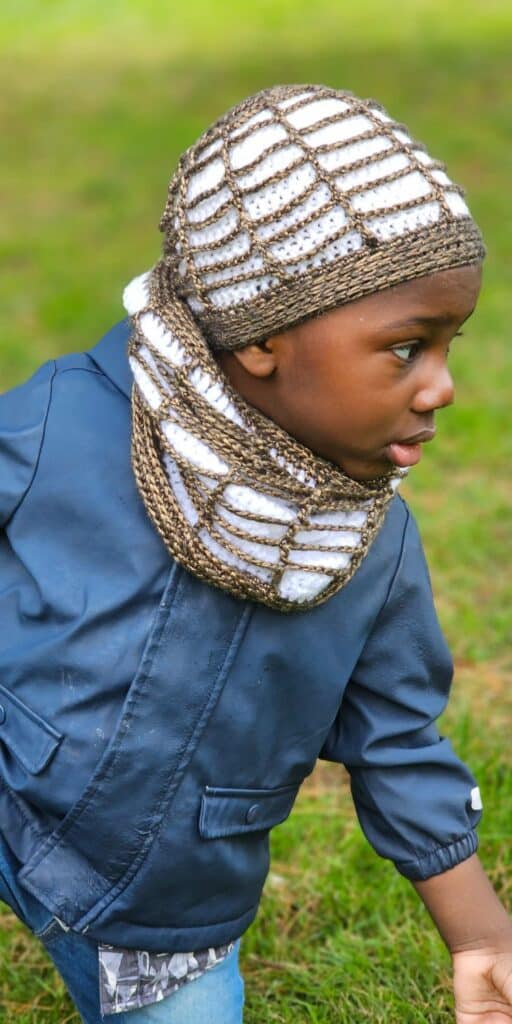
Crochet Spider web Beanie Pattern
This cute crochet spider web beanie pattern is an addition to the spider web lace collection in 6 different sizes!

I had fun designing this beanie, but even more so when my kids requested one for each. They even picked their colors, and I must say, it came out pretty beautiful.
Crochet Spider web Beanie Pattern Finished Measurements
| Size | Height | Circumference |
| 0 – 6 mths 6 – 12 mths | 7″ 8″ | 14” 15” |
| Toddler | 8″ | 16” |
| Child | 9″ | 17” |
| Teen/Adult small | 11″ | 19” |
| Adult Large | 10″ | 20” |


Materials for the crochet spider web beanie
Yarn: Any Worsted weight yarn in two colors.
Stylecraft Special Aran, (#4, 100% Acrylic, 196 m per 3.5 oz/100g Ball)
Estimated yardage
Color A – White – 90 (100, 120, 130, 140, 160) yards
Color B – Pink – 40 (50, 60, 70, 80, 90) yards

Hook and other materials
- 5 mm Crochet Hook – needed for sections 1 and 3
- 4 mm Crochet Hook needed for section 2
- Yarn needle
- Tape measure
Gauge
With 5 mm, follow the instructions for the beanie. Round 1 – 6 = 60 hdc = 4” before blocking.
Adjust hook size if necessary, to obtain gauge.

Spider Web Crochet Pattern notes
- Please kindly read through the pattern before starting.
- Any # 4 weight yarn can be substituted.
- The beanie is made in two separate parts: spiderweb lace and the body.
- The hat is worked from the top (crown) down and in rounds. Once you are done with the body of the hat, you place the spiderweb lace over the beanie and join both by adding the brim.
- Single stitch count is for all sizes, but at some points, the stitch counts are for all sizes. The first count is for the smallest size, followed by the next size. I.e. 0-6mths (6 – 12 mths, Toddler, Child, Teens/Adult Small, Adult large)
Skill Level – Advanced Beginner
Terms – US Terminology
Stitches
Chain(s) – ch(s)
Stitch(es) – st(s)
Single Crochet – sc
Half Double crochet – hdc
Double crochet – dc
Repeat – Rep
Hdc 3rd loop
Slip stitch – sl st

Construction Note
This project is made in 3 sections
Section 1 – The beanie body is made, starting with the crown, with instructions for each size to skip to the next section.
Section 2 – The spiderweb lace is made for each size; follow the instructions for each size.
Section 3 – The brim joins the spiderweb lace and the beanie’s body without increasing.

Spider web beanie pattern on Ravelry
Crochet Spider Web Beanie Pattern
Section 1: Beanie base
Crown
With Color A and 5 mm Crochet Hook.
Note:
- For all sizes, simply skip as instructed.
- Continue the rounds until instructed to skip for the size you are making.
- Measure the crown and compare with the diameter provided. If yours is too wide/small, remove/add one or two rounds until you have similar measurement as provided.
Round 1: In a magic ring, ch 2, (does not count as a stitch), 8 hdc in magic ring 8 hdc
- No need to join after each round, place stitch marker.
- Move the marker after each round.
Round 2: 2 hdc in each around. 16 hdc
Round 3: *hdc in next, 2 hdc in next, repeat from * around, . 24 hdc
Round 4: *hdc in next 2 sts, 2 hdc in next, repeat from * around, . 32 hdc
Round 5: *hdc in next 3 sts, 2 hdc in next, repeat from * around, . 40 beshdc
0 – 6 mths size alone – Continue to the body below.
Round 6: *hdc in next 4
sts, 2 hdc in next st, repeat from * around. 48 hdc
6 – 12 mths size alone – Continue to the body below.
Round 7: *hdc in next 5 sts, 2 hdc in next, repeat from * around, . 56 hdc
Toddler Size – Continue to the body below.
Round 8: *hdc in next 6 sts, 2 hdc in next, repeat from * around, . 64 hdc
Child Size – Continue to the body below.
Round 9: *hdc in next 7 sts, 2 hdc in next, repeat from * around. 72 hdc
Teen/Adult Small Size – Continue to the body below.
Round 10: *hdc in next 8 sts, 2 hdc in next, repeat from * around. 80 hdc
Adult Large Size – Continue to the body below.
Body
For all Sizes
Round 1: Hdc in each around. 40 (48, 56, 64, 72, 80) hdc.
Move stitch marker.
Rounds 2 – 7 (8, 9, 10, 12, 14): Repeat Round 1.
Adjust the number of rounds as desired. Sl st to the next st to close the height difference.
Fasten off.
Section 2 – Spiderweb
With Color B, 4 mm crochet hook
Round 1: In a magic ring, ch 1 (counts as first st), 4 sc and join with sl st to ch sp. 5 sc
Round 2: Ch 5 (counts as 1 dc + ch 2 sp), dc in same st as the ch sp, ch 2, (dc, ch 2, dc, ch 2) in each st around, sl st in 3rd ch of beginning ch 5. 10 dc, 10 ch sps
Round 3: Ch 7 (counts as dc + ch 4), *skip ch sp, dc in next st, ch 4, rep from * to end round, sl st in 3rd ch of beginning ch sp. 10 dc, 10 ch sps
Round 4: Ch 9 (counts as dc + ch 6), *skip ch sp, dc in next st, ch 6, rep from * to end round, sl st in 3rd ch of beginning ch sp. 10 dc, 10 ch sps
0 – 6 mths and 6 – 12 mths sizes alone Continue to Round 1 for all sizes below
Round 5: Ch 11 (counts as dc + ch 8), *skip ch sp, dc in next st, ch 8, rep from * to end round, sl st in 3rd ch of beginning ch sp. 10 dc, 10 ch sps
Toddler, Child sizes alone – skip Round 6 and continue to Round 1 below.
Teens/ Adult Small and Adult large, make Round 6
Round 6: Ch 13 (counts as dc + ch 10), *skip ch sp, dc in next st, ch 10, rep from * to end round, sl st in 3rd ch of beginning ch sp. 10 dc, 10 ch sps
For all sizes
Rounds 1 – 6: Ch 9 (9, 10, 11, 13, 13), *skip ch sp, dc in next st, ch 4 (6, 8, 8, 10, 10), rep from * to end round, sl st in 3rd ch of beginning ch sp. 10 dc, 10 ch sps
Do not fasten off.
Set aside.
Joining the spiderweb lace to the beanie base
- Insert the beanie base into the spiderweb net.
- Insert the tail from the beginning of the spiderweb lace through the MR of the beanie base and secure tightly.
- Secure the sides with stitch markers to keep both panels at the same levels.
- If the spiderweb lace is too short or too long compared to the beanie, you can add or remove one or two more rounds of lace.
Continue with color B
Section 3: Brim
- Crocheting over the two panels (ch sps and the remaining sts in section 1).
- It’s easier to crochet around the chains than into the chains.
- Evenly, space the sts (hdc) around the 10 chain spaces and the stitches from the last round on the beanie.
With a 4 mm crochet hook
Round 1: Ch 1, 4 (4, 5, 6, 7, 8) hdc over both panels around, join with a sl st to the beginning ch sp. 40 (48, 56, 64, 72, 80) hdc.
Round 2: Ch 1, working in 3rd loop around, hdc in each st, join with a sl st to the beginning ch. 40 (48, 56, 64, 72, 80) hdc.
Rounds 3 – 5 (5, 5, 6, 7, 7): Repeat round 2.
Optional
Last round: Ch 1, in 3rd loop, sc in each st around, join
Weave in ends.
Optional: Add pompom.
Other crochet projects for the home
Crochet Wall hangings – Round Up
Crochet sunflower projects you can not resist
Tips and Tricks for crochet rugs
Cheers,
Susan
About the Designer
Say Hi on Instagram and Subscribe To my email List for pattern discounts and freebies. For questions, send such to [email protected]. Read more about me here.