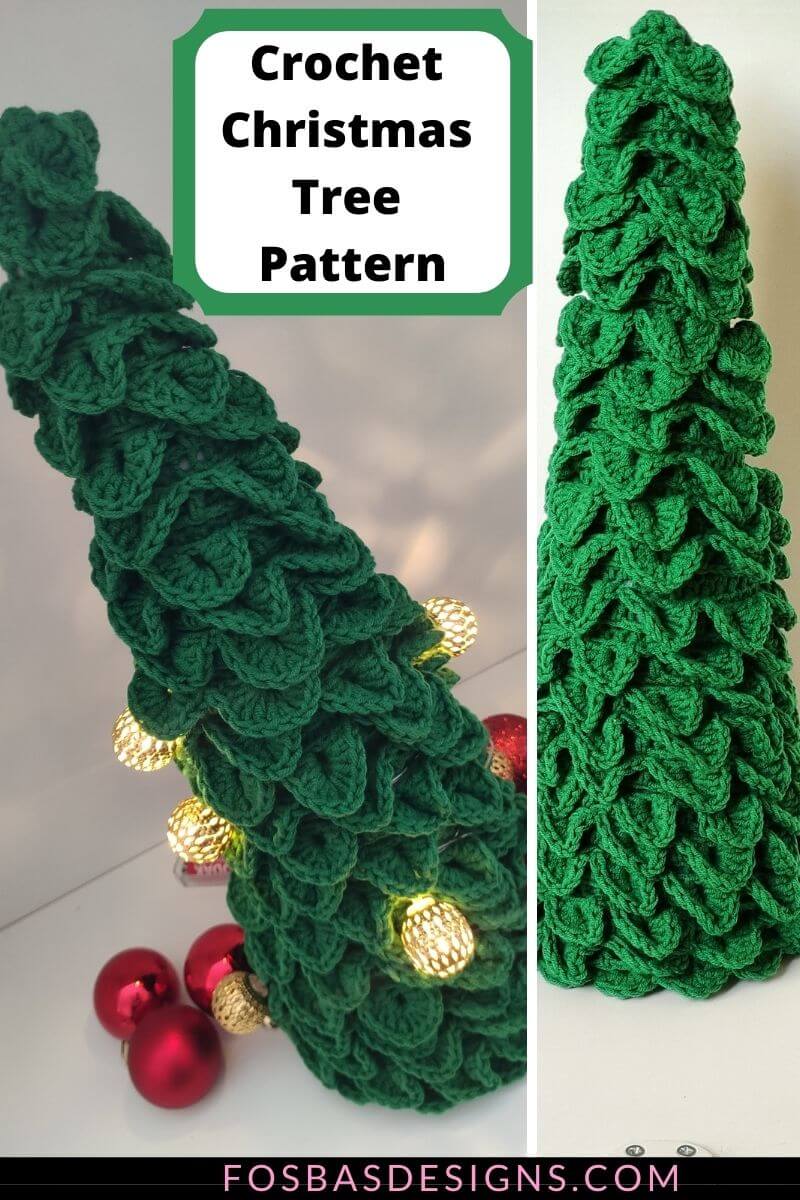
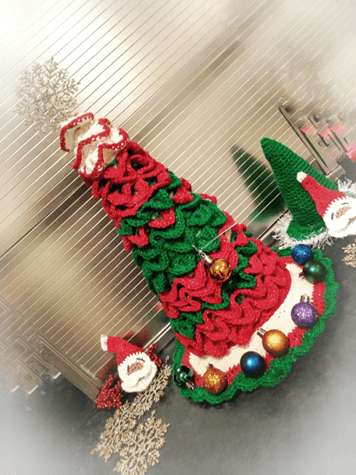
Crochet Christmas Tree Pattern
It’s time for a fun Crochet Christmas Tree Pattern! My son requested that I make Christmas Trees for his teachers in Nursery many years ago, which was why I designed the Christmas tree.
This crochet Christmas tree pattern is fun to make and you can make 1 or 2 over a couple of hours.
Another Interesting thing about this Christmas Tree Pattern is that you can make it in any color(s) of your choice and also in any length. Plus, you can make this pattern using either chunky or worsted-weight yarns.
You can pin this post for later or get the premium pattern which has more step-by-step pictures and written instructions for the different sizes available.

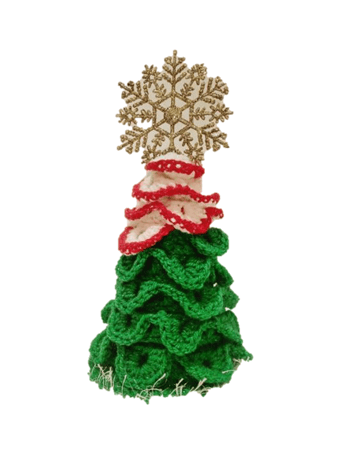
One of the things I love about this pattern is that it is super easy to customize. The pattern has instructions as to how to do so. The Christmas tree is made in 3 different sizes but you are welcome to make this into your desired length.
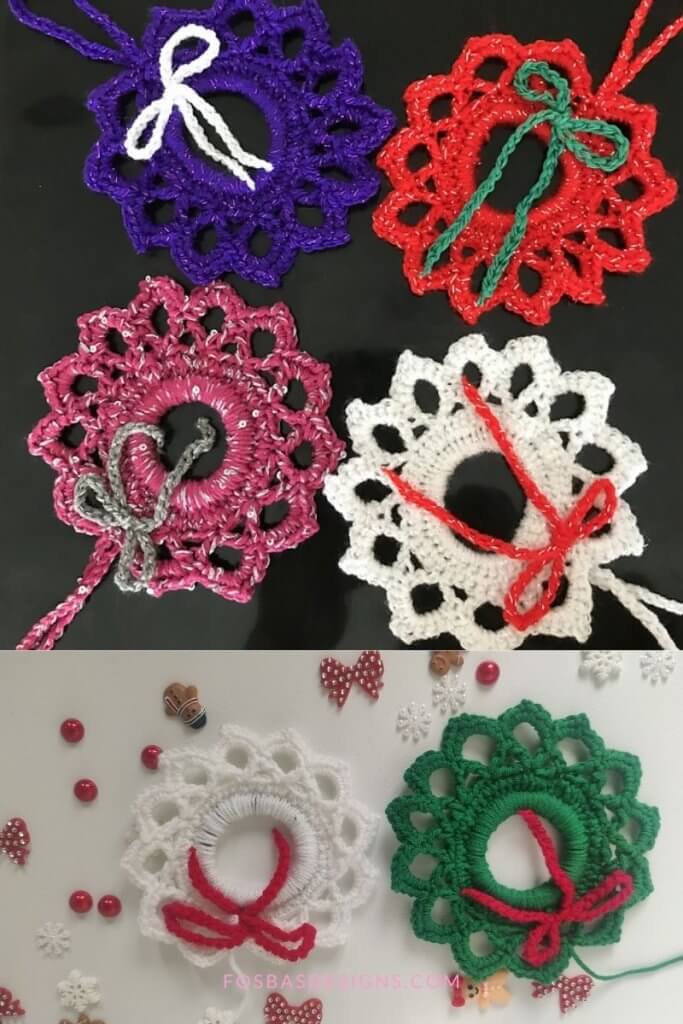
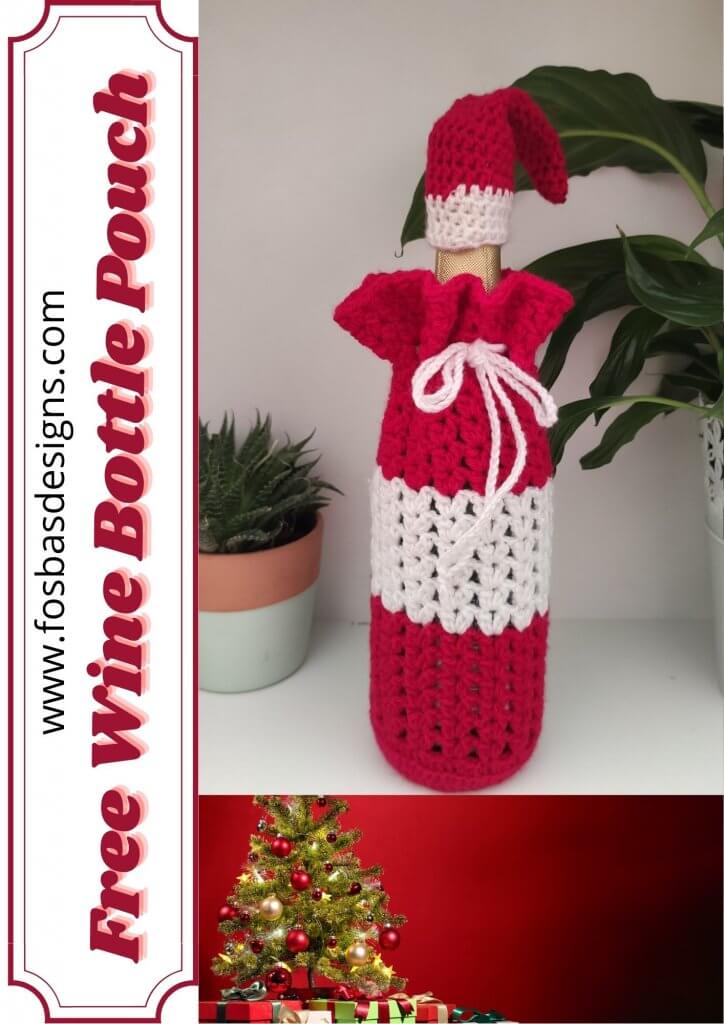
If you love adding some cute crochet ornaments to your Christmas tree, you would love the range I have here on my Blog. Checkout Crochet Christmas Ornament Pattern, also, if you fancy handing your wine to friends in some cute crochet sleeves, you would love the Wine bottle bag pattern.
Towel Hanger This is a free crochet tree pattern, but you can get the print-friendly, ad-free version on Ravelry or on Etsy.
Crochet Christmas tree on Ravelry
Crochet Christmas Tree pattern on Etsy
How about more crochet patterns for Christmas?
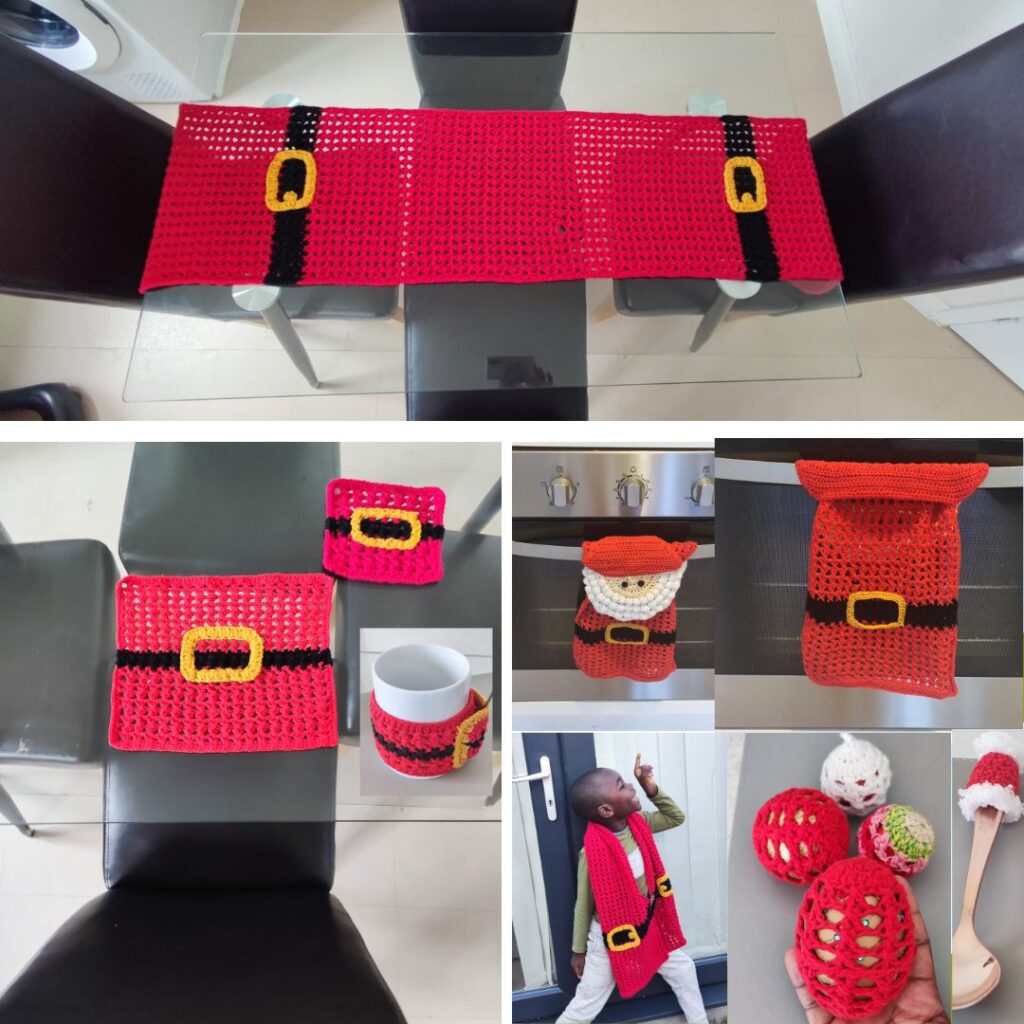
Crochet Santa mug pattern with pocket
Crochet Christmas table runner pattern
Easy crochet Christmas tree pattern
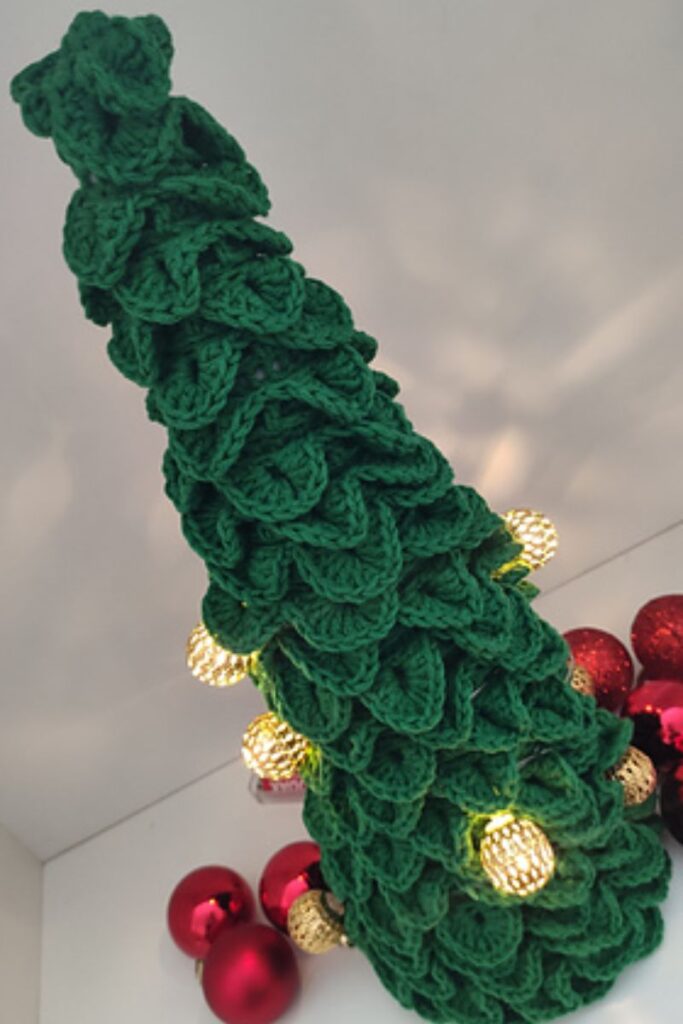
Using your crochet Christmas tree
Indoors – As a centerpiece in your home, simply skip hanging this Christmas tree
As an ornament – My son has requested a rather smaller version of this hanging crochet Christmas tree as ornaments on our family tree. I think this would be a beautiful addition.
Outdoors – You can decorate the outside of your home with this beautiful hanging crochet Christmas tree
Materials for your Christmas Tree Pattern
Yarn – you can use any other worsted weight yarn for your own version of this crochet Christmas tree pattern
Stylecraft Special Aran, (100% acrylic 157 yards/144 m per 3.5 oz/100g skein)
Any other worsted weight, #4 yarn can be substituted.
•1 skein in Green
•1 skein in Red
•1 skein in white/cream
•Optional – Glittery yarn in white about 10 yards
Hook and other materials
US size I/9 (5.5 mm)
Poly fiber or Duraform Cone
Stitch markers Gauge – gauge isn’t important as far as you make this pattern using either chunky or worsted weight yarn
14 sts x 10 rows = 10 cm/4” measured over hdc
Difficulty – Easy
Terms – US TERMINOLOGY
Stitch Abbreviations –
Chain – ch
Slip stitch – sl st
Single Crochet – sc
Half double crochet – Hdc
Double crochet – dc
Shell – 5 dc
Christmas tree Pattern on Ravelry
Note, you can use any color(s) of your choice.
Finished Dimension
Small – 6”
•Medium – 10”
•Large – 15”
Note:
The leaves use the crocodile stitch pattern
Remember you are welcome to sell finished items made from my patterns!!!
Instructions for the Christmas tree crochet pattern
Section 1: Cone
Small Sized Cone
Round 1: With A, in a magic ring, 4 sc into the magic ring. (4 sc) Place stitch marker.
[if you are not familiar with a magic ring, you can ch 2, 4 sc into 1st chain]
Round 2: *2 hdc in next st, hdc in next, repeat from * to end of the round, move
stitch marker after every round. (6 hdc)
Round 3: Hdc in each st, move stitch marker. (6 hdc)
Round 4: *2 hdc in next st, hdc in next 2 sts, repeat from * to end of the round. (8 hdc)
Round 5: Hdc in each st. (8 hdc)
Round 6: *2 hdc in next st, hdc in next 3 sts, repeat from * to end of the round. (10 hdc)
Round 7: Hdc in each st. (10 hdc)
Round 8: *2 hdc in next st, hdc in next 4 sts, repeat from * to end of the round. (12 hdc)
Round 9: Hdc in each st. (12 hdc)
Round 10: *2 hdc in next st, hdc in next 5 sts, repeat from * to end of the round. (14 hdc)
Round 11: Hdc in each st. (14 hdc)
Round 12: *2 hdc in next st, hdc in next 6 sts, repeat from * to end of the round. (16 hdc)
Round 13: Hdc in each st. (16 hdc)
Round 14: *2 hdc in next st, hdc in next 7 sts, repeat from * to end of the round. (18 hdc)
Round 15: Hdc in each st. (18 hdc)
Round 16: *2 hdc in next st, hdc in next 8 sts, repeat from * to end of the round (20 hdc)
Round 17: Hdc in each st. (20 hdc)
Fasten off
Continue with the Skirt.
Medium Sized Cone
With A, work Rounds 1 – 17 as with the small Sized Tree.
Round 18: *2 hdc in next st, hdc in next 9 sts, repeat from * to end of the round. (22
hdc)
Round 19: hdc in each st. (22 hdc)

Round 20: *2 hdc in next st, hdc in next 10 sts, repeat from * to end of the round. (24
hdc)
Round 21: hdc in each st. (24 hdc)
Round 22: *2 hdc in next st, hdc in next 11 sts, repeat from * to end of the round. (26
hdc)
Round 23: Hdc in each st. (26 hdc)
Round 24: *2 hdc in next st, hdc in next 12 sts, repeat from * to end of the round. (28
hdc)
Round 25: hdc in each st. (28 hdc)
Round 26: *2 hdc in next st, hdc in next 13 sts, repeat from * to end of the round. (30
hdc)
Rounds 27 – 28: Hdc in each st. (30 hdc)
Fasten off, sew in the edges.
Continue with the Skirt.
Large sized Cone
• With A, work Rounds 1 – 28 as for Small and medium
Round 29: *2 hdc in next st, hdc in next 14 sts, repeat from * to end of the round. (32
hdc)
Round 30: Hdc in each st. (32 hdc)
Round 31: *2 hdc in next st, hdc in next 15 sts, repeat from * to end of the round. (34
hdc)
Round 32: Hdc in each st. (34 hdc)
Round 33: *2 hdc in next st, hdc in next 16 sts, repeat from * to end of the round. (36
hdc)
Round 34: Hdc in each st. (36 hdc)
Round 35: *2 hdc in next st, hdc in next 17 sts, repeat from * to end of the round. (38
hdc)
Round 36: Hdc in each st. (38 hdc)
Round 37: *2 hdc in next st, hdc in next 18 sts, repeat from * to end of the round. (40
hdc)
Round 38: Hdc in each st. (40 hdc)
Round 39: *2 hdc in next st, hdc in next 19 sts, repeat from * to end of the round. (42
hdc)
Round 40: Hdc in each st. (42 hdc)
Round 41: *2 hdc in next st, hdc in next 20 sts, repeat from * to end of the round. (44
hdc)
Round 42: Hdc in each st. (44 hdc)

Round 43: *2 hdc in next st, hdc in next 21 sts, repeat from * to end of the round. (46
hdc)
Round 44: Hdc in each st. (46 hdc)
Round 45: *2 hdc in next st, hdc in next 22 sts, repeat from * to end of the round. (48
hdc)
Round 46: hdc in each st. (48 hdc)
Round 47: *2 hdc in next st, hdc in next 23 sts, repeat from * to end of the round. (50
hdc)
Round 48: Hdc in each st. (50 hdc)
Round 49: *2 hdc in next st, hdc in next 24 sts, repeat from * to end of the round. (52
hdc)
Round 50: Hdc in each st. (52 hdc)
For taller trees, continue to increase, note that you would need to increase the skirt and
leaves accordingly.
Fasten off, and weave in ends.
Continue with the Skirt.
Section 2 of the crochet Christmas Tree pattern: Tree Skirt
Small Size
Chains at the beginning of the round do not count as a st.
Round 1: With A, make a magic ring, ch 2 (do not count as a stitch here and
throughout the pattern, 6 hdc into the ring, join with a sl st to beginning ch. (6 hdc)
Round 2: ch 2, 2 hdc in each st around, join with a sl st to beginning ch. (12 hdc)
Round 3: Ch 2, working in BLO, 2 hdc in next st, hdc in next st, repeat from around, join
with a sl st to beginning ch. (18 hdc)
Round 4: Ch 2, working in both Loops 2 hdc in next st, hdc in next 2 sts, repeat from around, join with a sl st to beginning ch. (24 hdc)
Round 5: Ch 2, 2 hdc in next st, hdc in next 3 sts, repeat from around, join with a sl st
to beginning ch. (30 hdc)
Round 6: Ch 2, 2 hdc in next st, hdc in next 4 sts, repeat from around, join with a sl st
to beginning ch. (36 hdc)
Round 7: 2 hdc in next st, hdc in next 5 sts, repeat from around. (42 hdc)
Fasten off A, and continue to the last round for all
sizes below.
Medium Size
Round 1: With A, make a magic ring, ch 2, 6 hdc into the ring, join with a sl st to
beginning ch. (6 hdc)
Round 2: Ch 2, 2 hdc in each st around, join with a sl st to beginning ch. (12 hdc)
Round 3: Ch 2, *2 hdc in next st, hdc in next st, repeat from *around, join with a sl st to
beginning ch. (18 hdc)
Round 4: Ch 2, *2 hdc in next st, hdc in next 2 sts, repeat from *around, join with a sl st
to beginning ch. (24 hdc)
Round 5: Ch 2, working in BLO, *2 hdc in next st, hdc in next 3 sts, repeat from *around, join with a sl st to beginning ch. (30 hdc)
Round 6: Ch 2, working in both loops, *2 hdc in next st, hdc in next 4 sts, repeat from *around, join with a sl st to beginning ch. (36 hdc)
Round 7: Ch 2, in BLO, *2 hdc in next st, hdc in next 5 sts, repeat from *around, join with
a sl st to beginning ch. (42 hdc)
Fasten off A, join B
Round 8: Ch 2, working in both loops, with B, *2 hdc in next st, hdc in next 6 sts, repeat from *around, join with a sl st to beginning ch. (48 hdc)
Round 9: Ch 2, *2 hdc in next st, hdc in next 7 sts, repeat from *around, join with a
sl st to beginning ch. (54 hdc)
Fasten off B, join C
Round 10: Ch 2, *2 hdc in next st, hdc in next 8 sts, repeat from *around, join with a
sl st to beginning ch. (60 hdc)
Continue to last round for all sizes below.
Large size
Round 1: With A, make a magic ring, ch 2, 6 hdc into the ring, join with a sl st to
beginning ch. (6 hdc)
Round 2: Ch 2, 2 hdc in each st around, join with a sl st to beginning ch. (12 hdc)
Round 3: Ch 2, *2 hdc in next st, hdc in next st, repeat from *around, join with a sl st to
beginning ch. (18 hdc)
Round 4: Ch 2, *2 hdc in next st, hdc in next 2 sts, repeat from* around, join with a sl st
to beginning ch. (24 hdc)
Round 5: Ch 2, *2 hdc in next st, hdc in next 3 sts, repeat from *around, join with a sl st
to beginning ch. (30 hdc)
Round 6: Ch 2, *2 hdc in next st, hdc in next 4 sts, repeat from *around, join with a sl st
to beginning ch. (36 hdc)
Round 7: Ch 2, *2 hdc in next st, hdc in next 5 sts, repeat from *around, join with a sl st
to beginning ch. (42 hdc)
Round 8: Ch 2, *2 hdc in next st, hdc in next 6 sts, repeat from *around, join with a sl st
to beginning ch. (48 hdc)
Round 9: WCh 2, working in BLO, *2 hdc in next st, hdc in next 7 sts, repeat from *
around, join with a sl st to beginning ch. (54
hdc)
Round 10: Ch 2, working in both loops, *2 hdc in next st, hdc in next 8 sts, repeat from *around, join with a sl st to beginning ch. (60 hdc)
Fasten off A, join B
Round 11: Ch 2, with B, *2 hdc in next st, hdc in next 9 sts, repeat from *around, join
with a sl st to beginning ch. (66 hdc)
Round 12: Ch 2, *2 hdc in next st, hdc in next 10 sts, repeat from *around, join with
a sl st to beginning ch. (72 hdc)
Fasten off B, join C
Round 13: Ch 2, with C, *2 hdc in next st, hdc in next 11 sts, repeat from *around,
join with a sl st to beginning ch. (78 hdc)
Continue to the last round for all sizes below.
For all sizes – Edging for the Tree Skirt.
Two options for the edges of your skirt;
- Petals
Round 1: Ch 3, 5 dc in same stitch, skip next 2 sts, sc in next, skip next 2 sts, 5 dc in next
st, repeat from * across, sl st to beginning ch.
Or
- Glittery yarn
Round 1: With glittery yarn, work 1 hdc around.
Fasten off weave in ends.
You can block your Tree Skirt if it coils
To assemble:
Fill your cone with either polyfill or place in Duraform.
Place on the tree skirt made and join with a sl st across the FLO left from Round 4 (5,
9)
Section 3: Leaves
Notes
- The number of chains would depend on how tall your cone is and also on how close
you’d love your leaves to be. - For different layers/colors of leaves, this can be done in Row 2, simply fasten off and join the next color of your choice.
- The leaves use the crocodile stitch.
- For an accurate number of chains, wrap your chains around the cone.
Using Color B, Chain 154 (220, 300) should be in multiples of 6 + 4
Row 1: Dc in 4th ch from hook, *ch 1, skip 2 chs, dc in next ch, ch 1, skip 2 chs, 2 dc in
next ch, rep from * across, ending with 2 dc, turn.
25 – 2 dc/ 24 dc (36 – 2 dc/35 dc, 50 -2 dc/49 dc)
Row 2: Ch 1, *working sideways around the post (dc), work 5 dc in first st, ch 1, working
sideways around the next post (dc), work 5 dc in next st, skip ch 1 sp, sc in next dc, skip ch 1 sp. Rep from * across. 25 shells / 24 sc (36 shells/35 sc, 50 shells /49 sc)
Fasten off
Weave in ends
To Assemble
• With the cone placed upright, starting from the widest part of the cone, wrap your leaves around the cone, using a yarn needle join this point together.
• To secure the leave to your cone, you can stitch around the leaves to the cone or just at each intercept.
• Continue to wrap the leaves around the cone till the tip.
• Secure the last leaf by sewing it on the cone.
• Sew all ends
Check out other patterns on Ravelry and also on Esty
I hope you love this Crochet Christmas Tree pattern. I would love to see Christmas trees, do tag me with your Christmas trees.
Other fun Christmas-related crochet projects on the blog
Christmas Trees in 3 different sizes
Christmas Tree Skirt Free Pattern
Wind spinner Christmas Tree Pattern
Christmas Coaster Free Pattern
Christmas Placemat free pattern
Christmas Stars in 3 different sizes
Christmas Baubles Free Pattern


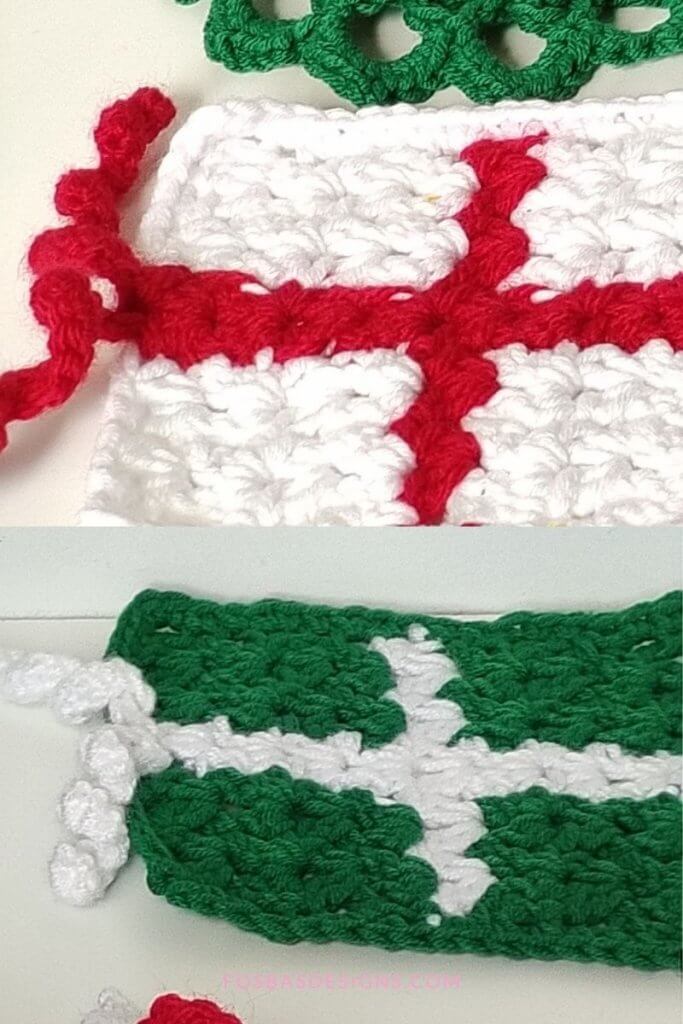
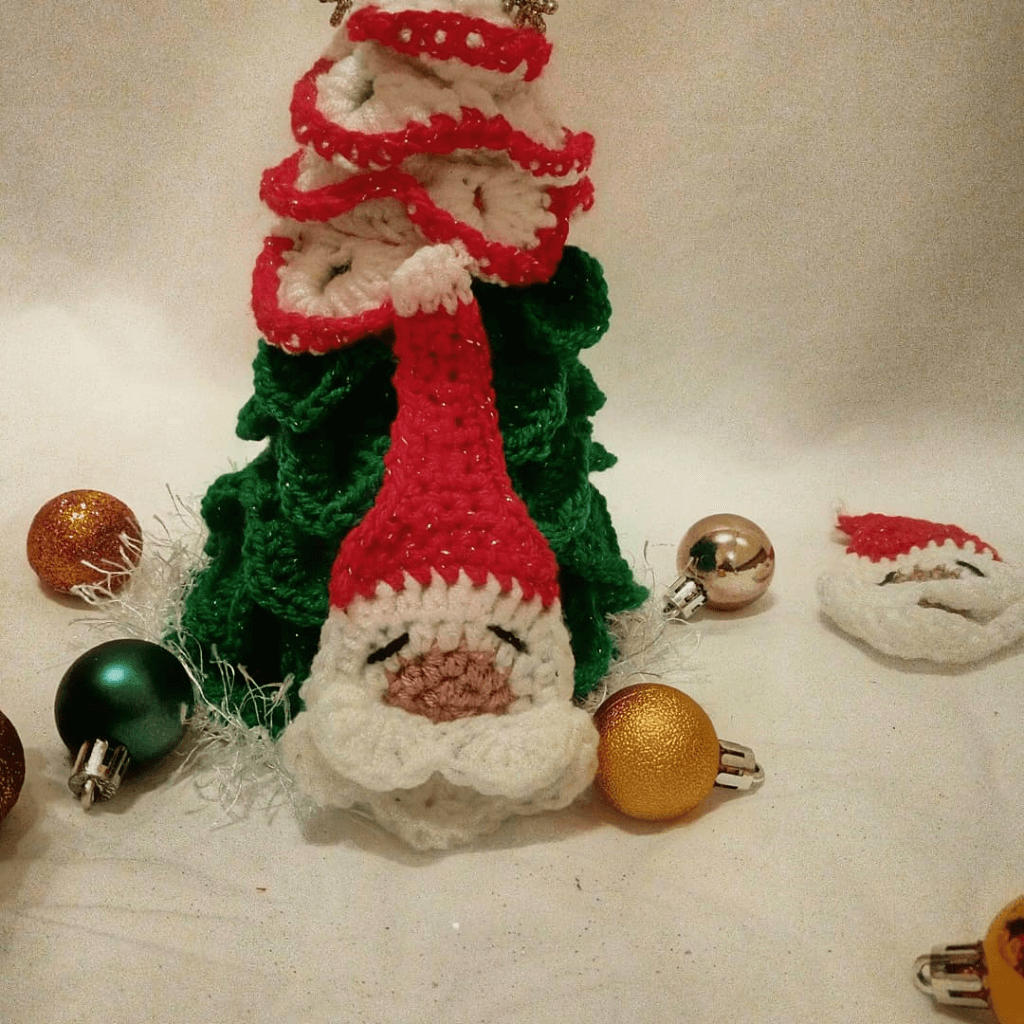
Hi. Thanks for sharing this pattern! It’s exactly what I was looking for. A lot of other Christmas tree patterns were more cartoony looking. In some of the pictures it looks like some of the alligator stitching at the top of the tree it has white leaves with a red edging. How was that done? I’m thinking of doing the whole thing in different shades of green but white white edging like it just snowed.
Aww, this makes me happy that you love the trees. You are right, that was the very first tree I made. I crocheted a round of single crochet with red yarn after completing the crocodile stitches. I hope this helps?
Round 7 in medium tree skirt directions is missing.
Hi Jes, So sorry about that. The numbering was missed. I have updated it now.